The Raspberry Pi
I have two major applications for a computer in my shack: logging and digital mode operation. Computer logging has many advantages. Keeping up with the States and countries you've worked and each station's QSL history is fantastic. Plus, the ability to read parameters directly from your radio is the essence of convenience (and laziness). Although I'm not an avid digital operator, I occasionally enjoy a PSK-31 QSO or sometimes I like to "read the mail" or copy a weather map on WEFAX.
I have an old Dell laptop (Inspiron 1420) running Ubuntu Linux that works great for both logging and running digital modes. For logging I use CQRLOG, a wonderful logging program that is written and maintained by Petr OK2CQR and Martin OK1RR. For digital operation, I use fldigi which is written and maintained by David W1HKJ and his associates. But my desk space is limited and I needed a computer with a smaller "footprint" than my laptop. I also wanted something with more modest power requirements and something that I might leave on 24/7.
When I first read about the Raspberry Pi, I thought it would be perfect. My only concern was the ARM processor running at 700Mhz. Would it have the "horsepower" necessary to do logging and to decode digital signals? At the time, there were few reports of hams attempting to use the Pi for logging and digital communications.
Hardware Costs
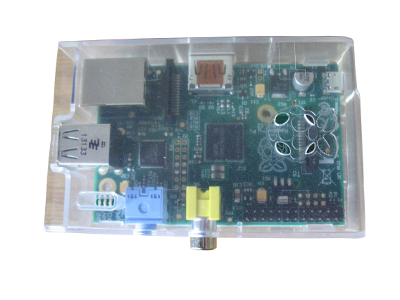
I purchased the Pi from Newark Element 14. The cost at that time was $35 US. I got the model B, 512 Mb version. On the advice of much that I read, I also purchased an enclosure. In retrospect, I think this was a good idea. The Pi with no enclosure would almost certainly be damaged, especially around my shack.
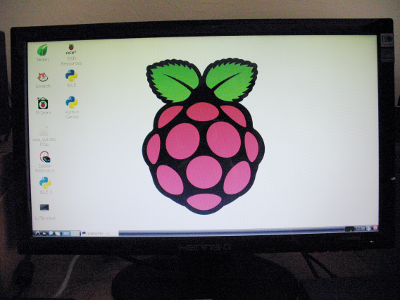
The other issue was a monitor. The video output from the Pi is either composite video (from an RCA connector) or HDMI. I wanted to use a monitor no larger than about 15 inches and I had no small monitor capable of HDMI input. I finally decided to use a 16 inch VGA monitor that I purchased at Walmart for $69 US. Because the monitor was VGA, I needed a HDMI to VGA adapter. I worried about the conversion, but several people on the forums were successful with the adapter. I found an adapter on Amazon for approximately $10 US.
From my initial research, I learned that power was a potentially "touchy" issue with the Pi. I read reports of sporadic problems with the Pi when the unit was underpowered. The problems appeared to be associated, or at least were exacerbated, by using power-hungry USB devices without a powered USB hub. Like many mobile devices, the Pi is powered through a mini-USB connector. If you have a 5 V power supply that uses a mini-USB adapter, you might be able to use it to power the Pi. Just make sure that it's 5 volts and at least 1 amp current. Since I had no such mobile device, I purchased an adapter from Amazon with specs of 5 V and 2 amps. So far, I've had no power issues, but I do use a powered USB hub (read below).
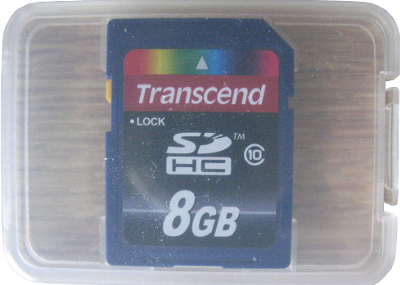
Finally, I needed a SD card. The SD card serves as the "hard-drive" for the Pi. The B version of the Pi uses the larger format cards (32 X 24mm). Two other characteristics of the SD card deserve mention: one is speed and the other is storage capacity. As far as speed is concerned, I initially used a number 4 card. I have since switched to a number 10 card. The numbers on the card, usually found in a broken circle printed on the card, indicates megabytes per second data transfer speed. I recommend the number 10 or higher. As far as capacity is concerned, I now use an 8 gigabyte card, having started with a 4 gigabyte card. Unlike Windows, Linux only needs about 2 gigabytes for the operating system itself, so a 4 gigabyte card is all you need. I switched to the 8 gig size in case I decided to load more software on my Pi. I'm glad I did since I found that I could run other additional programs on the Pi besides those associated with ham radio. If you would like to read more about SD cards, see Jack Schofield's article in The Guardian.
| Component | Cost ($US) |
|---|---|
| Raspberry Pi ModB 512M | 35.00 |
| Multicorp Clear Enclosure | 9.99 |
| EasyAcc US Universal Travel 5V 2A | 12.99 |
| Transcend 8GB Class 10 SDHC card | 7.88 |
| Hannspree 16in LED Monitor | 69.00 |
| HDMI to VGA Adapter | 4.50 |
SD Card Setup
There are several different Linux OS's you can install on the Pi (there will soon be a Windows 10 version available). I decided to install Raspbian. Although this may seem strange to a "Windows user", there is no "install disc" for Raspbian. Instead, you download an "image" of the OS and then flash it to the SD card. You can download the Raspbian image file here.
To "flash" the SD card, you must be able to access it from your computer. Many laptop computers have a SD card reader/writer. Hopefully, you have one. If not, you can purchase a fairly inexpensive, external SD reader/writer that connects to your computer via USB. You can find them locally at an electronics store or check NewEgg. Instructions to flash the SD card are available for Linux, Mac and Windows at the following site. Since I use Linux, I used the program "dd" from the command line to install the Raspbian OS on the SD card. If you use Linux and use the command line program dd, please be careful. You can ruin your Linux install if you incorrectly specify the path. Follow the directions provided exactly. Regardless of which OS you use, if you don't feel comfortable flashing the SD card, ask a more experienced friend for help.
The next thing to determine is whether you want the Pi to be on the Internet. I encourage you to configure the Pi for Internet access. As a ham, you'll want to access propagation reports, QRZ and other sites. Since my Pi sits close to my router, I put RJ45 connectors on each end of a short piece of CAT5 cable. I connected one end to the Ethernet port on the PI and the other end to an open port on the router. The Ethernet connection should be recognized by the Pi during OS installation and it will grab an IP address from the router using DHCP. If you want a static IP, see below.
You should also have a keyboard, mouse and monitor connected to the Pi before the initial boot. I used a USB keyboard and a Logitech wireless mouse. Also, and this becomes important, I used a powered Dlink USB hub. I'll describe the USB attachments a bit later. Before you boot the Pi for the first time, make sure you have a keyboard and mouse attached.
Once the OS is on the SD card and you have a mouse and keyboard attached to the Pi, you're ready for the initial boot. For Raspbian, the OS will boot into the "raspi-config" menu. For more information on this configuration menu, see the following webpage. Don't be concerned if the screen looks strange at this point.
Here's what I changed in raspi-config:
- Expand the filesystem. I expanded the filesystem to take up most of the 8 gigs on the card. This will require a reboot. Finish the other configuration options before you reboot.
- Change the user PW: This is a good idea. Although your Pi is sitting behind your router and presumably safe from "raw" net exposure, you never know. Better to be safe than sorry.
- I chose to boot to the graphical desktop.
- I chose Central Time for Internationalization Options.
- In advanced options, I gave the graphical interface 256 megs of memory.
- I also enabled SSH in the advanced options menu. This will allow you to transfer files to and from other computers on your network. It's handy!!
- I enabled "overscan" in the advanced options because my screen went from border to board with no black margins.
When you're finished, tab to "finish" and reboot. All should be well...hopefully.
The next thing I would do is to "update" the files of the OS. Changes are often made to files in the OS because of "bugs" and/or "security". If you wish to check for updates, make sure you have Internet access and start the program "LX Terminal". You should see a command line at this point with a blinking cursor. Issue the following command at the prompt: "sudo apt-get update" (no quotes) and watch the OS search various repositories for updates. Next, issue the following command: "sudo apt-get upgrade" (no quotes). This will actually update the cache files. This may take a while.
Software Installation
Hamlib
I thought connecting my radio to my computer was a waste of time, but I've changed my mind. It's so nice to have the operating parameters filled in automatically when you enter a call into your logging software (see below). Hamlib is the software that contains the "mojo" to get your computer to talk to your radio. It doesn't support all radios, but the list of supported radios is pretty extensive. If you want to try this, you'll have to install the hamlib program "manually". Hamlib is NOT in the 'apt-cache', which means you can't simply type 'sudo apt-get install hamlib' and have it install itself. But it's no big deal to install it yourself. It does take a little time and a few manipulations. If you're comfortable moving files around within a subdirectory, you can do this.
The first thing you'll need to do is to download the hamlib 'tarball'. I think one of the safest places to get software is Sourceforge. I think they're a reputable website with good policies. You can download hamlib from Sourceforge at the following link.
Once you have the program downloaded (in my case hamlib-1.2.15.3.tar.gz, about 1.7 Mb), it will need to be "extracted". You can use the "Archive Manager" in Raspbian to "untar" the program, but the command line (from within LXTerminal) is much easier. You'll also have to decide where to install the program. I moved the compressed file into the /usr/share/local/src subdirectory and "extracted" it there using the command 'tar -xvzf hamlib*'. If all goes well, that will make a subdirectory called "hamlib-1.2.15.3" containing several dozen files. Once that's done, you need few more things to make it work.
Before we actually install the program, let's take care of one piece of housekeeping. There is one "dependency" that must be installed before we can install hamlib. Luckily, it's in the 'apt-cache' and easily installed. Let's do that now: type the command 'sudo apt-get install libltdl-dev'. Once that's done, we're ready to get down to business.
Now, type 'cd hamlib-1.2.15.3' (or whatever the newly formed subdirectory is named) to get "into" the subdirectory and from the command line, issue the following commands in the order indicated:
  ./configure
  make
  sudo make install
  sudo ldconfig
That's it. Hamlib should now be installed.
fldigi
The Raspberry Pi will run the digital mode program fldigi. However, because of the rather slow processor (at least on my B version of the Pi) and memory constraints, I used the Pi with a USB SignaLink. The USB SignaLink has a built in sound card that helps tremendously with signal processing. I also found that I had problems reading signals accurately if I had the USB from the SignaLink plugged into a USB hub, even if it was 'powered". Copy was perfect and the program worked much better if the SignaLink was plugged directly into the Pi. Newer versions of the Pi have four USB ports, rather than two, making direct connection easier.
Installing fldigi is a bit easier than hamlib since fldigi is contained in the 'apt-cache'. That means you can install this wonderful little program by issuing the following from the command line (again, from within LXTerminal): type 'sudo apt-get install fldigi' and if everything goes well, fldigi will install within a minute or two. Oh yes, unlike inferior and costly OS's, your program will run immediately, without need for a reboot.
CQRLOG
One of the most complete and best logging programs for Linux is CQRLOG. It will run on the Raspberry Pi Model B. Admittedly, it doesn't set any speed records, but it works well enough for all practical purposes. If you want to try CQRLOG on the Pi you must get the program compiled for use on the ARM processor. You can't use the program designed to run on the X86 PC. Several hams have specifically compiled the program for use on ARM. I got version 1.5.6 from Dan, OK1HRA. Dan was nice enough to give me permission to distribute the link. Here it is CQRLOG v. 1.5.6 for ARM. (update 9/10/15: For those of you running the Raspberry Pi 2, CQRLOG version 1.9.0 is now available at the CQRLOG website. Thanks to Laci HA5ZG for compiling the program and to Martin, OK1RR and Petr, OK2CQR for putting it on their website.)
Once you have the compiled program, installation is easy because it's a "deb" archive package. These are easily installed with the command line 'sudo dpkg -i (name of package)'. However, dpkg may warn of missing "dependencies". CQRLOG needs mysql. If you haven't installed mysql (server and client), then you will get a warning. To avoid any issues, I installed gdebi ('sudo apt-get install gdebi'). This is a graphical front-end for the dpkg. With gdebi started, you 'load' the deb archive into the program and then click 'install'. Gdebi will make sure all dependencies are installed. CQRLOG should now run.
I did have one "failed" install of CQRLOG. During that install I was asked to provide a password for mysql. Ordinarily, this is a good idea and during the mentioned install, I did provide a password. When I ran CQRLOG for the first time, I got an "Access Denied Error". I uninstalled the program and re-installed only this time pressed 'enter' at the password dialog for mysql. CQRLOG started after doing that. I'm not sure that providing 'no' password "fixed" the install, but if you should have problems installing CQRLOG, you might uninstall (sudo dpkg -r cqrlog) and re-install as suggested. It might help.
One last comment about version 1.5.6-1 of CQRLOG. Recently, the "propagation window" in the program stopped working. Petr explained that recently the URL from which the data were obtained was changed. Newer versions of the program contain corrected code. Version 1.9.0 for the Raspberry Pi 2 runs perfectly.
Final Touches
Midnight Commander (MC)
You may have occasion to alter files on the Pi in some way - copy, move, rename, and read are common actions. If you remember the old file managers in the DOS/Windows 3.1 days, you'll want to install MC. This lightweight file manager (installed with 'sudo apt-get install mc') will present you with two side by side windows. Press 'tab' to move between windows. The program allows you to copy, move etc. files from one window to the other with two key presses. It allows lots of other file manipulations too. It worth the time and trouble to learn this program (see a short tutorial here).
Static IP
If you want to access the Pi from another computer in your network or move files between computers on your network and the Pi, you'll have to know the IP of the Pi. You can get your Pi to use the same IP address at start-up easily.
You can specify which IP you want the Pi to have in the /etc/network/interfaces file. This little text file is read by the Pi's OS at boot up. The default file specifies DHCP, that is, Dynamic Host Configuration Protocol, which allows the router to give the Pi an IP automatically from a range of IP addresses. In order to defeat this default behavior, you have to specify "static" in place of DHCP and specify the desired IP in the file.
But before we change anything in the interfaces file, let's save a copy in case our changes don't work: type 'sudo cp /etc/network/interfaces /etc/network/interfaces.old'.
A typical interfaces file on a Raspberry Pi might look like this:
  auto lo
  iface lo inet loopback
  iface eth0 inet static
  address 192.168.1.75
  netmask 255.255.255.0
  network 192.168.1.0
  gateway 192.168.1.254
  broadcast 192.168.1.255
  dns-nameservers 208.67.222.222 208.67.220.220
There may be some other settings below these. Most of the settings shown are not required and of course, need to be changed to your specific network. Probably the two most important are lines 3 and 4: changing 'dhcp' in line 3 to 'static' as shown, and the address setting, specifying the intended IP for the Pi.
To change the interfaces file, you need permission, which means we must start our text file editor using the 'sudo' prefix, like this: 'sudo nano'. This will start the text editing program nano and load the interfaces file for you. Now you can make the changes you want and save them. You will need to 'reboot' to make the changes take place.