IN3OTD's web site
...under perpetual construction.

HP disk on SD card emulator
I have built the HPDisk, an HP disk drive on SD card emulator designed by Anders Gustafsson
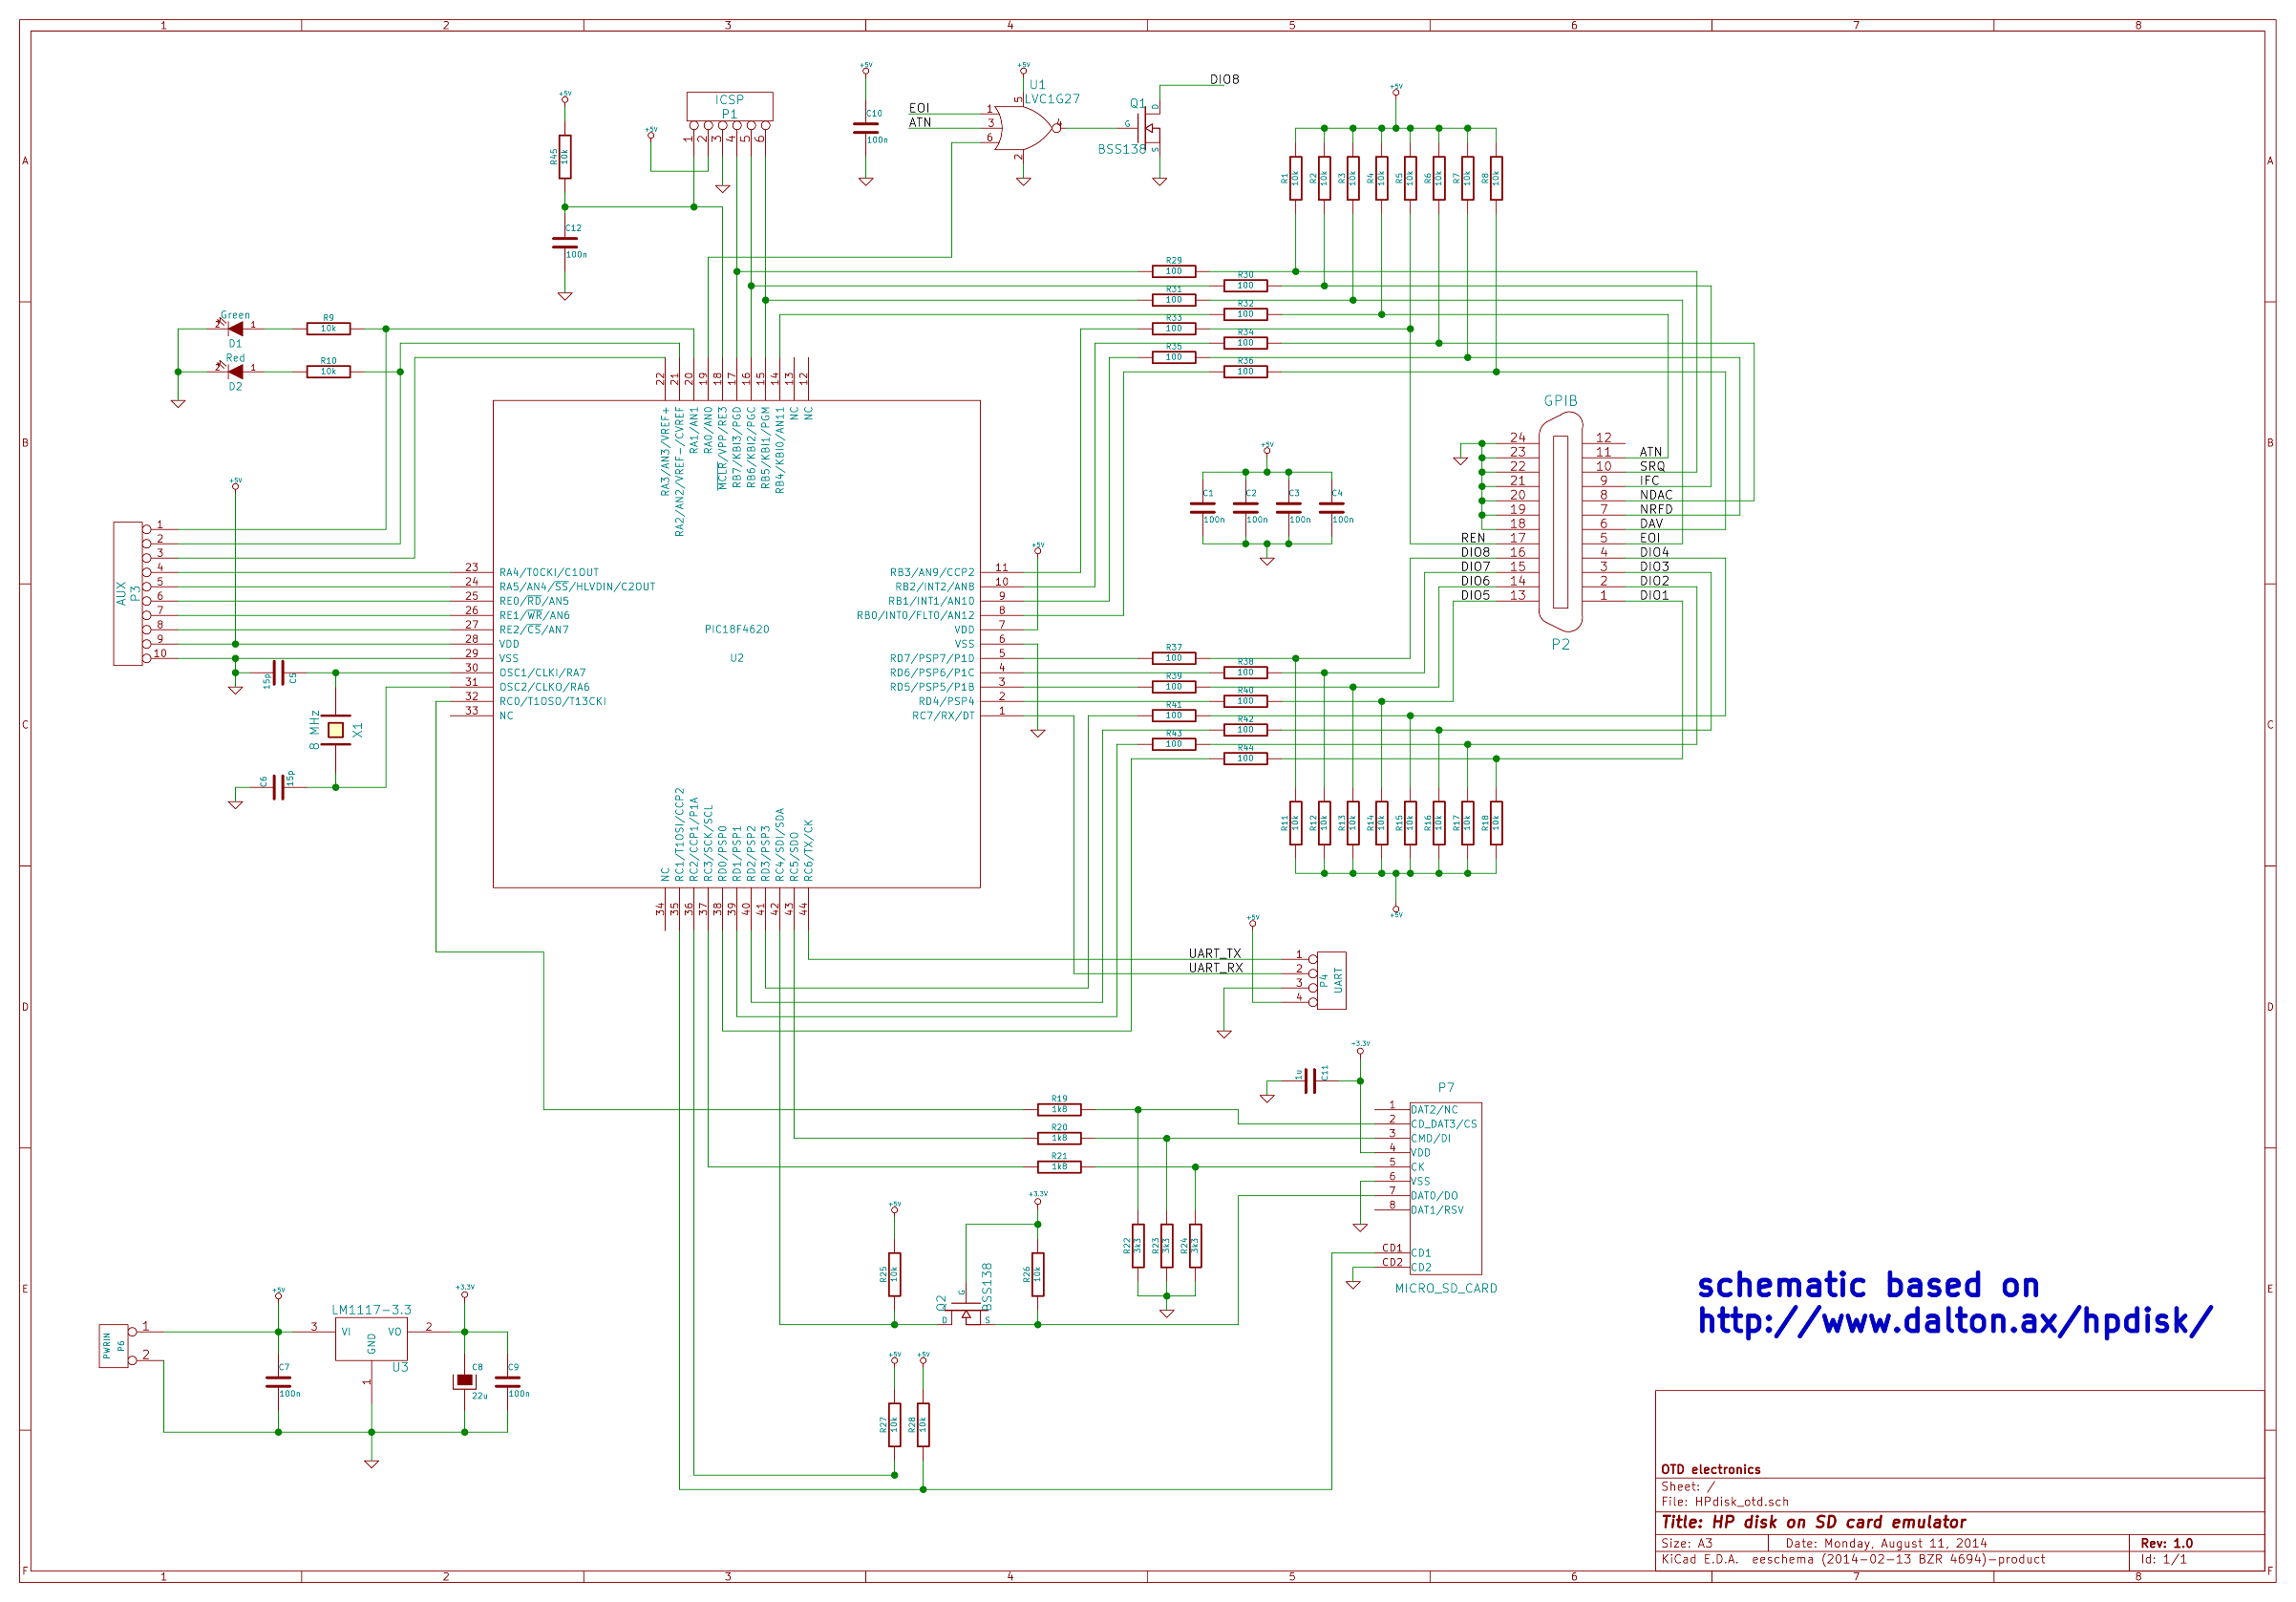
The schematic is practically identical to the original design:
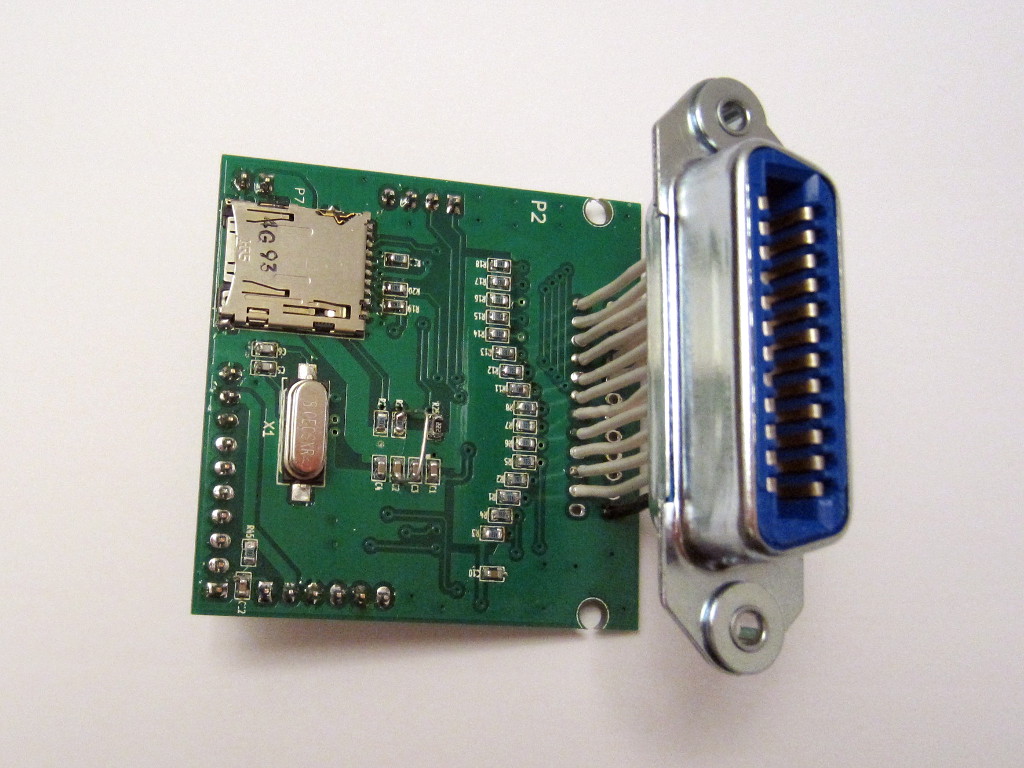
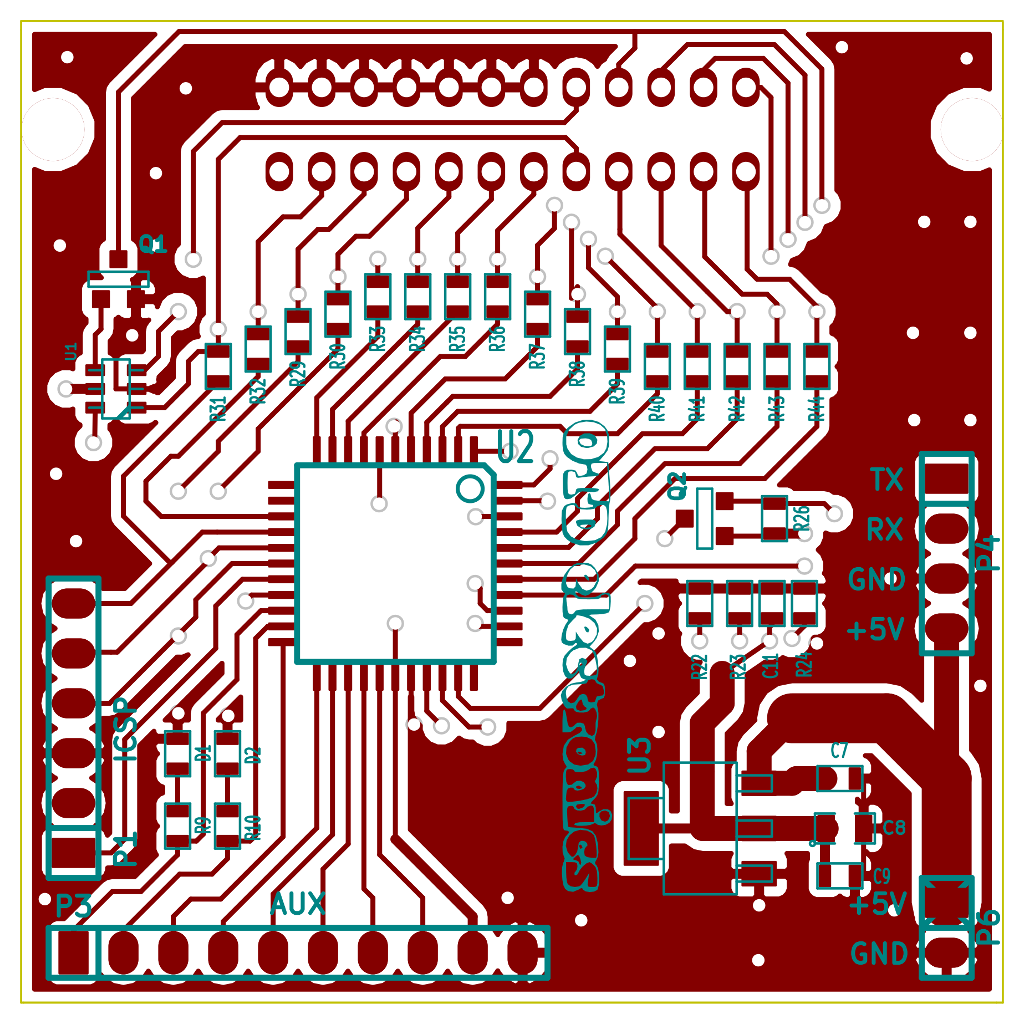
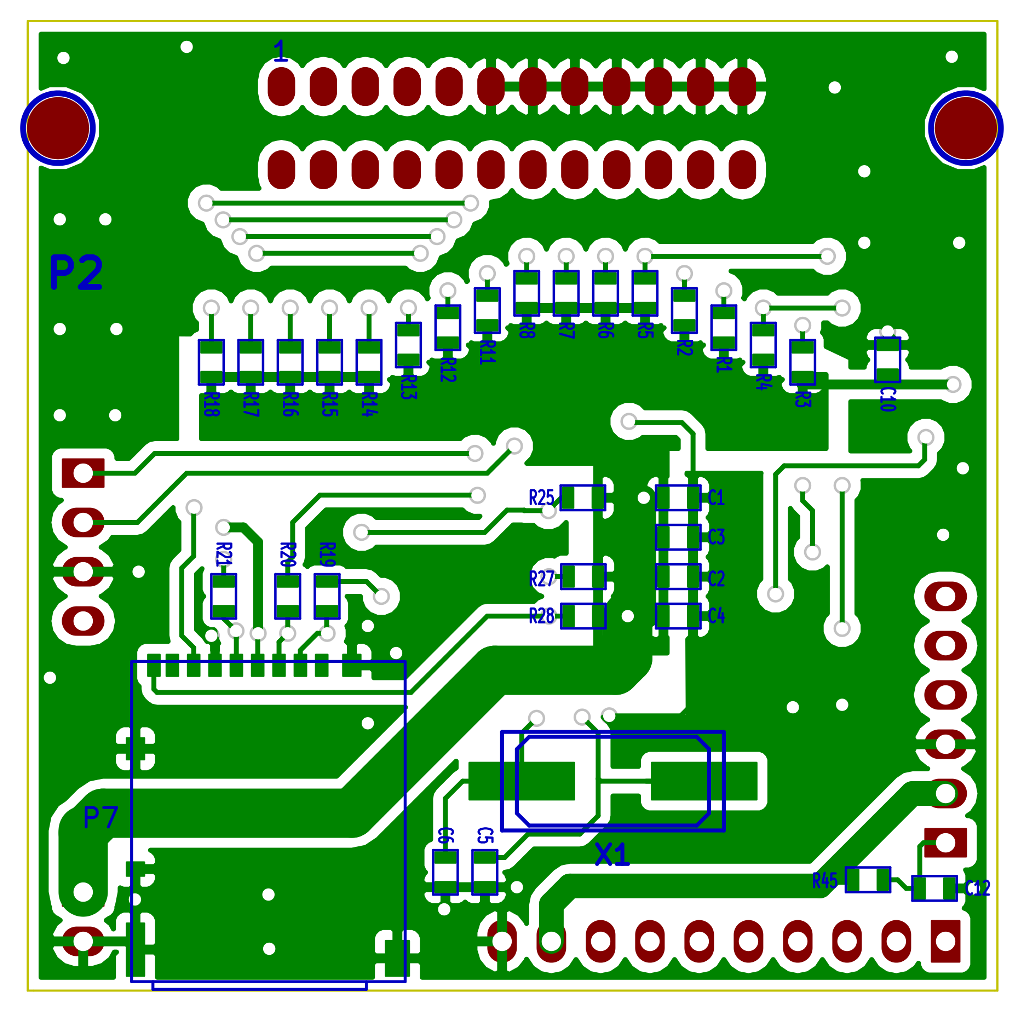
I have designed my own PCB since I wanted it to be somewhat smaller than the Anders' version
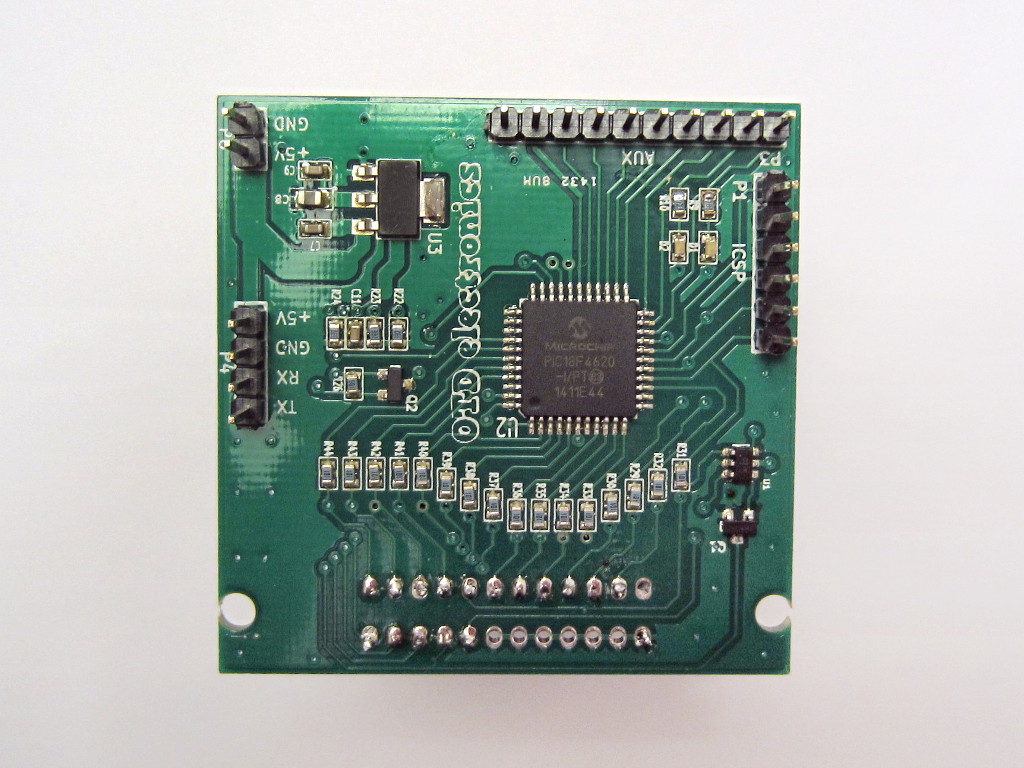
The PCB size was constrained to be 5 cm x 5 cm, to fit in the smaller price range of the cheap PCB building services available - this is why the holes for the GPIB connector did not completely fit.
Here is the BOM I used to build the prototype above, with the Mouser part numbers for the various components; it should be possible to load the whole BOM directly from the .csv file on the Mouser website using the "BOM import" page there.
Schematic corrections
- R27 should not be mounted and the PIC pin 36 grounded instead. That pin was previously used for the "write protect" functionality of the regular-size SD cards but since this feature is not present on micro-SD cards that signal should be pulled low. It's also possible to change the FW to ignore the pin 36 level
- the pin 1 marked on the PCB near the GPIB connector is in the wrong position! The real pin 1 is the pin ABOVE that one, towards the resistors. Please compare with the positions of all the ground pins, from pin 18 to 24
- R25 should be changed to 1800 Ω or 2200 Ω, to speed up the level shifter
The BOM above already includes the correct components values.
Build notes
- the lateral pins of the micro-SD card socket are difficult to solder by hand: with hindsight I should have made the pads larger, to allow better contact with the soldering iron tip. If you solder it using solder paste and a reflow oven, it will be ok. (I reflowed the top and did the bottom by hand)
- the UART prints some info/debug messages, it may be useful to take a look at that at the beginning, just in case. You'll need the usual level shifter to convert the low-voltage signals from the PC to the standard serial port levels (and to add the needed logic inversion(s))
- the AUX pins are not used at present
The SD card SPI clock frequency is 2 MHz; the clock waveform seems fine but the data on the micro SD side are quite "rounded". The BSS138 level shifter is just fast enough with the current speed and a different circuit will be needed at higher speeds.
Anyway, with the default settings the transfer rate seems not too bad; saving the instrument state on an HP 8753C VNA needs just a few seconds.
The SD-card emulator uses the GPIB address 0, which should be the default for the old HP machines.
I have noticed that often when I first connect the disk emulator to the GPIB bus and then power it up, it does not work properly. I usually first power up the disk emulator and only after I connect it to the instrument.
The PIC outputs drive strength is not high enough to be fully compliant with the GPIB requirements. In theory one should use the special GPIB buffers for ensuring isolation when powered down and driving the bus but in practice the circuit above works fine if you have only a few other instruments connected to the GPIB. If too many instruments are connected on the bus, the HP disk emulator will not respond properly anymore and may cause errors on the bus. At least during the initial test, connect the GPIB disk emulator directly to a single instrument.
Debugging
The card debug UART is configured as 38400N1; at power up it will output some messages like this:
HPDisk v 0.16
Feb 24 2014 19:18:53
SD SPI DIV: 1
STKPTR: 1
Hardware PP

Mounting
Mount returns 0

SD_mount returns 0
Reading config
Open /hpdisk.cfg returns 0
Read 18 bytes
K:PROTO V:1
K:DEBUG V:1
P:1 D:1
SS/80 9134L

Open /lifdata.bin returns 0
Max Vector 14893056 (E34000)

Interface clear
Open /lifdata.bin returns 0
Max Vector 14893056 (E34000)
No messages are printed during the files transfers, unless the FW is recompiled with the debug messages enabled. This option may be helpful to find any issue with the board, but in practice I did not need that as everything worked fine since the beginning.
The numerical codes after "returns" in the messages above are related to the SD card access: the possible codes are:
| Code | Meaning |
|---|---|
| 0 | OK (no errors) |
| 1 | FR_DISK_ERR |
| 2 | FR_NOT_READY |
| 3 | FR_NO_FILE |
| 4 | FR_NO_PATH |
| 5 | FR_NOT_OPENED |
| 6 | FR_NOT_ENABLED |
| 7 | FR_NO_FILESYSTEM |
Led D1 will blink just after power up to indicate any of the errors code above, with a number of short blinks equal to the error code number. If everything is ok, it will be steadily on.
The led D2 will blink during any GPIB data transfer or be steadily on if no transfer is in progress.
Firmware
Since the device schematic is almost identical to the original one, you can directly use the firmware prepared by Anders. The FW must use the HW parallel poll mode; I currently use fattest_16_hwpp_d.hex found in the Version_16_fw.zip file found on his web page. Any more recent version should also work but I did not try newer ones, since the version I'm using works fine for my needs.
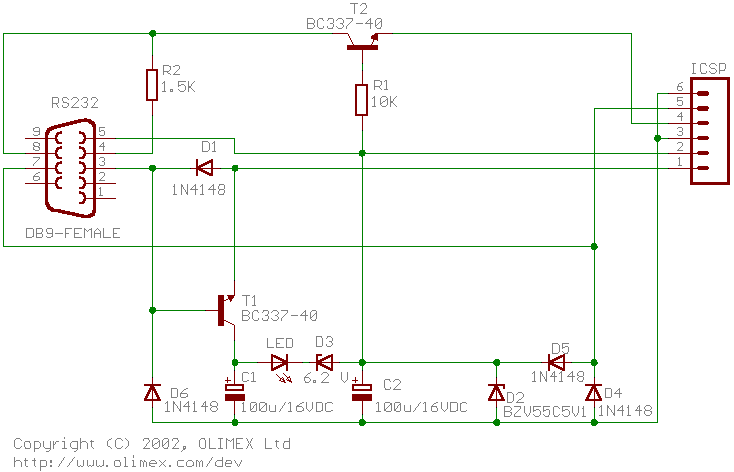
The programmer I used was a good ol' JDM-like, more or less like this from Olimex (its schematic is here). The pin numbering of the board ICSP connector matches the programmer pinout (pin 1 goes to /MCLR,VPP).
The SW I used to load the FW was WinPic800 v3.64H under Windows XP; once the board is connected to the programmer you can check with a Ctrl-D that the device is correctly detected; normally the programmer LED is off, but when doing a Ctrl-D it blinks a few times and then the device model is correctly shown.
Preparing the SD card
The SD card to be used with the GPIB disk emulator needs to be properly prepared, as explained on the Anders' website: in practice these two files are needed:
- a file named hpdisk.cfg to configure the disk emulator. Here is the file that I use on my SD card for an HP 8753C VNA; I expect it to work fine with other instruments also.
- a file named lifdata.bin which is the actual "disk" seen by the instrument via GPIB. You just need to create an empty file with the desired "disk" size. I use one which is about 20 MB.
To create this empty file, I just used dd under Linux. For Windows there should be an equivalent command, googling "windows create big empty file" returns several options, or you could copy the sample files on Anders' page, like the 15 Mb disk.