Here is the picture before.

Camper at our camp site in Greenbrier County, before the renovation.
July 6, 2006
My 1971 Lee Camper Restoration Project for Hunting Camp
Here is my summer project that I have just completed. As you read this it will seem like I haven't finished but I completed the complete project on September 20, 2006. This is a journal type record of my project.
This is my 1971 Lee camper that I bought 3 years ago from my brother in law.
He bought it from someone in Ohio 2 years earlier. That person was a Nascar
race fan...that is why it is blue and red. It also had a
"BIG" number 43 on the back.
Here is the picture before.
Camper at our camp site in Greenbrier County, before the renovation.
July 6, 2006
Here are updated pictures of my camper since I have painted it. I did this in two days with 12 cans of "Hunter Green" and 2 cans of the "Walnut".
The Krylon paint can handle/sprayer was a life safer!!

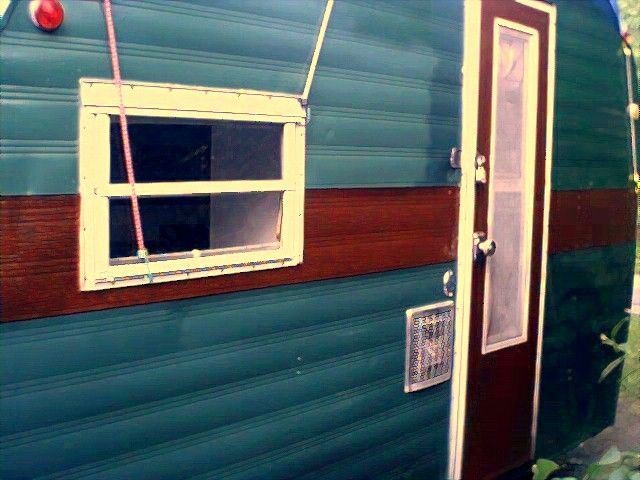
Side of Camper
Side of Camper (Door)
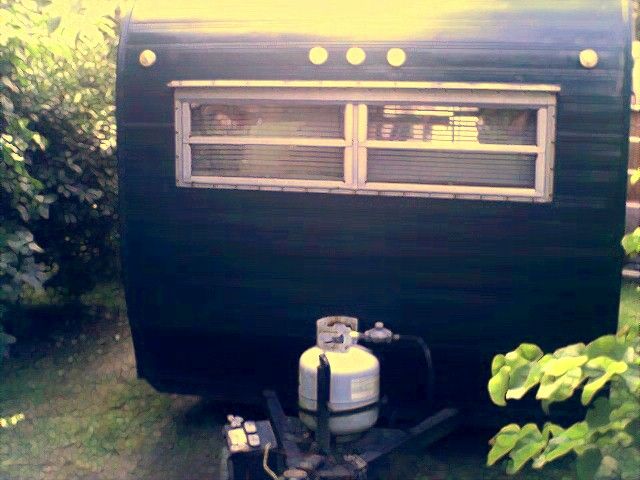

Front of Camper
Back of Camper
The colors are "Hunter Green" and "Walnut".
Right now I am working on the insides. Got to get some new paneling and linoleum.
I really don't need to replace the linoleum, but I want to give it a fresh look.
The paneling in the back needs replaced cause the roof leaked where the wall and ceiling join together.
The outside molding caulk was the old original gray putty like tape, and it had dried up and cracked.
I have bought 3 tubes of GE Silicone I 100% pure silicone to redo the seams around the outside molding.
I worked on the heater and got it all cleaned out. The first year I got it we couldn't keep the furnace burning.
After pulling the burner out of the firebox I know why. I had to empty the Scorpion Dirt Devil 4 times!
I am still looking for a 10 or 20 gallon water tank for it. Someone took the water tank out of the camper. The fill line hose is still there and the faucet pump line is still there.
I am also looking for the metal brackets that hold the table to the wall and the ones that mount to the table.
Not that I need them, but I thought I might mount them on the outside of the camper where the door is, so I can put a table out there.
I can use the original table as a pattern and make a second table for the outside.
==================================================
July 21, 2006
Just an update...I have completed sealing the seams on the roof with 100% silicone.
I have removed the cabinet doors and painted the doors walnut.
Went to Lowes last weekend and bought 4 sheets of paneling and 2 boxes of self adhesive tile.
Bought screws to secure the paneling to the walls along with 2 tubes of panel adhesive.
Spent some of the evening after the sun went down getting measurements and laying it out on paper.
Will try and take some digital pictures of the interior before I get started and then take some after I am done.
Got a lot still to do and bow season is fast approaching!! But I think I will have it done.
At least the back where the seam leak was the worst.
================================================
August 1, 2006
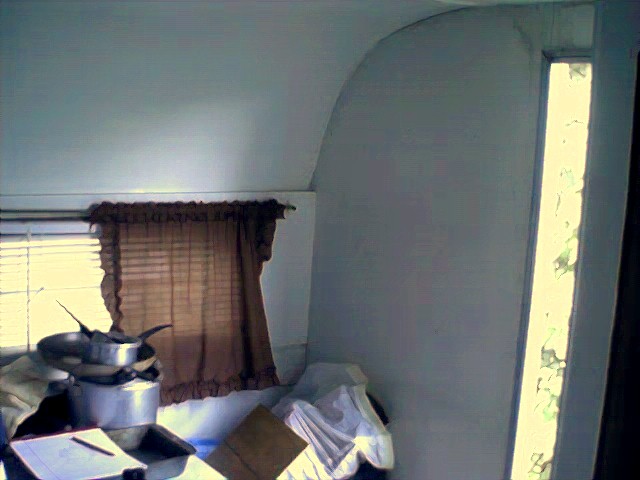
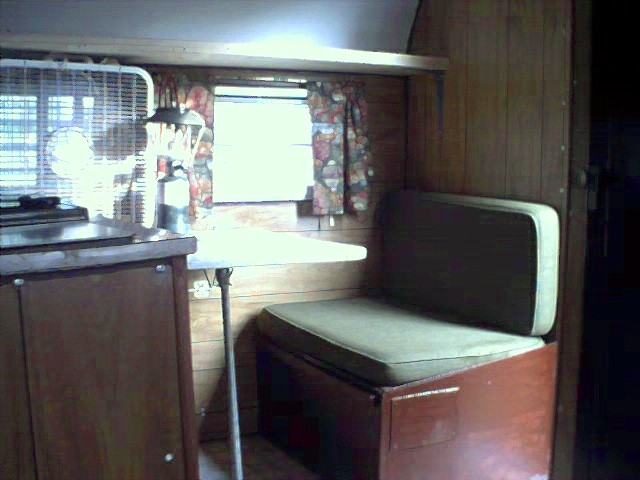
More of an update on the camper...sorry I didn't get any pictures before the paneling went up but take my word for it, it was nasty.
The paneling had been painted white and where it had leaked there was mold and mildew down the wall from the cabinet to the floor.
I had to rebuild the bottom of the cabinet...the wood had just rotted. But all is well now and solid.
Here are a few pictures, but of course I haven't finished yet. In the picture you will notice that the cabinet under the sink is still white...since this picture I have gotten all the walls
re-paneled except the very front wall. Gotta make another run to Lowes and get one more sheet and the paneling will be done.
Then all that is left is for the linoleum tile to go down and for my wife to make the curtains.
Bought the material (deer in the woods material) from Wal-Mart and my wife has already cut the curtains but needs to sew them.
Here are some pictures:

================================================
August 3, 2006
Okay...finally I have completed all the work...well maybe not all the work.
I still have to repair the ice box door where my son set a lantern to close to it and melted the cover and put in a standup gun rack.
But all in all it is DONE!!
Here are the photos:


The curtains are a deer pattern from Wal-Mart. I am going to get some Mossy Oak Breakup material from Wal-Mart and do the cushions...well my wife is going to do the cushions.
I will have to get a piece of foam about 18 inches tall, 4 inches thick and about 72 inches long for a back rest cushion on the back bench.
I already have the original seat cushion, but it needs covering badly!
I made the cover for the sink last night so I could have additional counter space when not needing to use the sink.
But I am pretty proud of the work since it is the first time I attempted it.
=========================================
August 6, 2006
As of yesterday I have finished all work on the inside, picked up all the tools and cleaned the interior and the only thing left is a new regulator and rubber gas line hose and she is ready to go back to camp.
Well the front cushions aren't covered yet, but I can live with them like they are.
My wife and I covered the old back cushion Saturday and it didn't look to bad.
Here are the last pictures of the camper taken yesterday afternoon. You will see the gun rack that I built in these photos.
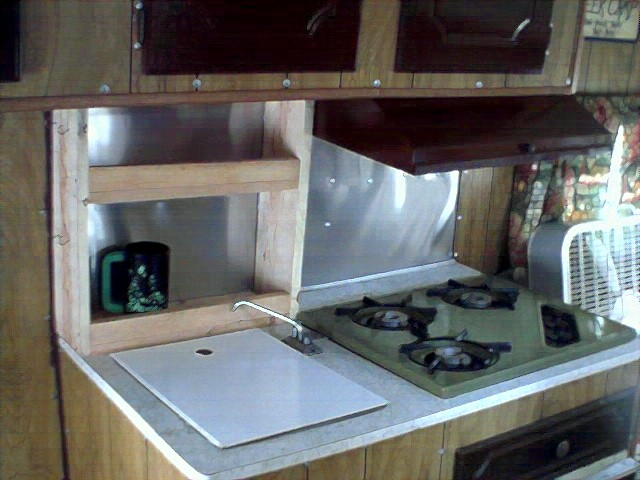
Standing at the door looking in:


Standing at the door looking in at the sink, stove and icebox (remember the icebox was damaged 2 years ago when my son set a lantern in the floor and melted the
plastic brown covering).
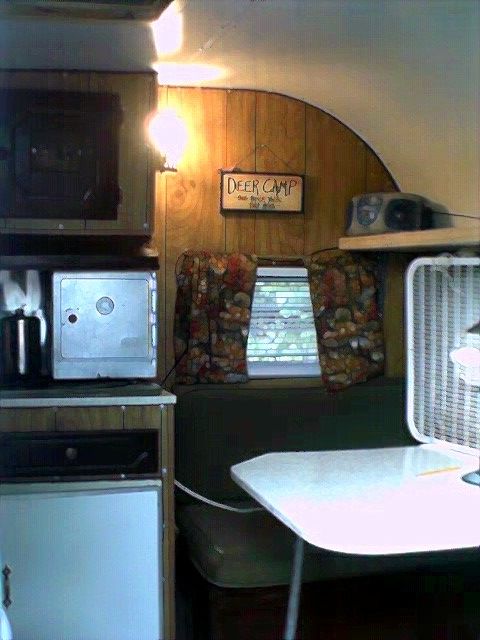

Looking in with the 110 AC light
on. Standing at the table looking back
at the back bunk.

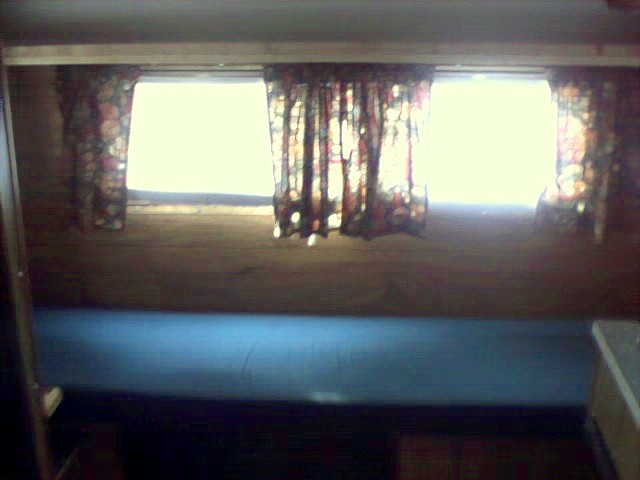
View of the
back.
View of the back with curtains open.

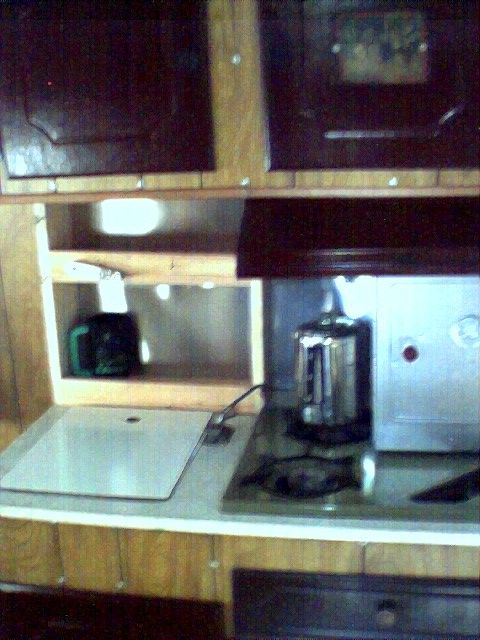
Standing at stove looking at the door. Sink and stove
area.
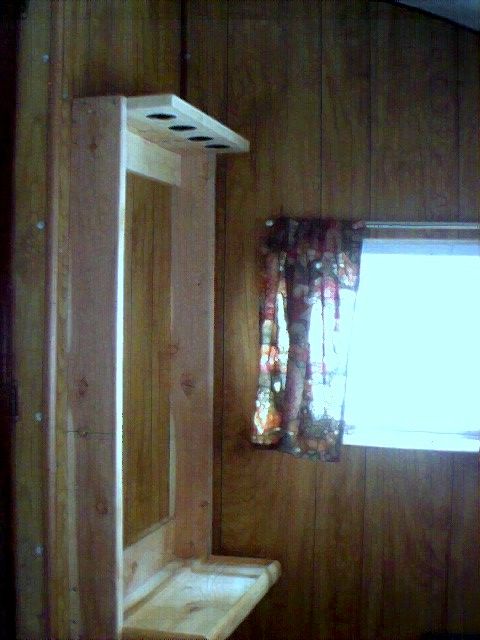
Gun rack at back of
camper.
Setting on the back bunk looking towards the front.
I sat down and tallied up the total cost for this restoration...unless I missed some items, which I may have...the total cost as of today has been $339 for this renovation.
With the regulator and rubber gas line still needed I figure it will have cost me about $375 to renovate this old camper.
A link to the 2008 Hunt 2007 Hunt 2006 Hunt 2005 Hunt 2004 Hunt 2003 Hunt 2002 Hunt 2001 Hunt Over the Years Hunt
back to Hunting Hobby
Back to WD8WV Domain This page last revised: 01/06/09 08:12:55 PM email: [email protected]