I looked at a lot of enclosures befor I settled on this one.
I got it at Fry's for about 9 bux. This was quite the bargain as
most or your local electronics stored sharge double or triple that
for a comprable box. first I drilled all of the holes and then I painted
the sides dark green and the face and back white using some spray paint
I had laying around.
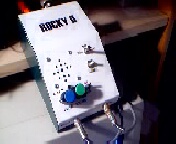
I used some Rub-On labels that I bought at Ocean State electronics to
label the various knobs and jacks. The ROCKY II label was printed on a
sheet of paper out of my comoputer and then tacked down using spray on acrylic.
The spray on acrylic is like clear spray paint and works wonders
for sealing the rub-on labels.
I then went to the hardware store and bought some 1/2" aluminum 'L' stock.
The minimum that they'd sell my was 3' but that was ok... I was building a
Rock-Mite and nothing was going to stop me. I took my aluminum stock over
to my friends house and we used this really nice saw to cut me 20 individual
3/8" slices. This was more than I needed, but then I figured I could use them
in the future on something else. I then filed eack one down and drilled two holes
in each. These made my 'L' brackets as shown below.
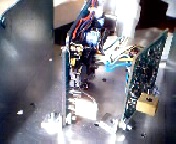
The picture below shows a single 40 meter Rock-Mite and
the AAPB audio filter installed. The remaining 20 meter Rock-Mite
installs along the left side of the enclosure.
You can see the two white holes in the picture where the 'L' brackets attach.
I then built each of the Rock-Mites and fitted them with Molex Connectors .
I made sure to follow the directions closely and didn't rush.
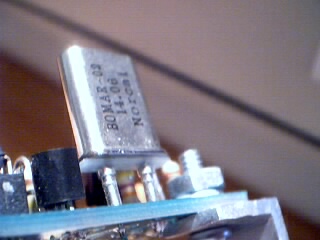
I used machined pins for the xtals, but I was afraid that the xtals would short
on the pins. So I cut a short piece from the end of a ty-wrap and used an awl
to put two holes in it such that it would fit the xtals. The picture below
shows how this turned out.
I then built the AAPB board. This was a real adventure since I had never
built a SMT kit befor. It didn't turn out to be the most beautiful, but it
worked on the first try. I also used two 6 pin Molex connectors to make the
connection between the knobs, switched etc... and the actual PCB.
The AAPB is the PCB to the far right in the picture above.
I had to replace the stock sensitivity potentiometer to allow me
to change the setting withouit having to remove the board from the enclosure.
I used a rotery switch to select from three levels of filtering.
I also installed a switch to completely bypass the AAPB and connect
the Rock-Mite audio output directly to the headphones. Also, I installed
a small speaker on the face of the enclosure. The audio out the the tiny
speaker isn't good by any means, but it works.
The provided LED was installed on the face of the enclosure
between the two knobs.
I used a DPDT - CENTER OFF switch to mechanically isolate the power and the audio.
The Dit, Dash, and SW inputs were isolated usign 1N4001 diodes (I have used
the Jackson Harbor PIC in this same configuration with no success)

Here is the schematic that shows how the two Rock-Mites are wired together.
[Home] [QSL] [QRPP] [Projects] [Links]