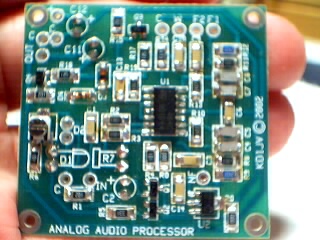
This picture shows my second attempt at this kit.
It came out much prettier that my first one.
The first one went into my ROCKY II radio.
This one is going to be companioned with a RM-30.
It is my understanding that this kit is no longer available at this time
as it has been replaced with a newer version.
You can visit http://www.qsl.net/kd1jv for more info on these kits.
My first suggestion with this kit is to read all of the directions
completely befor starting it. Also, I found that the parts install
order made it so that some of the parts were hard to solder due to their
proximity to their neighbors. You may want to consider assembling left to
right instead.
Having never built a mostly SMT kit befor, this was a great way
for me to get started. I tried many different techniques
to get the parts to stay in position while I tried to solder them down.
I know there are a lot of tried and true ways, but a toothpick pressed down
on the componant while I soldered it in position worked best for me.
If you're new to SMT kit building, just remember that less heat and
less solder are better approaches. Too much heat and or too much solder
are bad combinations that can damage componants and should be avoided.
I plan on using two 6 pin Molex connectors to provide the connectivity
to the panel switches and jacks as I did in the Dual Bander Rock-Mite.
Also, I ran ground through all of the spare pins of each the Molex
connectors back to a chassis ground.

Here's the 'Through Hole' parts.
I mounted these one the other side so that they would be easier to solder.
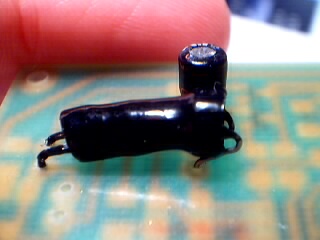
And here's a close-up of the finished Optio-Isolator.
I used the supplied heatshrink tubing as well as a few splashes of black nail-polish.
I have used the filter board with the dual band rock-mite extensively.
I really love the added selectivity that it brings as well as the AGC
functionality. I really keeps the static crashes from blowing my ears out.
Getting the sensativity adjusted correctly was a bit tricky.
I found that the adjustment I made with the cover off, was
different when the cover was on. I found that the optio
coupler/isolator picked up a little light that leaked through layors
of nail polish and would make the sensativity change. I ended up
dimming the lights, adjusting it, and then buttoning up the
enclosure. This left the sensativity where I wanted it.
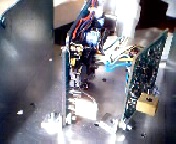
Here's the AAPB installed in the ROCKY II.
The AAPB is the board on the right with the big square
potentiometer soldered to it. I had to replace the original
sensativity potentiomenter so that I could adjust it without
taking the board out of the enclosure.
[Home] [QSL] [QRPP] [Projects] [Links]