3D Printing landing zone...
We are on the way with the project now in phase 2. The first part was just Matthew and Lloyd kicking around the idea of getting one. But now we have eight people that opted in on the project and we await the full assembly at the clubhouse...
|
|
 |
**Update [5/5/18]: This is the fourth update. Current updates are at the top of the page. To see what updates have been posted in the past, scroll down.
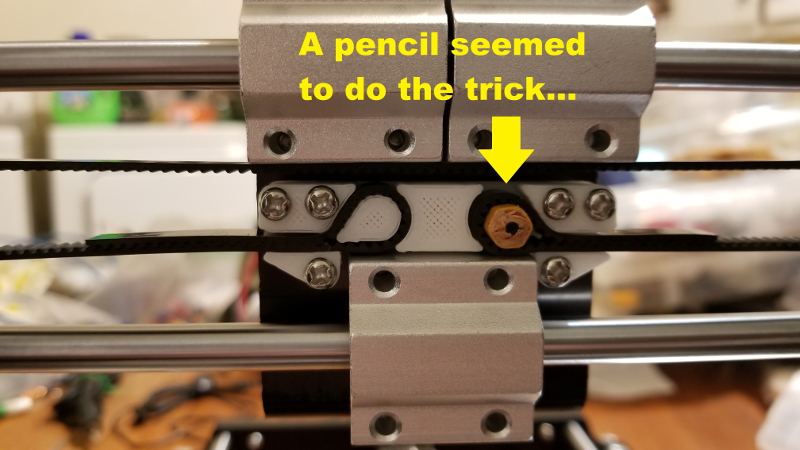
Wow - it has been a while. A ton of things have happened since the last update on this project. We had members with home, family and health issues, work issues, scheduling, the Spring Project 2018 and just a whole bunch of life-things colliding all at once. But hey - we're still at it though. As some of you know, I have taken the printer home to get it finished. It is sitting on the kitchen table as of this publication. And today I sat down to get the assembly completed. Colby Taylor had 3D printed a fix for the X-Axis issue we ran into a few months ago. But to no avail it messed up. I had to fix it with part of a #2 Pencil. But it seems to be holding.
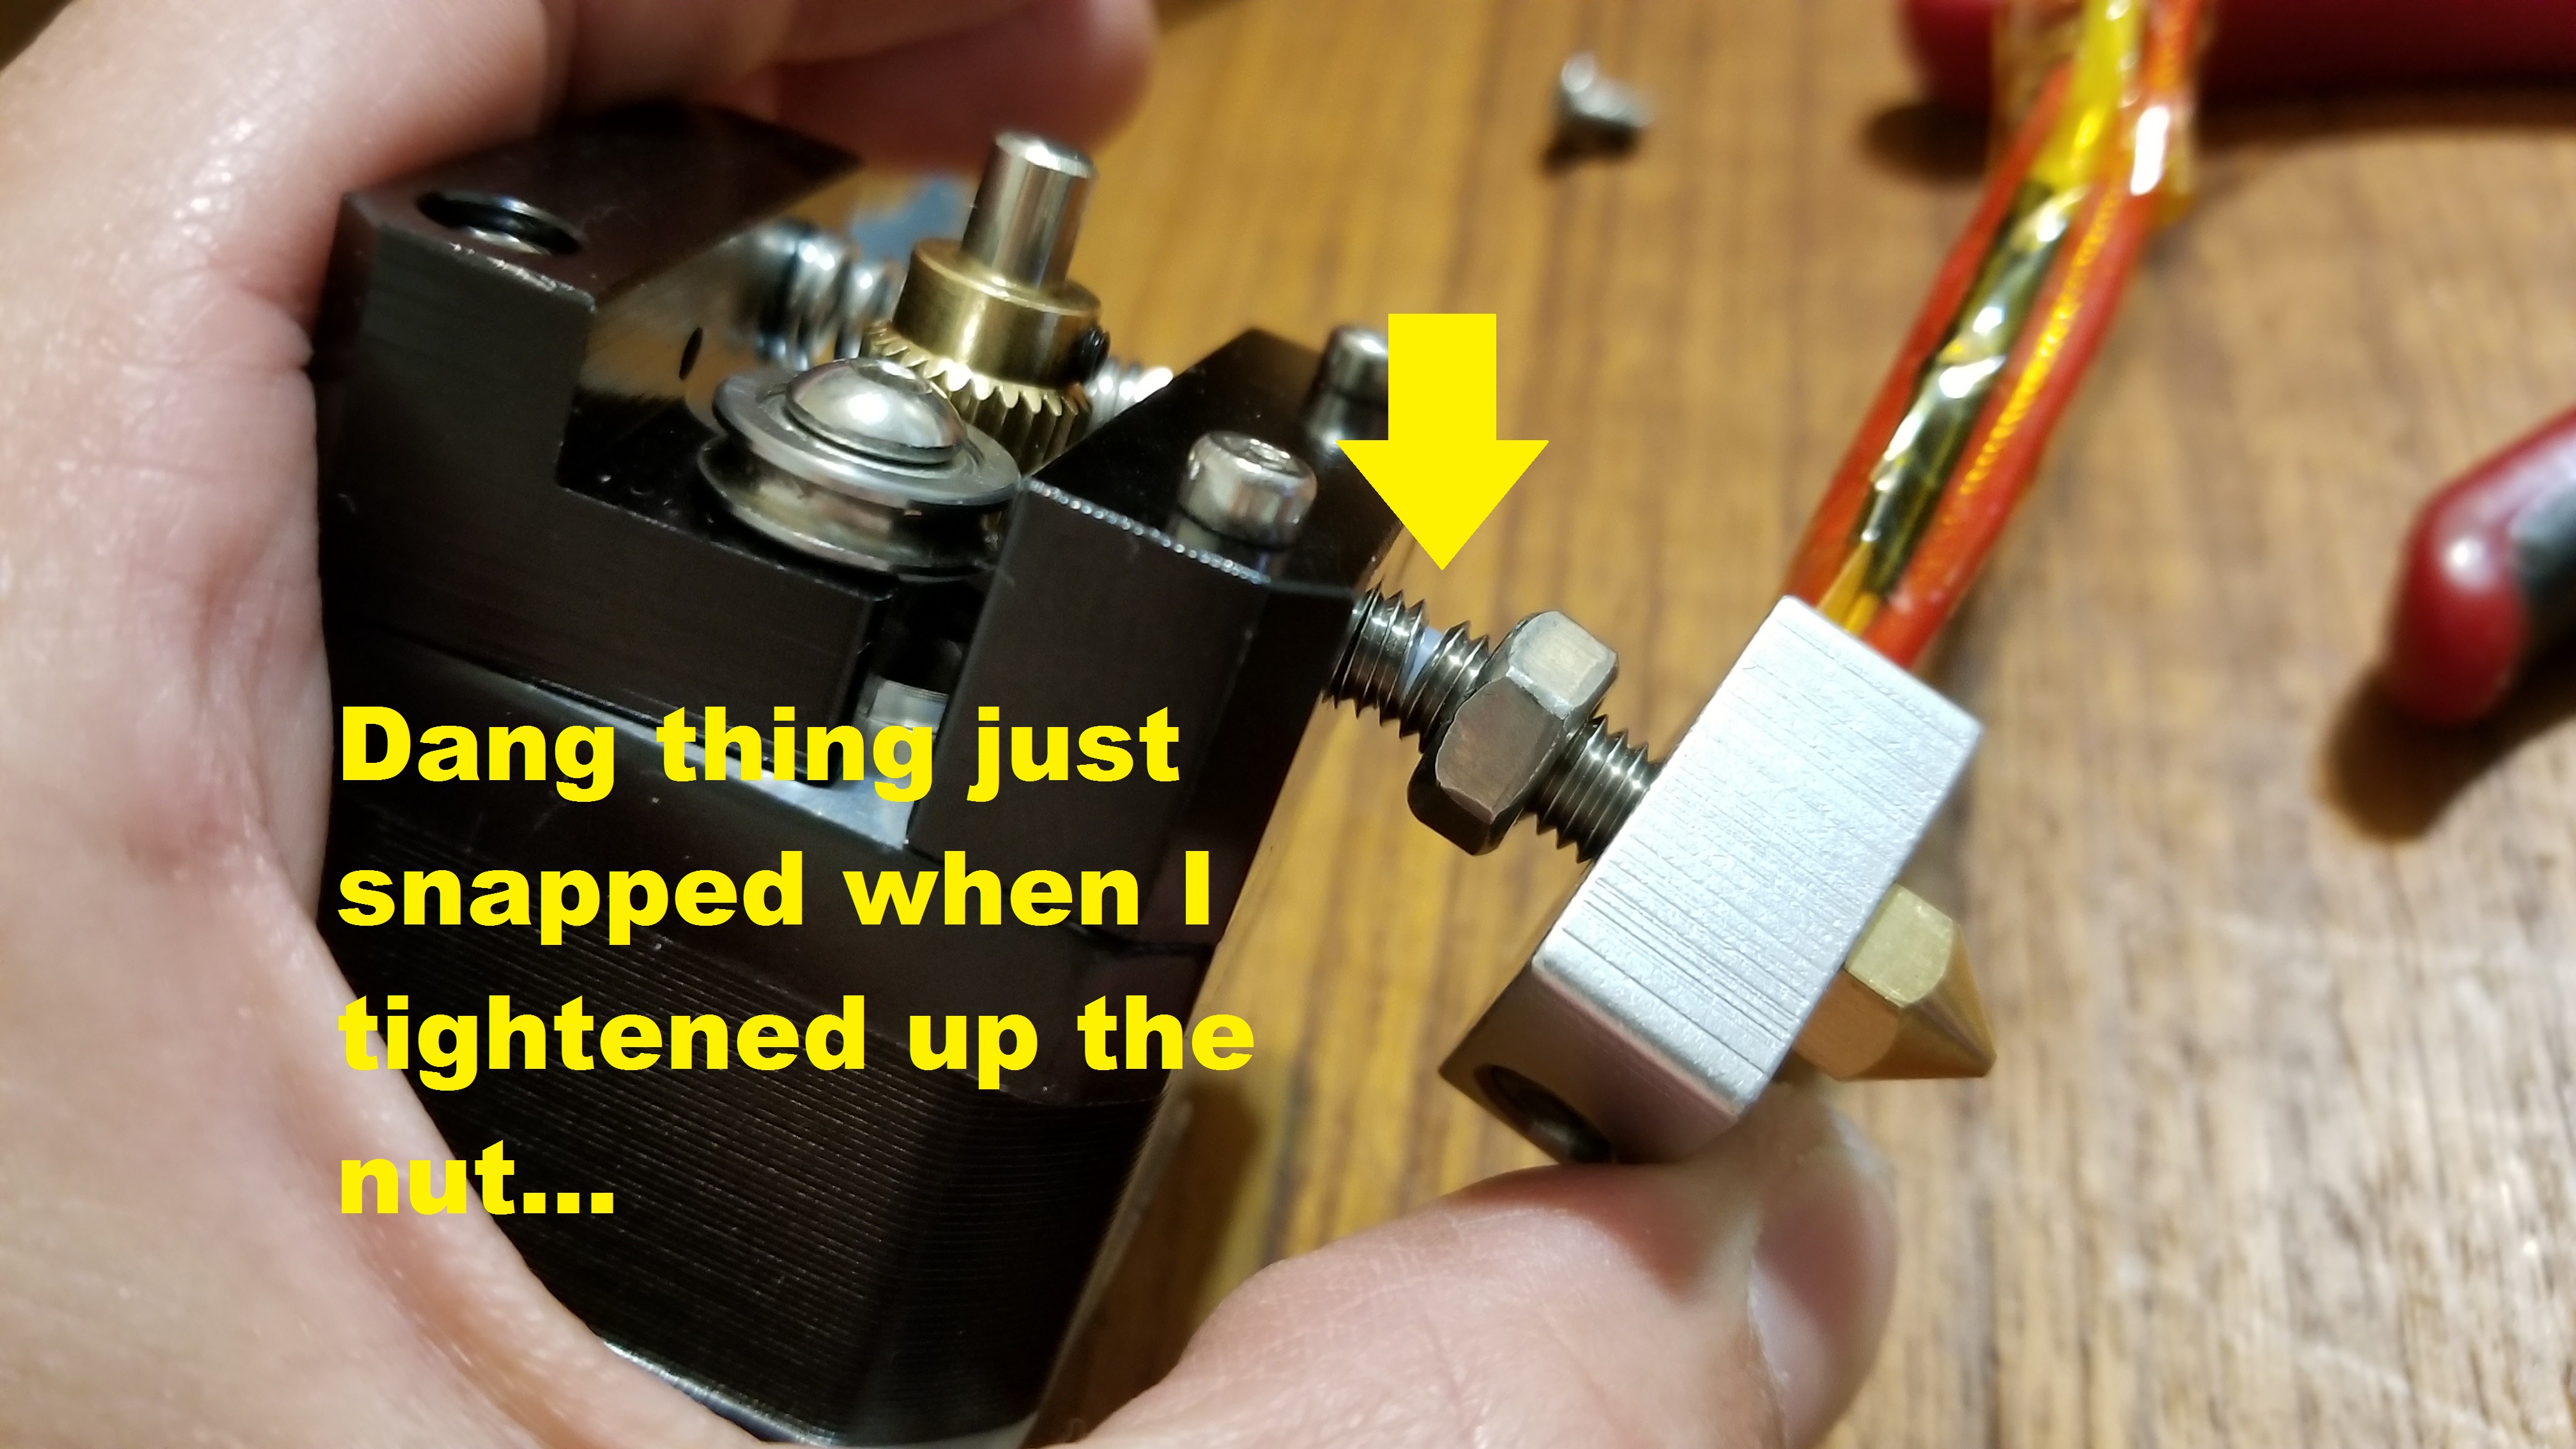
BUT THEN I went to install the extruder assembly. And the dang extruder tube to the nozzle broke!! Dang it! So be advised that I will be using some of the upgrade money to purchase a replacement. Take a look at the images below. They explain everything better than a novella. So we have another delay. But IT WILL be completed eventually. Ugh.
Click to enlarge images into a new tab.
 |
 |
 |
| Well - what can I say. I was trying to get that belt pulled through and back around with enough tension on it to move the carriage properly. But the part just kind of pealed off right inside the teardrop holder. I fiddled a bit and thought of the pencil. In fact, the part might ought to be redesigned to work this way. It was WAY easier to get the belt positioned after this happened. |
Had this thing mounted by the base screw (can't see it here) and ready to tighten up that nut on the underneath side of the X-Axis carriage. Everything was just fine until I wanted to have it just a 'bit' more snug. I sighed with a declarative when I felt it give way. Just like when a screw head breaks off. Ugh. No quick fix for this one... |
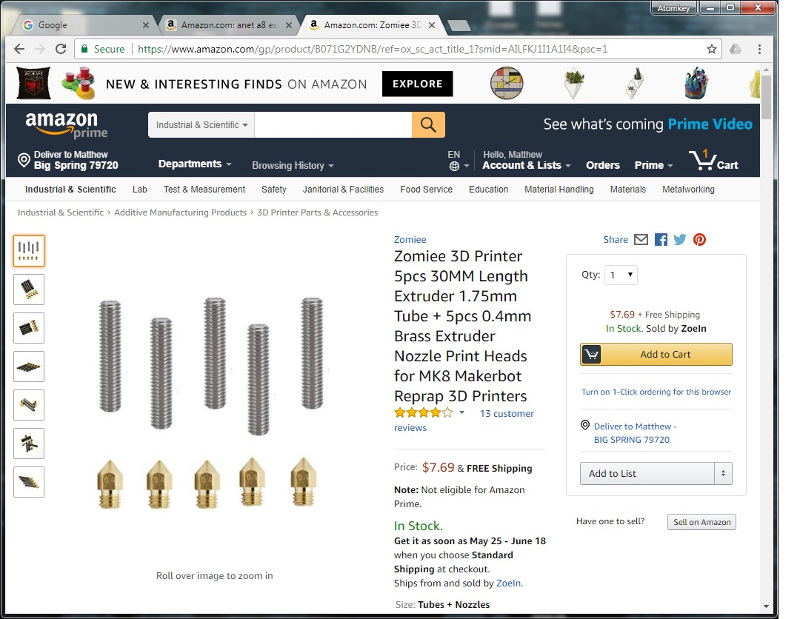
So - that means I have to get a replacement part for it. In the process of finding out what the tube was called in the first place (Extruder Tube ~ duh) and the various sizes and compatibilites etc... I also found out by reading reviews this part of 3D printers has a tendency to break/snap. After shopping around I found these and reports look decent enough to give them a try. More to come when the arrive... |
**Update [12/28/17]: This is the thrid update. Current updates are at the top of the page. To see what updates have been posted in the past, scroll down.
These final EIGHT (8) club members have met the requirements for All Access to the opt-in build on the ANET A8 3D Printer: Matthew, Lloyd, Henry, Daren, Pepper, Tom, Tracy, and Leland
              Here is our balance listing for those that have opted in -

              Lloyd     $30.00
              Henry     $40.00
              Daren     $40.00
              Pepper    $30.00
              Tom       $30.00
              Tracy     -pending- pledged
              Leland    -pending- pledged

              And of course myself (Matthew) when I made the purchase to begin with. And my
              contribution of the additional $30 as well for the proposed upgrades.

              > To make sure everyone has a good time and no one gets their feelings hurt
              > I've made a separate page that spells out the general guidelines that Lloyd
              > Henry and I first formulated before we made it available to all club members.

              PLEASE READ IT - click HERE to continue...
|
**Update [11/27/17]: This is the second update. The following club members have opted in for the 3D printer: Matthew, Lloyd, Henry, Daren, Pepper, Laurie, Tom, Tracy, and now also Elizabeth and Leland
              The total cost of the printer was $164.69
              Several considerations for must have upgrades have been reviewed
              since we actually got it delivered. This will add to the overall cost
              of the options in - so each person's cache-in will go up a little.
              This was expected and explained with the initial meeting.

              So what is going to be added and why?

              1) A better power supply
              2) Dedicated switch (the printer comes with just a plug)
              3) A MOSFET controller
              4) Bearings

              My first guess right off the bat for these items together is going to be close
              to $80 - so let's add that to the exist cost and divide it out for those
              opting in: $164.69 + $80 = $244.69

              With TEN (10) people (now) opting in brings it down to around $24.47 ea.

              ** So that's still less than $25 bucks per person to get full access to
                 the printer once it is assembled, upgraded, and ready to run.

              Please read the older updates if you haven't already so that you are well
              informed on this on-going project.

              Now let's take a closer look at these upgrades. What do they look like,
              where are we going to get them, and what are the explanations behind
              needing them.

              Click HERE to look at the upgrades page.

              > To make sure everyone has a good time and no one gets their feelings hurt
              > I've made a separate page that spells out the general guidelines that Lloyd
              > Henry and I first formulated before we made it available to all club members.

              PLEASE READ IT - click HERE to continue...
|
**Update [11/14/17]: The following club members have opted in for the 3D printer: Matthew, Lloyd, Henry, Daren, Pepper, Laurie, Tom, Tracy
              The total cost of the printer was $164.69

              With eight (8) people opting in brings it down to around $20.60 ea.

              Keep in mind that we will be gradually upgrading the printer over
              the course of the year. For instance the next upgrade will probably
              be bearings sometime in Februrary, maybe earlier. And they cost $23.00
              or so. So a week or so before that happens everyone that has opted in
              will get a notification on the purchase ahead of time and will need to
              bring their money to the next meeting.

              If for any reason any member decides they no longer want to have access
              to the printer, they can opt out of paying in on further upgrades. But
              the whole point of opting in is a dedication to keep upgrading the
              machinery until it is as good as it can be.

              From what I can tell that doesn't mean too terribly much though.

              To make sure everyone has a good time and no one gets their feelings hurt
              I've made a separate page that spells out the general guidelines that Lloyd
              Henry and I first formulated before we made it available to all club members.

              PLEASE READ IT - click HERE to continue...
|
Okay - so there are two sections kind of... Because I also have a place on my own website for the build I have
kept some of the links that are are relevent for me there... You will find them in this section:
My website basically just has links to You Tube videos I've found for
reference that I think might be useful in the build/upgrades/etc...
Click HERE for that link.
And this section has BSARC stuff on the topic
So yall probably want to know what kind of printer we got?
Here is a link to the specs:
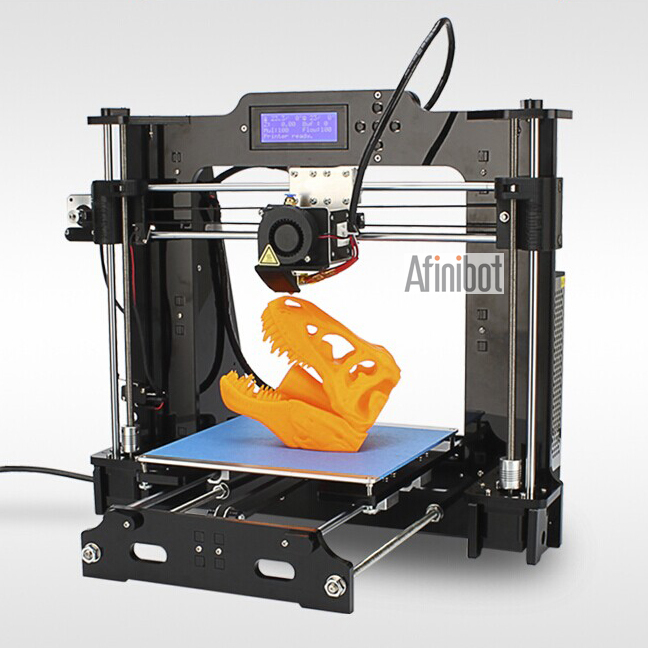
ANET A8 3d Printer
It is an entry level machine with many of the features you would upgrade first off anyways like
a heated print bed, etc. There is a great deal of support and mods for this machine so it looks
to be a good starting place.
For instance - once the basic printer is assembled we can actually start printing the rest of it
in the form of its own upgrades. Take a look at the machine when it starts out, and then after
a few mods done by other owners:
To start off we are going to just do the assembly and testing for a while. We want to know what it can do, and
do our best to not damage it while learning how to draft parts in 3d.
I don't know if it comes with filament, and to be on the safe side I have odered some to start working with. Already looking into this
stuff over the course of the year, and even more so since we ordered the machine, I have found that filament testing is a big deal.
Different companies boast different things and different materials make for different results.
Who know where this will get us. I hope in the future when we need a custom part we can just download the .dwg data file
and simply print one out. We'll see and we hope other members show interest in the project.
Right now, as of publication [Nov 6] there is not tracking data on it. It's in Atlantic Libo - well, I expected that because
it was the deal I found on it, but only if I went with the Chinese warehouse. The US warehouse wasn't part of the deal, and the
shipping was only $2 more for China so... What? Anyway. I expect it might be here before December? Hahahaha!! Oh well. It wasn't like we
were in a hurry anyway.
I can't wait to post this on Facebook. Jodi's gonna love it. Hi Jodi! Hey ya doin? Mind if I
have Lloyd back for a while?
Thanks for checking out the project everyone.
Matthew ~ W5KER / W5LND / KN3RD
-end of document-
|