Getting Started in APRS
My experience with the Tiny Trak 3PLUS from Byonics

I have been looking at APRS for a while, thinking it looked interesting, but didn't really have a specific use for a system. While more ham stuff just for the sake of more stuff is not a problem, I never had the impetus to actually buy anything for APRS. Two things have changed that recently.
Some of my Jeep/4x4 and geocaching buddies are getting interested in APRS as a way to track our activities off road and away from the pavement's end (where AAA ends their service...). By having an APRS tracker you can send your position in real-time to web sites that anyone with a web browser can monitor, complete with the ability to send them brief messages. Also some websites, particularly aprs.fi, saves your tracking information for up to six months, so you can review it when you get home or share it with others.
To get my feet wet in APRS I looked around for some basic equipment to get things started, without investing a lot in case I decided it really wasn't for me. I would have liked to use my old Kantronics KPC3, but it is a bit too old to be able to work well with APRS. It does work fine to monitor APRS packets, but is a pain to try to transmit and it won't digipeat them properly.
Most APRS rigs have three main parts:
I decided to try a Byonics TinyTrak3PLUS. (www.byonics.com/tinytrak) According to their website, it will interface with my existing GPSr and radios and provide the ability to send my position and status on the APRS network. They have a zip file with the instructionas and configuration software, which I reviewed before buying.
In theory, this will give me a fairly simple rig that I can turn on at the beginning of a Jeep run and not have to think about again. No schedule to keep with someone expecting me to check in, no need to monitor whether I have repeater coverage, and basically no reason to do anything with it while having fun on the trail. Anyone with web access should be able to keep track of my position on the go, without action required during the trip.
Of course, if you do want to use APRS for more you have the option of changing the status message on go, or even sending short emails. There are even several options for displaying the information of APRS stations around you in real time, so you can keep track of other vehicles on the trail. I'll be exploring more of these options as I get into this.
I ordered my TinyTrak on a Thursday evening and got an email Friday that my order had been received and would be shipped shortly. During the weekend between placing the order and the order being shipped I realized that there were issues with the old Radio Shack HTX-202 I had planned to use, so I shot off an email requesting a change to a radio cable with a connector for my Yaesu VX-5R. I got a friendly email back saying the change was no problem, and pointing out some form and fit issues with the 4-conductor mini-plug Yaesu used for a while. They have since moved to different plug, but the radios in the field are stuck with the connector that Yaesu abandoned.
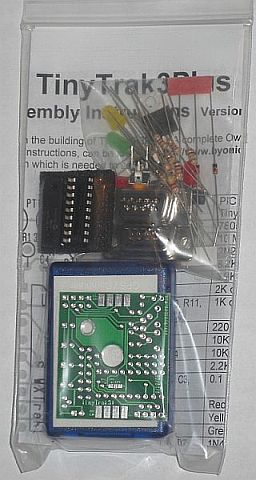
My TinyTrak kit and the requested cables shipped form Las Vegas promptly on Monday and it was delivered on Wednesday. All the correct cables were included and a kit had all listed parts, along with a schematic and instructions on one sheet.

I was a bit surprised by the small package. It is hard to grasp how small this device actually is from the photos.
I got the "Assembly Required" kit. I still like to build some of the ham stuff I use. Doing so helps keep you focused on it while you are building it and you learn more about how it works and why things are what they are better than a "plug and play" item. Besides, even if I got the assembled version you know I would take it apart to see what was in it. The price difference was only $9; $33 for the kit versus $42 assembled.
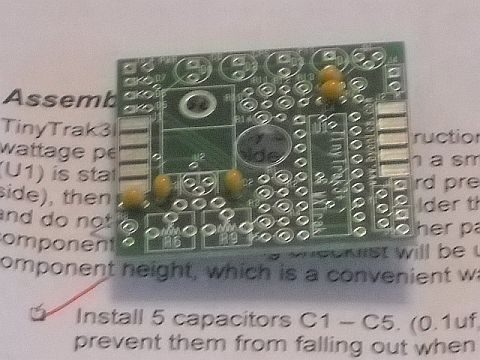
I started building on Thursday. The instructions included were a double-sided sheet with 20 assembly steps. Very little electronics jargon is used, and it is explained when it is used. Having assembled a number of electronics kits of various levels of complexity, this one was very simple and easy. Even a beginner with no kit experience should be able to put this together successfully with a little care and patience.
After a total of about an hour of building time I was done with the circuit board construction and ready to start testing. No surprises during the build and no problems getting things together as directed.
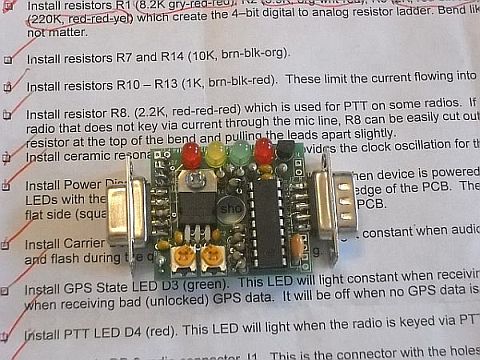
Testing started with checking the power connection. I inserted a couple of component lead cutting into pins 14 and 5 on the PIC socket and measured 3.15 K-ohms, which was pretty close to the expected 3 K-ohms. I applied power and got an even 5VDC as expected.
After inserting the PIC chip and doing a thorough visual inspection I powered it up and was pleased to see the correct three flashes from the yellow and green LEDs. I clicked the Check Version button on the configuration software screen and the version reported as expected. Using the tone test buttons and a second HT I adjusted the transmit audio level, and then adjusted the receive audio level to just open with the HT volume set about 1/3 on.
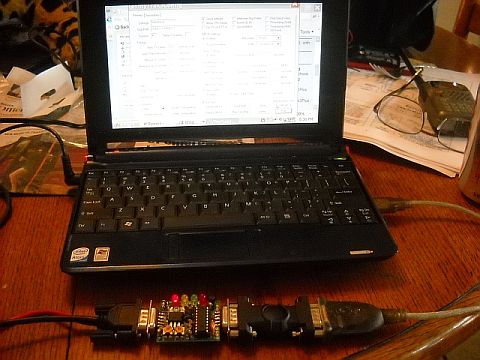
The configuration on-load worked as expected, and I disconnected the computer and connected my Garmin Etrex Venture. The GPS LED flashed until I put the GPS on a window sill where it could pick up satellite signals. The GPS locked and the LED went solid. I was able to check at www.aprs.fi and found myself on the APRS map.

In summary: the TinyTrak3Plus was easy to order, arrived promptly, was easy to assemble, and seems to work as advertised. I ll add updates as I learn more.
My plan is also to find a way to put this tracker system in a rocket payload. It looks like everything will fit in a length of 4 inch body tube and weight less than 6 pounds--maybe 8 with a larger battery pack. I have no timeline for that part of the project, but as I learn more about the TinyTrak and APRS in general I will be working on it.
UPDATE, 8/25/09!
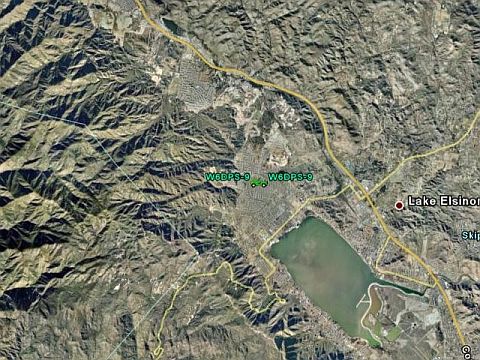
After trying the tracker out on a weekend near Big Bear, this is the coverage I got:
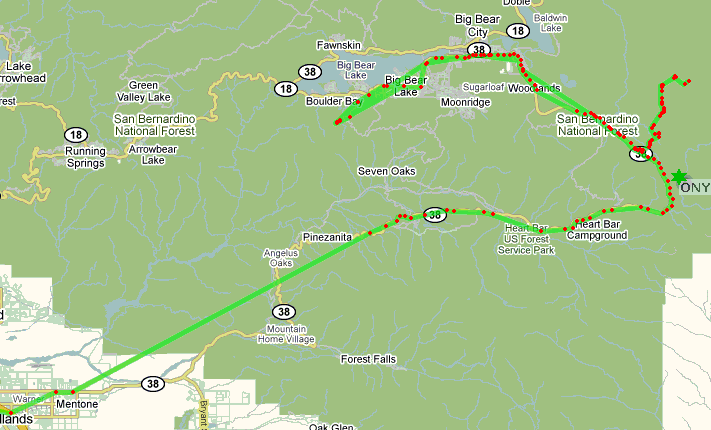
I am pretty happy with my TinyTrak3+, and thinking of additional ways to use it. When I actually get started on a rocket payload, I'll post a separate page.
Another UPDATE, 9/3/11!
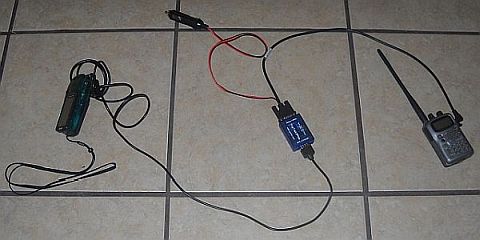
After a couple of years of use and some ideas of how I wished this system was put together, I changed the way this was put together. Check the update on the project page for my interface module that reduces clutter and allows access to other features.
Updated 02/08/26