I have 3 "stations", my main operating position in my "shed" , my "Winter Headquarters" in my Garage, and my portable "GO" Kit:
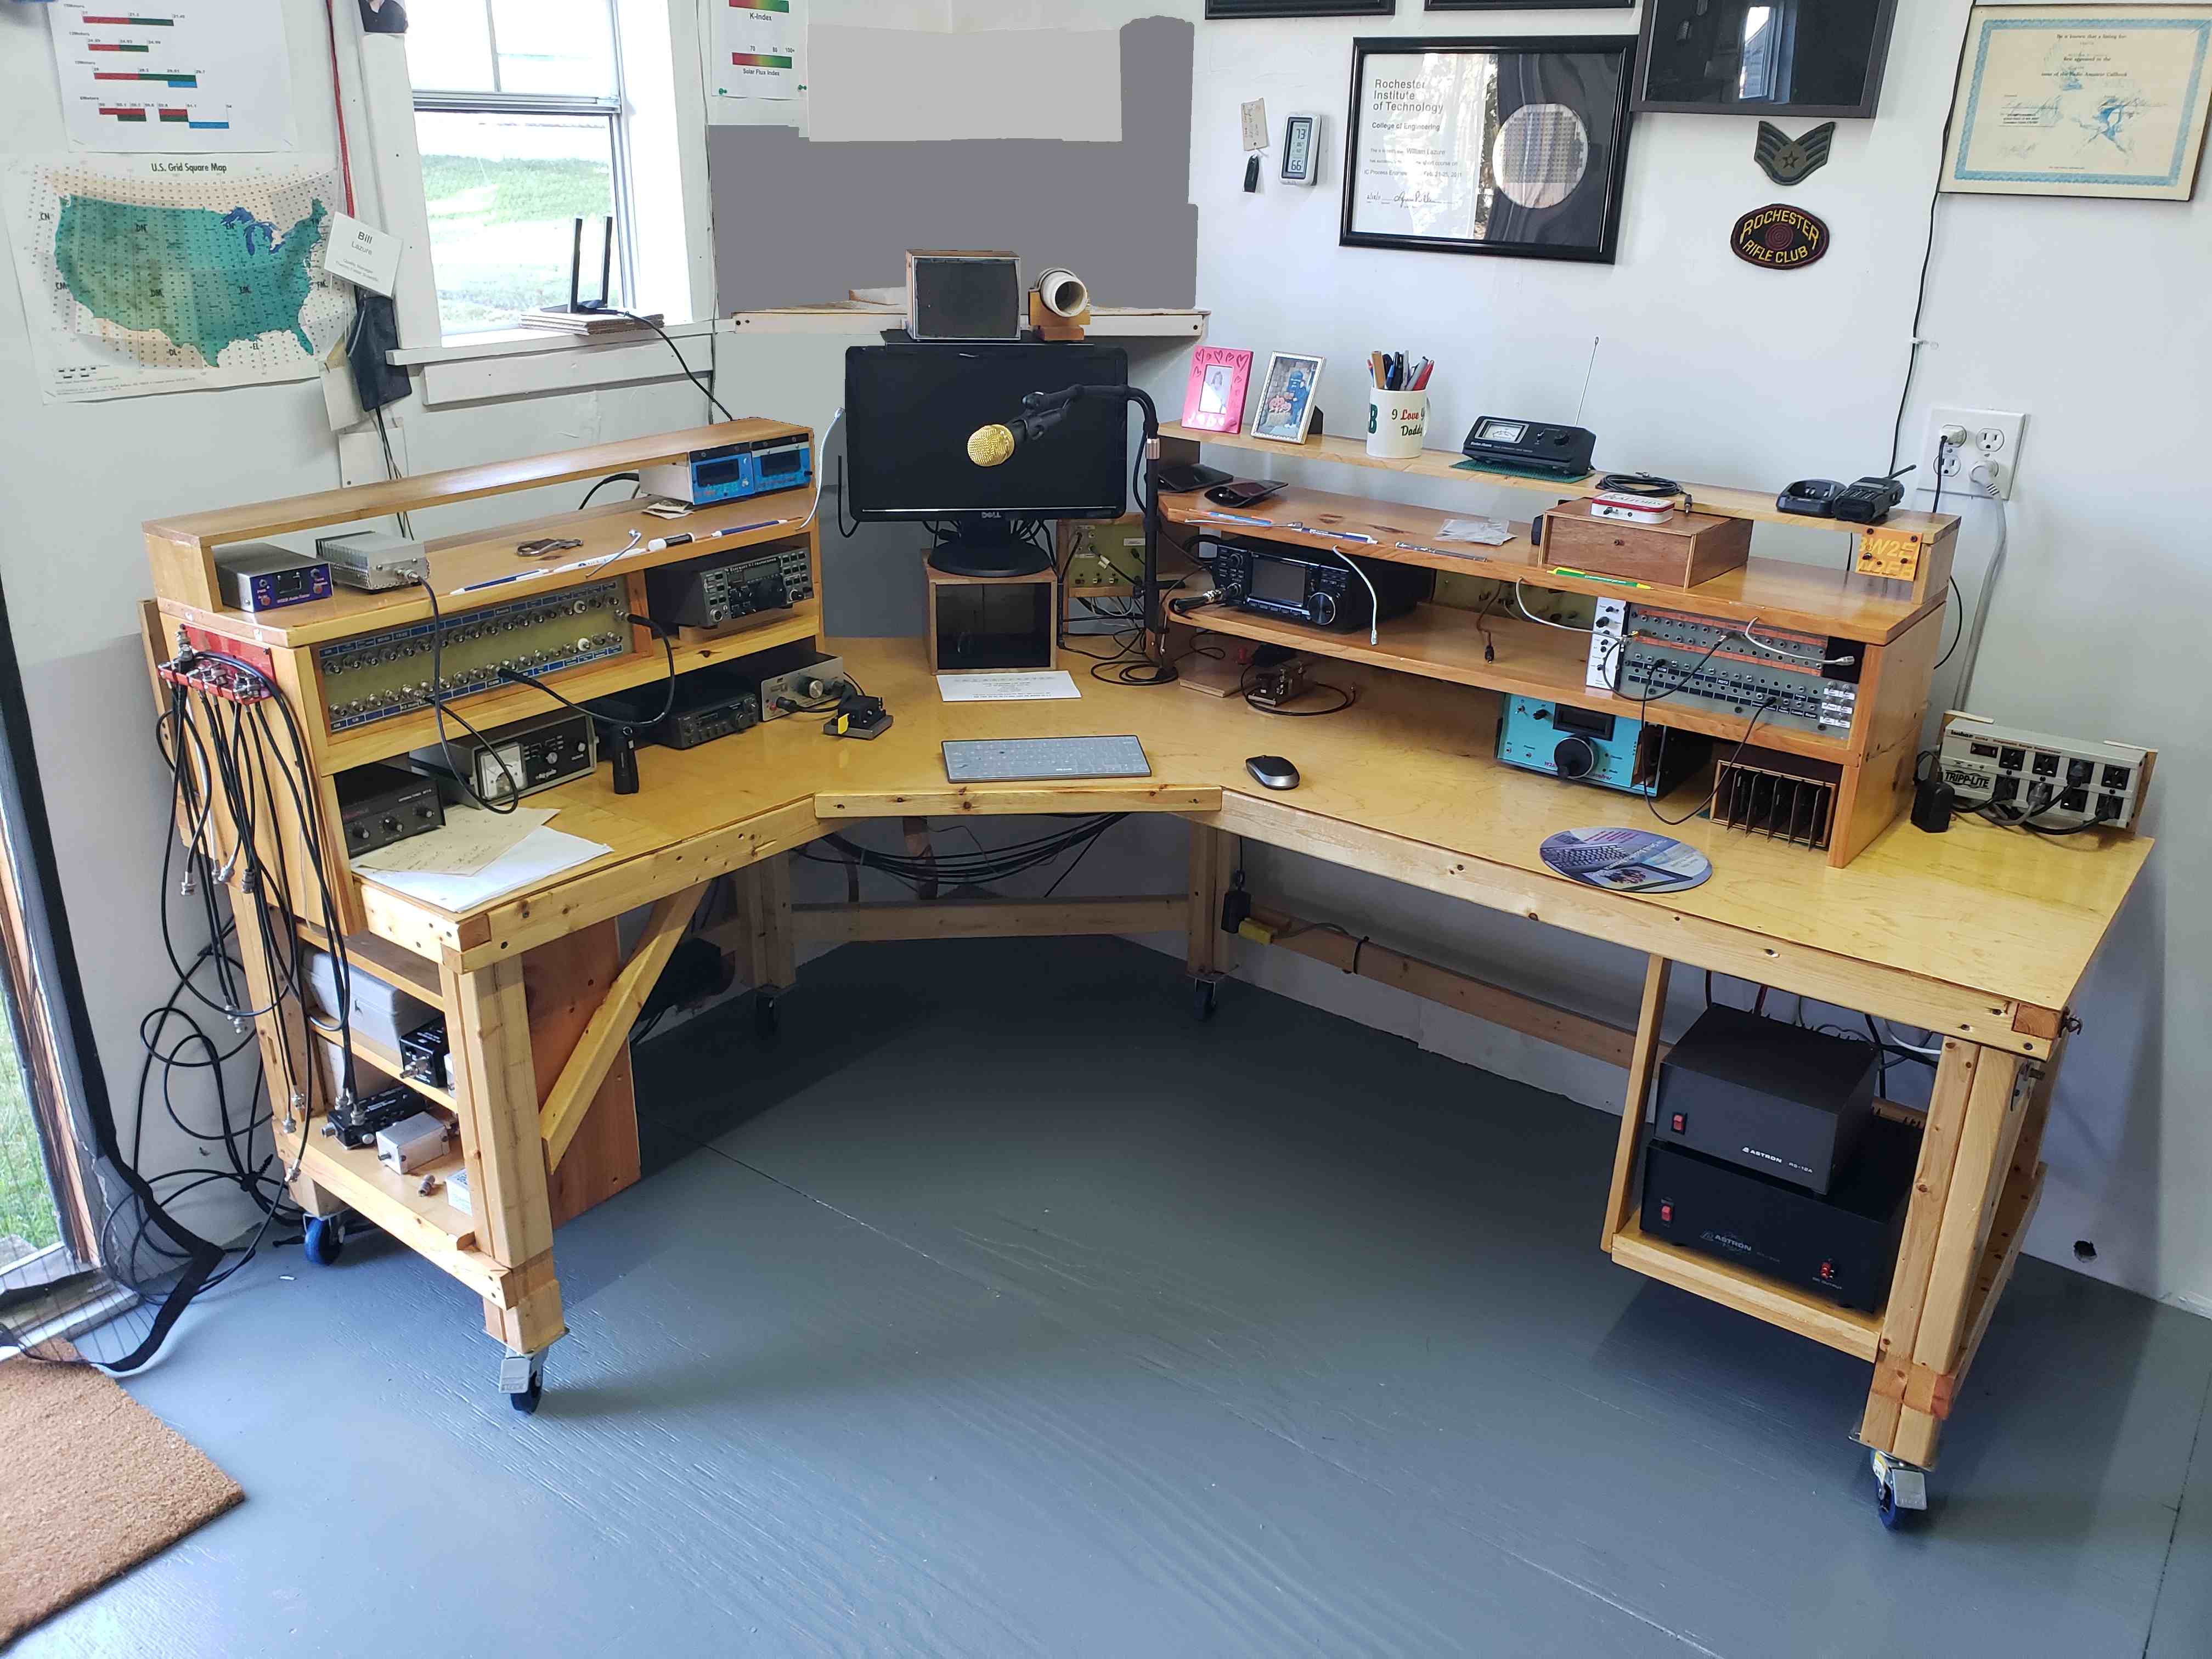
Main Station:
| Icom IC-7300 | All-Band +6M All-Mode 100W SDR Transceiver | In 2020, I realized the technology in my shack was getting fairly old. After a few weeks of research, this rig stood out as the best mix of value for the money. It's now my "go-to" rig for most operating. |
| Elecraft K2 | All-Band high-performance QRP Transceiver | In 1996, I wrote a web page for a local business. They paid me with enough money to buy a K2. It took me about 40 hours to build and worked first time. Since then I've added numerous accessories and modifications and it's still my best CW contest rig. |
| Astron RS-35A | 35A Power supply | When I upgraded my rig to a full 100W radio, I needed a supply that would be able to provide all the current it could need. Thus, during a visit to my closest HRO (New Castle, DE...about a 5 hour drive), I bought this supply. |
| Hy-Gain 421B | Analog Power & SWR Meter | This isn't fancy or expensive, but it's a fairly accurate and reliable piece of RF test gear. |
| Homebrew SWR and Power Meters | Click Here! | I homebrewed digital meters for both power and SWR. They're useful additions to the position. |
| DC Power monitoring | Quicksilver Radio | I added voltage monitoring, both +12V station power, and +9V accessory power to the audio and keying patch panel. It proved its worth once when I experienced a power supply failure. |
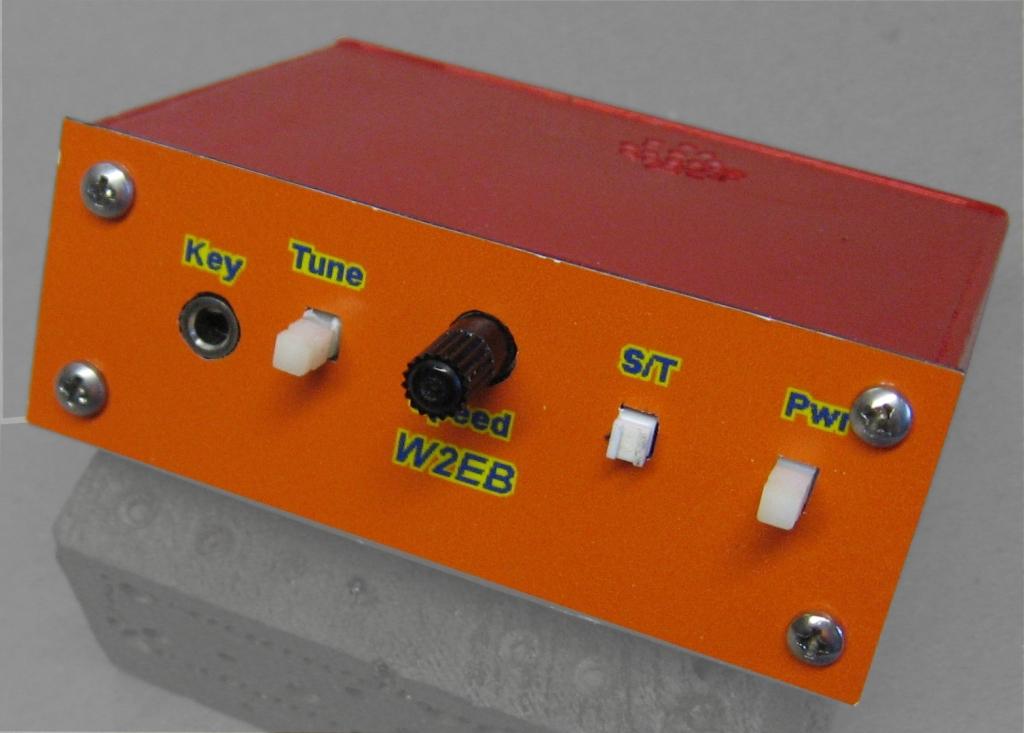
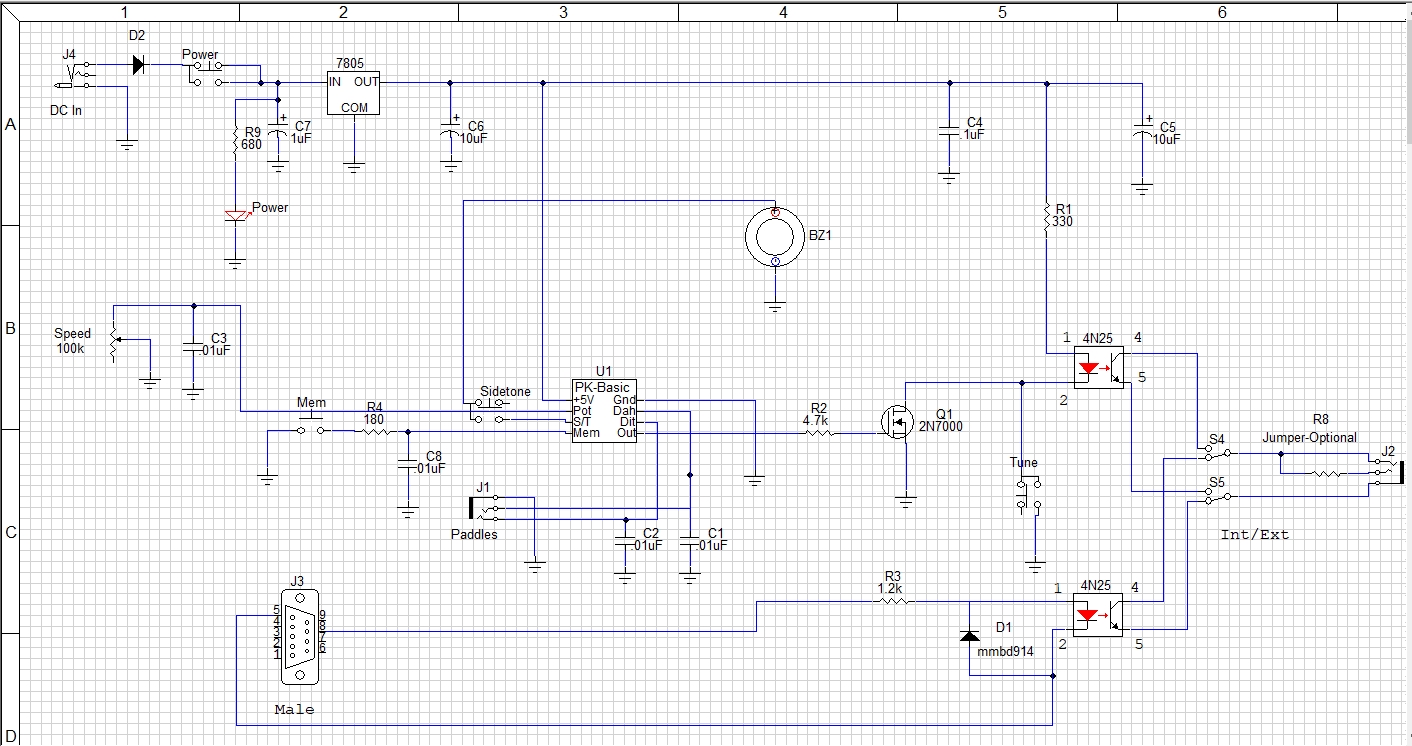
| Homebrew Keyer | Schematic | I run older and homebrew rigs that often don't have sidetone or internal keyers. So, I built a station keyer. It also contains a keying circuit for serial ports. |
| ATU-100 Auto-Tuner Kit | EBAY Listing | I have radios enough to run every band from 160M to 6 M...more than I have antennas for. I needed a tuner and this one was inexpensive and works well. A bonus is that it was a kit; I love building kits. |
| Heil ICMBG Microphone | Heil ICMBG | I've run borrowed or homebrew mics for years. I finally decided when I got the new SDR rig, that it was time for me to sound as good as I could. This mic is specifically designed for ICOM rigs like my new SDR rig. |
| Terryza Mini-Computer | Terryza on Amazon | This computer fits behind the monitor. It's very compact and low-power. |
| RF Patch Panels | I Use BNC patch panels to interconnect my rigs and antennas. | |
| The Console itself | PDF of the Console | My previous operating position was little more than a big table with a fancy shelf on it. It didn't have space for a computer or monitor, and couldn't be customized. Thus began design & construction of this console. It's on wheels so I can access the rear easily. All connections are mounted on fiberglass panels suspended behind each shelf and the wiring is behind those panels. It's fully self-contained with the only external connections being antenna cables and power. |
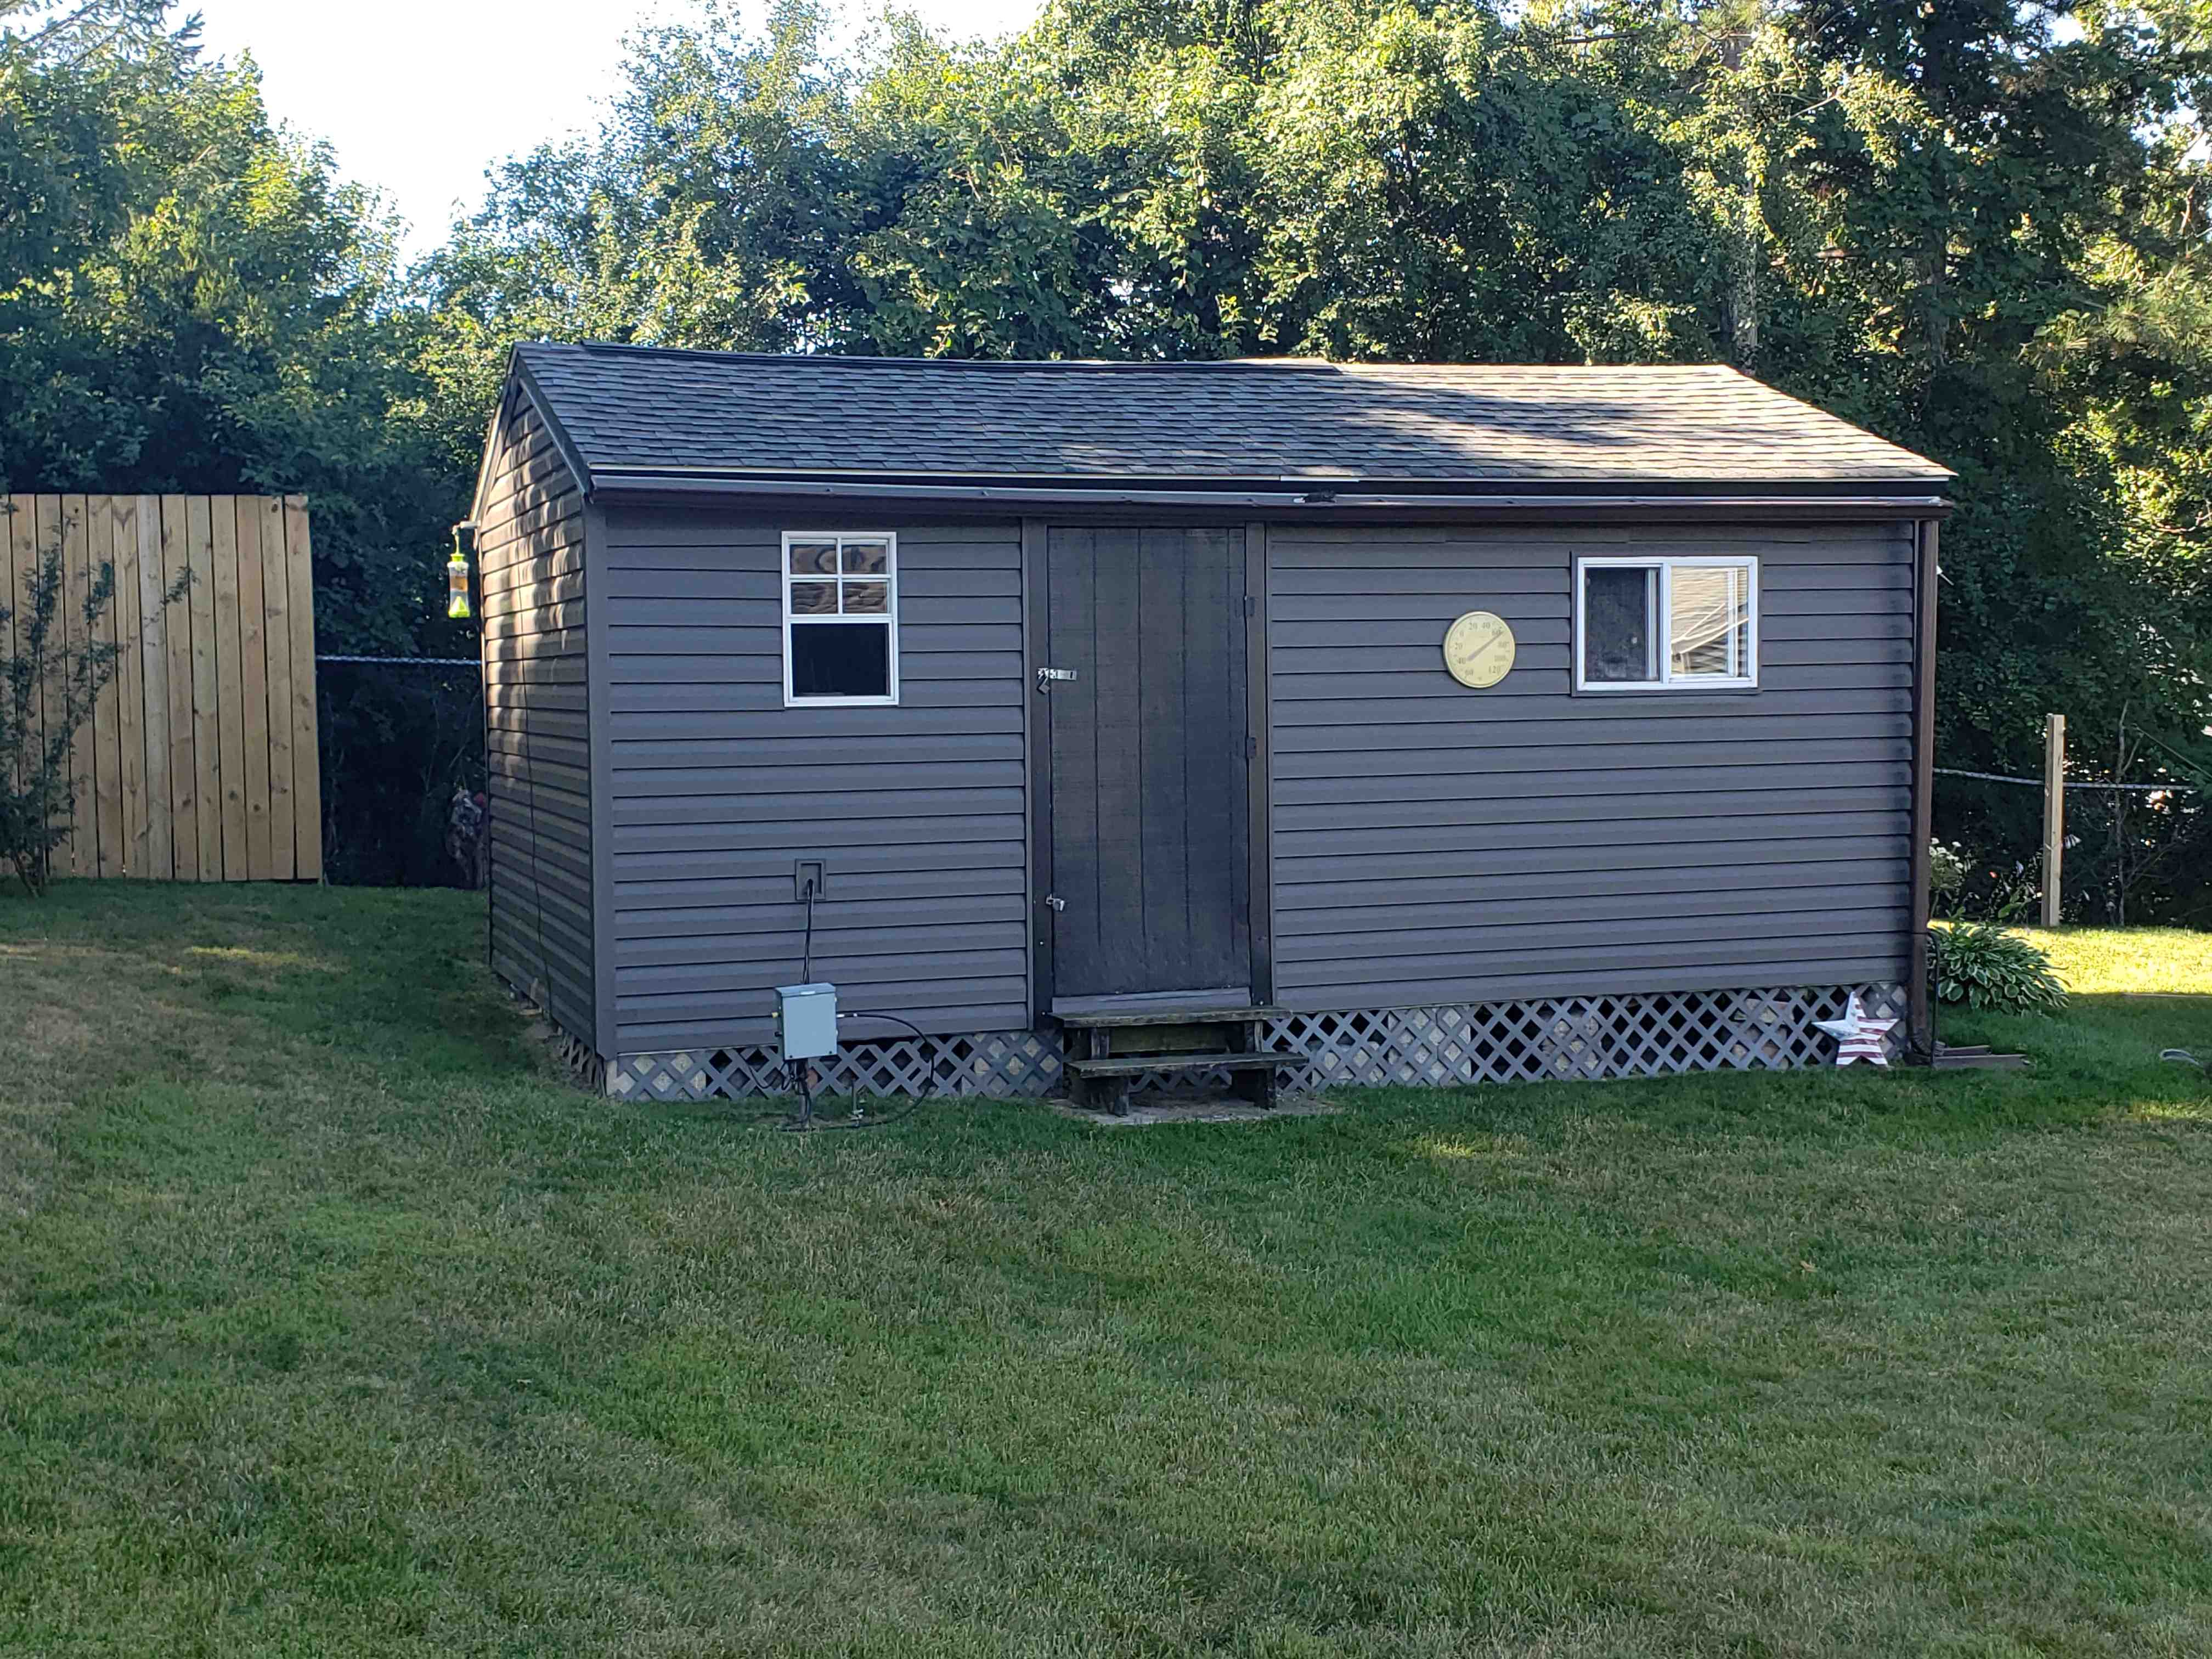
Winters in our area can get brutally cold: as low as -20F for weeks on end. The power to my main shed is only a 20A 120V branch; incapable of running an actual furnace or even running a space heater and anything else. Thus, I use a kerosene heater for much of the winter. Sadly, the kerosene heater has 2 major drawbacks:
1. Soot - The kerosene heater emits invisible soot whenever it's running. This soot builds up on the walls of my shed, and on my equipment and is VERY tough to clean.
2. Slow heating - The shed is uninsulated, and on the extremely cold days, running for an hour can only get the temperature up to a balmy 35 degrees F. Getting to "room Temperature" can take several hours.
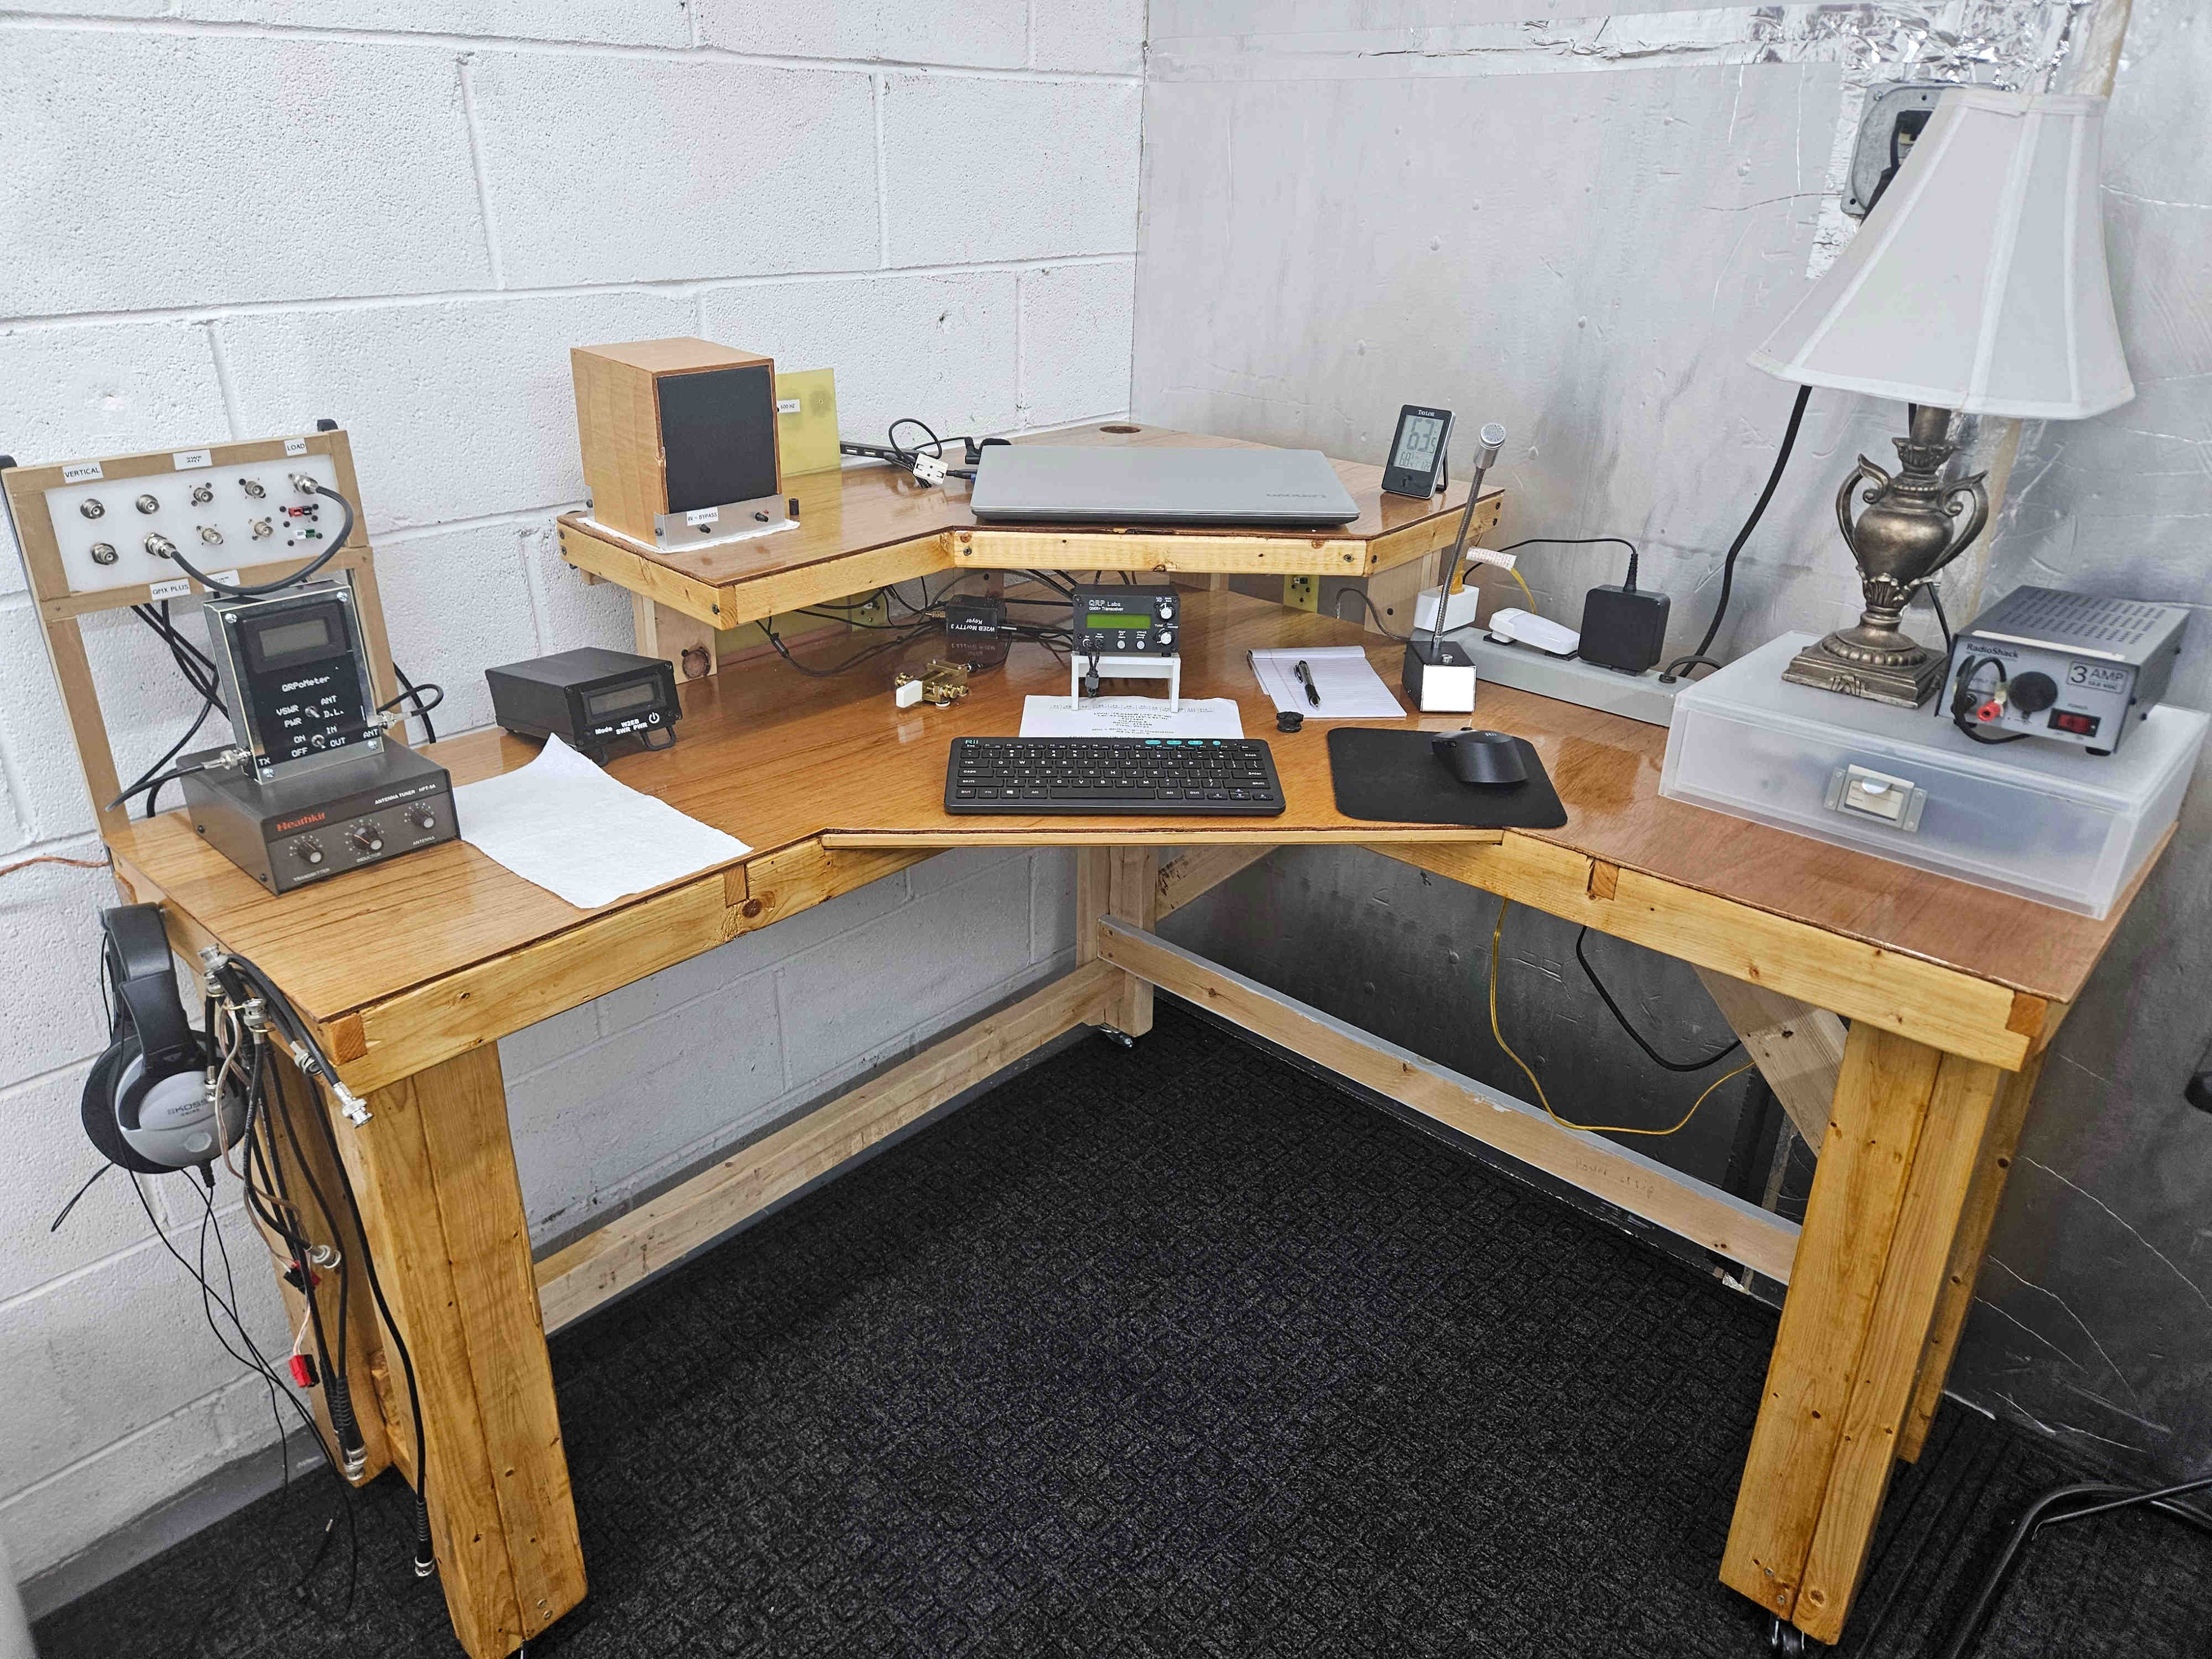
The most obvious, and least expensive, answer to these issues is to move my operation indoors on the coldest days. I enclosed the uninsulated walls of my attached garage in 1" foam boards. I then placed these boards, as walls, against 2 large wire shelves forming a room within the garage. I can then heat this area, which normally never goes below 45 degrees F or so, with a simple space heater and get it up to 65 degrees in 30 minutes or less. I then ran a single feedline to a lightning arrestor (grounded to my cold water feed line). To the arrestor I attached the feedline to a 40M to 10M multi-band vertical antenna (with 7ea 40' long buried radials).
I built a smaller version of my main shed operating position to hold the equipment, mount the patch panels, and conceal the wiring.
Voila...a fairly functional amateur radio station!
| QMX+ | QRP 160M to 6M CW & SSB SDR Transceiver | I wanted all-band capability for the garage "shed", but didn't want to move either radio from the main shed. I used both fro varying purposes and it would have been a PITA to constantly move either back and forth. So, not long after establishing the garage operating area, Hans Summers offered this very full-featured rig for only $125 (+$25 for matching chassis). Sold! |
| RadioShack 3A power supply | RadioShack 22-504 | Perfect supply for a QRP Rig |
| Heathkit QRP Tuner | Heathkit HFT-9A QRP Tuner | I already have one of these in the main shed. I use it occasionally to "tweak" antennas closer to resonance. I knew I wanted a tuner for the garage, so when I found this at the 2025 DelMarVa Section Convention in Georgetown, DE for $25, it was a no-brainer. |
| SWR & Power Meter | Homebrew. See here | My original design. An Award-Winning digital SWR and RF Power meter. |
| SWR & Power Meter | QRP-O-Meter by NM0S | I found an original unbuilt QRP-O-Meter kit at OzarkCon 2025 for $30. A steal. Now I have what has been called one of the most accurate QRP RF Power meters available. |
| Speaker/Audio Amp | Homebrew | The QMX+ is designed for headphones only; it has no audio amp. Thus, I used an enclosed speaker and added a simple LM386-based audio amp to the speaker enclosure. Now I can use a speaker with the rig instead of only headphones. |
My "GO" Kit:
The Kit
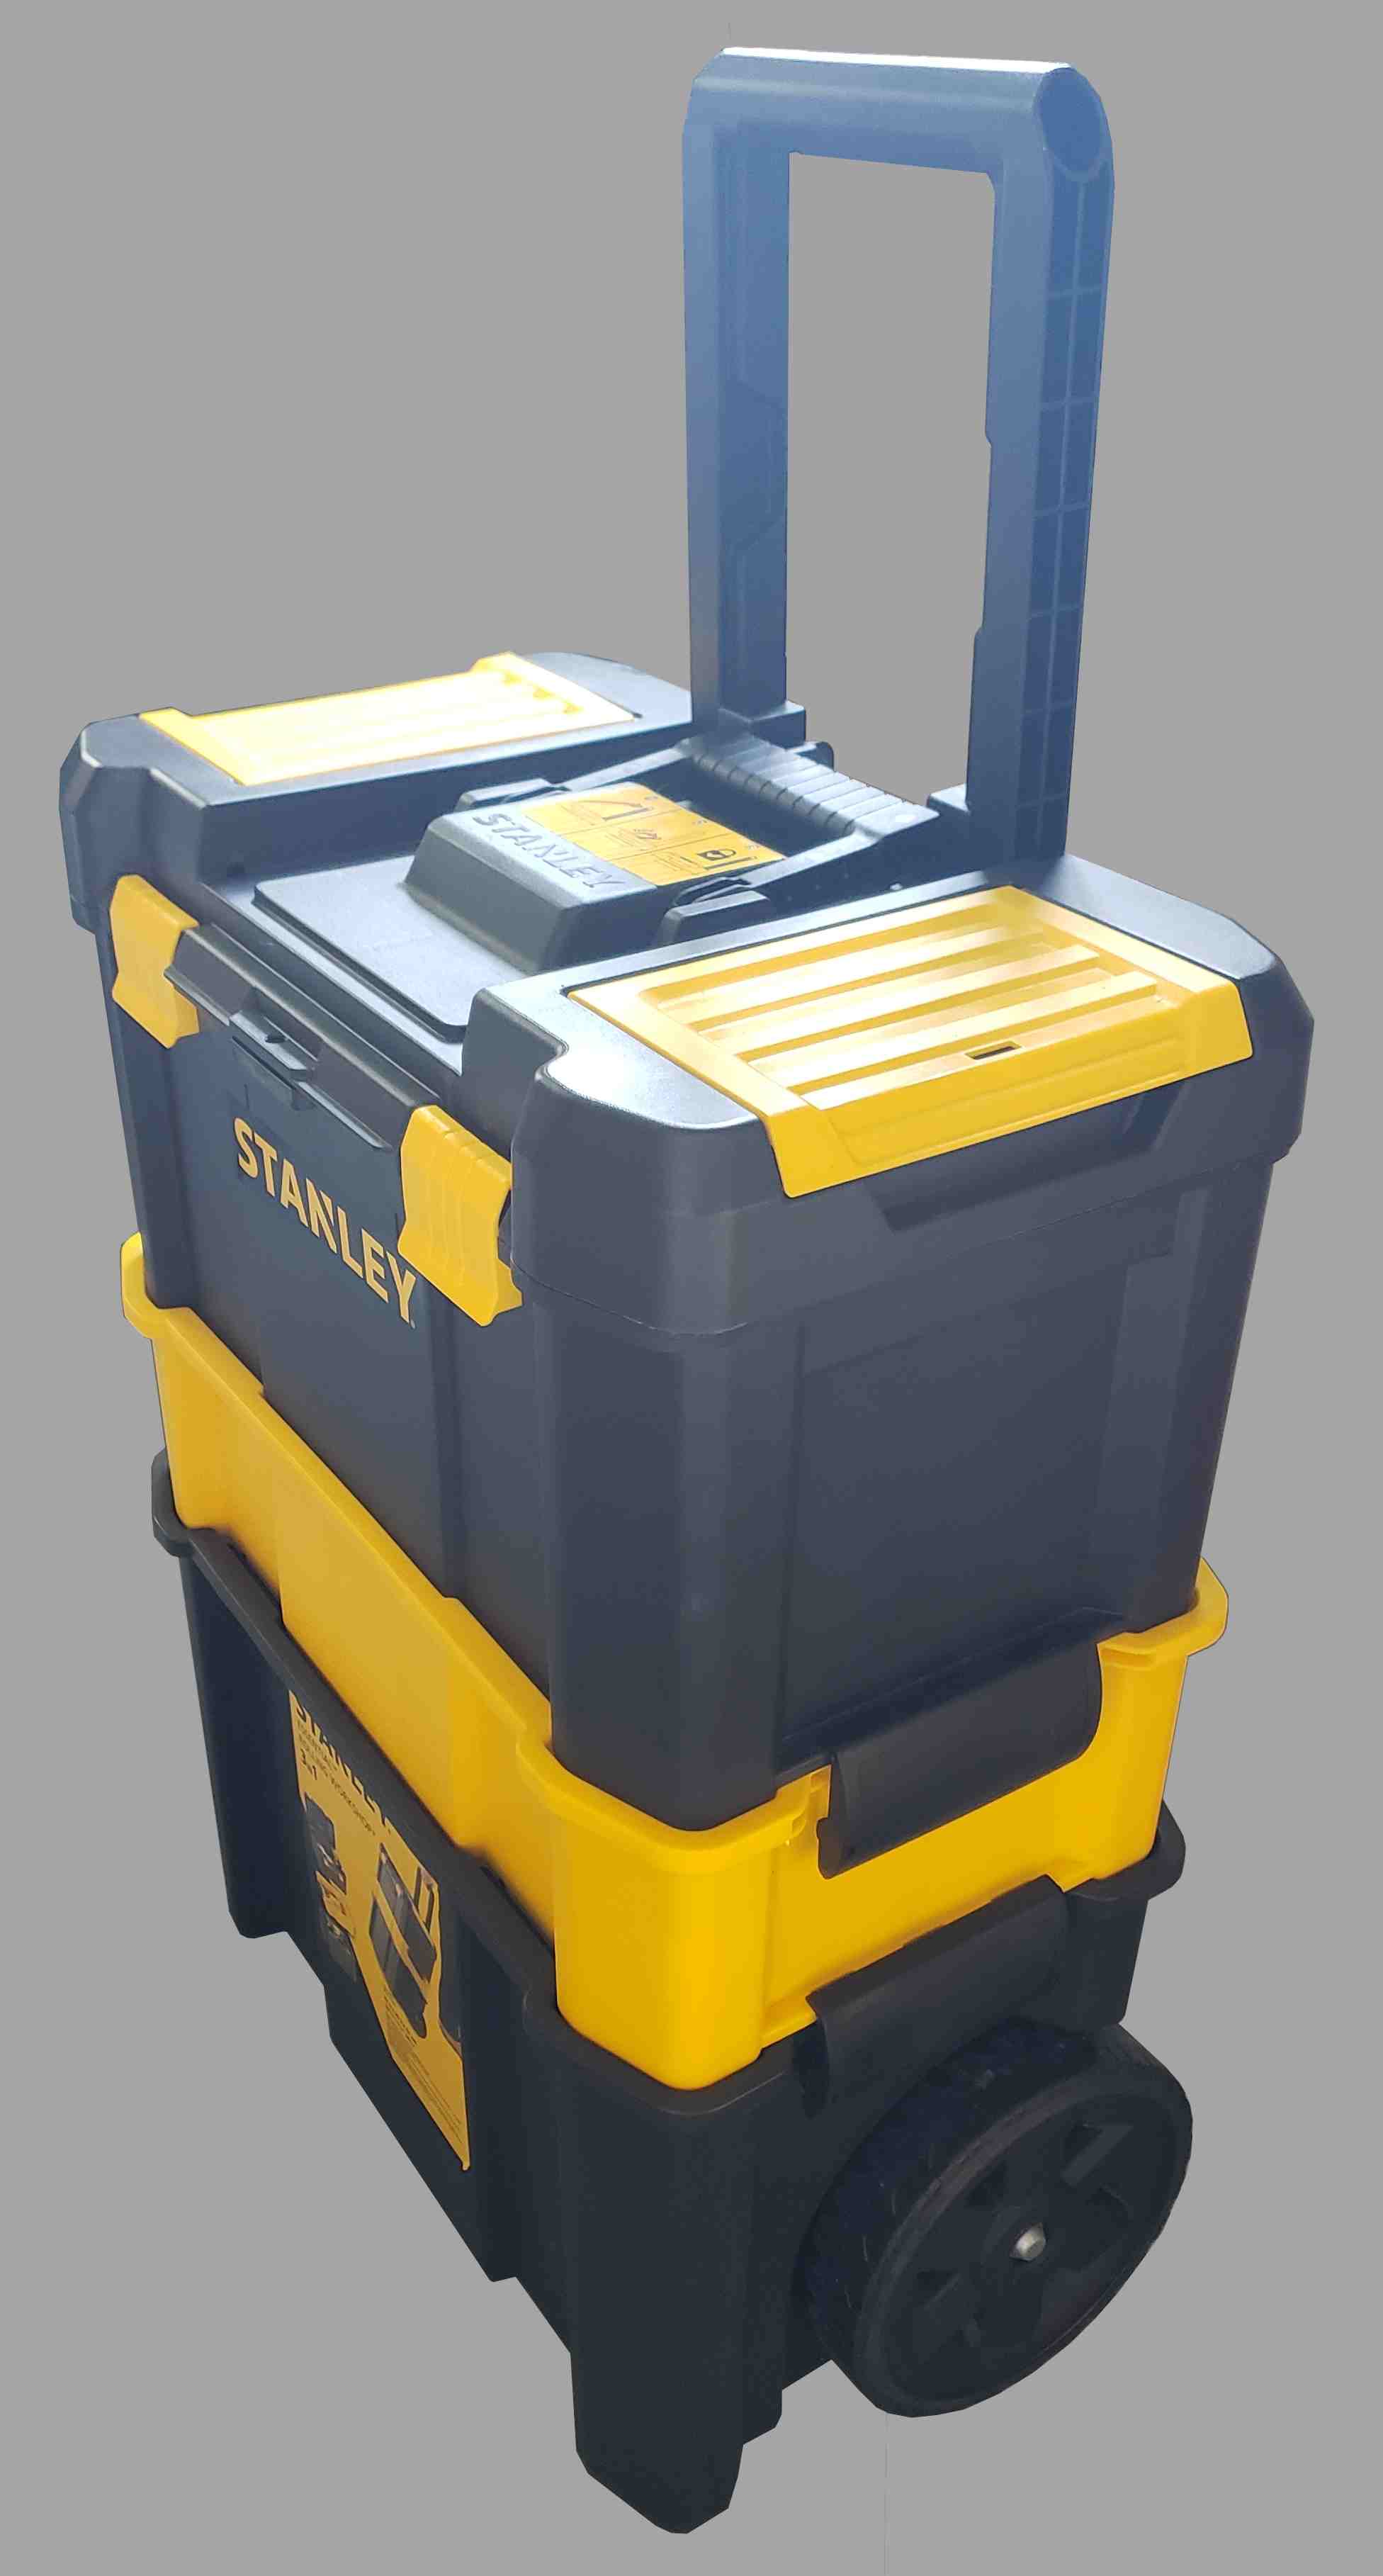
The entire "GO" Kit fits in a toolbox for portability. The box itself has installed power ports and a battery pack. Otherwise, all major equipment is contained in foam cutouts for protection.

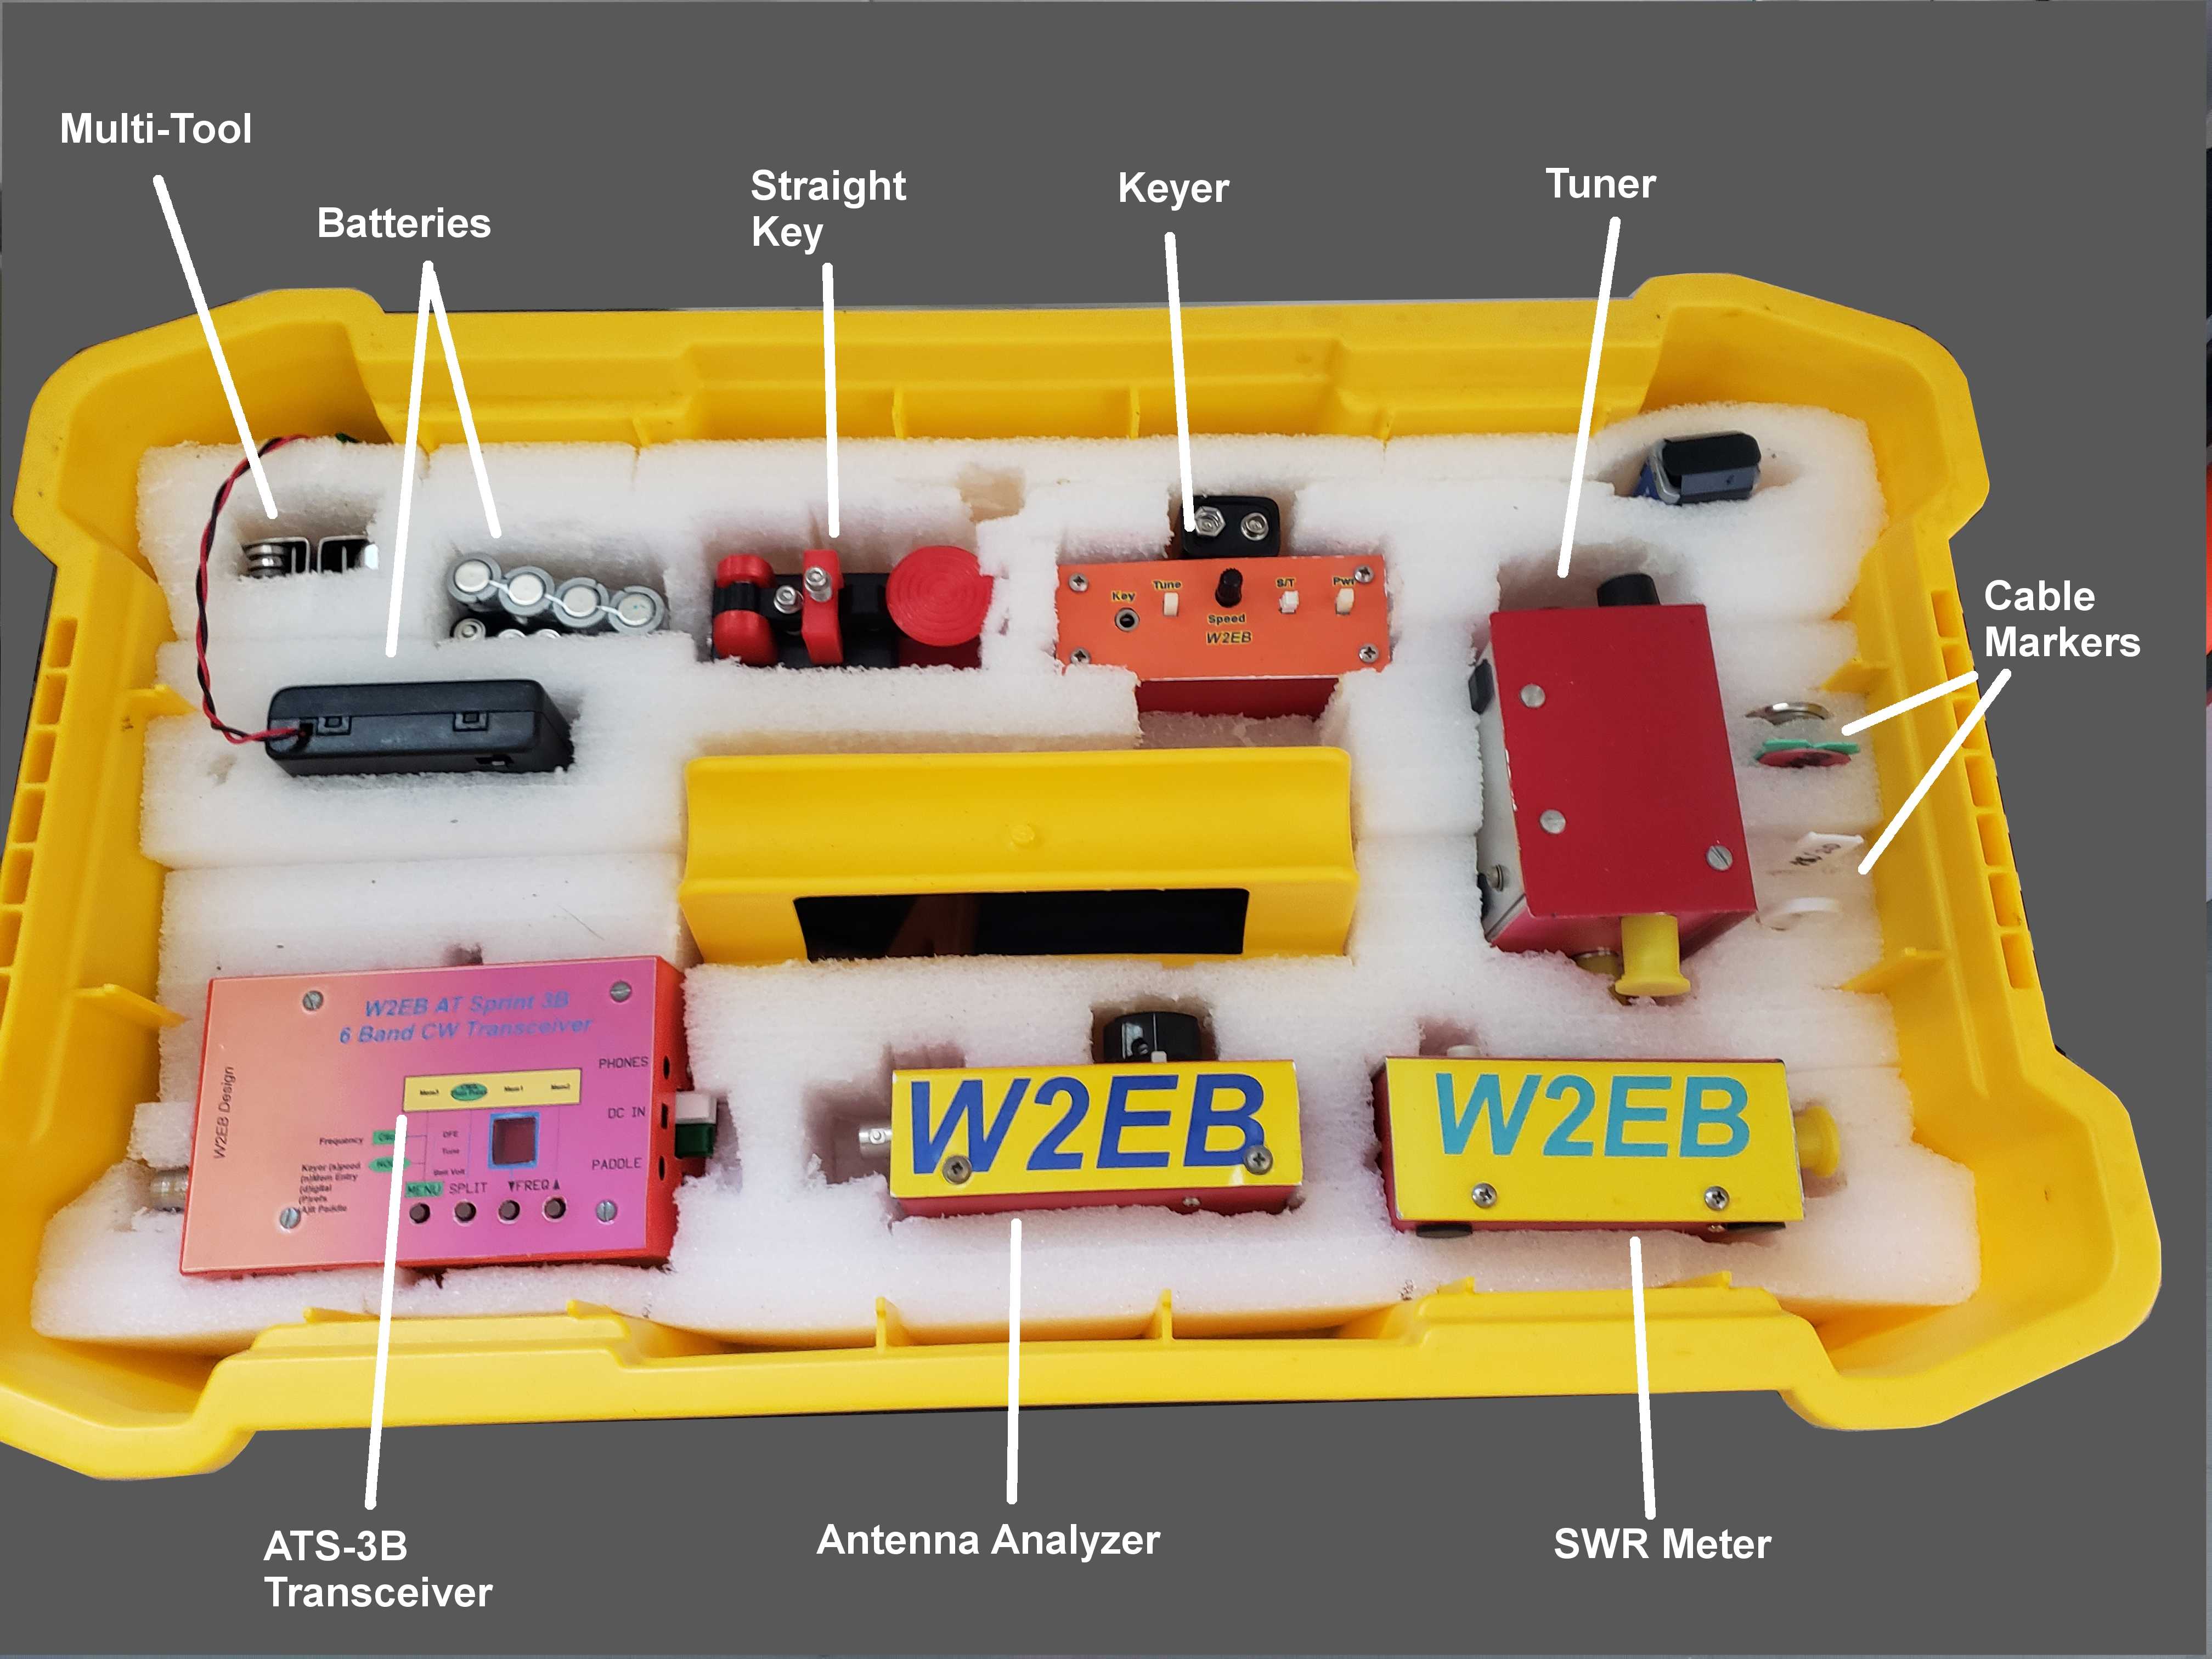
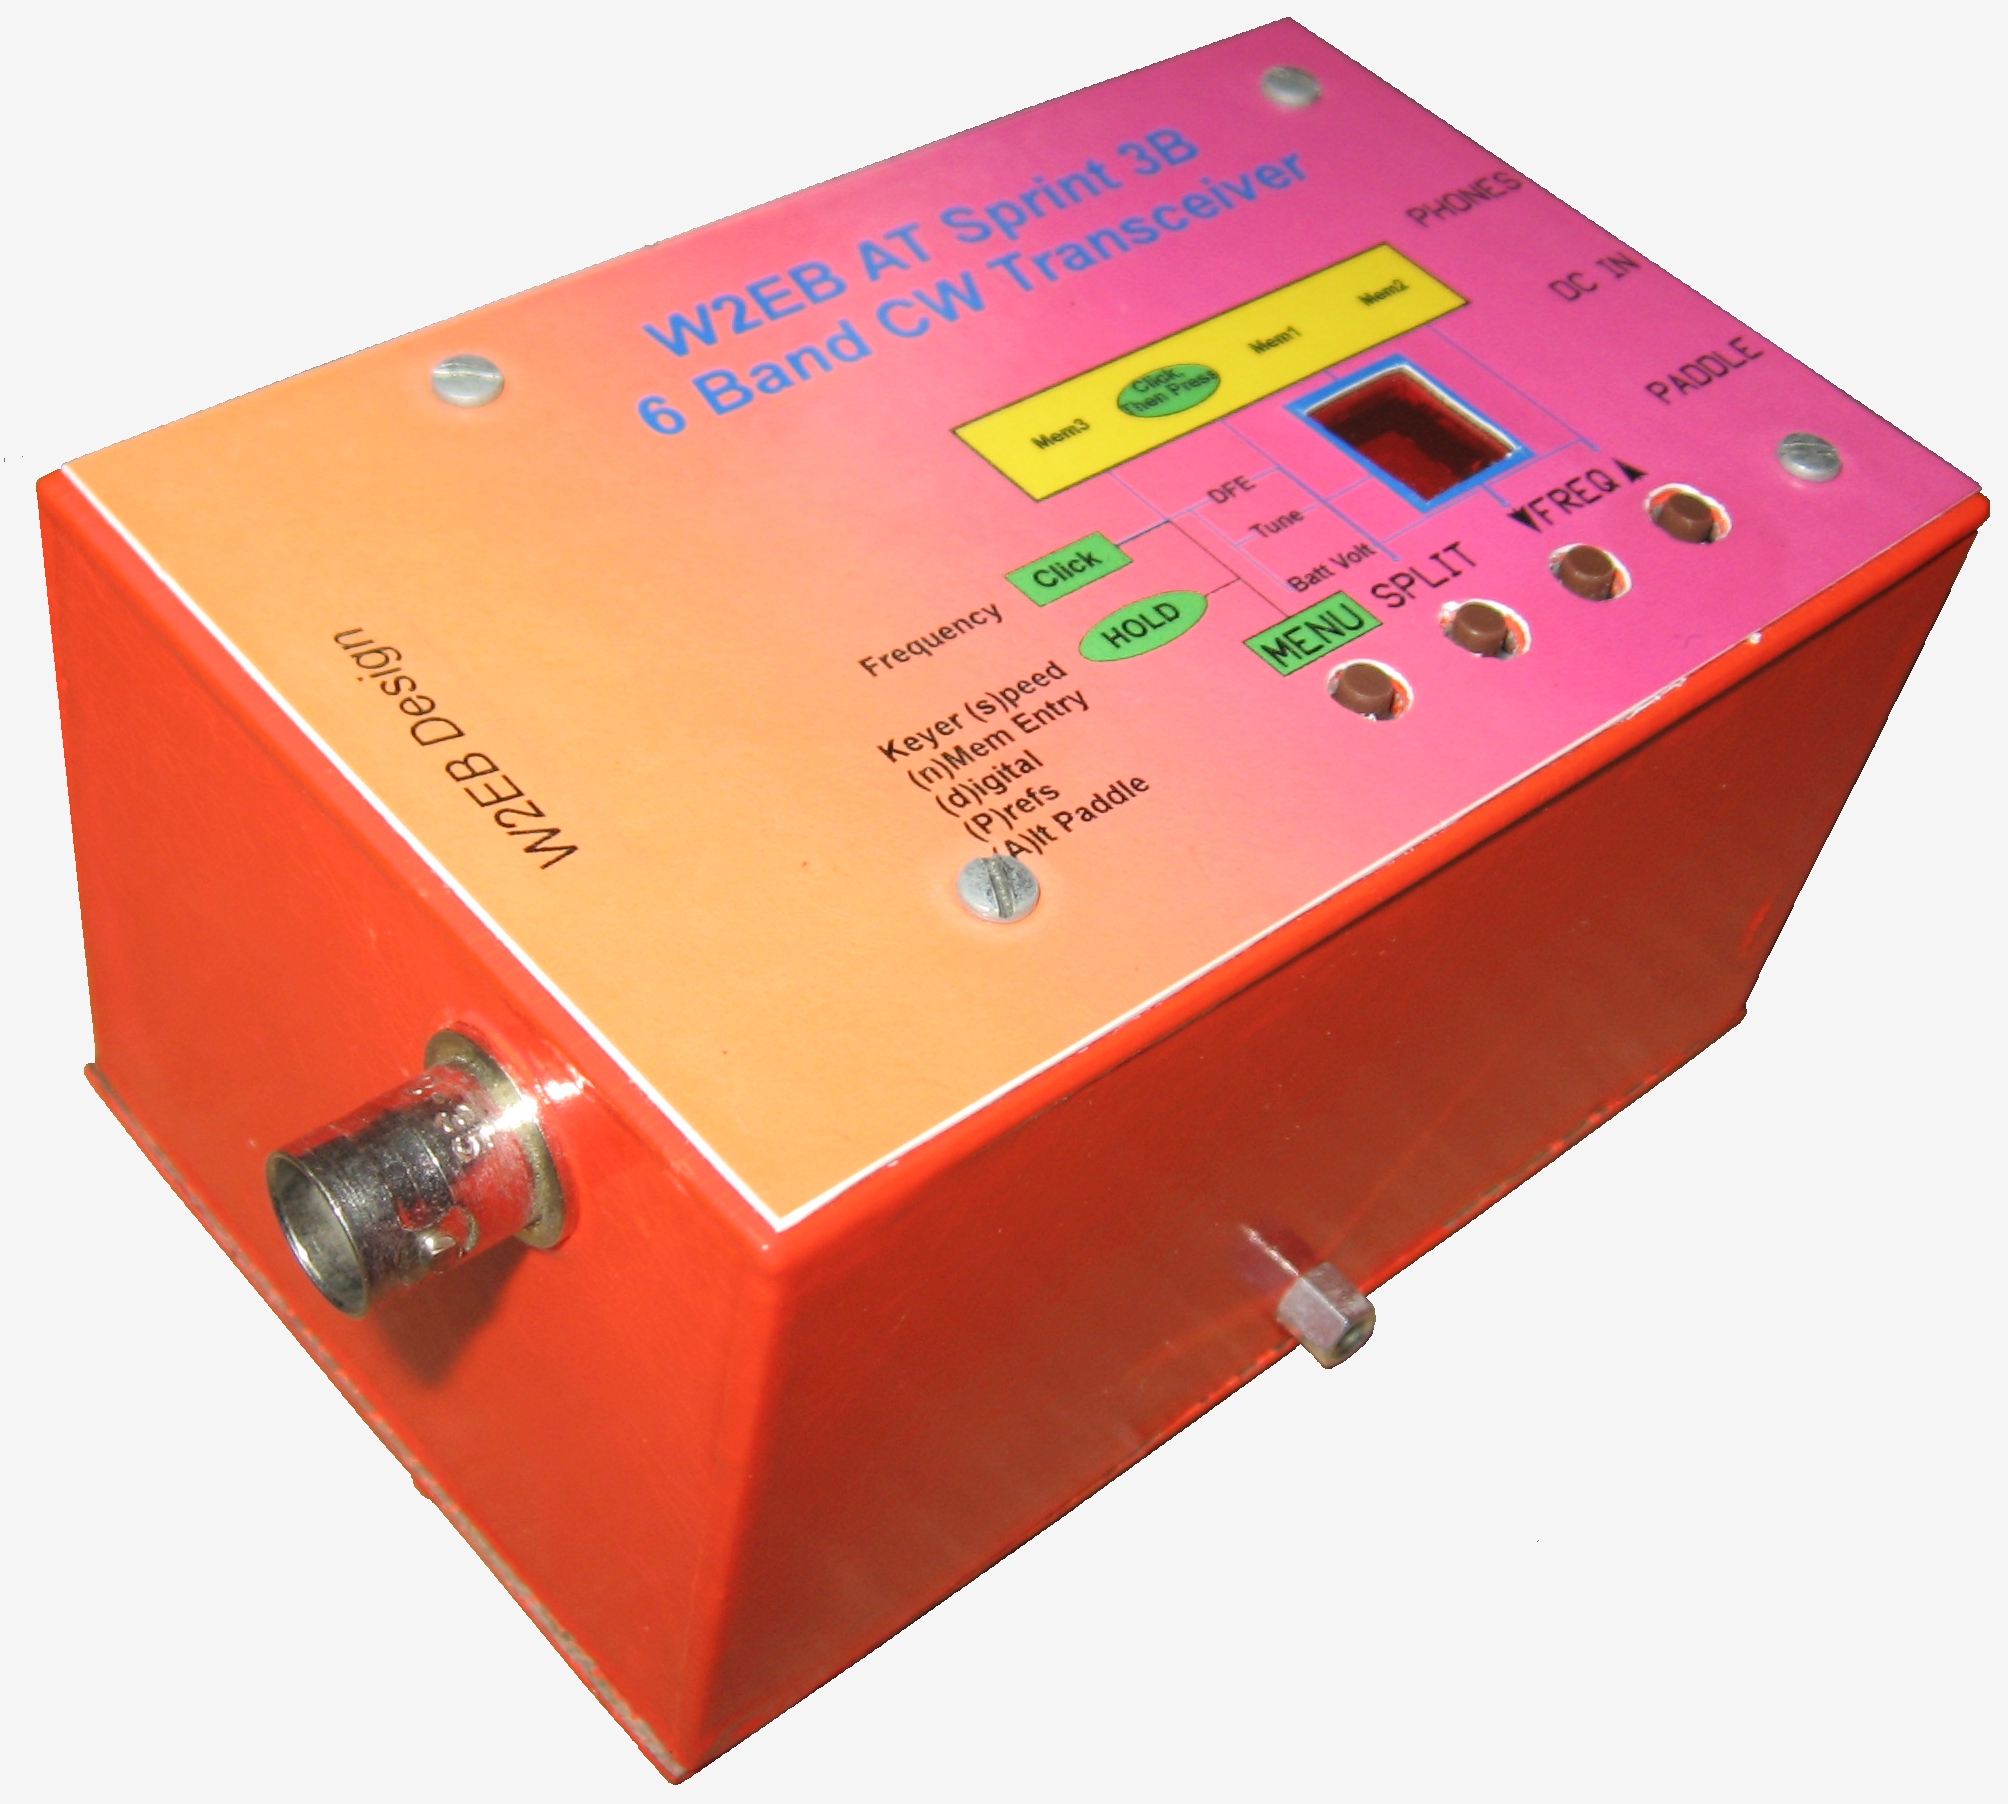
KD1JV ATS-3B Transceiver
The ATS-3B was a limited release multiband CW QRP Transceiver that can cover all amateur bands from 80M to 15M. It can be powered from 9V and puts out about 2W - 3W at that voltage. The receiver is quite sensitive and the IF bandwidth is about 400Hz...perfectly suitable for CW.
QRP Antenna Tuner
Given that the "GO" Kit is meant to be used anywhere under emergency conditions, I included a tuner to allow me to use a random wire as an antenna. This tuner is a basic "T" type with an enclosed LED & Diode SWR indicator.
Antenna Analyzer
Just like for the Antenna Tuner, I may be required to place wires or try to use any random metal like downspouts or towers as antennas. This tool allows me to tune such devices for resonance, or at least know where they resonate.
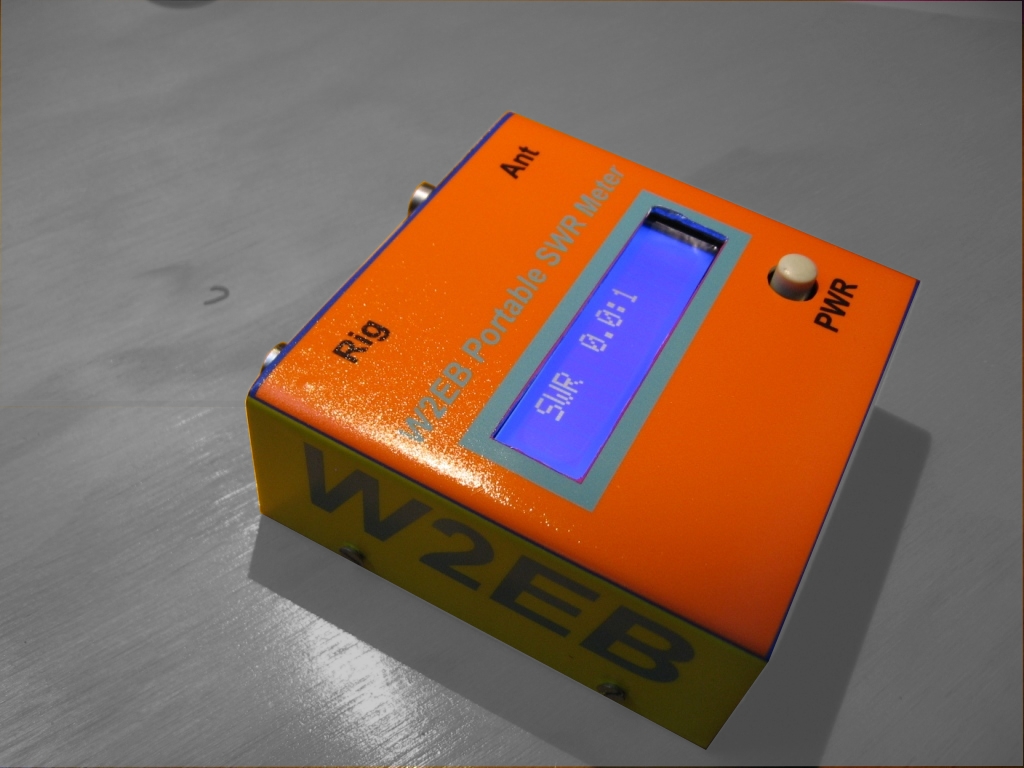
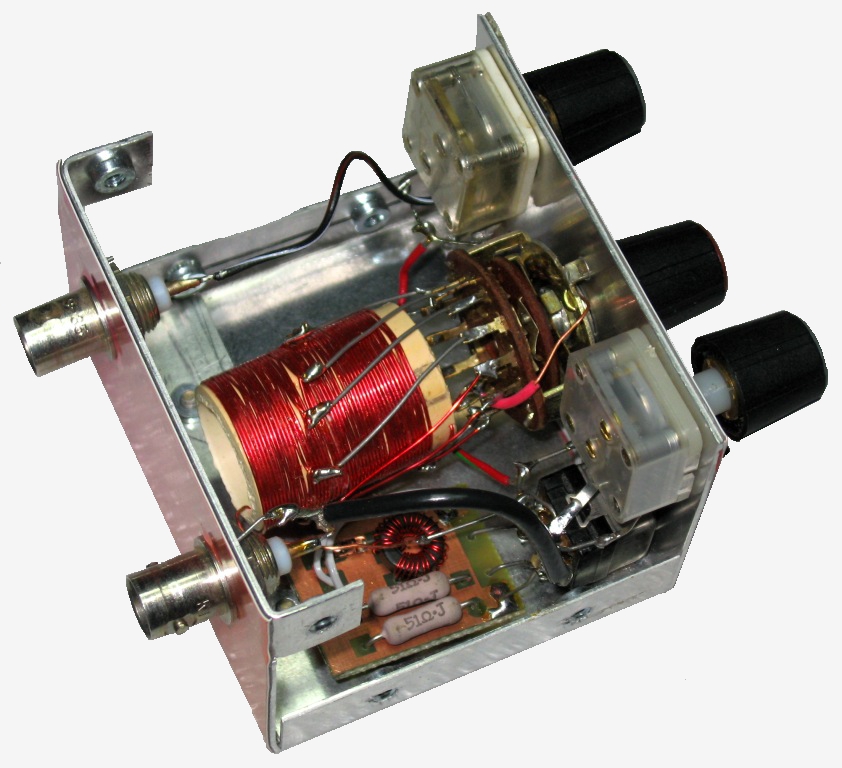
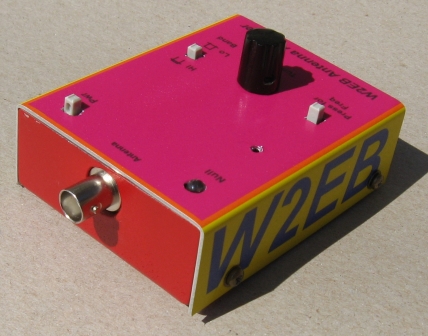
Digital SWR Meter
In the same theme as the previous 2 items, this meter allows me to determine the exact SWR of whatever I'm using as an antenna. It's all-digital and direct reading. Just press the power button and read the SWR.
Keyer
The ATS-3B changes transmit CW speed by accessing its internal menus. I found that method cumbersome and wanted to vary speed simply by using a knob. Thus, I built an external keyer. An added bonus to using an external keyer was that it allows me to "tune" or trnsmit continuously to test antennas. This keyer also has selectable sidetone.