Home Links Contact Information
Copyright � 1995 - 2021 John Tait All rights reserved.
The "Woodpecker" Tuning aid
Most modern Amateur Radio operators, are well used to modern "no tune" transistorised rigs, but have problems when faced with the intricacies of tuning a valve PA for the first time. Even those of us who were around in the heyday of valve rigs, and are well used to tuning a valve PA, should find the Woodpecker very useful. If the new operator has a skilled "Elmer" at his shoulder, he will quickly learn to tune up safely, but if help is not at hand, he can do a lot of damage to a valve PA if he gets it wrong. The beauty of this little gadget is that it allows you to tune up at full peak output power, whilst limiting the average power to a fraction of the peak, thereby protecting the PA from "meltdown". EVEN WITH THE PA WELL OFF RESONANCE....
The following article describes two different, but equally simple, "Woodpecker" circuits. I claim no credit for either, as they have been published before. The first was published in one of the famous "FoxTango Club" newsletters back in the seventies, and the second was published in "Ham Radio Magazine" (unfortunately now SK) also in the seventies. The Fox Tango Club is still very active. Their "FoxTango Yahoo Group", ably administered by Carol Maher W4CLM, is an extremely usefull resource. The club has an enthusiastic and inventive group of members who help each other to keep the old (and new) Yaesu rigs "firing on all cylinders". With members like old "triple L" himself, (Harry Leeming G3LLL) they are not short on experience or talent. They even have a collective "junk box" to supply hard-to-get parts to their members.
Details of the second pulser can also be found on Richard L Measures AG6K excellent website. You'll find an amazing amount of information on amplifiers there.
If you don't have the time or the parts to build one of these, but think you could use one, take a look at Larry Hofer KB4OEI's page. He does a neat "Pecker" at a reasonable price. He does a couple of other useful gadgets as well.
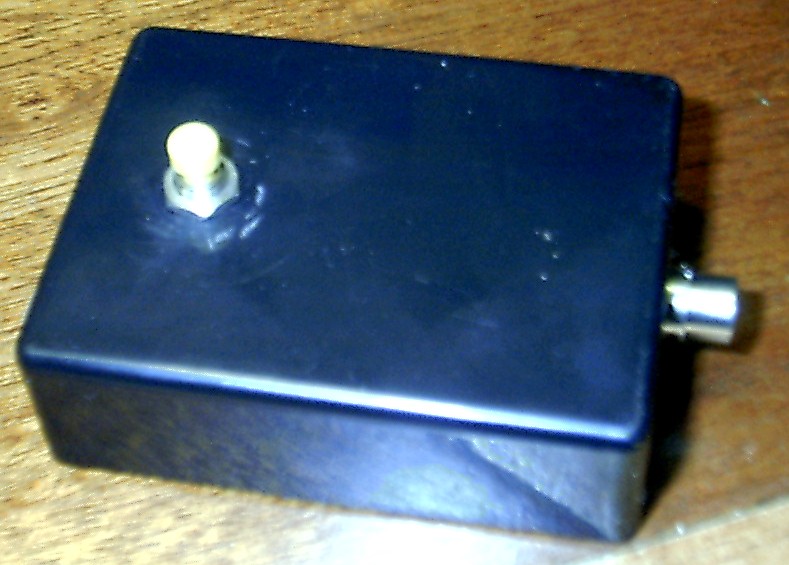
( The finished "Woodpeckers" are housed in small boxes 3 X 2 X 1 inches )
The Tone Pulser (ssb mode) Type
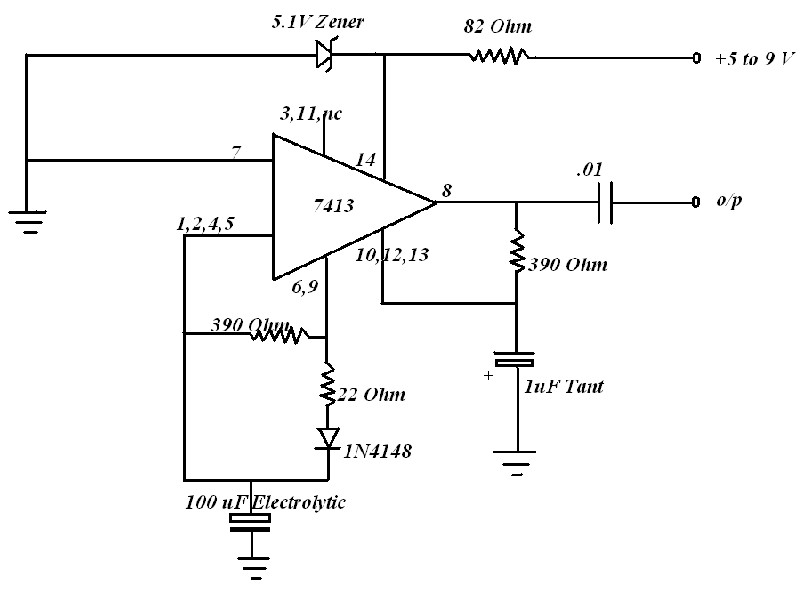
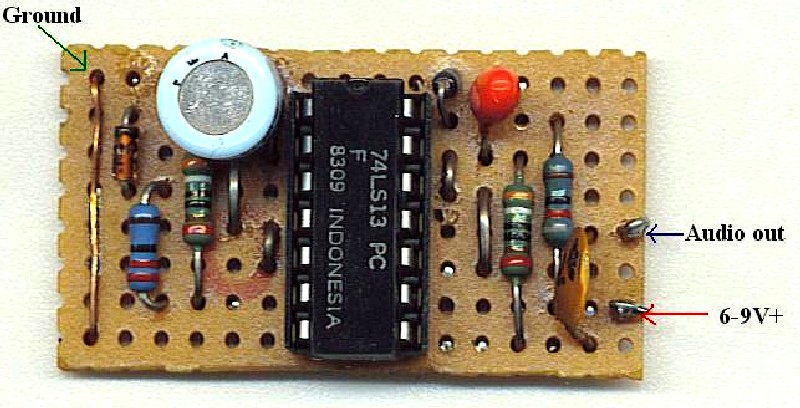
The first circuit consists of a 7413 dual Schmitt trigger chip, and a few passive components. One half of the chip generates an audio tone, which is switched on and off at a lower frequency by the other half of the 7413. This sends a series of tone pulses to the microphone input. This signal can be used for tuning your valve PA, or Linear Amplifier at full power, without causing any damage due to being off resonance etc. Even though the tone can drive the amp to full output, it only does so for the duration of the short pulse, the actual "duty cycle" being determined by the ratio of the tone pulse time, to the "off" time between pulses.
Mine runs at about 10% duty cycle, so even with my Alpha 78 way off tune, there is no distress to the amp. The average o/p shows only about 150 watts, while the peak is anything up to 2 kW into the dummy load.
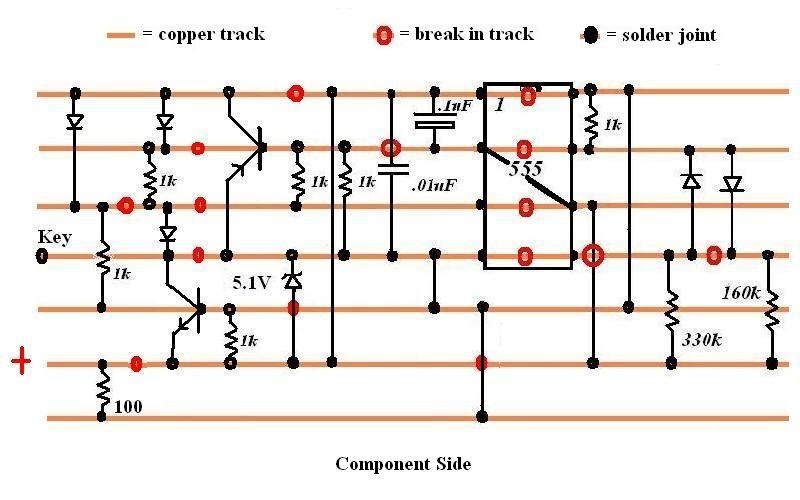
( Circuit diagram of the tone pulser )
This circuit was produced and sold commercially by International Radio up to quite recently. I bought one from them some years ago, and it has been a great asset. I built it into the base of my MC60 desk microphone, where it has worked flawlessly for years.
A number of visitors to my shack have commented that they'd like to have one, so I did a bit of searching, and eventually found the circuit. I have built a few, and I've included the details below for any of you who'd like to "roll your own".
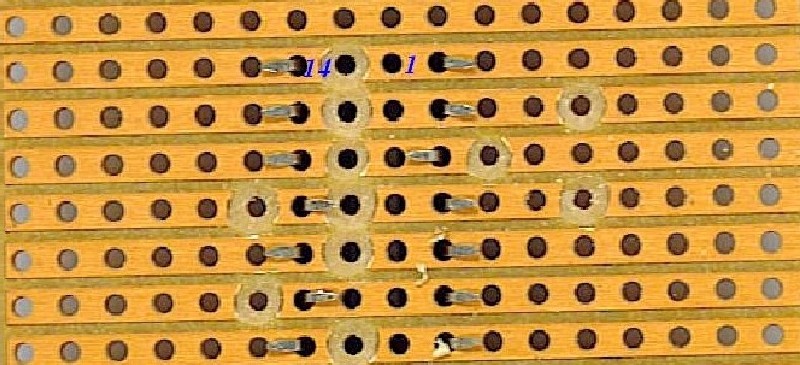
( Copper side of Vero board, showing the breaks in the tracks. Breaks are made by twisting the point of a 4mm drill bit in the appropriate holes. The pins of the 14 pin DIL socket are visible. )
The output of the tone pulsing Woodpecker can be fed to the microphone input of the transeiver, or to any other audio input jack. For instance, the "Patch in" socket on the back of an FT1000MP is ideal. The Woodpecker in the photograph above shows a phono socket on the end of the small box in which it is housed. This is the audio output jack. On the top of the box there's a small push button switch. Pressing this button with the rig in SSB mode, connects power from a PP3 battery to the Woodpecker, which now sends the pulsed tone to the microphone socket. Releasing the button switches it off again.
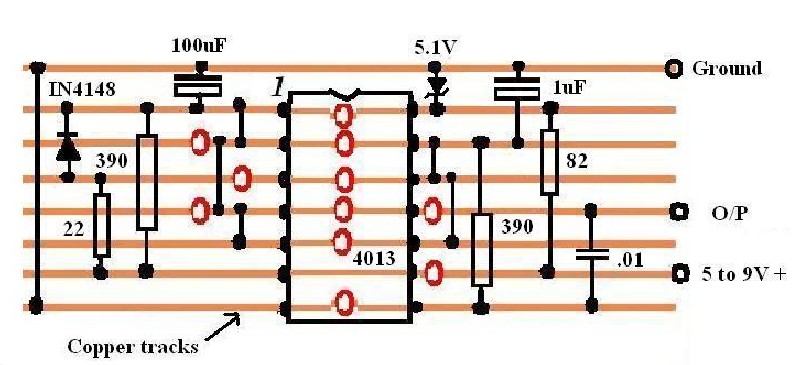
( Drawing of the component layout on the veroboard..Looking down on the component side.)
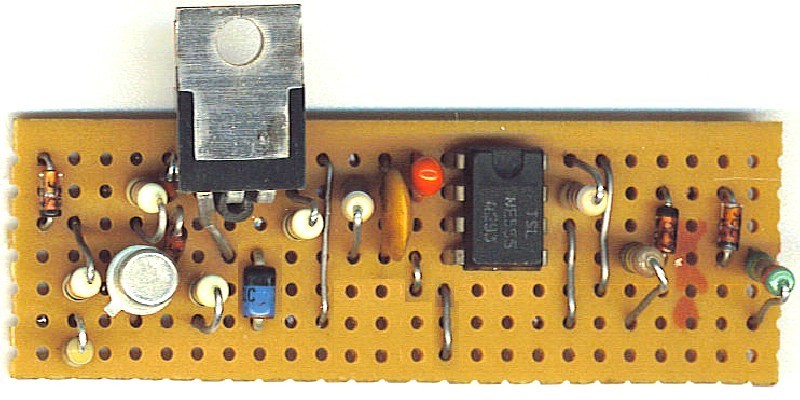
( Completed board...Component side )
As you can see, there are only ten components on the actual board, so it's quite simple to build. You can package it to suit yourself. In the microphone base, as I did, or in a seperate box, or whatever suits.
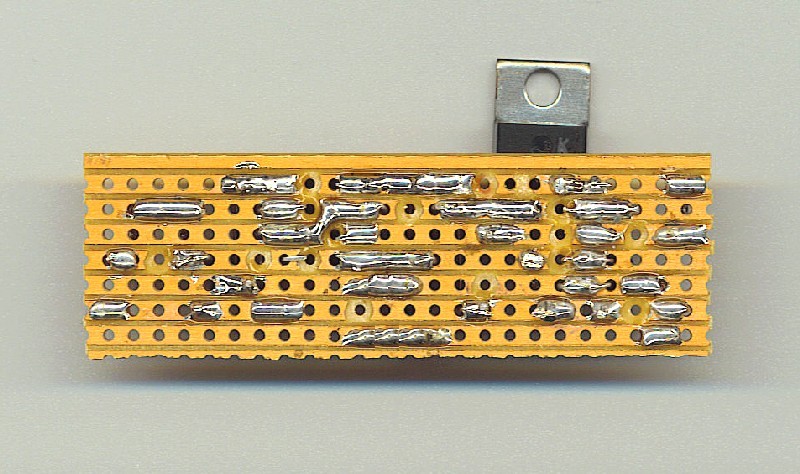
( Completed board underside )
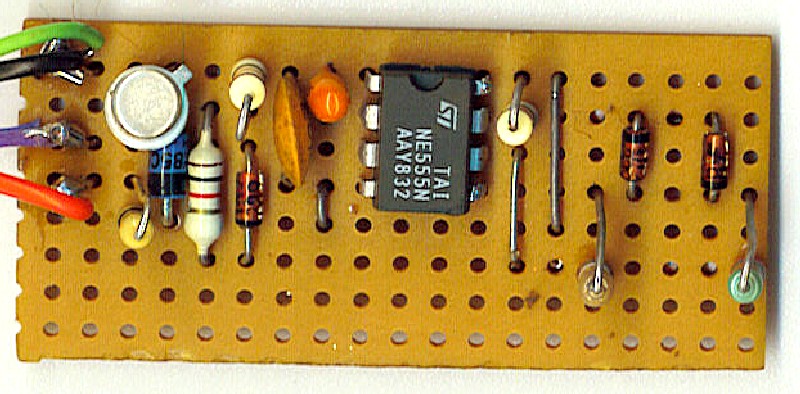
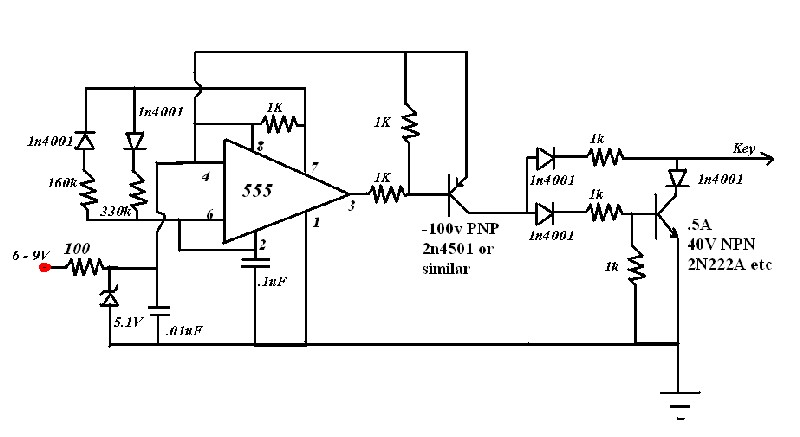
The second circuit works in a similar sort of way, but whereas the previous circuit is used to tune up in SSB mode, this gadget is used in the CW mode. It is basically one half of an electronic keyer. It uses a 555 timer chip to generate a string of "dots" at about forty to fifty words per minute. The output of this can just be wired in parallel with your morse key.
Below are two variations of this circuit. The first, simpler one, is fine for keying a modern solid state rig, when tuning up a linear amplifier.
The second, can handle the negative voltage keying of the older type rigs with tube PAs. Use this with your TS830 etc.
For Solid state Rigs
( Use this circuit for positive voltage keying. i.e solid state rigs )
The ratio of the "dot" to the space between dots....and therefore the duty cycle.... can be adjusted by changing the relative values of the 390K, and 150K resistors.
( Underside of Vero board, showing the breaks in the copper strips, and 555 chip position )
( Component positions looking at copper side )
( Completed board, view of component side )
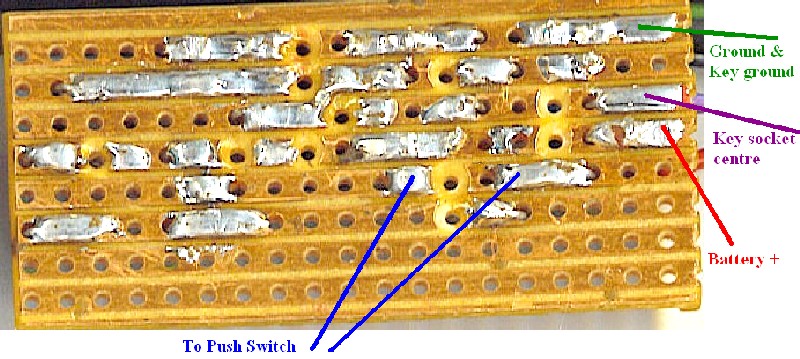
( Copper side, showing connection points )
( Use this circuit for negative voltage keying. i.e valve rigs. TS830 etc )


( View of finished board )
( View of parts placement looking component side )
( View of finshed board copper side )
( Component layout looking at copper side of board )

Home Links Contact Information
Copyright � 1995 - 2021 John Tait All rights reserved.
All pages and content there-in, are the intellectual property of the author, and protected by law.
All pages and content, are subject to change at any time, without notice.