
![]()
![]()
![]()
![]()
![]()
![]()

SARA Coverage map Visit the Official SARA Web Site at www.n4nw.org
Please be sure to read this brief page on VHF Propogation Basics
Please read our Standard Disclaimer regarding content of this site.
Most of the equipment can be had for relatively cheap, with exception of a duplexer. So I began exploring the possibilities of building my own duplexer from scratch. I located a wealth of information on the web, and began to investigate the pro's and con's of each approach.
Personally, the most desriable situation would allow me to place a duplexer inside the rack with the repeater itsself. Only one of the DIY projects would allow this approach. It was design developed by Sam Kennedy. I printed his web page with the duplexer construction details to a PDF and it can be viewed by clicking the following link -> KT4QW Helical Duplexer <- These files can also be viewed by going to Sam's web site. I read the description of how this design is constructed, and decided that I would pursue the heliax duplexer described on several other sites.
The first design I was able to locate was the WB5WPA Heliax Duplexer.pdf. I decided this was the way to go due to the simplicity of the design. I have also been flooded with requests for the information after mentioning my project on the repeater builder list server. I posted this pdf because Jim's page apparently comes and goes due to local provider issues. If possible, I would visit Jim's web site first. Allowing access to the various on-line calculators and the like. If Jim's site is unavailable, you can get enough info from the above pdf to get started.
I also followed another link to the following page maintained by Glen, WA7X... describing how he used the heliax notches to boost the performance of his more traditional "can" type setup. Glen's page is located here. Glen provides some good construction advice. For more information, Glen provides the following email address mail@wa7x.
So far, I have completed three of the reqiured 8 filters needed for my repeater project.
A plot of the "first-cut" can be viewed here.. try1.pdf.
A plot of the first filter with the appropriate capicator added to reduce insertion loss can be viewed here 1finished.pdf.
And finally, a plot of three completed filters in series can be viewed here... 3in series.pdf.
As time allows, I will post photos of the construction techniques that were employed by myself. But, as this is still a "work in progress", the photos will have to wait for completion of the project.
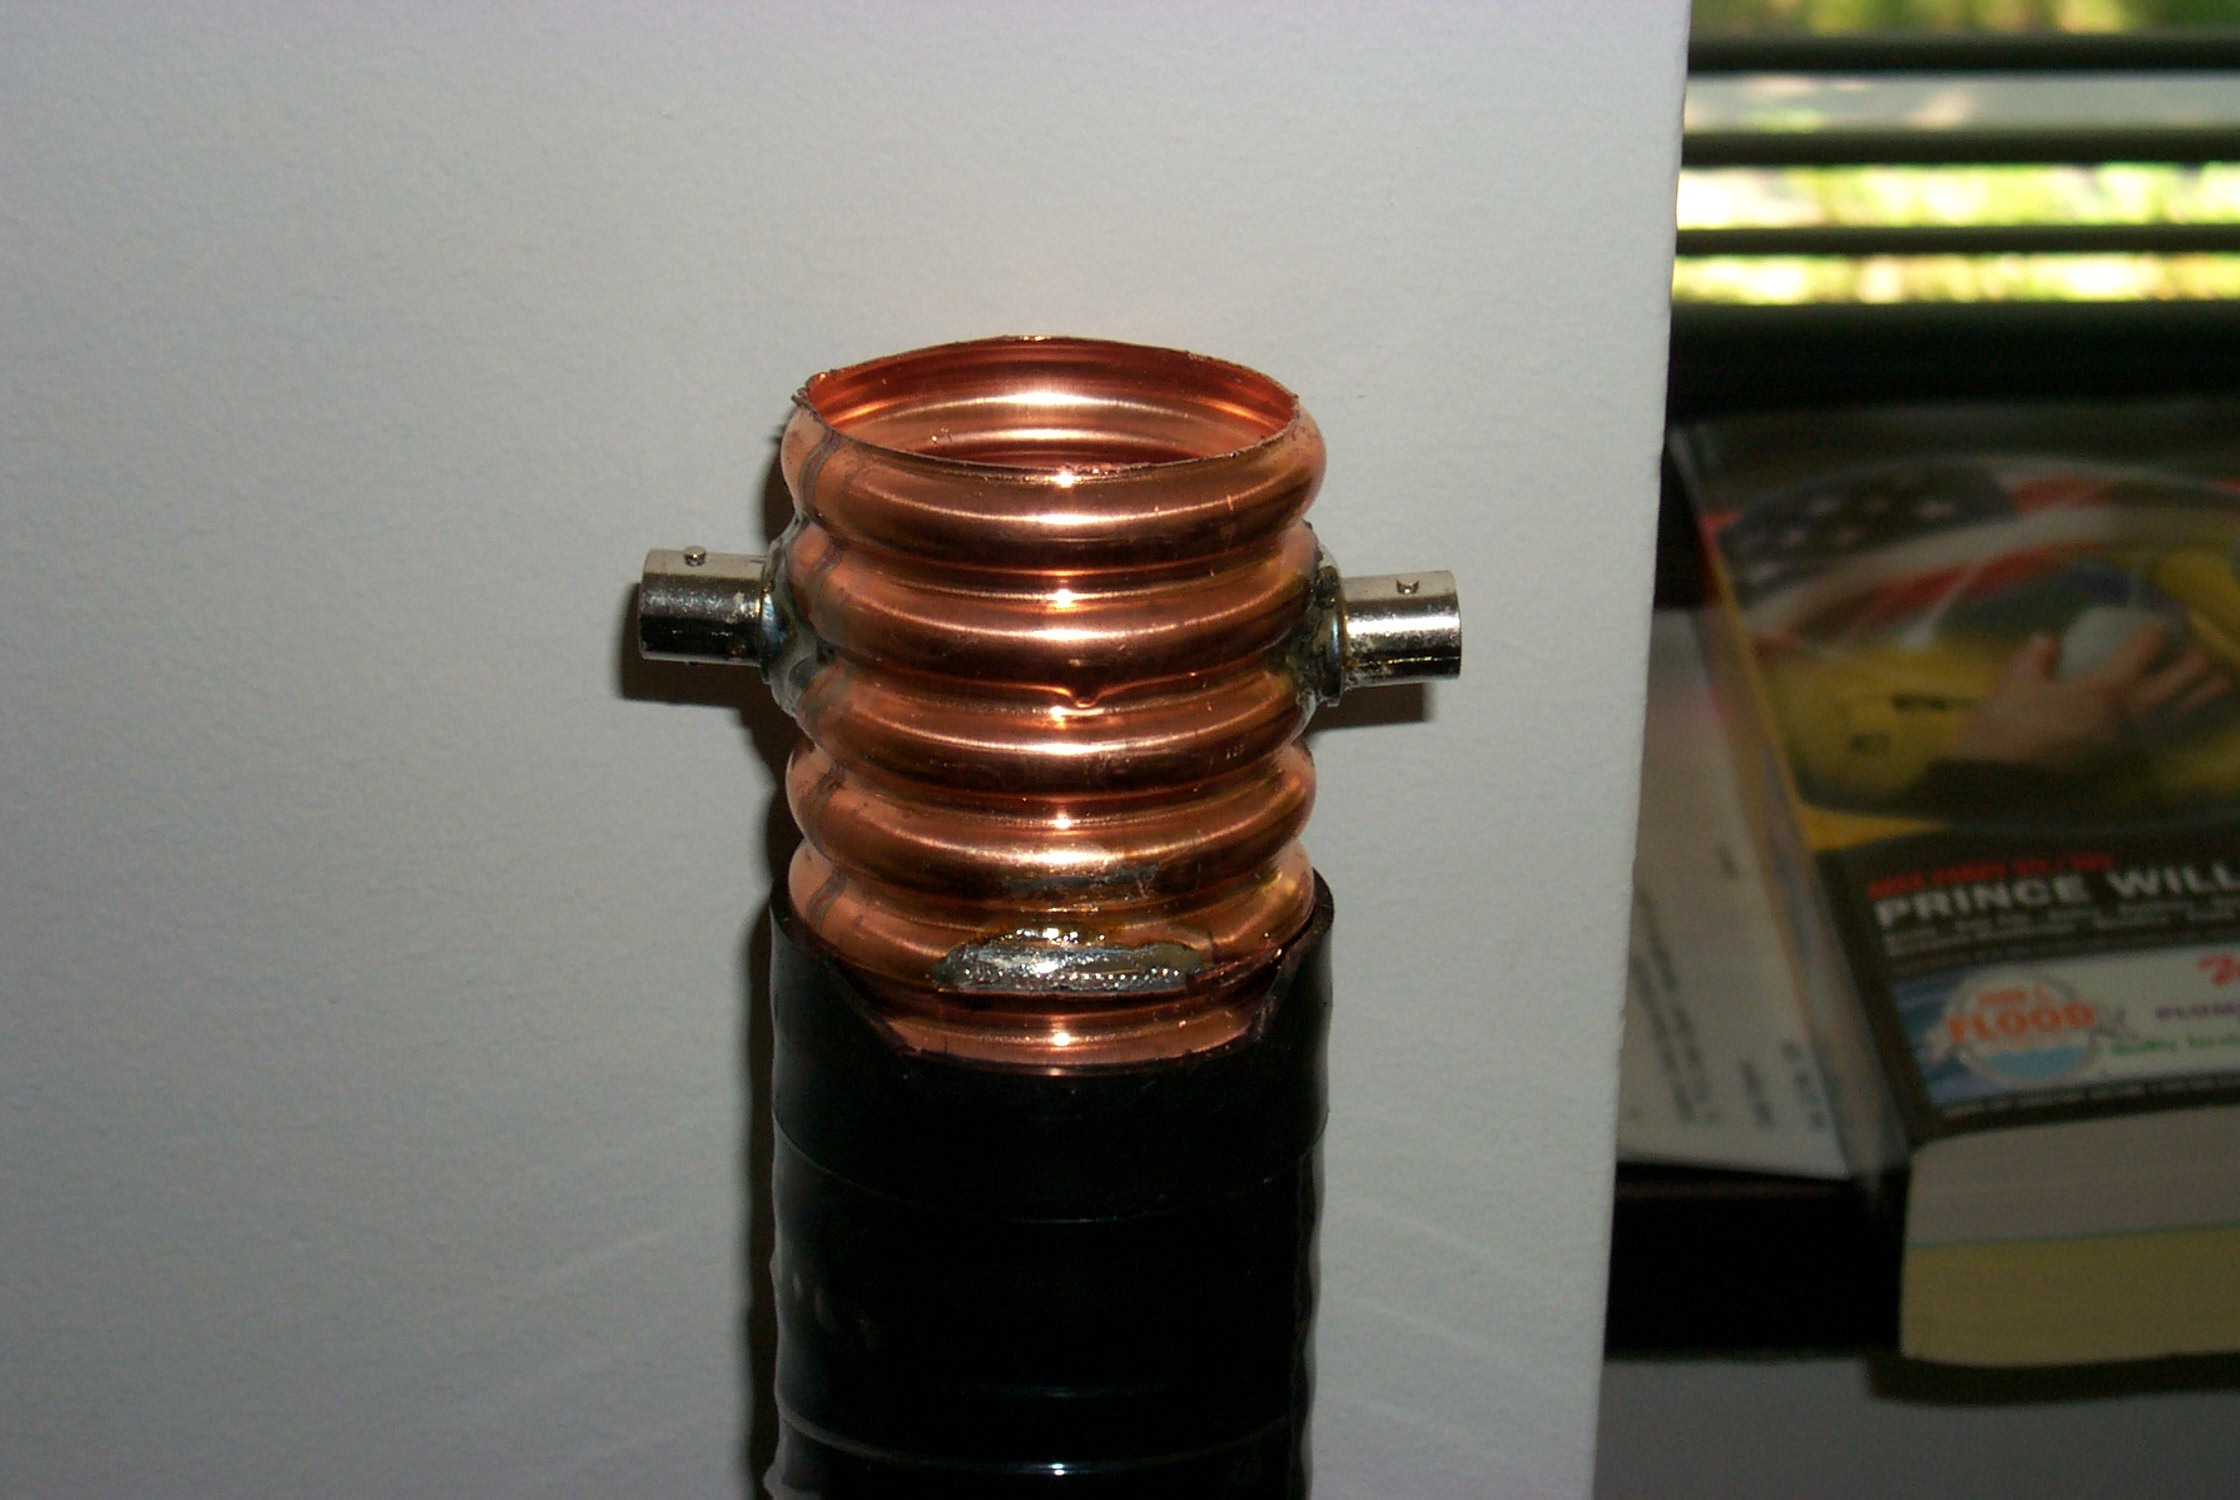
As promised... a couple of my construction variations...
The first step after determining the resonant length is to add 1 1/2"
before cutting the heliax...
Then drill clearance holes for the BNC connectors one inch beyond the resonant length. Next short the inner conductor to the outer conductor on the bottom end by soldering 1/2" copper strap across the bottom
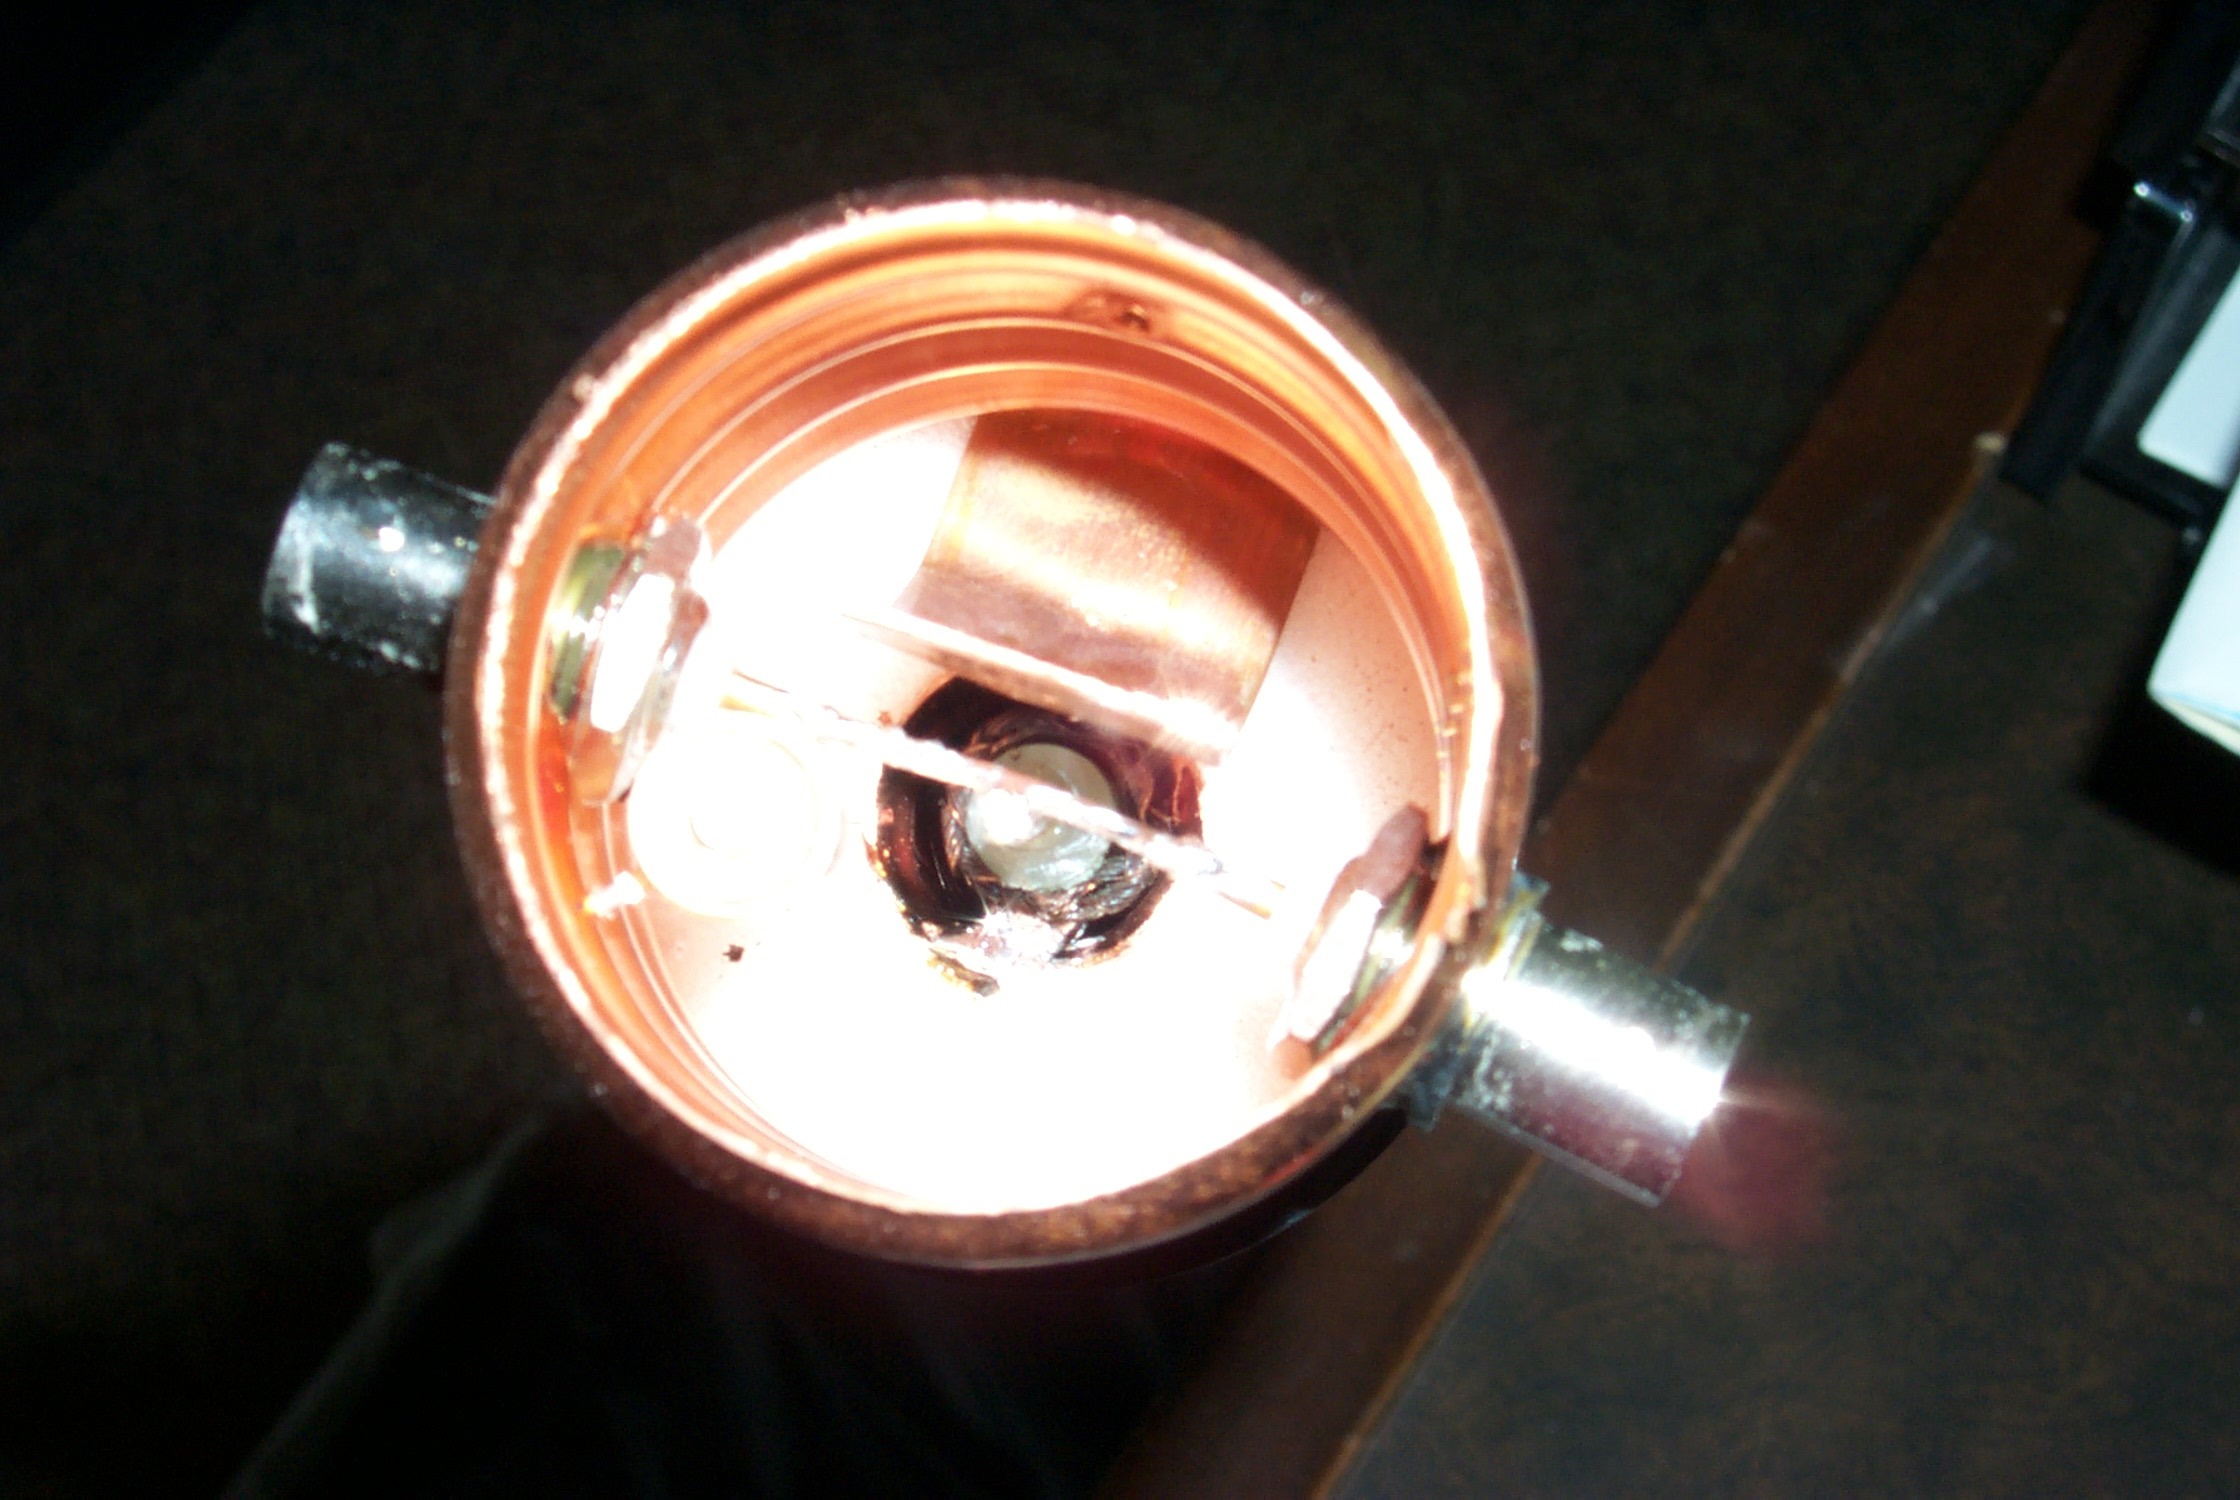
The top of the Heliax is cut using a Dremel tool ... I was
able to find a bit that resembles a tiny saw blade on a shaft. Set the depth so
that the case of the Dremel is used as a "depth gauge". Insert the
bit inside the inner conductor, and clip the inner conductor like in the
picture. I set the depth to be 1 1/2". Then use a razor knife inserted
through the slit ( also cut with the Dremel ) to cut the dielectric loose so it
can be removed with the cut portion of the center conductor. Discard the cut
away items. Insert the "gimmick cap" and tack the braid to the center
conductor ( slide up or down for rough tuning )
This photo shows the method for attaching the "fine-tuning" tab. Use
a Dremel tool and cut a slit in the side to insert a piece of 1/2" copper
strap, and solder in place with a "big-honkin'-iron".
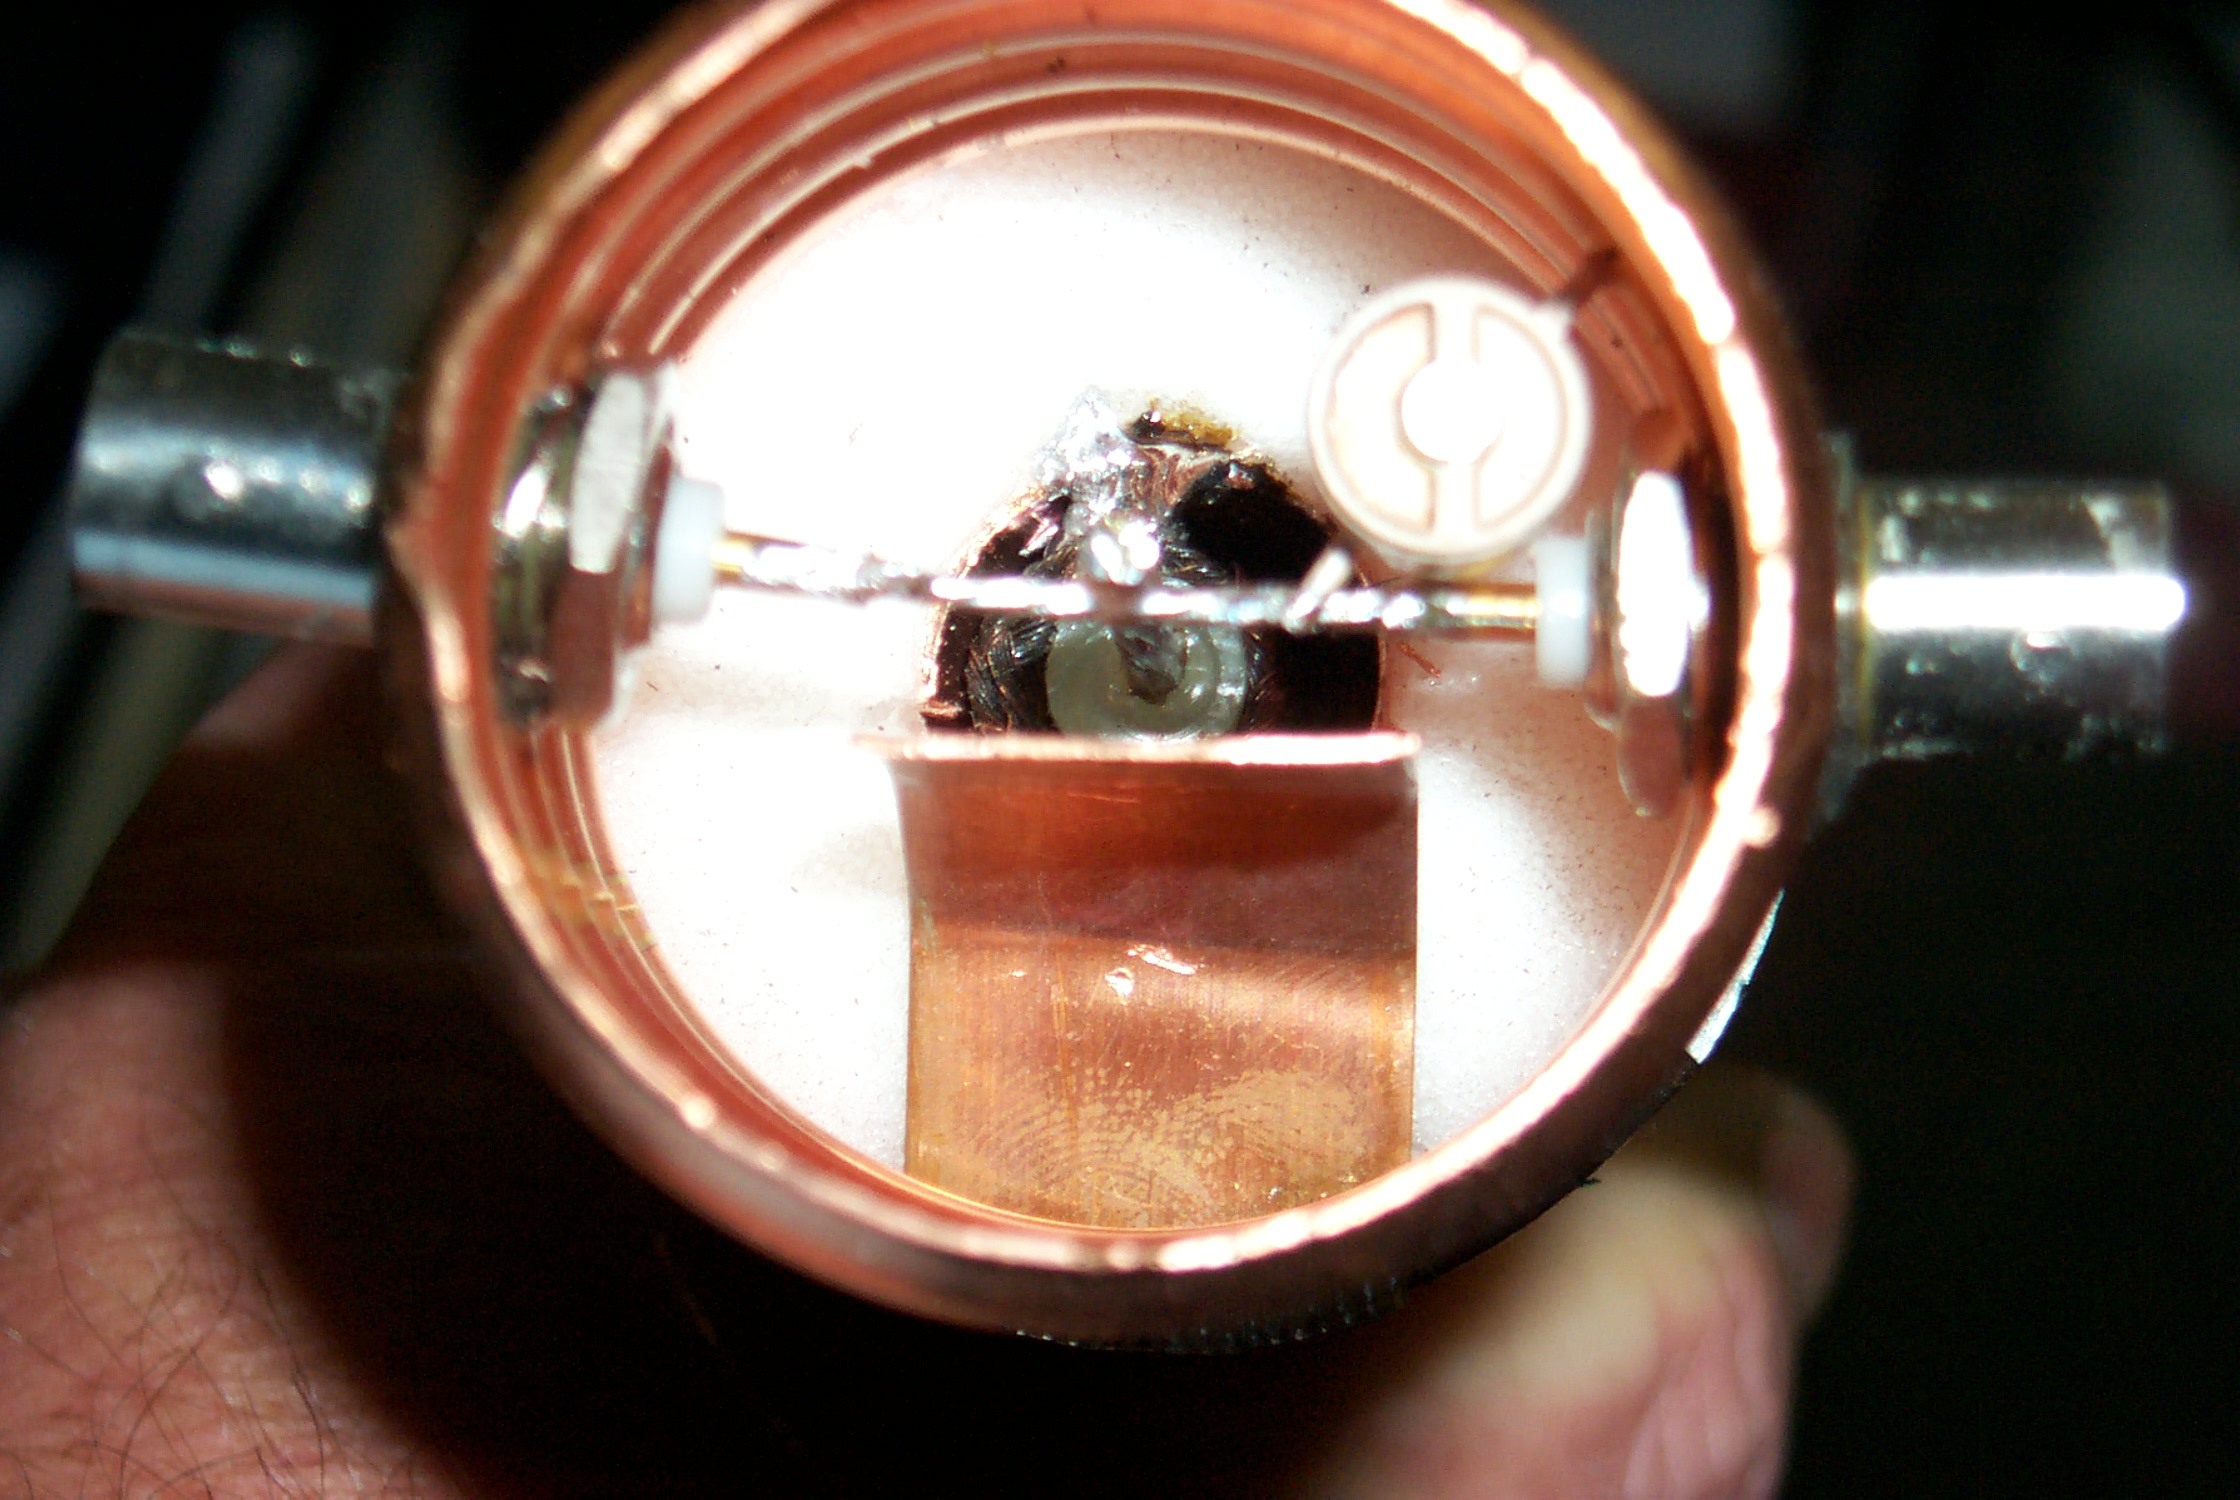
The trim cap or inductor.. depending on TX or RX notch, is added last.
I also plan to use plastic "cap-plugs" on either end to keep "critters" out of the finished assembly.
Nice clean package... no need to buy double sided PC board and solder a box together.
73's for now..
Mike
About Me | Contact Info Index | News Index | My Hobbies Index
This document maintained by [email protected].
Material Copyright © 2004 K5JMP