This is a FREE and simple to use add on
for the PC User running Windows. It is used in conjunction with the EchoLink program. The EchoLink program must be installed for this add on
to work. There are many features that can be used by normal PC users. Some of the many features include Easy to use Menu screen with
visual indicators showing what is happening, Easy control of the remote
transceiver, Preset easy to select frequencies, Text Box Chat with
Graphics, Updates within the program and much more.
If you wish to provide a HF
connected node you will need the Client software EchoTC. Email me for
information and software
Email
Nigel ZL2SEA
A BIG Thank You to
Jonathan K1RFD for providing
EchoLink. Without it this program EchoPCUser would not have been possible.
The EchoLink program is
provided FREE as is the EchoPCUser add-on.
You must have EchoLink
installed and running before installing EchoTR
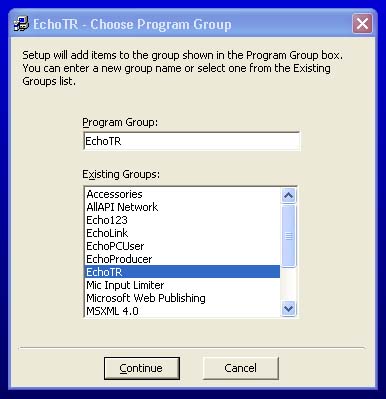
Download the software into
a directory unzip the software (4 files) and Run Setup C:\Program Files\EchoTR\ is
where the program places its files. You must let the program install in
the default directory.
Updates to the program can be
checked and checked from the program and updated. See below for update
information.
24 hour PC Clock
Make
sure your Windows clock is on 24 hour time. In Windows XP to do this, go to the Windows
control panel, make sure it is in "Classic View" and choose "Region and
Language Options." Then, click Customize. Choose the tab labelled "Time."
Under the Time Format pull-down menu, choose "HH:mm:ss." Click OK, Then OK
again, and Windows should now be showing the time in 24 hour format. If this
is not done you will see strange frequencies appear on the frequency read
out panels at certain times of the day
The main screen
was made to look like a transceiver with sections on the screen when clicked
with the mouse will send commands to the remote transceiver. Hovering the mouse
pointer over parts of the screen is show a tip with information for that control
Remote Time
This when
clicked will send a request to the Remote Node requesting there Date
and Time
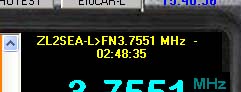
What Frequency ?
If clicked
to send a message to the remote Node requesting the frequency
that the node is on.
Signal Report
If
clicked when a station at the remote end is transmitting
a mess
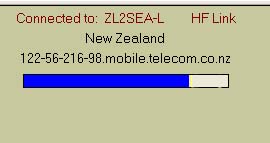
Last Station
Connected
When you connect to a station
its call sign will be shown. This will only show
that last station connected to your node.
age
will be sent back to you giving his signal report at the
node.
Station
List
The station list
displays the connection details from the remote node also if more than
one station is connected to that node a list of there connected stations
TX / RX
This can be used as
well as the EchoLink PTT. When transmitting the button will turn red and
an indication light will let you know that your node is transmitting
Force TX/RX
In some cases when conditions change and the squelch
opens it is desirable to force the remote radio to stop sending you signals
and put you in transmit mode this can be simply done by clicking the TX/RX
button while receiving signals. This will send a text message sending the
time and "CPT?" to the remote radio. An orange indicator round the TX/RX
button will light up letting you know that this option is in use. When the
remote radio drop's carrier you will go into TX mode immediately so don't
click the button and walk away . There is a 5 second timer set internally
just in case something doesn't happen and revert you back to normal
operation.
Select
HF Node
You can store up to
4 pre set remote nodes within the program and the nodes can be
connected/disconnected by clicking on the appropriate button located
above the text chat panel. The small buttons will disconnect the
selected button node if connected.
Text
Chat Panel
This panel displays
the incoming text. The textbox chat screen can be activated by simply
clicking within the orange text window. When text is received a small
window will open up above the frequency display for a few seconds
showing that last text sent before closing again.
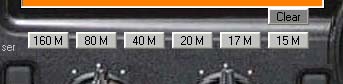
Band
Selection
The band selection
buttons when pressed will display for a short period stored preset
frequencies that can be used to change the frequency of the remote
Transceiver.
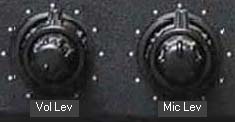
Volume and Mic Levels
By clicking on the Vol Lev And Mic Lev
will open the computer sound Devices option enabling you to alter the levels
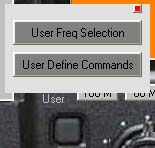
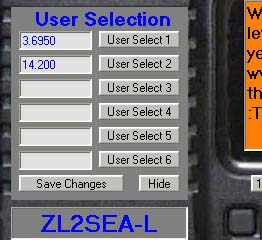
User
Selection
Access to the two screens below via the User Selection button
This option will
enable you to save and use spot frequencies.
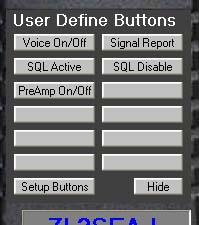
This
option will enable you to save and use Text Box Commands. Some
pre set commands have been added that have been included. These Text
commands can be changed if required in the Setup Buttons section
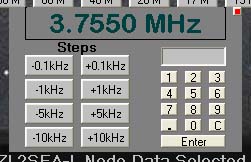
Step
This option will
enable you to step up and down by clicking the appropriate buttons buttons are
clicked
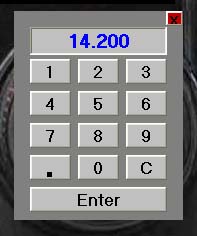
Enter
Frequency
To enter the
frequency manually simply click on the tuning knob and when the Number Pad
window opens enter the frequency in the format 999.9999 eg 14.200 and press
enter. Clicking on the Freq. button will also open the text input window.
Last Text
Message
The last text message will be displayed here for a couple of seconds
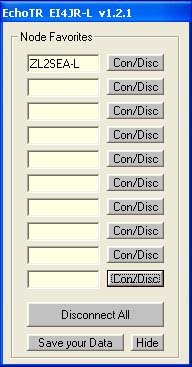
Node Favorites
As you find more and more of the HF nodes you can hold them in your
favourites list and connect / disconnect at the click of a button. If you
have more that one node connect a click of the Disconnect All will as the
button says will Disconnect all connected stations.
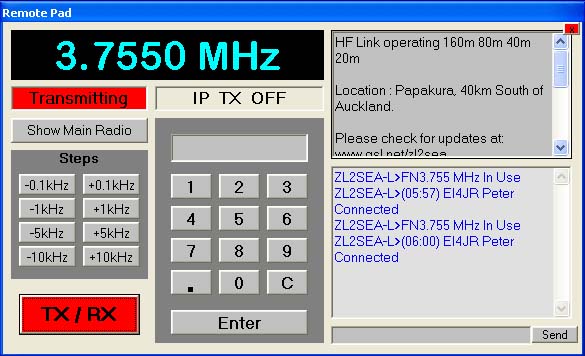
Remote Pad
The Remote pad is accessed
from the main radio screen by clicking the Remote Pad Button
This pad has same the
functionality as the main radio screen in regards TX/RX, Frequency
Steps, Frequency input, Frequency & Station list Display and Chat Text.
Clicking on the chat text screen will open the main chat text if
required.
This screen will stay on
top of other screens on your computer screen which is very useful when
doing other things on your PC.
TX / RX
This can be used as
well as the EchoLink PTT. When transmitting the button will turn red and
an indication light will let you know that your node is transmitting
Force TX/RX
In some cases when conditions change and the squelch
opens it is desirable to force the remote radio to stop sending you signals
and put you in transmit mode this can be simply done by clicking the TX/RX
button while receiving signals. This will send a text message sending the
time and "CPT?" to the remote radio. An orange indicator round the TX/RX
button will light up letting you know that this option is in use. When the
remote radio drop's carrier you will go into TX mode immediately so don't
click the button and walk away . There is a 5 second timer set internally
just in case something doesn't happen and revert you back to normal
operation.
VU Meter
A VU meter that works only when you are transmitting shows the level of your
audio.
Please Note: Your
Audio level controls the ALC of the HF radio. Audio level MUST be nearly full
scale
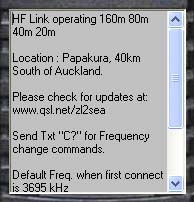
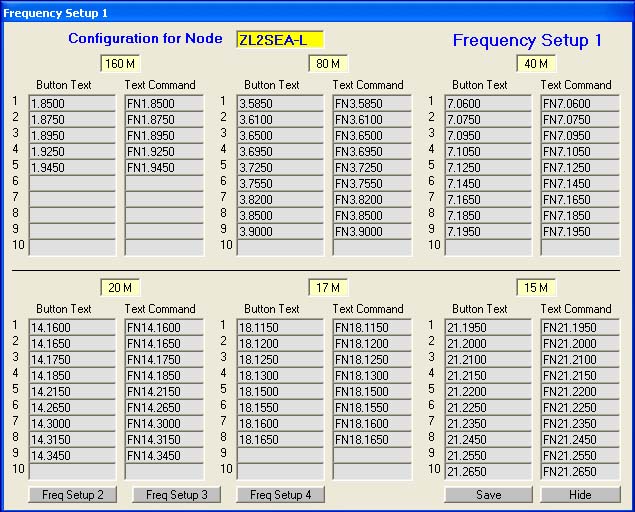
Frequency Setup
This option
enables you to set the Frequency Setup and Band Buttons with the required
frequencies and bands. There are a total of 4 sets that can be used. The example
above shows the default setup that is used for the ZL2SEA-L link. If you were to
change the frequency in the normal EchoLink text box you would enter FN and the
frequency example FN14.1600 this setup screen will make it easier to change
frequency in the future with out the hassle of having to keep typing the change
frequency ccommand
Band
Enter the band that
indicates the frequencies that you are interested in. Example 160 M or 2
M or15 M etc
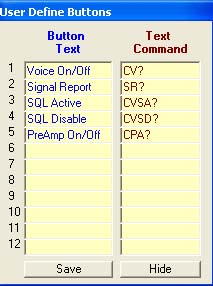
Button
Text
Enter the caption
that you wish to use in the Button Text Filed as an example 14.1600 or
3.8200 or 145.3375 etc
Text
Command
The Text Command
must be entered as shown in the above picture. Syntax is FN999.99999
example FN14.1600 or FN3.8200 or FN145.3375 etc
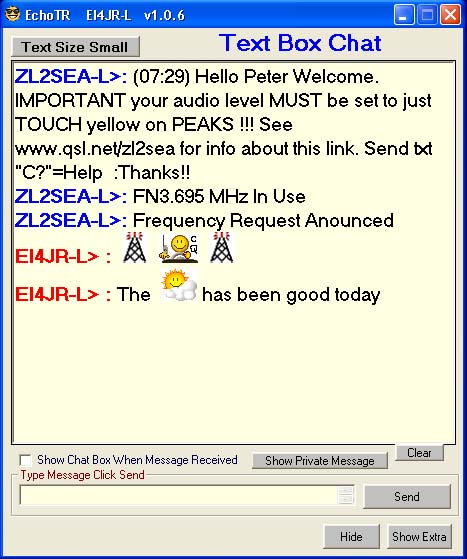
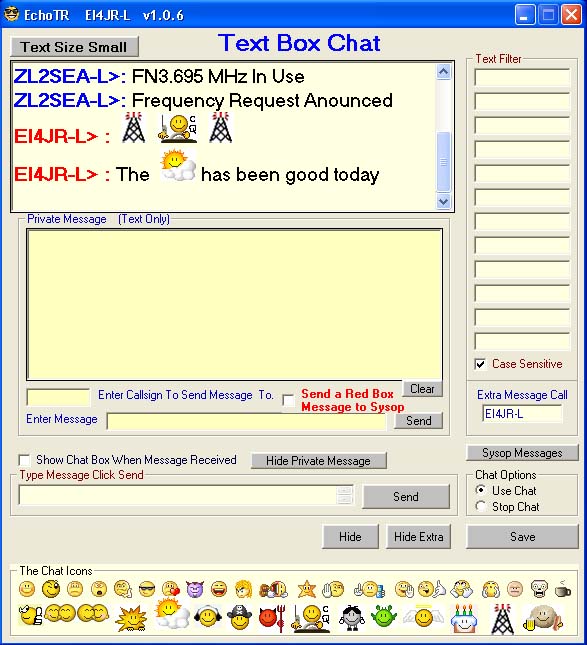
Text Box Chat
Text Box Chat Screen on left
is normal text mode and screen on right is the enlarged text. The text size
can be changed by clicking the small button at the top left of the text
screen.
This option uses the EchoLink text
box facility but in a more fun graphical way. Messages can be sent to other
nodes that are connected to you or the conference you are connected to.
Simply enter your message to send and either press the entre key or click on
the send button. The small button on the top left will change the size of
the font larger or smaller depending on your visual requirements
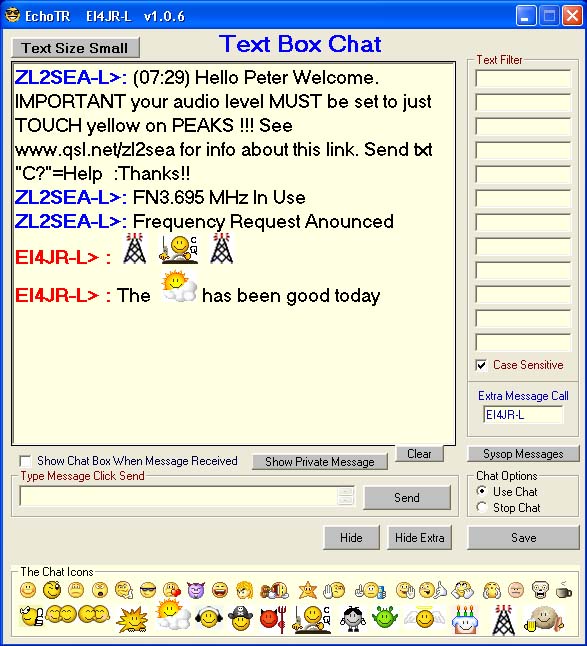
Hide Extra Button
The Hide Extra button will reveal or hide
some extra tools that you can use in your chat box.
Show Chat Box When Message Received
This option when ticked will make the chat
box pop up so as it can be seen when a text chat is received.
Text Filter
Entre a words into one of the filter boxes
that would be in a sentence that would appear in your text box. If
the word is detected then the complete sentence is not displayed
in the text box. This option is not case sensitive
Case Sensitive
This option when ticked will make the
filter word case sensitive. When not ticked all filter words
upper or lower case messages will filtered
Extra Message Call
This option enables you to add a 2nd
callsign that can be used for messages, This is useful as senders of
messages forget to add the -L or -R to some of the callsigns so
having an alternate call helps stop this problem. Sometime your call
is different to your node callsign so this option enables you to put
your own call as the extra message callsign.
Smiley's
Here you can add smiley's to your text.
Only stations that are running the EchoChat text box will see the
smiley pictures. To select a smiley simply hover over the picture
that you wish to add to your text message and either click on the
picture or wait for the tool tip as it will show the key press that
you would need to enter.
Some other smiley's that are not shown are
:loo - :beer - :skull - :xmas - :monk - :PeterEI4JR
Text Box messages
This option is shown below
Private Message
This section is a text only option where
you can send a messages to a node that is connected directly or a
conference that you are connected to. Simply enter the callsign and
any extensions like -L or -R, Type your message and click on send
when finished. If the station receives your message you will get and
acknowledgment message back saying Message Received. If the station
is on line and connected to the system that you are connected to
then they will get the message. If you get no acknowledgment then
they will not have had the message put in there Private Message box.
The private message box will automatically open if you receive a
message
Send a Red Box Message to Sysop
This option is where you can send messages
to the sysop of a node into his high alert Red Message Box..
Messages For Sysop's
Attention
This screen will only appear if a message
for the sysop has been left. Messages like Mute's, Automated Disconnects
and other messages will be shown here that is addressed to your
node. The information will
include the Date - Time - Who sent the message and the message.
The automated messages if addressed to
your node will be displayed as above. This is very useful as you
will know if there has been a problem with your node.
Messages can be manually sent sent using
the text box or text box chat to the sysop of the node using the
syntax of star star callsign of the node star star and then your
message. for example **EI2IPG-R** Your Message. You can
leave off the " -L or -R " example **EI2IPG** or **ei2ipg** so a
message sent informing the sysop of a problem or just a general
message would look like this "**EI2IPG-R** Your node
sounded good today de Peter EI4JR". Remember this only works
with nodes running this software
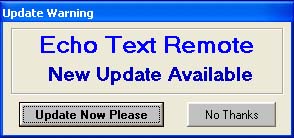
Auto Update Check
When the program start it will check for
any updates. If there is any update the screen above will be
displayed. If you wish to update simply click on the Update Now
Please button and follow the Update Program information below
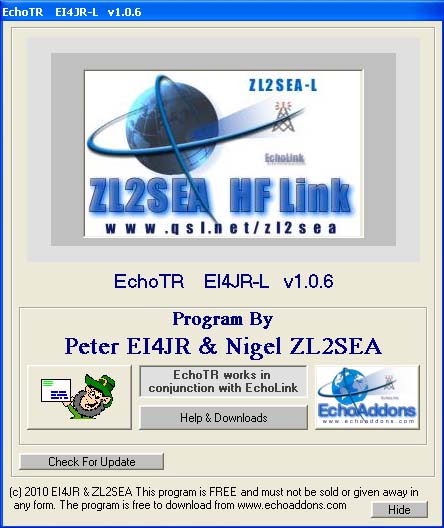
About / Help / Updates
This screen will give you access to Help
and Updates
To check for updates simply click on the
Check For Updates button. If there is an update a button will
appear saying that an update is available. To update simply
click it and the update process will start by closing the
program before the update
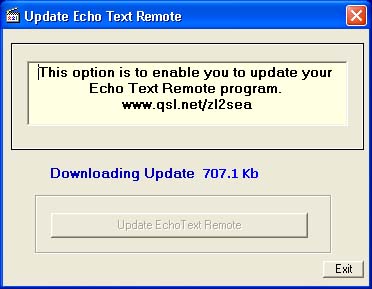
Update Program
Click on the Update EchoTextRemote Button
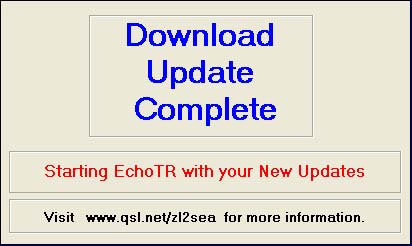
When the download has finished the
Download Update Complete screen will appear for a few seconds before the main
EchoTR program Starts
You must have EchoLink
installed and running before installing EchoTR
Download the EchoTR_Ver.xxx.zip software into
a directory unzip the software (4 files) and Run Setup
C:\Program Files\EchoTR is
where the program places its files. You must let the program install it in
the default directory.
Updates to the program can be
checked and checked from the program and updated.
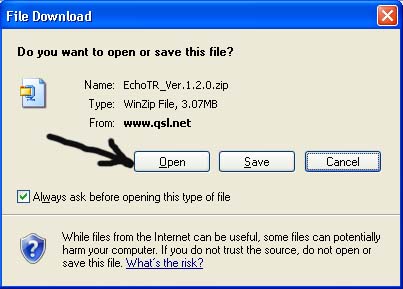
When you click on the Download option for
EchoTR select the Open button
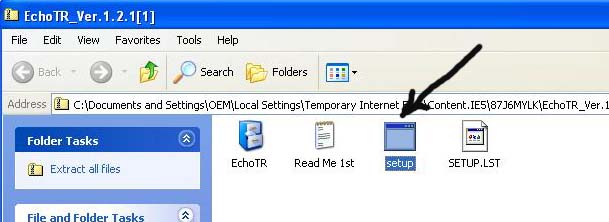
This will Run the setup program and you
will see the following screens. Let the program install into the default
directory
Double Click on Setup
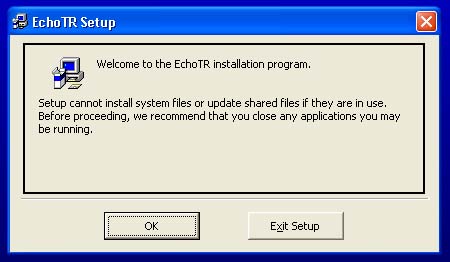
Click OK
Click on the button with the arrow
pointing to it. Let the program install in the default directory
Click the continue button
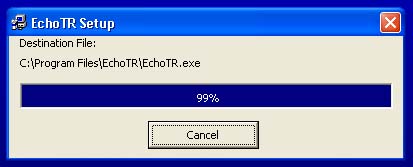
The program will now start to install
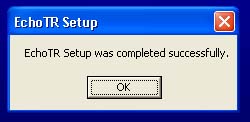
Click OK
You would now start the program as you
would do with any other program by clicking on the windows Start button -- Programs
-- EchoTR-- Then click theEchoTR button
The above screens when using Windows XP
Audio Levels
Please Note: Your
Audio level controls the ALC of the HF radio. Audio level MUST be
strong in Blue and JUST TOUCH YELLOW on PEAKS.
===========================================
Access
to Connect Required
Due to the
possibility of some Amateur Radio Connecting to the ZL2SEA HF Link
and operating outside there Amateur Radio Licence, Access to use
the ZL2SEA Link is by application. If you have any frequency
restrictions on your licence then please read the "What License
do I need to Operate the ZL2SEA HF Link?" web page in the link
bellow.
If you have “NO
Restrictions on Operating in the HF bands” on your Licence then
just email me with your call sign and I will be happy to give you
access, by applying you confirm that your Licence complies.