This is a simple to use add on
for the PC User running Windows. It is used in conjunction with the EchoLink program. The EchoLink program must be installed for this add on
to work. Easy to use Radio Screen with visual indicators showing what is
happening, Easy control of the
transceiver using Ham Radio Deluxe, Band Edge, Set Text Box Chat with
Graphics, Updates within the program and much more. This program Only runs
in sysop mode. Its sister program that connected users can use is EchoTR
If you wish to provide a HF
connected node you will need This Client software EchoTC. Email me for
information and the software
Email
Nigel ZL2SEANormally if you want to use the
service the EchoTR program is what you will
need
A BIG Thank You to
Jonathan K1RFD for providing
EchoLink. Without it this program EchoPCUser would not have been possible.
The EchoLink program is
provided FREE as is the EchoPCUser add-on.
You must have EchoLink
& Ham Radio Deluxe installed and running before installing EchoTC
Download the software into
a directory unzip the software (4 files) and Run Setup C:\Program Files\EchoTC\ is
where the program places its files. You must let the program install in
the default directory.
Updates to the program can be
checked and checked from the program and updated. See below for update
information.
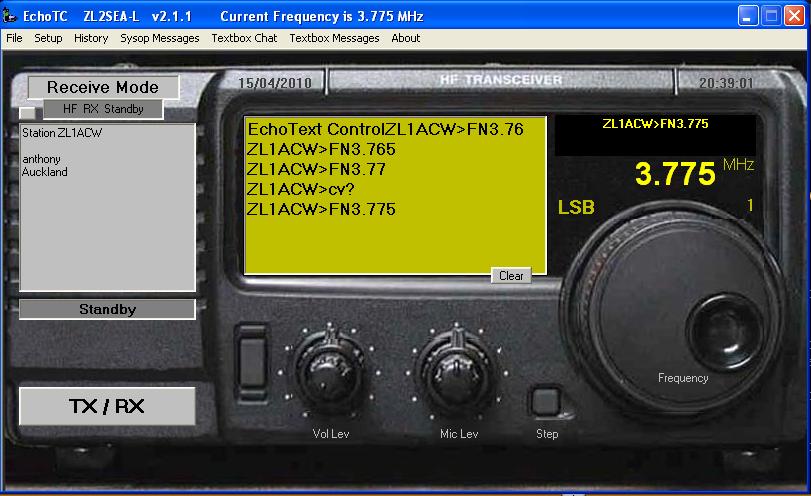
The main screen
was made to look like a transceiver with sections on the screen when clicked
with the mouse will send commands to the remote transceiver. Hovering the mouse
pointer over parts of the screen is show a tip with information for that control
Knobs & Buttons
Access to the Volume , Mic, Frequency Steps and
Frequency input pad can be obtained simply by clicking the appropriate
control to open the required option
Frequency Input Pad
You may find from time to time the need to move
frequency due to QRM
Clicking on the Steps Button and Frequency knob will give access to the
Frequency Pad and Steps option
Steps Simply click on the required step that
you want and the frequency will change and also let all connected to you via
the text box that the frequency has changes which will display the correct
frequency on there EchoTR program if they are using it. The changed
frequencies will only change within the set band edge settings
Frequency Input Pad Simply click on the required number buttons that you want and
the frequency will change when the enter button is clicked this will also
let all connected to you via the text box that the frequency has changes
which will display the correct frequency on there EchoTR program if they are
using it. The changed frequencies will only change within the set band edge
settings
When all connected stations have disconnected the frequency will revert to
the default frequency that you have set.
TX / RX
This can be used as
well as the EchoLink PTT. When transmitting the button will turn red and
an indication light will let you know that your node is transmitting
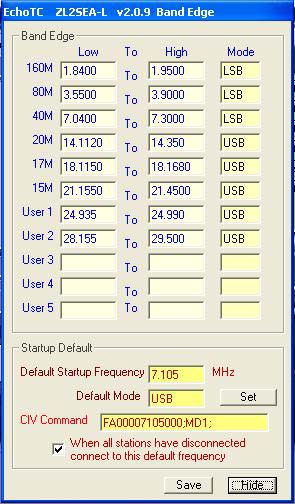
Band Edges
It is important to set that band edges as to
protect against transmitting out side of the amateur bands.
The program has band edges already set and can be changed to your
required band edges as shown below
Band Edges
Start-up Default
Default Start-up Frequency Enter the frequency that you wish your system to select when the
program starts and revert to when all stations disconnect from your node if
the option to do so is ticked. The frequency must be input in MHz as an
example which will include the period "." Example 7.105 or 14.200 or
145.3375 etc.
Default Mode Enter the default mode. USB or LSB or FM
CIV Command The program works in conjunction with Ham Radio Deluxe. You
should read the section 3rd Party Software in the HRD manual page 149
onwards.
Setting the frequency has the command =
FA<11 digit frequency>; Example for a
frequency of 7.105 MHz you would enter FA00007105000;
Setting the mode has the command = MD<mode>; Where
Mode = 1: LSB 2: USB 3: CW 4: FM 5: AM. For LSB you would enter
MD1;
If the default was 7.105 MHz LSB the CIV command
would be FA00007105000;MD1; If the default was 14.175MHz USB the CIV command would be
FA00014175000;MD2; If the default was 145.3375MHz FM the CIV command would be
FA00145337500;MD4; Note the semicolon ";" must be included and that no periods "." are
used.
Text Box Greeting Messages
Text Box
Messages
Messages Time Stamping
When this option is ticked your Text Box
Messages will be time stamped.
Greeting Messages
This option enables you to automatically send
greeting messages to stations connecting to your node.
Select the message that you want sent on the
connection of a station to you node. Messages can be up to 160
characters.
Messages 1 to 9 can be amended and saved.
Message 10 simply says a station as connected or disconnected.
Randomise Greeting
This option when clicked will randomise
message 1 to the number selected. The will enable you to have a random
message sent each time a node connects to you.
Delay Before Sending Message
A delay can be added before your message is
sent. I have found 9 seconds is about right for me
Text Box To CIV
This option will enable you to add short cuts text commands that
your users can use if they are not using the EchoTR program and just want to
use the text box via EchoLink or iPhome / iPod text box. There are 3 sets of
these command if you need them.
Text Box Command This is the command that your user will have to send.
Text Box Reply The text box reply is very important that it has the text reply
that is in the Text Box Format for Frequency and Mode change example
FN <Frequency> as an example for the frequency of 7.105 MHz you would put in
the minimum command of FN 7.105 you can put in any message
after the command that will mean a little more to your users as an example
FN 7.105 MHz Accepted. See the screen above to see how I
have mine
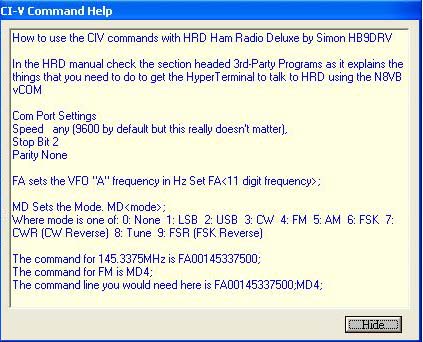
CIV Command The program works in conjunction with Ham Radio Deluxe. You should
read the section 3rd Party Software in the HRD manual page 149 onwards.
Setting the frequency has the command =
FA<11 digit frequency>; Example for a frequency
of 7.105 MHz you would enter FA00007105000;
Setting the mode has the command = MD<mode>; Where Mode
= 1: LSB 2: USB 3: CW 4: FM 5: AM. For LSB you would enter MD1;
Examples If the default was 7.105 MHz LSB the CIV command would be
FA00007105000;MD1; If the default was 14.175MHz USB the CIV command would be
FA00014175000;MD2; If the default was 145.3375MHz FM the CIV command would be
FA00145337500;MD4; Note the semicolon ";" must be included and that no periods "." are
used
CI-V Command
Help
Text Box
Messages
Text Box
Messages 1 & 2This option
enables you to send up to 10 pre set messages messages via the Chat Text
Box.
Simply enter the data into the required fields. Click the send button to
send your pre set message. Please note that the messages will only be
sent to the text box when you have a station connected to you.
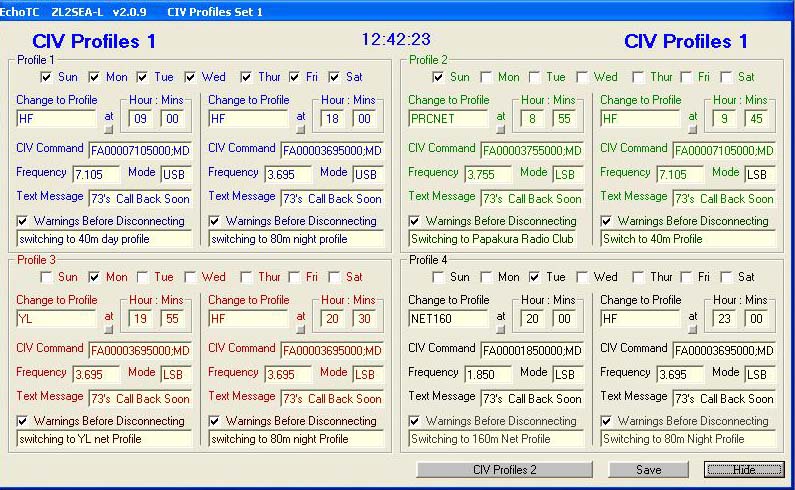
CIV Profiles 1 & 2
This option will enable
you to change the EchoLink profiles that will adapt to your needs. If
you wish to change bands at certain times of the day when they are
usable or stop connection stations for local nets this is the section
that you need
Day of the week Tick the day or days required
Change to Profile Enter the profile that you want EchoLink to change to.
See What are Profiles below if you are unsure what a profile is
Hours and Minutes enter the hours and minutes that you want the profile to start
CIV Command
The program works in conjunction with Ham Radio Deluxe. You
should read the section 3rd Party Software in the HRD manual
page 149 onwards.Setting the frequency has
the command = FA<11 digit frequency>;
Example for a frequency of 7.105 MHz you would enter
FA00007105000; Setting the mode has the
command = MD<mode>; Where Mode = 1: LSB 2: USB
3: CW 4: FM 5: AM. For LSB you would enter MD1;
If the default was 7.105 MHz LSB the
CIV command would be FA00007105000;MD1; If the default was 14.175MHz USB the CIV command
would be FA00014175000;MD2; If the default was 145.3375MHz FM the CIV command
would be FA00145337500;MD4; Note the semicolon ";" must be included and that no periods
"." are used.
Frequency
Enter the frequency that you wish your system to
select when the program changes profile and revert to when all
stations disconnect from your node if the option to do so is ticked.
The frequency must be input in MHz as an example which will include
the period "." Example 7.105 or 14.200 or 145.3375 etc.
Default Mode Enter the default mode. USB or LSB or FM
Warnings before disconnecting
This option if ticked will send a 2 minute and 1
minute warning of disconnecting with the message that is place in
the text box. All station will be disconnected when the profiles are
changed so a warning in the text box to all connected stations
Text Message A text box message that has been entered will be sent at the
time of disconnecting all stations when the profile changes
Text Message
What are Profiles
If you do not know what profile are I
suggest that you go and read up in the help section in advanced
topics in the EchoLink
website
In brief the changes made to any of EchoLink's
settings are stored to the computer's hard disk, and are restored
each time the program is started.
For convenience, EchoLink also allows any number
of different combinations of settings to be stored separately, and
given a descriptive name. This is useful if you want to be
able to switch back and forth between two (or more) commonly-used
settings, such as the different frequencies bands modes and local
nets
To use this feature, choose Profiles from the
File menu on EchoLink. A list of the currently-defined
profiles is shown; by default, only the profile called MAIN is
defined. (The MAIN profile cannot be deleted or re-named).
To create a new EchoLink profile, choose New, and
enter a name for the profile. Choose whether you want
the new profile to initially contain all of the current settings, or
begin with default settings. (If you choose default settings,
the Setup Wizard will appear the first time the profile is invoked.)
EchoLink will create a shortcut in the Programs section of your
Windows Start menu for the new profile. You can use either of these
shortcuts to start up EchoLink directly with any of the profiles you
have defined or swap them using the EchoTC program as shown above.
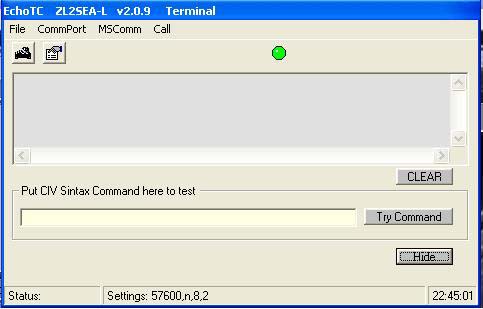
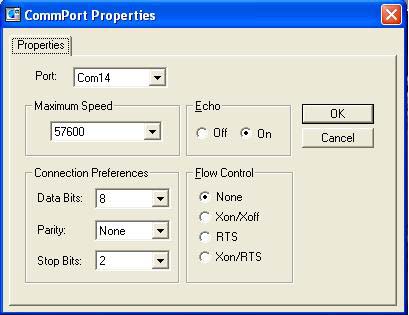
Comport Setup
Select CommPort to change the settings
The connection parameters used by the 3rd-party
program to connect with Com X are: Speed
any (9600 by default but this really doesn't
matter), Stop bits 2, Parity none.
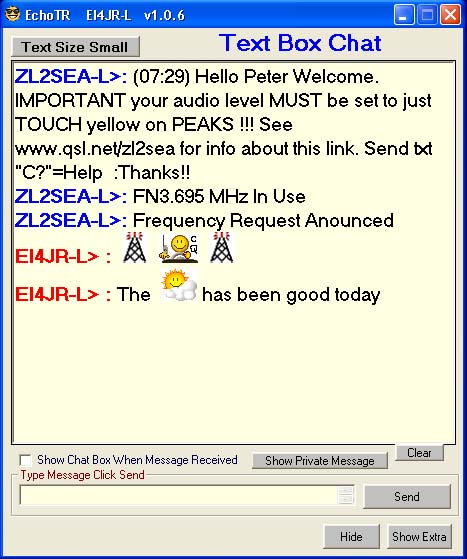
Text Box Chat
Text Box Chat Screen on left
is normal text mode and screen on right is the enlarged text. The text size
can be changed by clicking the small button at the top left of the text
screen.
This option uses the EchoLink text
box facility but in a more fun graphical way. Messages can be sent to other
nodes that are connected to you or the conference you are connected to.
Simply enter your message to send and either press the entre key or click on
the send button. The small button on the top left will change the size of
the font larger or smaller depending on your visual requirements
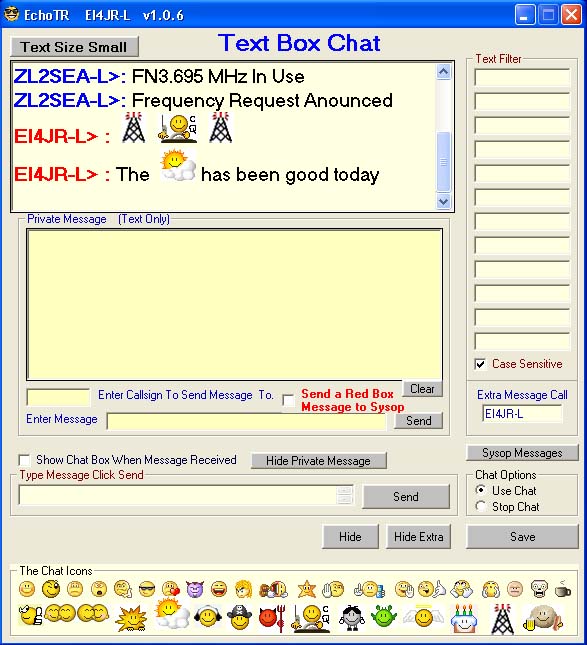
Hide Extra Button
The Hide Extra button will reveal or hide
some extra tools that you can use in your chat box.
Show Chat Box When Message Received
This option when ticked will make the chat
box pop up so as it can be seen when a text chat is received.
Text Filter
Entre a words into one of the filter boxes
that would be in a sentence that would appear in your text box. If
the word is detected then the complete sentence is not displayed
in the text box. This option is not case sensitive
Case Sensitive
This option when ticked will make the
filter word case sensitive. When not ticked all filter words
upper or lower case messages will filtered
Extra Message Call
This option enables you to add a 2nd
callsign that can be used for messages, This is useful as senders of
messages forget to add the -L or -R to some of the callsigns so
having an alternate call helps stop this problem. Sometime your call
is different to your node callsign so this option enables you to put
your own call as the extra message callsign.
Smiley's
Here you can add smiley's to your text.
Only stations that are running the EchoChat text box will see the
smiley pictures. To select a smiley simply hover over the picture
that you wish to add to your text message and either click on the
picture or wait for the tool tip as it will show the key press that
you would need to enter.
Some other smiley's that are not shown are
:loo - :beer - :skull - :xmas - :monk - :PeterEI4JR
Text Box messages
This option is shown below
Private Message
This section is a text only option where
you can send a messages to a node that is connected directly or a
conference that you are connected to. Simply enter the callsign and
any extensions like -L or -R, Type your message and click on send
when finished. If the station receives your message you will get and
acknowledgment message back saying Message Received. If the station
is on line and connected to the system that you are connected to
then they will get the message. If you get no acknowledgment then
they will not have had the message put in there Private Message box.
The private message box will automatically open if you receive a
message
Send a Red Box Message to Sysop
This option is where you can send messages
to the sysop of a node into his high alert Red Message Box..
Messages For Sysop's
Attention
This screen will only appear if a message
for the sysop has been left. Messages like Mute's, Automated Disconnects
and other messages will be shown here that is addressed to your
node. The information will
include the Date - Time - Who sent the message and the message.
The automated messages if addressed to
your node will be displayed as above. This is very useful as you
will know if there has been a problem with your node.
Messages can be manually sent sent using
the text box or text box chat to the sysop of the node using the
syntax of star star callsign of the node star star and then your
message. for example **EI2IPG-R** Your Message. You can
leave off the " -L or -R " example **EI2IPG** or **ei2ipg** so a
message sent informing the sysop of a problem or just a general
message would look like this "**EI2IPG-R** Your node
sounded good today de Peter EI4JR". Remember this only works
with nodes running this software
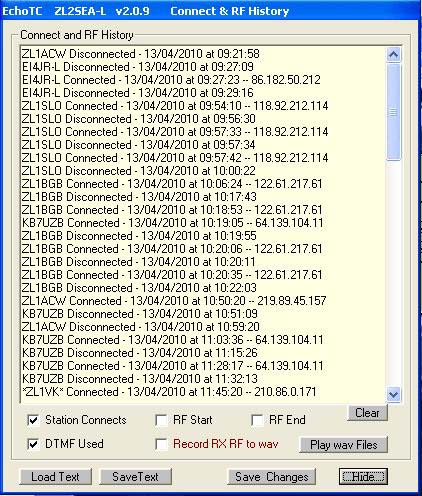
Connect and RF History
The connect & RF history can be recorded if required
by simply selecting the appropriate tick box. Station Connects, RF End, RF
Start, DTMF Used
Auto Update Check
When the program start it will check for
any updates. If there is any update the screen above will be
displayed. If you wish to update simply click on the Update Now
Please button and follow the Update Program information below
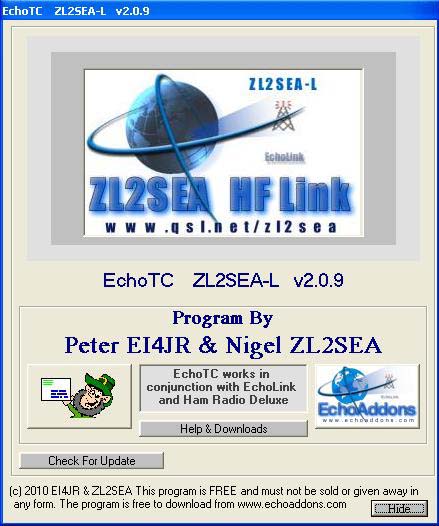
About / Help / Updates
This screen will give you access to Help
and Updates
To check for updates simply click on the
Check For Updates button. If there is an update a button will
appear saying that an update is available. To update simply
click it and the update process will start by closing the
program before the update
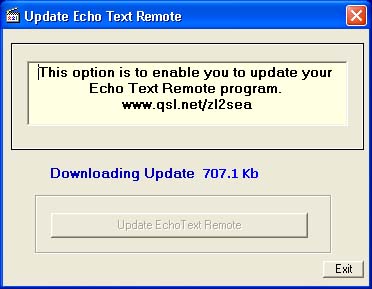
Update Program
Click on the Update EchoTextRemote Button
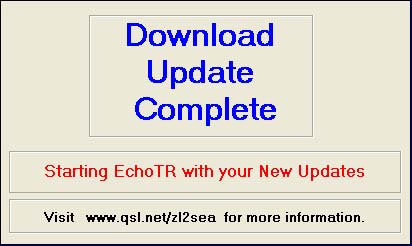
When the download has finished the
Download Update Complete screen will appear for a few seconds before the main
EchoTR program Starts
You must have EchoLink
installed and running before installing EchoTR
Download the EchoTR_Ver.xxx.zip software into
a directory unzip the software (4 files) and Run Setup
C:\Program Files\EchoTR is
where the program places its files. You must let the program install it in
the default directory.
Updates to the program can be
checked and checked from the program and updated.
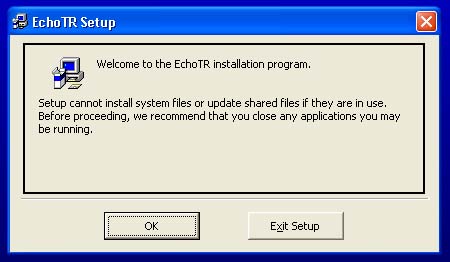
Run the setup program and you
will see the following screens. Let the program install into the default
directory
Click OK
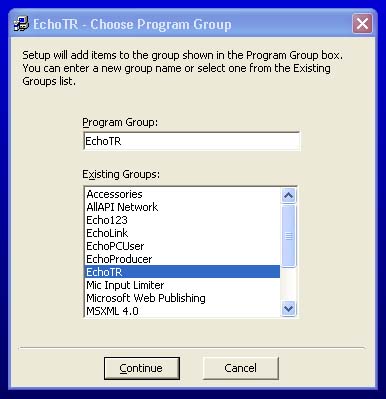
Click on the button with the arrow
pointing to it. Let the program install in the default directory
Click the continue button
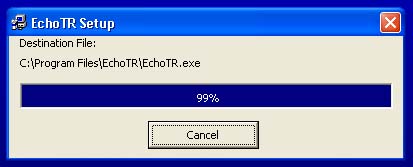
The program will now start to install
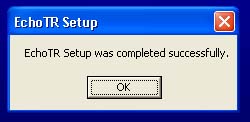
Click OK
You would now start the program as you
would do with any other program by clicking on the windows Start button -- Programs
-- EchoTR-- Then click theEchoTR button
The above screens when using Windows XP
Audio Levels
Please Note: Your
Audio level controls the ALC of the HF radio. Audio level MUST be
strong in Blue and JUST TOUCH YELLOW on PEAKS.
===========================================
Thanks for
visiting my webpage and hope to speak with you soon