Spring 2019 Project Page
Project mission: Design, program, and build a handheld Electomagnetic Field Detector.
|
|
 |
This is the place to be for updates and instructions for the EM Detector Build.
This year we got a late start on our project - so it will likely take us past July to complete. But we are still on track. We didn't have anything really on the table, and I suggested this a month later than normal. I had been messing around with the ESP32 and Atmel line of MCUs when I saw a simple example for detecting wide range EM fields. I built a simple example and thought it was kinda neat.
So the next step was seeing if anyone was interested. I brought the prototype to a meeting and managed to get enough folks involved that it was worth getting parts ordered for a build. And so here we are - and here are those that decided to participate this year:
   Henry Hunter [KN3RD]
   Bruce Jaeger [KE7TDR]
    Ed St. John [KD5AAP]
Pepper Sullivan [WF1RE]
  Steve Merrick [W5SDM]
Leland Pechacek [W5LMP]
   Daren Bishop [W5DTB]
Matthew Grayson [W5KER]
Final assignement update:
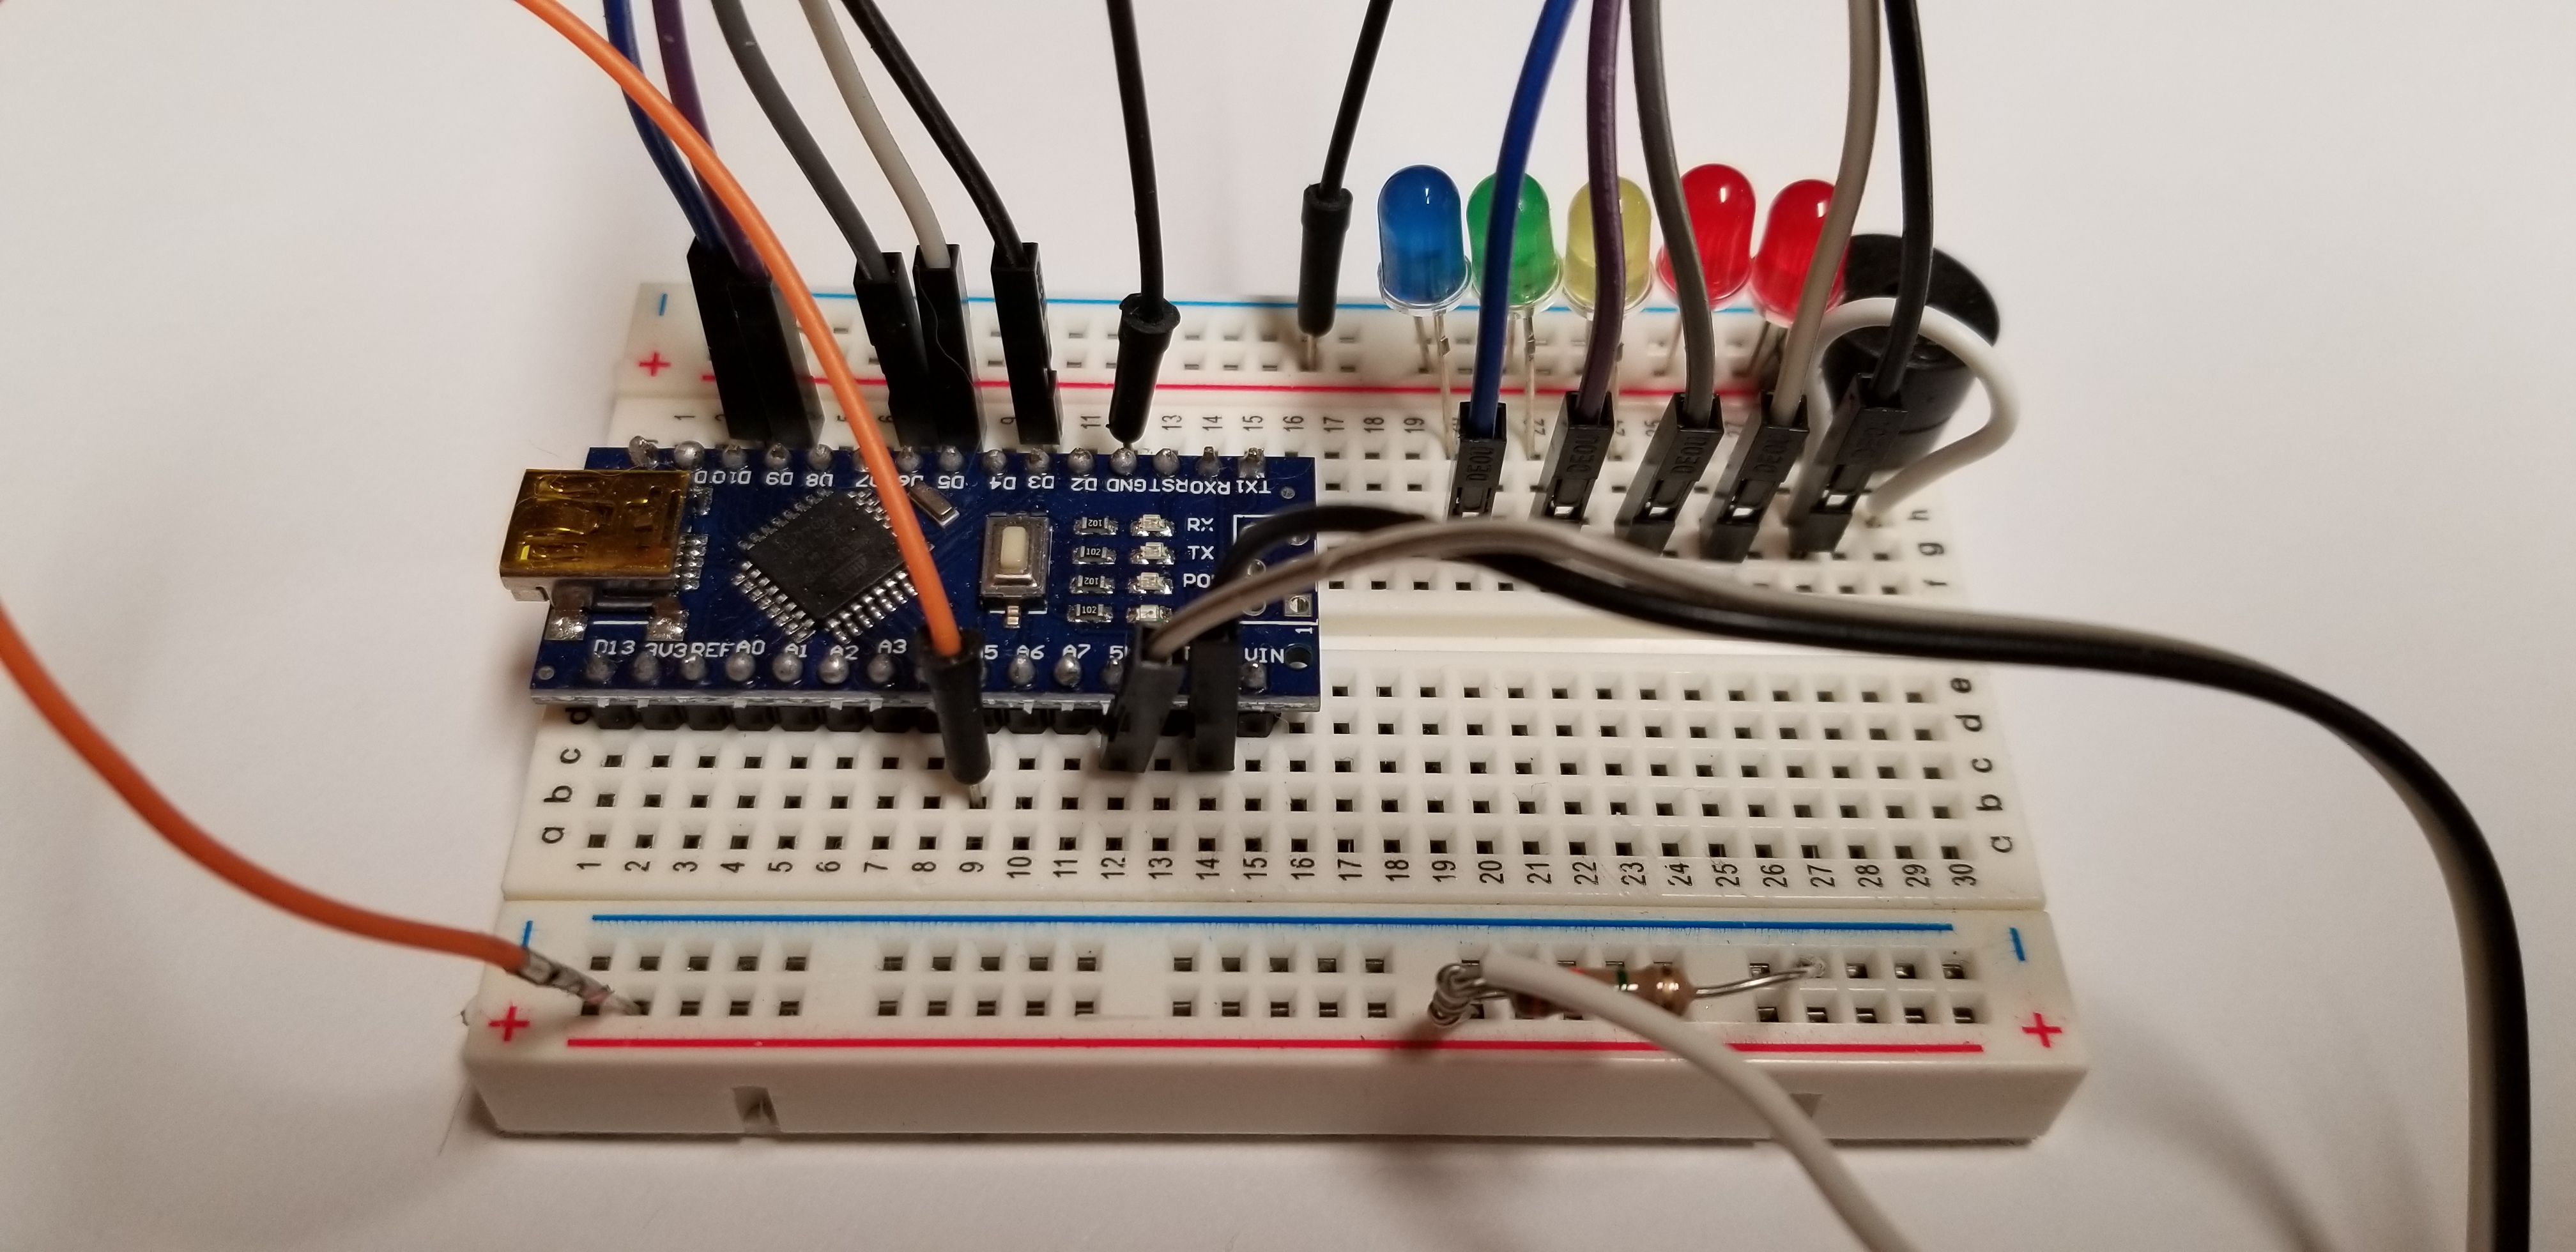
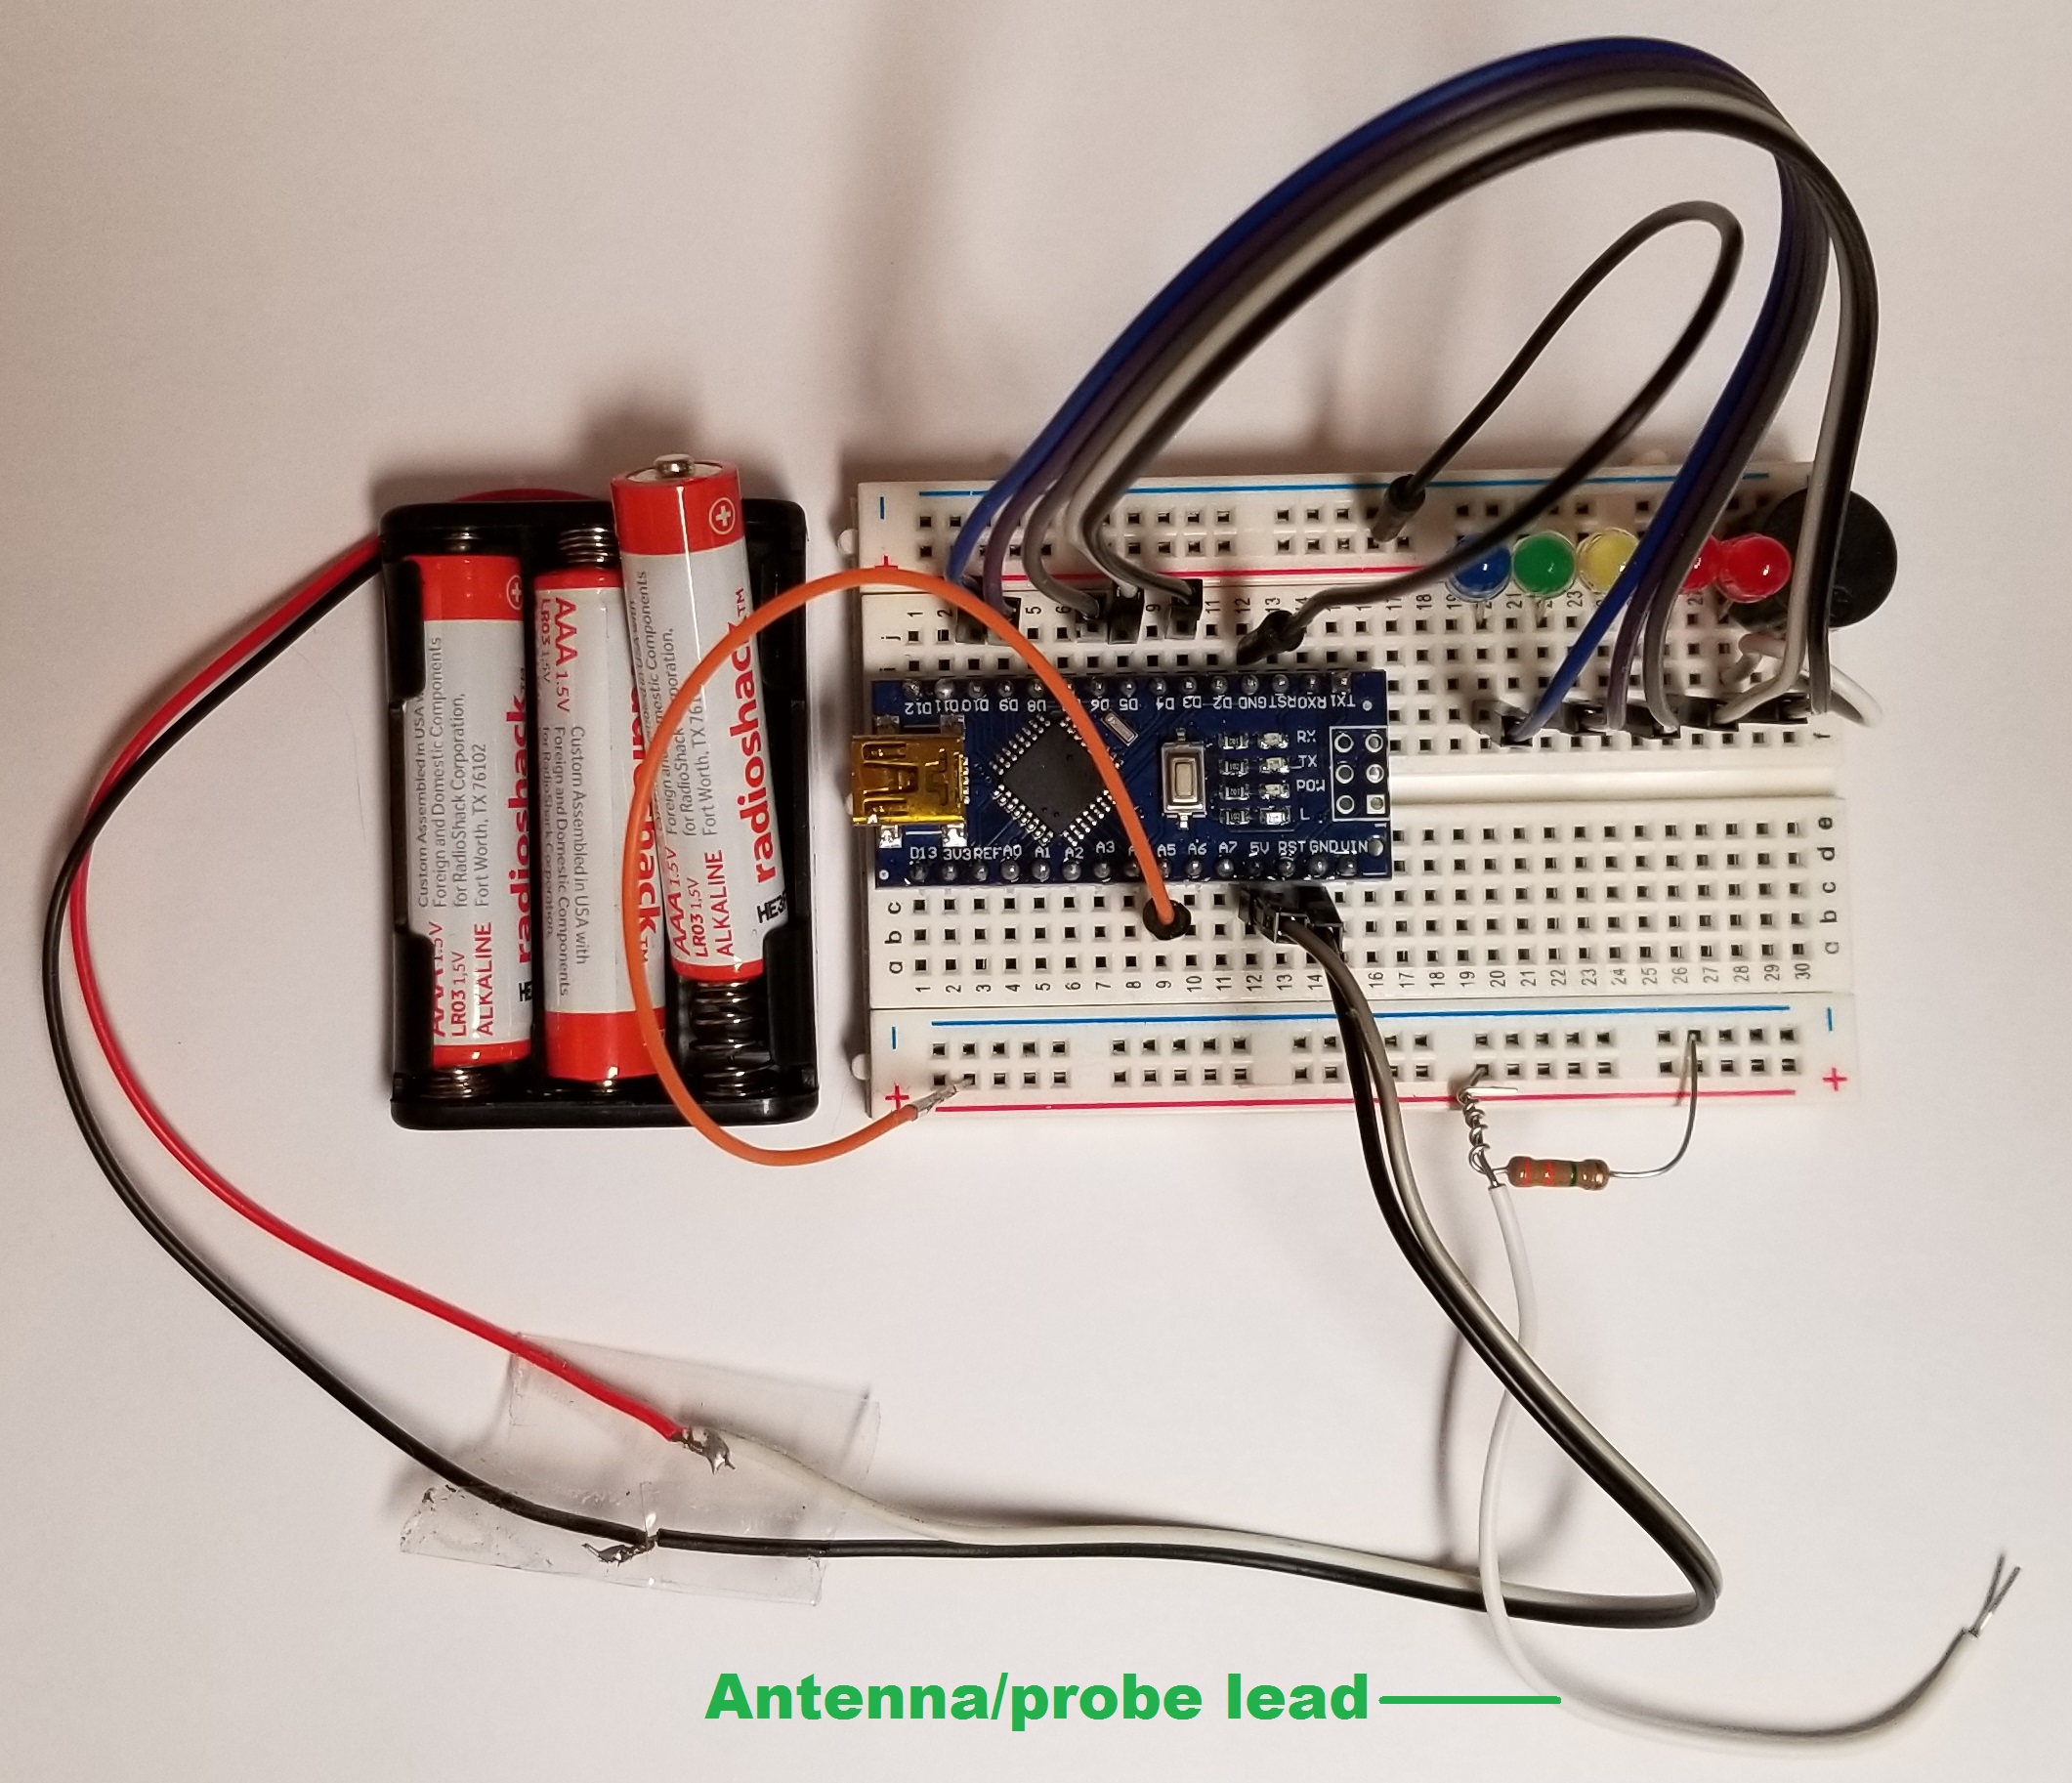
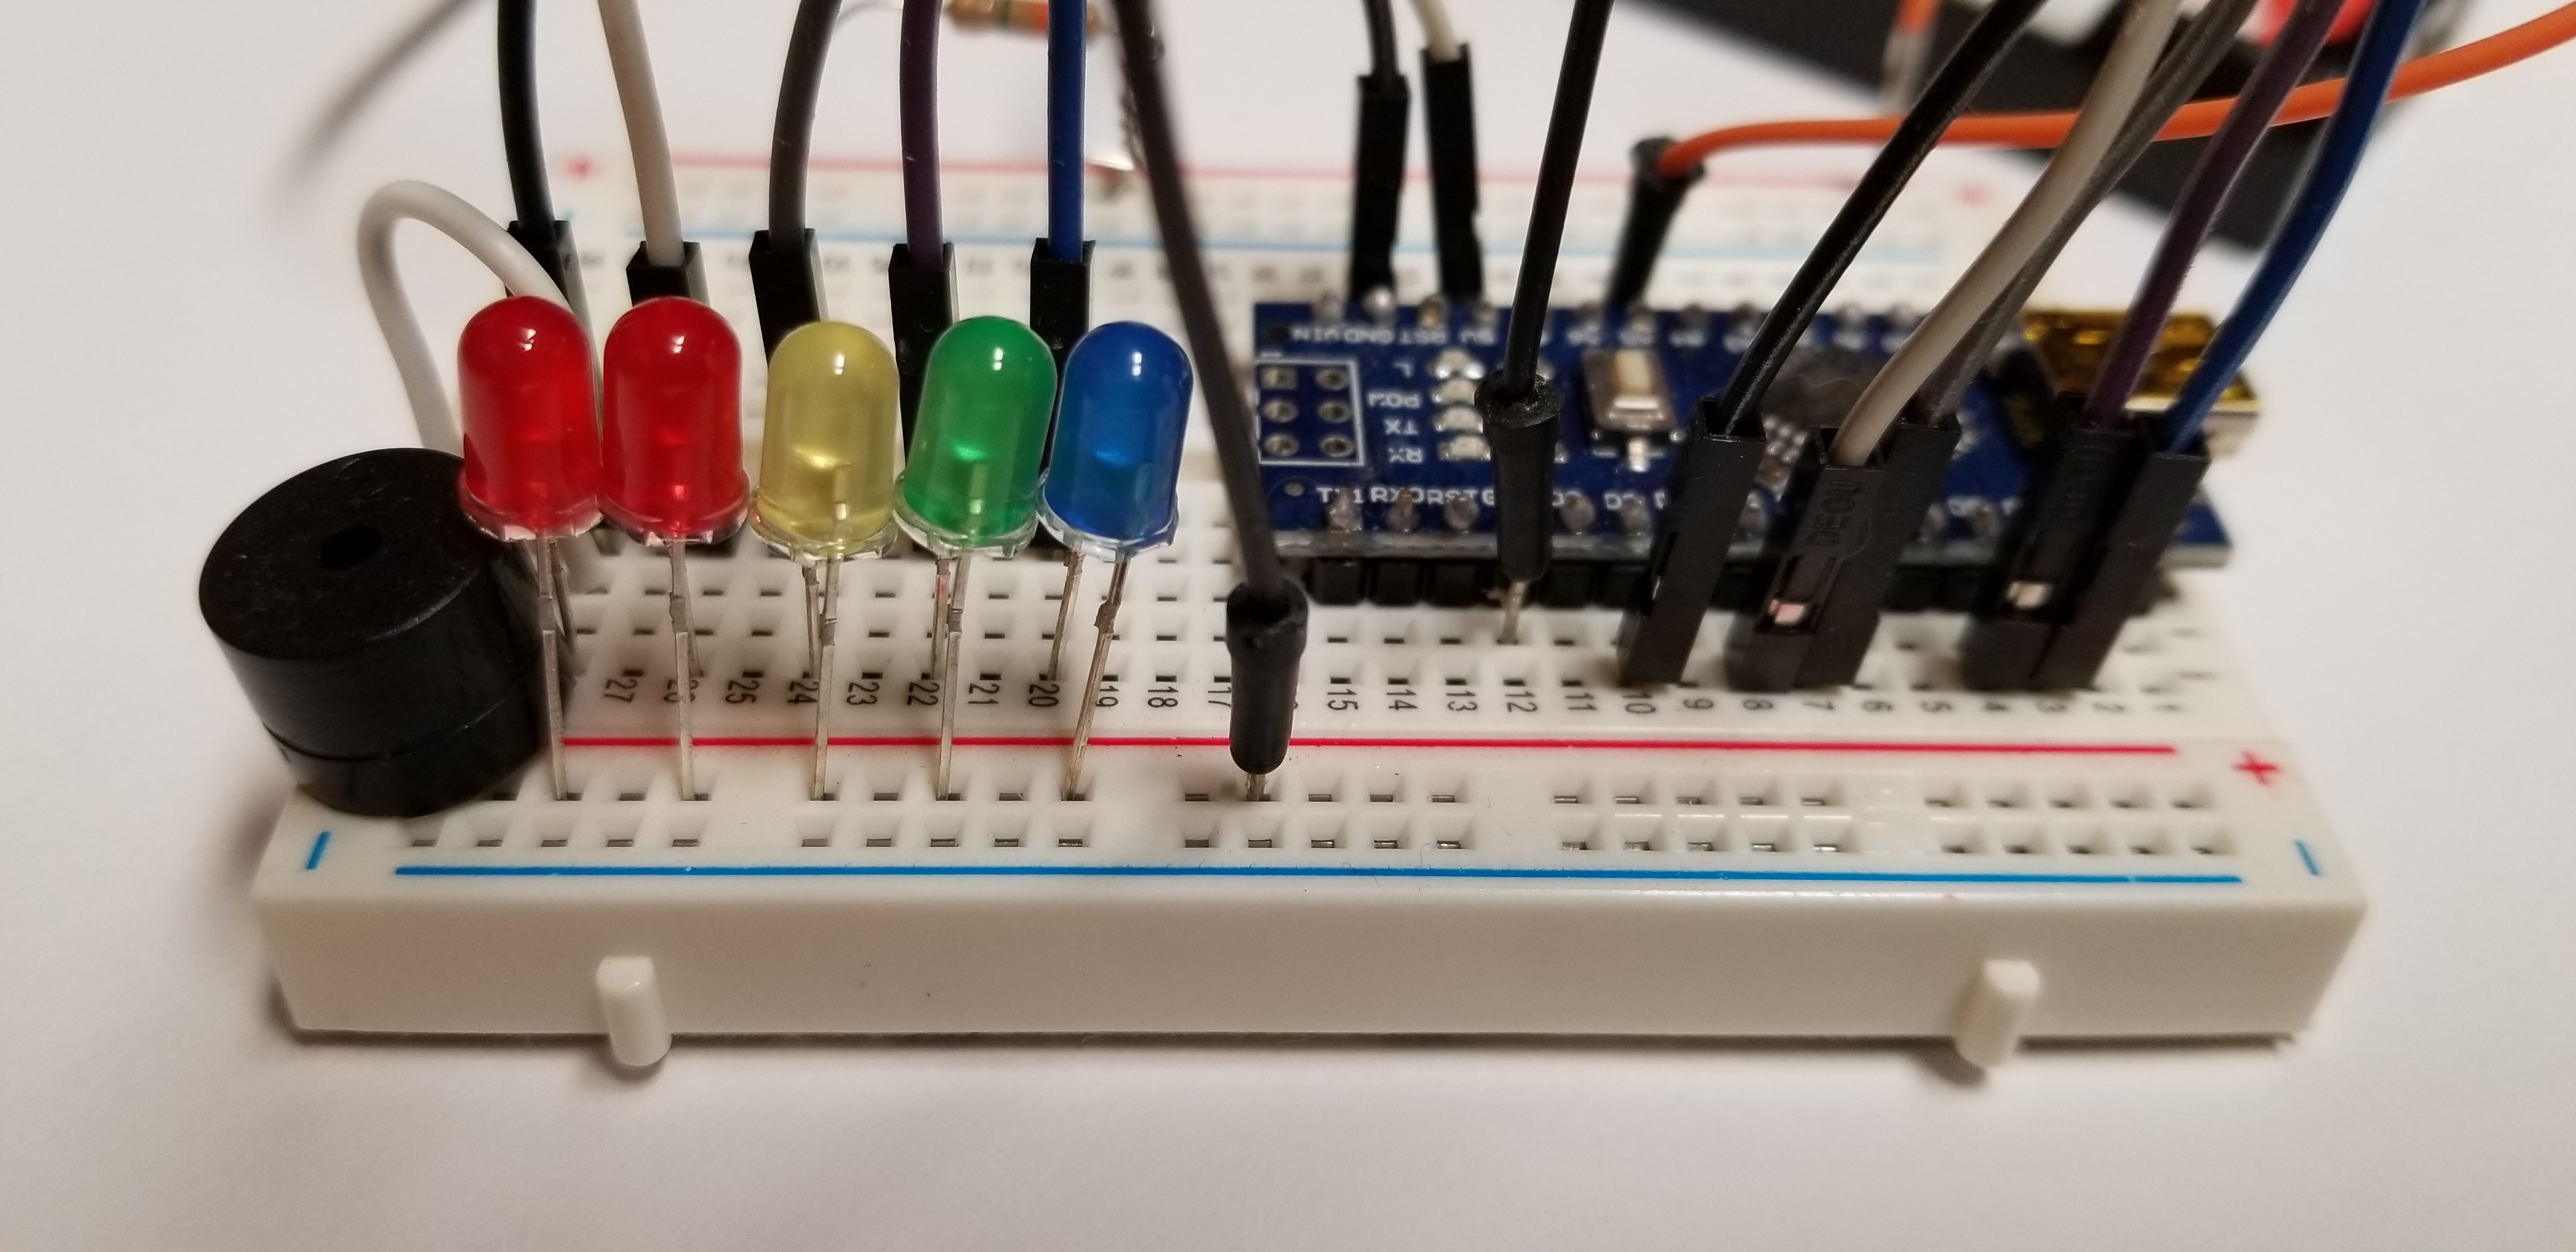
Alright folks - for anyone that is still wanting to complete their build I've included some screenshots on what the device looks like assembled on a breadboard. This should be enough to help you solder out the connections and get it working.
Also, I've inlcuded the arduino.ino source code for you to download. Click HERE to get it. You will need the Arduino compiler to use it and with your Arduino board if you want to change the way the detector works.
The Arduino compiler IDE can be downloaded HERE.
Here are the screenshots (click for full screen):
The piezo buzzer is connected directly to the +/- lines of the last RED led.


Assignement updated:
So we didn't get anyone to meet up for the build. And that's okay. I know there was a lot of disconnect on this target time. So this is what we will do. Everyone has their complete kits. That is, the parts you need. When you are ready to complete your build just let me know and I will sit down with you one on one and we will solder it out, test it, and make it look nice! Just give me a call or send me an email! Thanks all. Matthew [W5KER] ~ [email protected]
Last assignement updated:
Homework! Everyone got a chance to pick up their starter kits during the last club meeting on Monday (7/1/19). If you haven't gotten your kit it's no big emergency. You will find them in a cardboard box at the clubhouse still. So drop by when you get a chance if you like. The kits are in zip-lock bags and include [1 ea.] mounting enclosure, [1 ea.] SPST Pushbutton Switch, and 5 count Metal LED Panel Mount Holders.
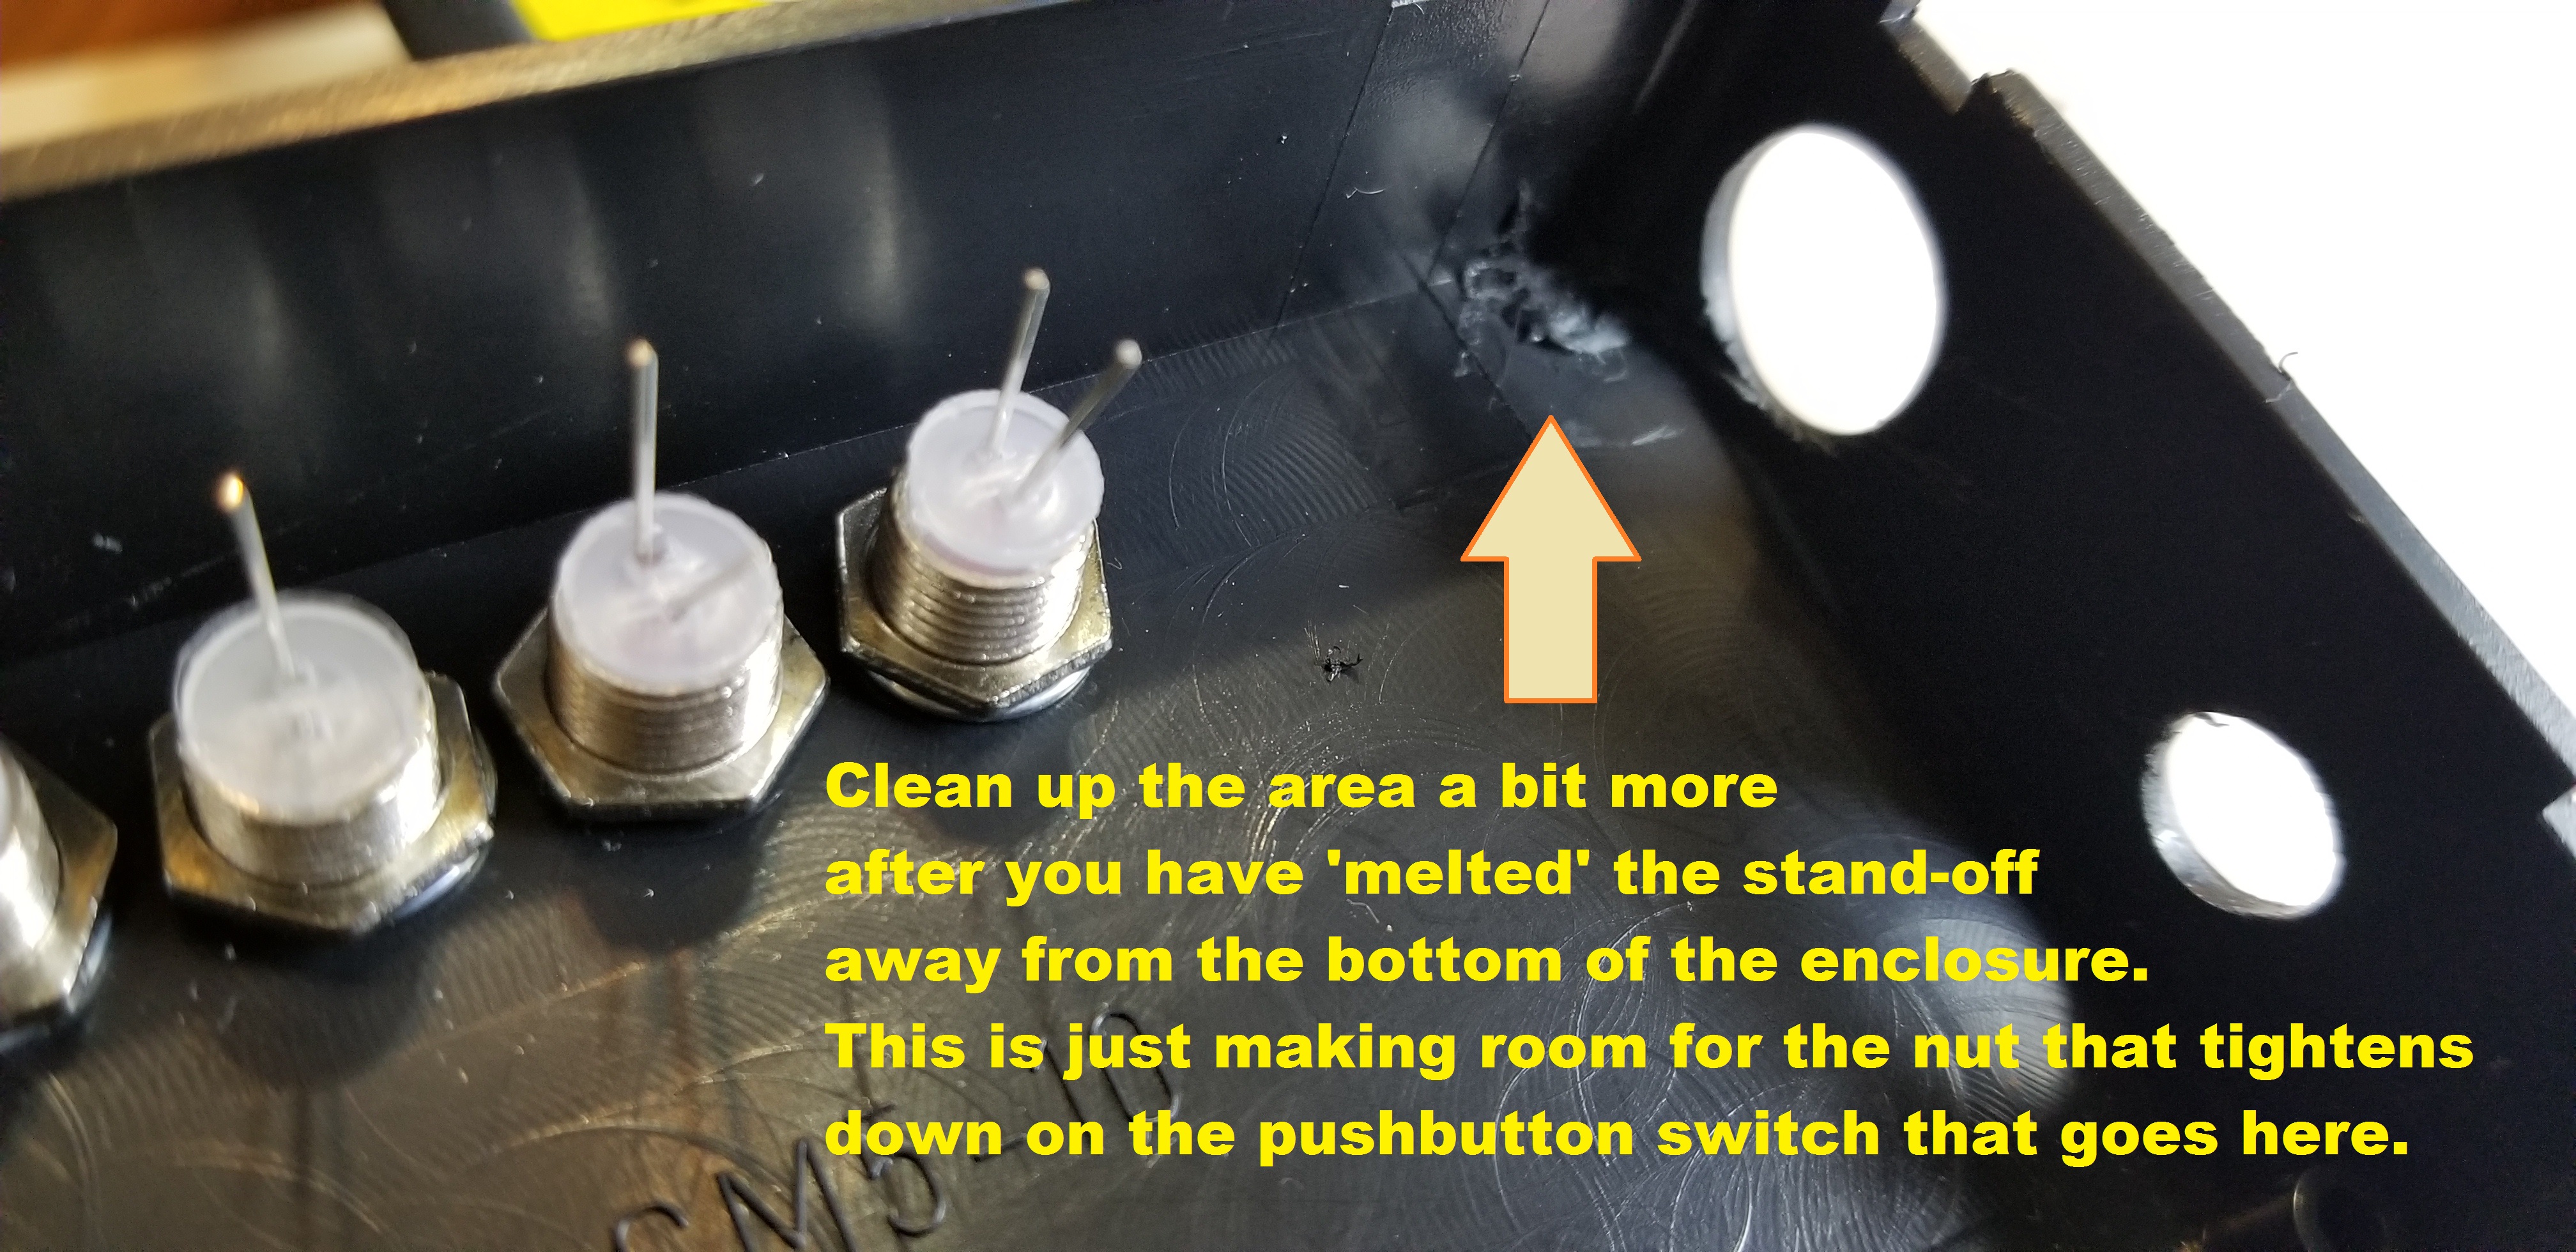
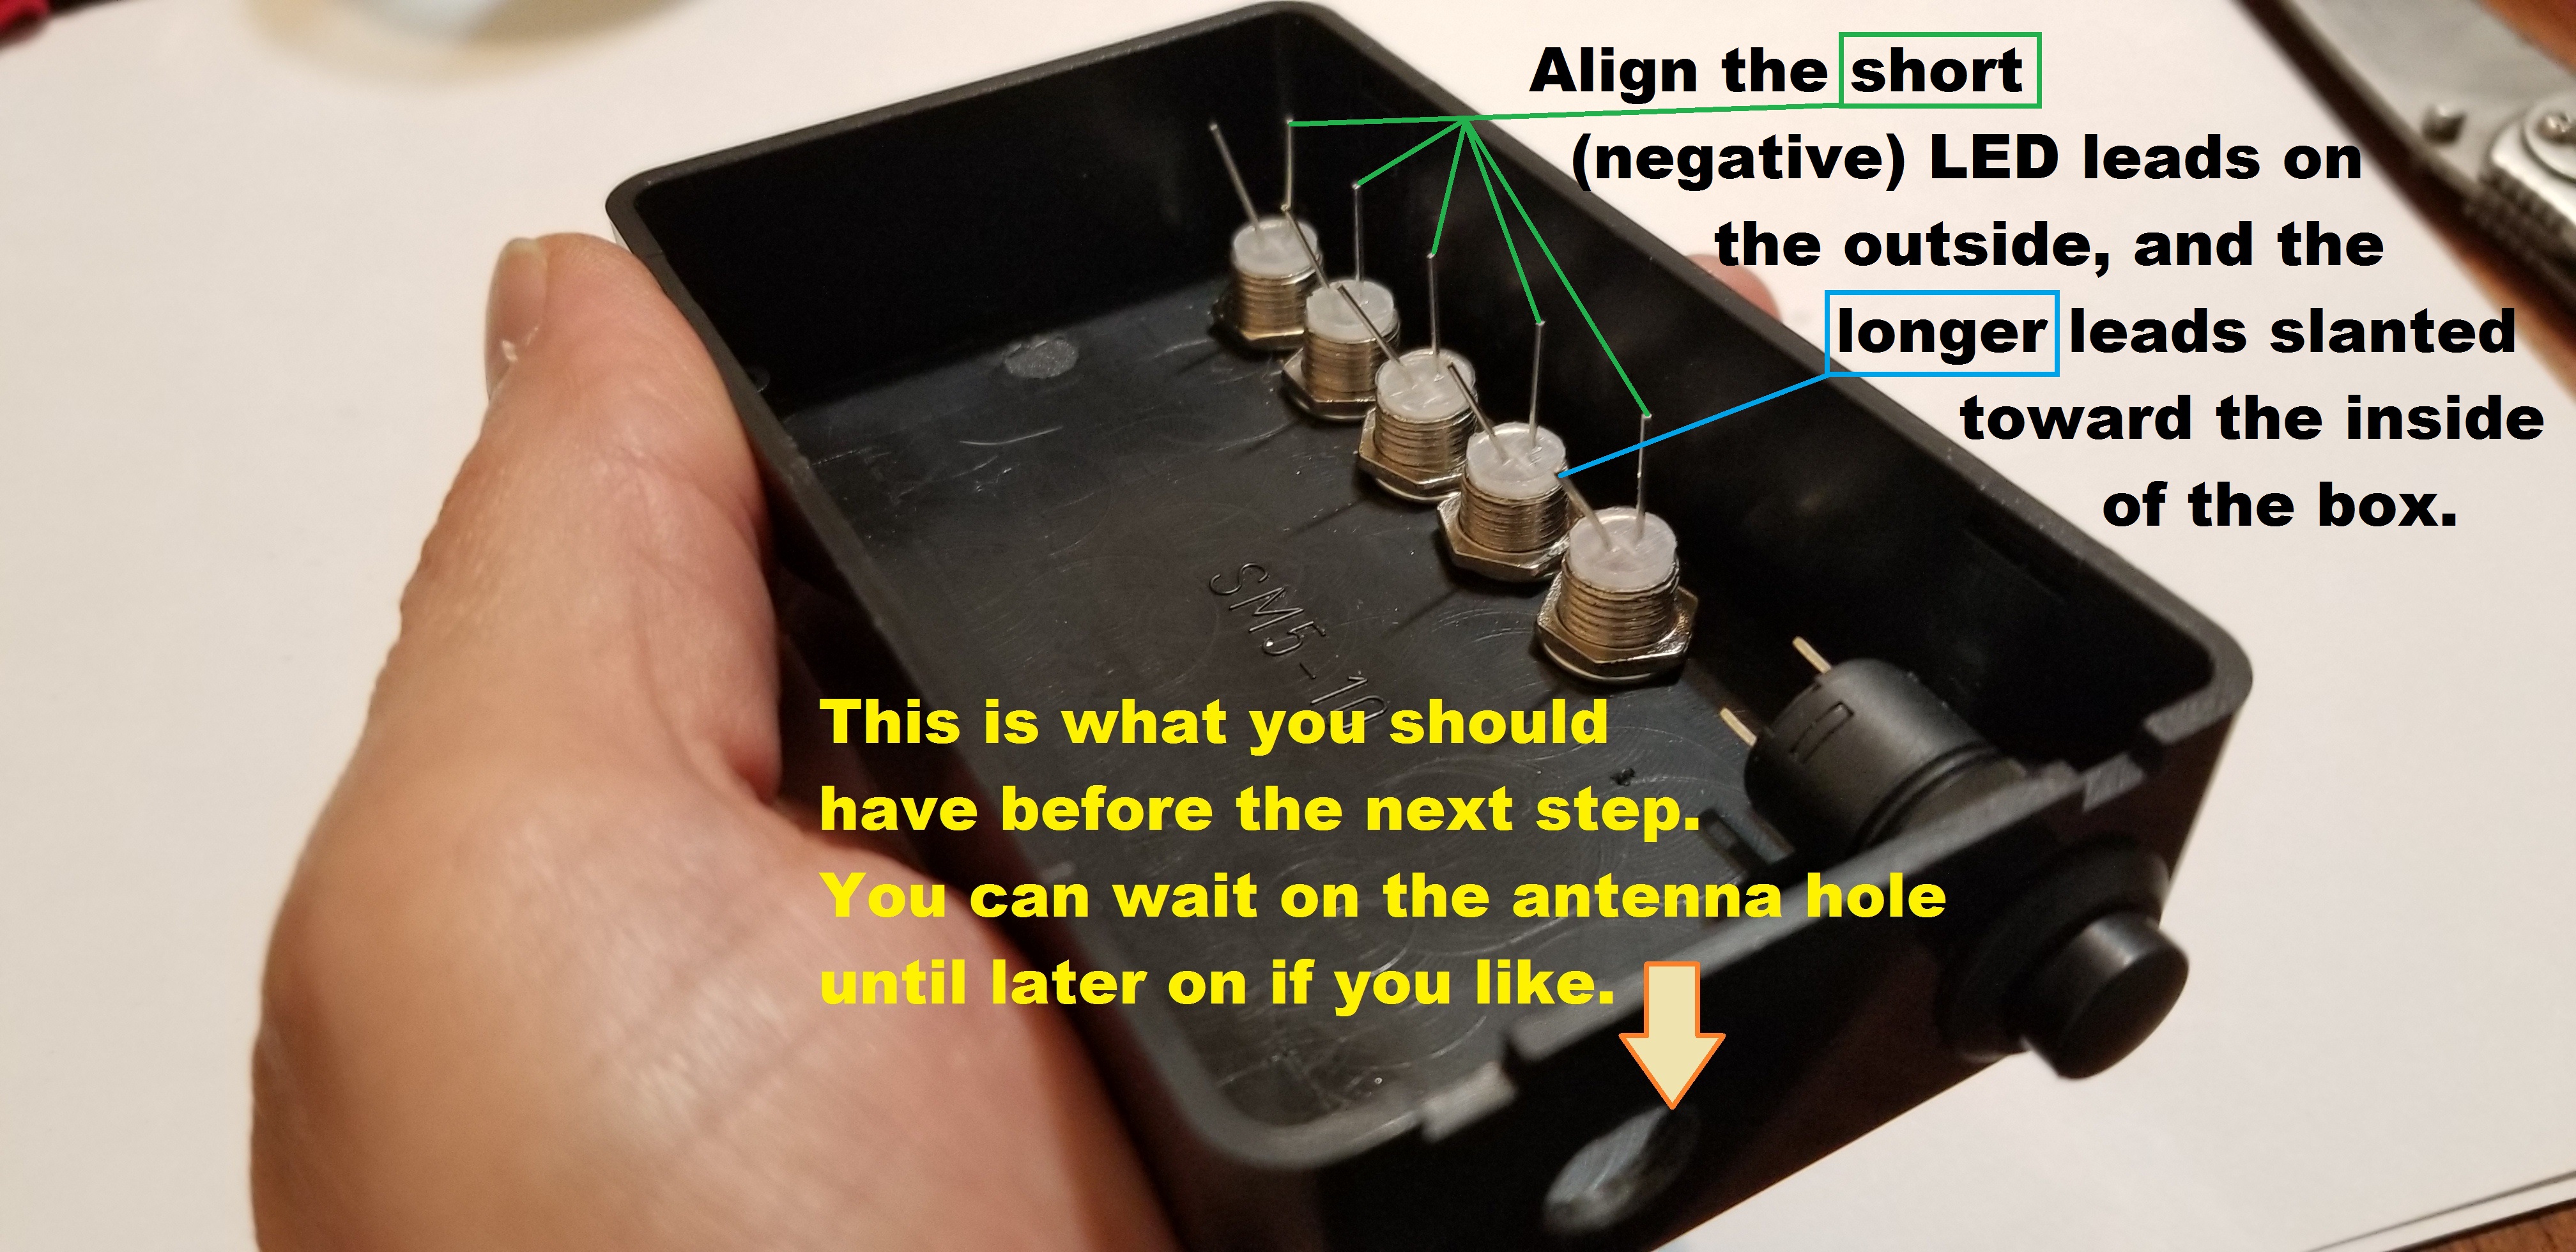
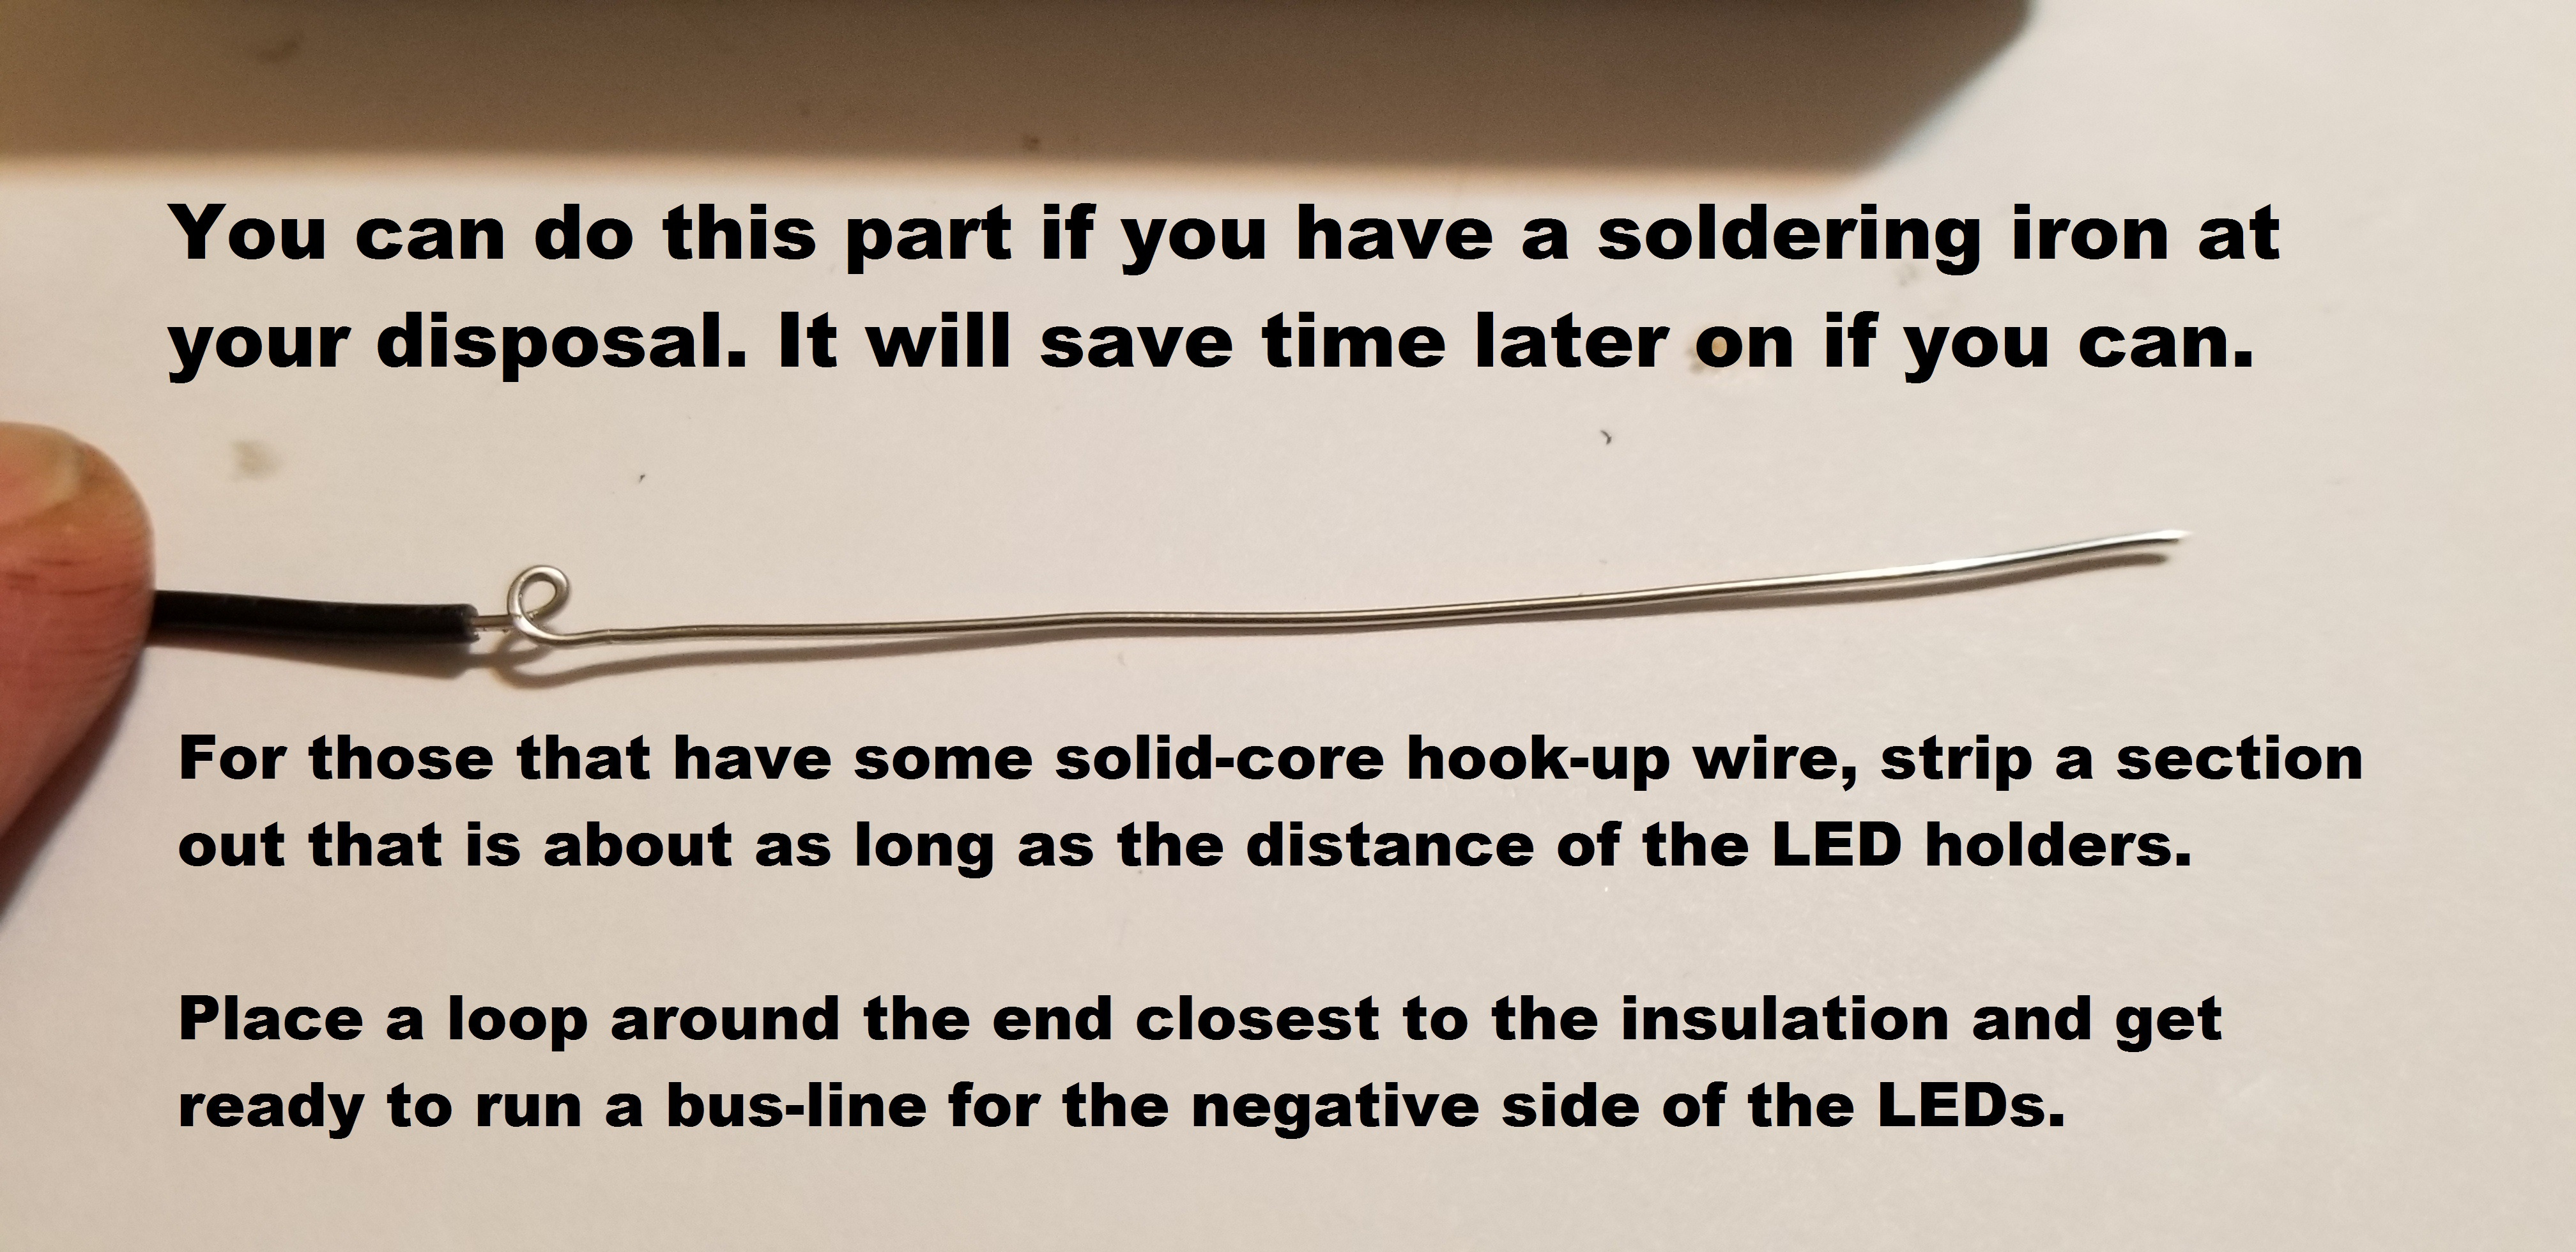
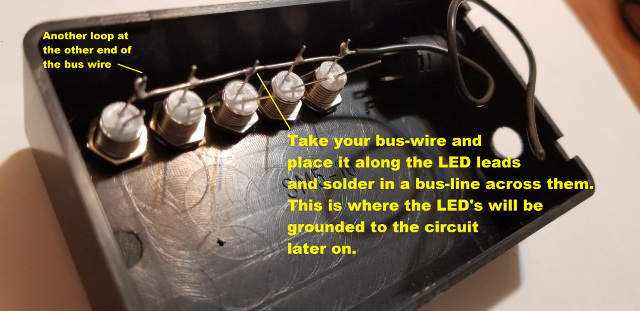
It takes some time to get the prefabrication part of our build done, and I figured most everyone can handle that part on their own. You just need a drill and some patience. If you feel uncomfortable doing it on your own then don't. We can do it later in a group. But getting this part done will mean more time to focus on the difficuly of soldering the components together later on. So here's the first steps on the pre-fab part:
First: You will need to make sure you have the coverplate templae. This will help you mark the holes where the LEDs will be drilled out for. These are with the kits at the clubhouse. Cut one out for your project. If you need to print your own you can download this image (click to download):
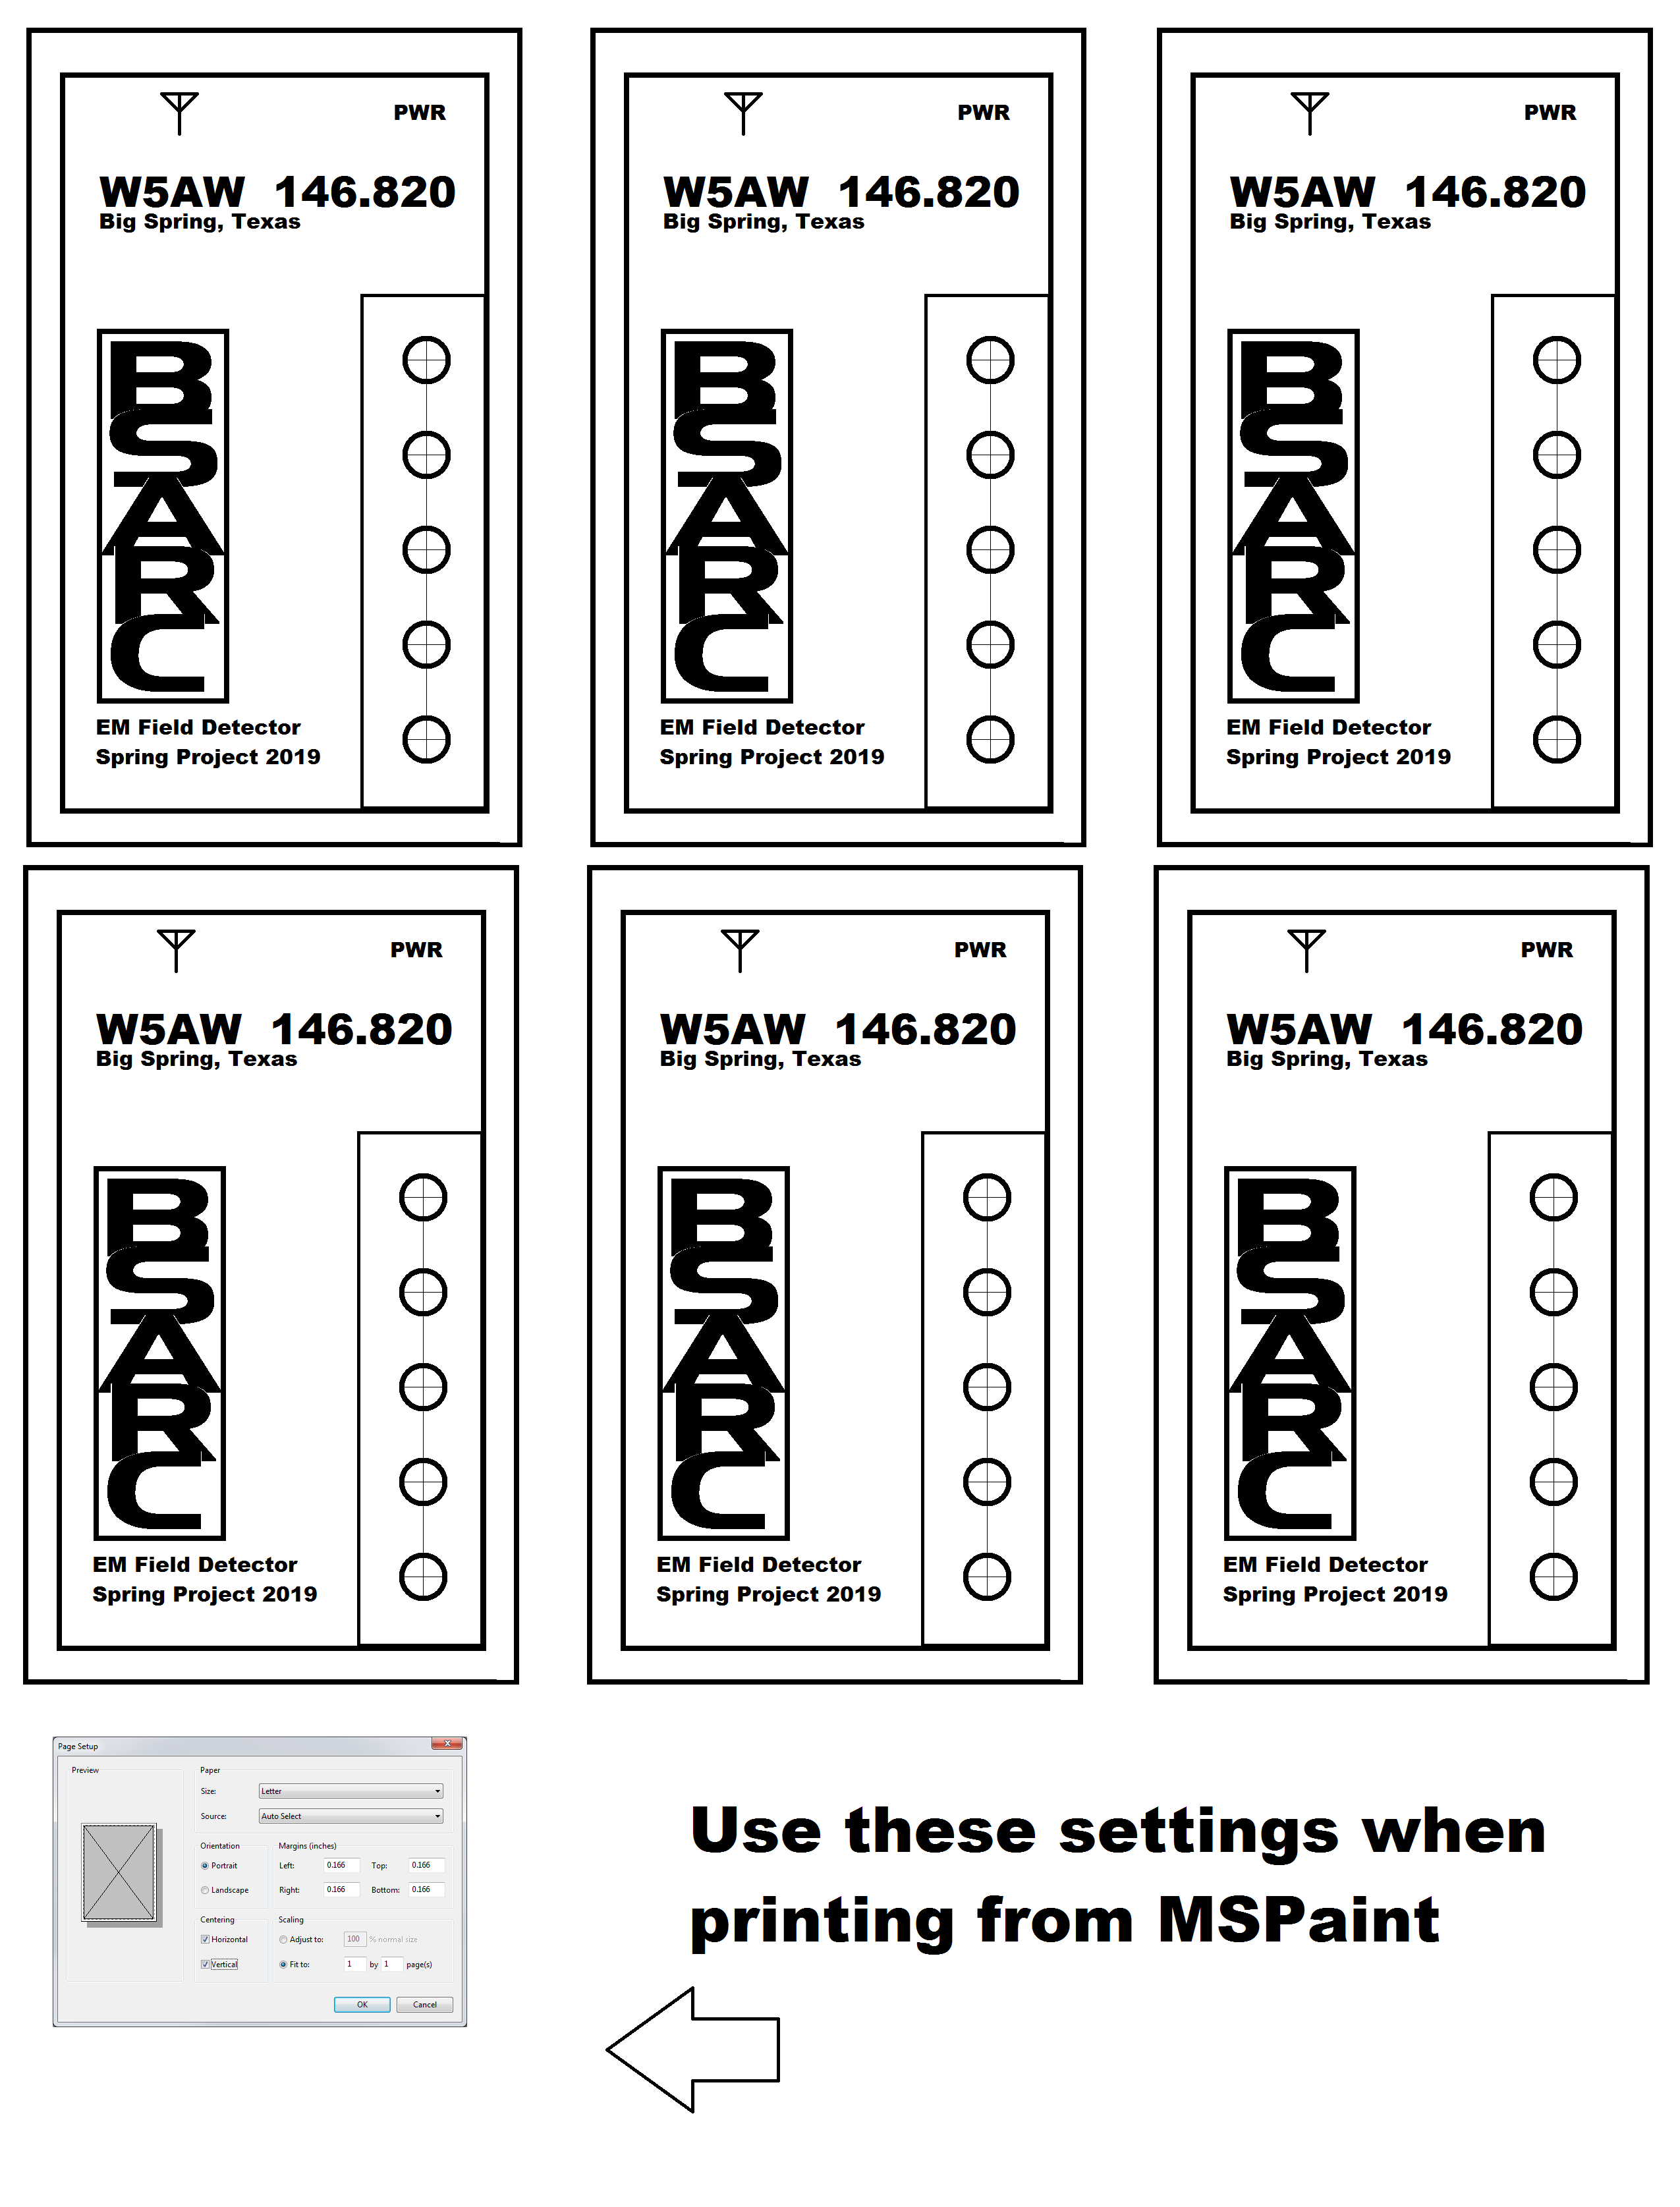
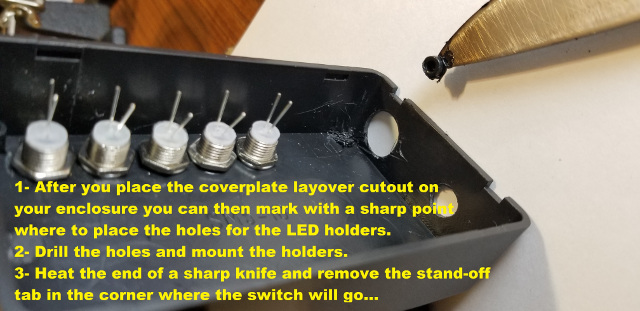
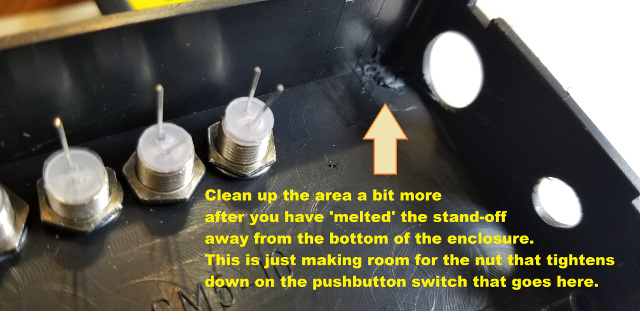
Cut-out the inner rectangle and place it over the enclosure and mark your centers for the LED holes... After that, follow the next steps illustrated below. Note: you can click on these images to zoom them into a new tab or window if they are too small for you to read.

And that's all for now folks. More to come. We will schedule a build time fairly soon. Any requests for a good time are welcome. Otherwise it will be on a Saturday afternoon like it has always been so far.
-end of document-
|