Getting Started
Ready to Copy - ARRL
National Traffic System - Message Management
Copyright
2014 - D. Lane Kendall WK4WC
The best way to learn RTC is by using it. This section will guide you through creating your first radiogram.
Launch
RTC either from your desktop shortcut or by clicking on the
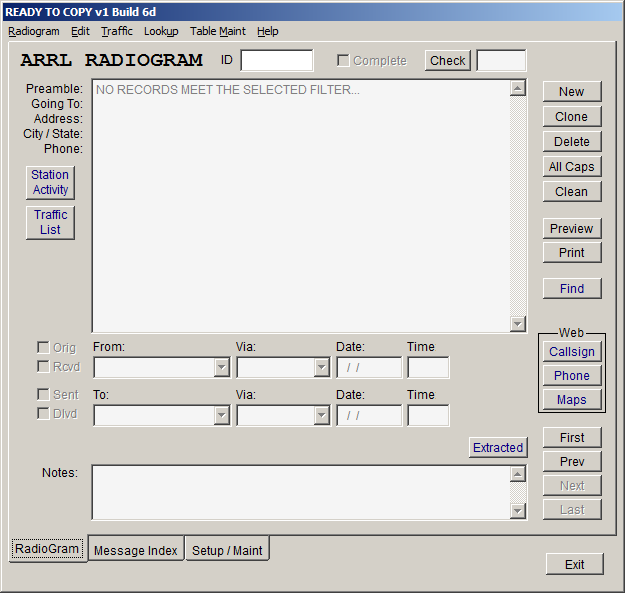
executable file. For a new installation, you should see a screen like
the one below. The message on the screen below indicates that no
records match the selected filter. In this case there are no records
in the database.
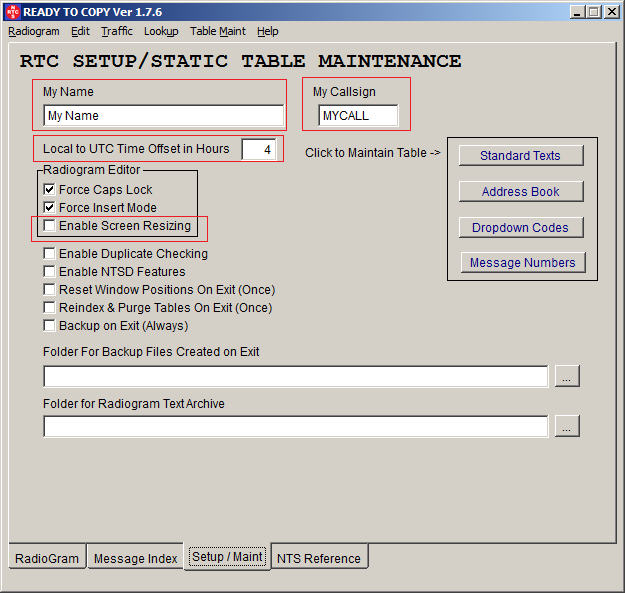
Before you proceed, click on the "Setup/Maint" tab of the main screen. Enter your name callsign and the UTC offset for your area. This would be a good time to enable "Screen Resizing" if you like. Click HERE for details.
That is enough for now. Go back to the "Radiogram" tab.
Whether you are receiving a radiogram from another station or generating outgoing traffic the process is the same.
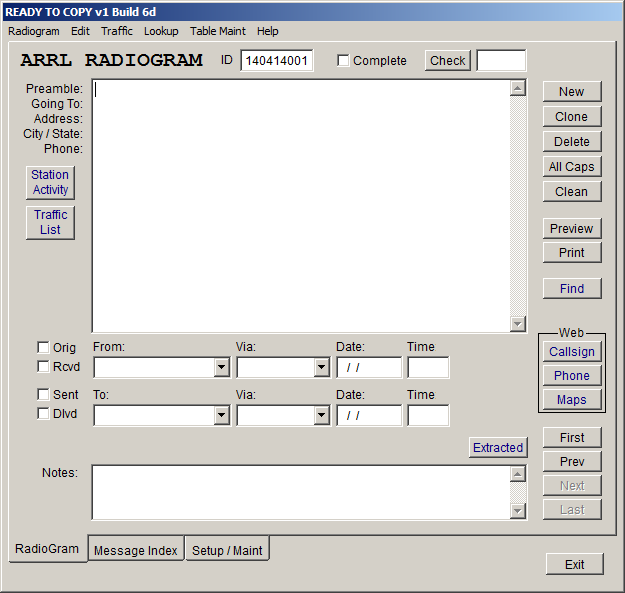
Create your first radiogram by clicking the ‘New’ command button. All the controls on the screen will be blank except for the ID which is generated by the system based on the current year, month, date and the number of messages already generated for the current date.
Type the new radiogram as you would in any other editor starting with the preamble. As soon as you start typing the label on the Check button turns red. This alerts you that a change has been made.
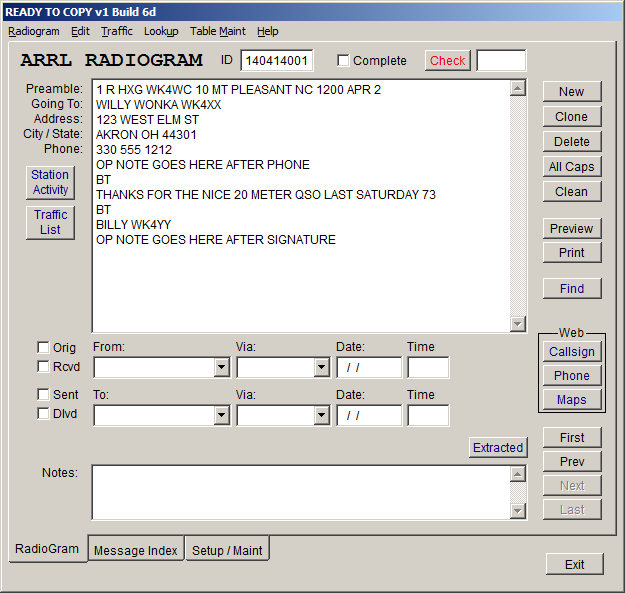
The first 5 lines of the radiogram must align with the labels on the left side of the editor. The Preamble, To, Address, City and Phone must be on the same line as the corresponding label. Additional telephone numbers should go on subsequent lines.
Radiograms are typically transmitted in exactly this order. This is important because RTC relies on this formatting for data parsing and for many other functions.
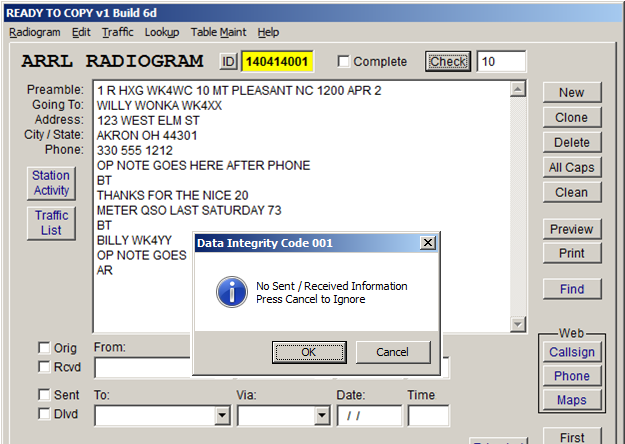
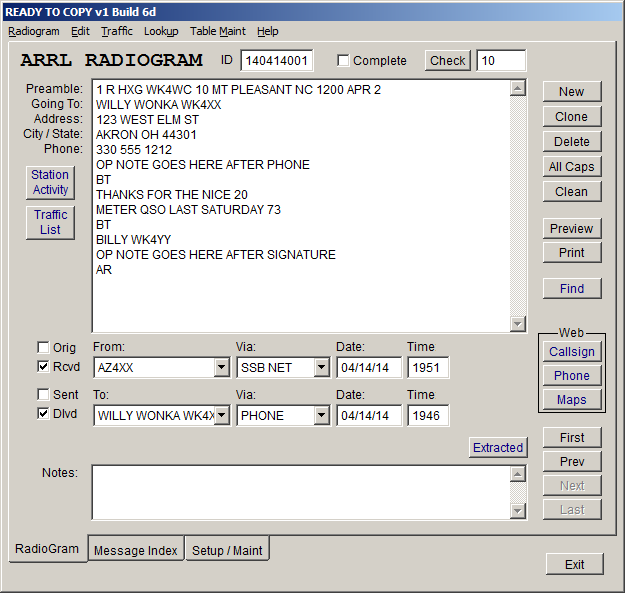
When you have finished typing the radiogram it should look similar to the one pictured below. Optional Op Notes are positioned as on any radiogram, after the phone number and / or after the signature. Op notes are not limited to a single line. They can consume as many lines as needed.
The most important part of RTC radiogram formatting are the breaks. In order for RTC to function properly, there must be two (and only two) breaks (BT) and they must be the only characters on the line. This designates where the text of the message begins and ends.
When you have finished typing the radiogram it is time to run Check. This can be done by clicking the Check command button or typing Control + K.
Check refers to a subprogram that processes the radiogram information. A partial list of functions follows.
Format the message text into lines of 5 words each.
Count the number of words in the message text and compare it to the check in the preamble.
Perform data integrity tests to ensure the preamble is correctly formatted and complete and the message will be accounted for properly in the station activity reports.
Extracted data from the radiogram that will be used for other program screens and functions.
After “Check” runs the message text may be reformatted. The textbox to the right of the Check button contains the number of words that RTC calculated in the message text. If it were different than the check entered in the preamble, the text will be red calling attention to the discrepancy.
To become familiar with this feature, make changes in the message text or the check in the preamble. Run Check after making changes and observe the program’s behavior. RTC also works with preamble checks containing “ARL”.
At this point the message ID field background turns yellow and the ID label becomes a command button. This is expected and alerts the user to the fact that there is no sent or received data has been entered. To see the exact error, click the ID command button.
For our example, click the Received (Rcvd) checkbox. The current time and date will auto-fill the date and time fields. This feature works especially well if you are taking traffic directly in RTC. The date and time auto-fill can be adjusted to an offset to allow for UTC on the Setup/Maintenance screen.
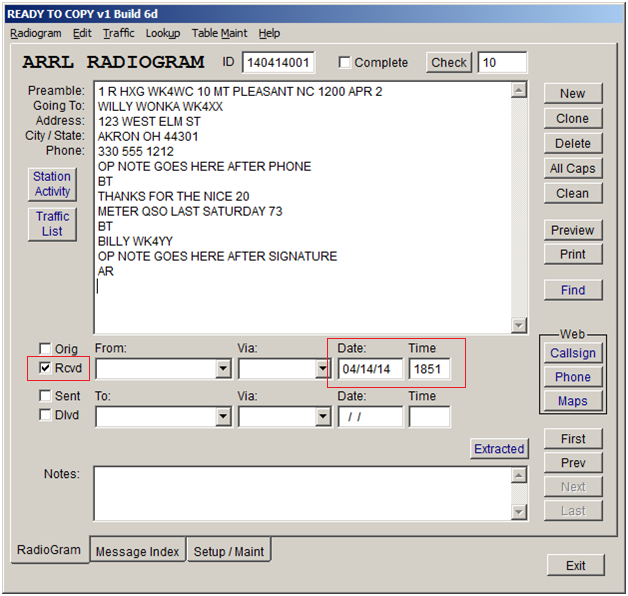
The ID field will change to black on white and the ID command button will change back to a label because the data integrity rules are now satisfied.
Received, Sent and Via Information
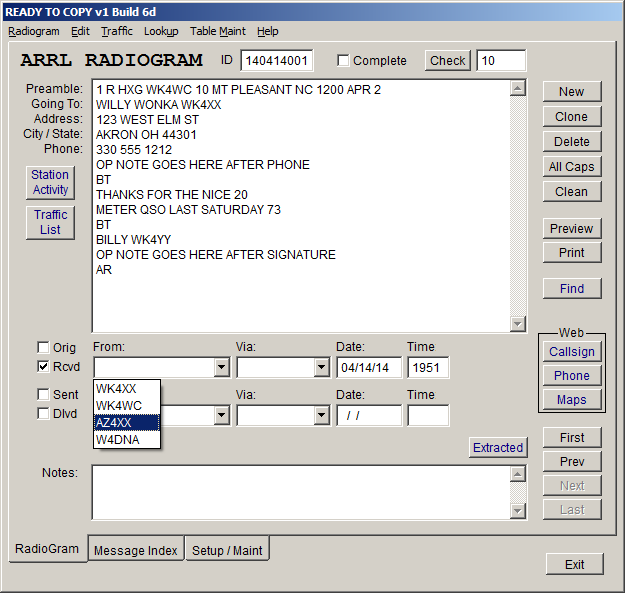
The next step is to record the how the radiogram was received. The From and Via fields are not required but are displayed on the station activity report if they are present. The content of these fields can be input by selecting from a dropdown list or typing into the textbox.
In the example below “From” information was selected from the dropdown list.
In the example below, "SSB NET" was typed directly into the Via field.
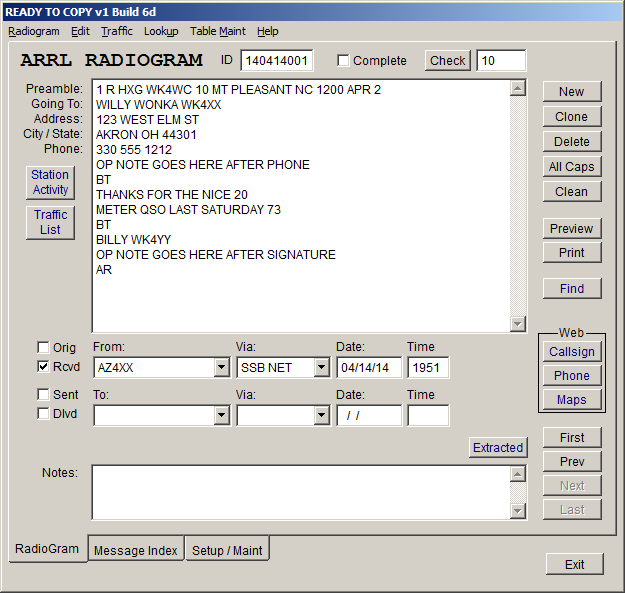
If
you manually enter from or via information by typing it into the
textboxes, that information will be displayed as a selection in the
dropdown list until you exit RTC. Maintaining your own information for
the dropdown lists is covered in the Setup/Maintenance section.
When
you send (relay) or deliver the radiogram click either the Sent or
Delivered (Dlvd) checkbox. The current time and date will auto-fill the
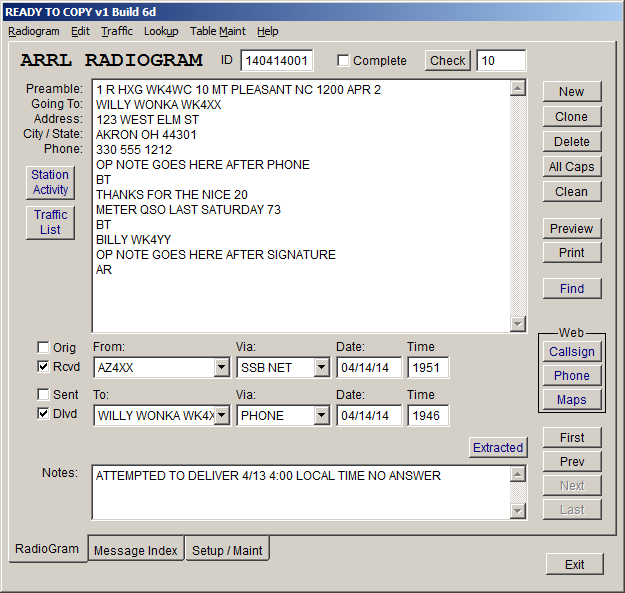
time and date fields. In addition, if you click the Dlvd checkbox RTC
auto-fills the To field with the recipient’s name.
Complete the Via field as before.
The Notes field is a handy place to store any information about the radiogram. Attempted delivery info is only one example.
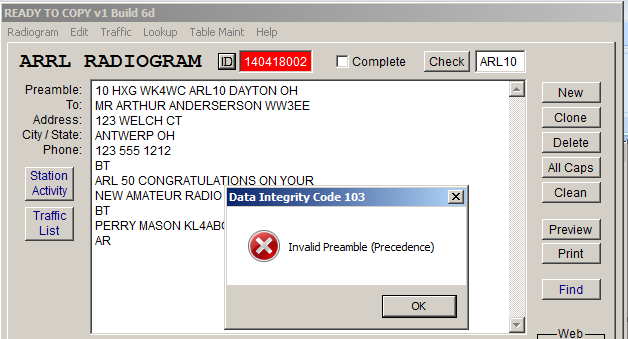
RTC performs data integrity evaluations on the message preamble during the “check” process. These include checking for a message number, precedence, station of origin etc. In the example below, the precedence is missing from the preamble. After clicking the check button, the message id field is white on red indicating a preamble data integrity issue. The ID label becomes a command button. Click the ID command button for details about the problem.
Missing or invalid breaks "BT" will also cause a white on red message id.
None of the errors above will stop the program. If these errors occur they can be corrected. The white on red alert message lets you know that there is a problem with the radiogram that should be corrected to preserve the validity of the radiogram for delivery passing to another station.
This message does not prevent the user from proceeding but calls attention to the fact that there is a problem with the preamble or breaks "BT". Correct the error and run “Check” again to clear the error.
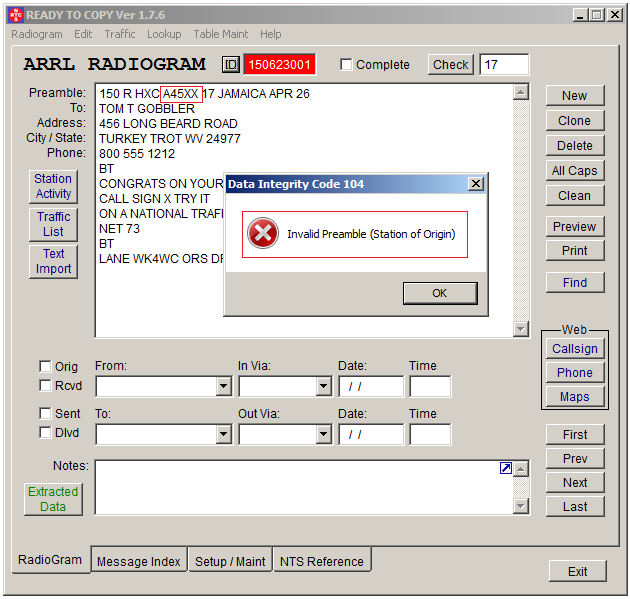
If the "station of origin" callsign is invalid an white in red message id will result. Version 1.7.6 introduced support for foreign or unsusal callsigns.
Support for foreign (or other unusual) Callsigns
Ready To Copy will report an error if the callsign in the preamble is invalid. Also an invalid callsign cannot be extracted for later use by the callsign lookups. The RTC callsign verification routine consists of a simple set of rules. A callsign will consist of 1 or 2 letters plus a single number plus 1, 2 or 3 letters. This works for all US callsigns and most foreign callsigns. As traffic handlers we seldom deal with anything other than US or Canadian callsigns BUT it can happen. For example Jamaican callsigns begin with a number like "6Y3B". Callsigns for Oman can have two numbers like “A45XX”. During the ARRL Centennial celebration callsign W100AW was used. Either of these exceptions will cause RTC to report an error.
In this rare circumstance, simply create a new record in the Address Book for the foreign callsign. For unusual callsigns the name and address are of secondary importance but can be entered if you like.
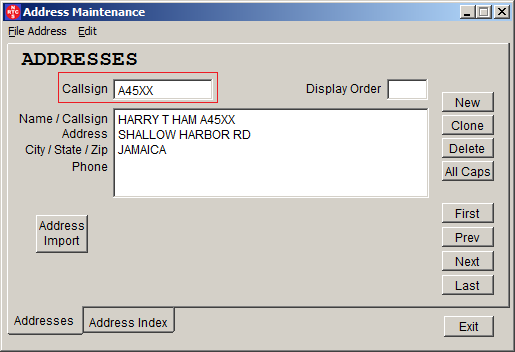
Go back to the main screen and click the “Check” button. The error will clear because RTC will now consider any callsign in the address book as valid if it fails the normal verification routines.
View/Print Message (Radiogram)
Many traffic handlers prefer to keep paper copies of their messages. RTC has two command buttons on the main screen for printing the message. The “Print” button sends the message directly to the default printer. The “Preview” button launches a preview of the radiogram with the option to print. This feature is particularly useful if you need to print the radiogram for to a document file. There are free printer drivers that allow creation of PDF and DOC files.

Station Activity Screen and Printed Report
One of the most powerful features of RTC is the ability to calculate your traffic count almost instantly.
Click the Station Activity command button. Your new radiogram will be counted as 1 message received and 1 delivered for a total of 2. The current month is selected by default. To view another month’s report select the Month and Year in the month dropdown and year textbox, then click “Requery” to refresh the screen.
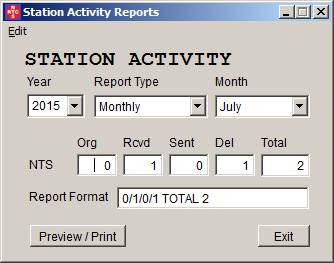
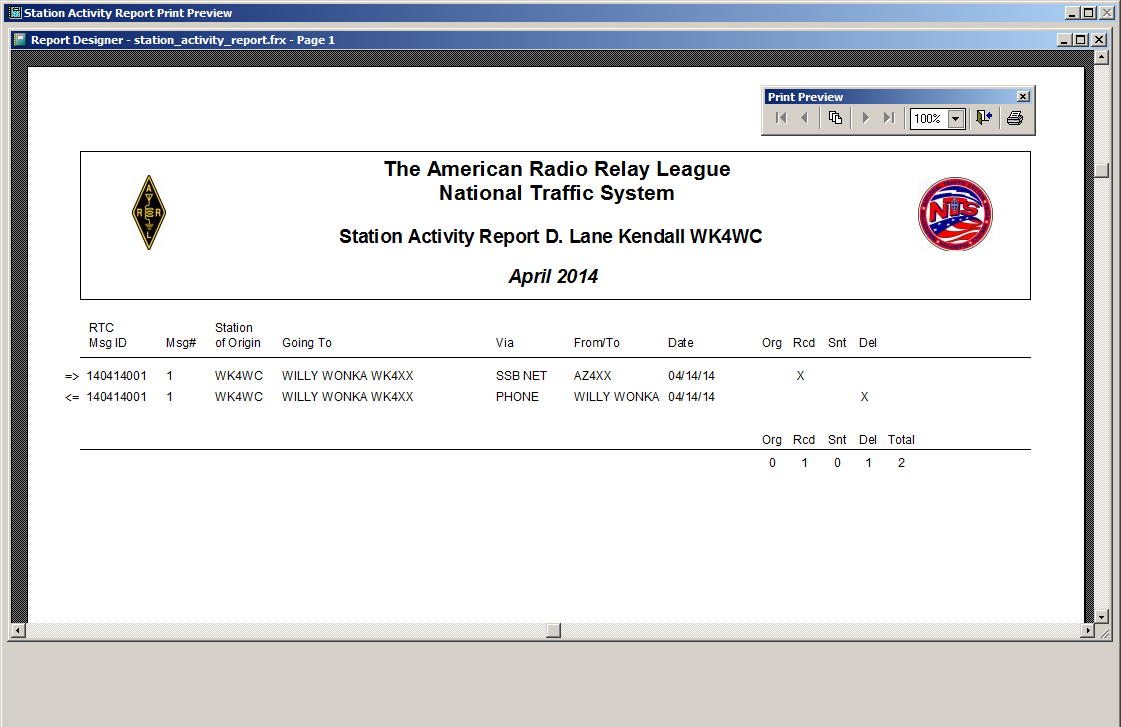
Click Preview/Print for a detailed report that can be previewed or printed.
Details of the printed report will be covered the “Using RTC” section.
Now that you have successfully created a radiogram in RTC you are familiar with the program’s core functionality. Read the “Using RTC” section to learn about more features and tools. The “Navigation” section describes how to move around in the database, find messages and use the filter function to view only the current or active messages.