

An Experiment with a Rocket Stove - page 5
This is another experiment where I tried to make an easy to construct, efficient, very low cost rocket stove for use by one person or possibly a small family. The interesting thing about the "rocket" stove concept is that once you get the basic principles down, a useable design can be made from materials that are available almost anywhere.
1. Combustion air needs to have access to the entire surface of the fuel for
best efficiency.
2. The more surface area of the fuel, the faster it will burn. Charcoal and ash
on the outside will restrict the ability of air to come in contact with the
fuel, so the wood diameter needs to be kept below about 1" for best efficiency.
3. Combustion is driven by the flow of the hot exhaust gas. A chimney, even a
relatively short one, 12" to 24", preferably insulated, will give the pressure
difference needed to draw in air.
4. Minimizing the fuel opening size will help the stove draw supply air in from
the air inlet, usually underneath the fuel, rather than over the top of the
fuel.
5. Anything that cools the fire will drop the speed of the exhaust gas, drop the
efficiency, and cause smoke. Pre-heating the incoming air, adding fuel slowly,
using dry, small-diameter fuel will help minimize the temperature drop.
6. The stove needs a way to transfer the heat from the exhaust gas to the food
being cooked or the gain in efficiency of the stove is wasted. A "skirt" that
forces the hot gas from the chimney against the cook pot as it exits the oven
greatly boosts the cooking efficiency. Basically, it's just a simple heat
exchanger, but made to the proper size for the cook pot, it can make a large
difference in heating.
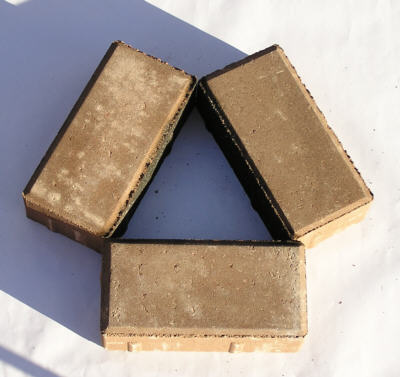
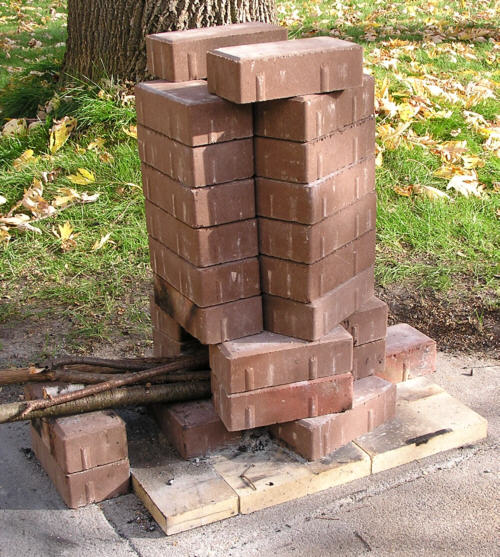
I decided to try making a stove from brick, as brick can be obtained almost everywhere. As in the previous design, the retail cost is under ten dollars. The "paver" bricks that I used are available at most large hardware or landscaping supply stores in this country. They are often on sale, especially in the summer, for 30 to 40 cents apiece. Hand-made bricks could be used also. They may not last as long as fire brick, but these stoves don't need to last for years. After trying a few different combinations, I settled on the design on this page. It can be assembled in a matter of minutes. Another course or two of bricks in the chimney couldn't hurt. This stove has much more thermal mass than earlier designs and will take a little longer to heat up, but it will keep the coals hot and retain heat for quite a while after the fire goes out.
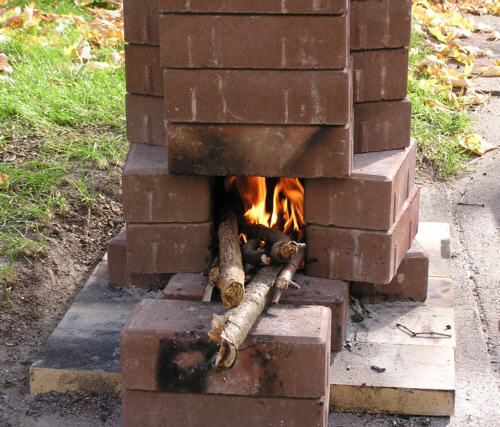
This test unit consists of a complete wood stove. If the wood is over a foot long or so, an external support for the wood, to keep it level or pointed slightly downward into the stove, is needed. The wood used should be about one inch diameter or less for best results. For the tests, I put down a layer of firebrick under the stoves to protect my driveway.
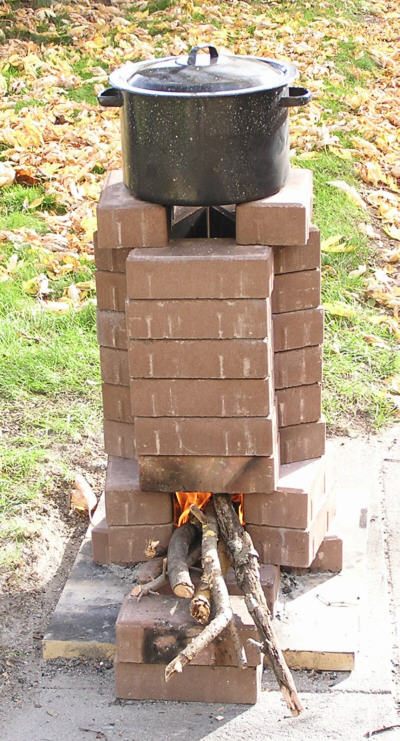
The design test - The tests used a 7 1/2 quart, covered pot filled with 1/2 gallon of water. The first heating test uses two bricks for a pot support. The second test replaces the brick support with a metal bucket that has a 4" diameter hole cut in the bottom. The pot is supported inside by angle brackets mounted about 2 1/2" from the top edge, which gives about 3/8" clearance to the cook pot at it's closest. This isn't the most effective skirt setup, but I had the bucket sitting around from my first rocket stove test with that cook pot. Ideally, the skirt would have straight walls like the pot, cover more of the side of the pot, and be surrounded by insulation.
Pictures of first test on Oct. 28, 2007
 Stopped test after 40 min.- water almost at a boil.
Pictures of second test on Oct. 28, 2007
 One-half gallon of water started boiling in 10 min., rolling boil in 11 min.
Conclusions:
The addition of a skirt to channel the hot exhaust gas along the base and sides of the
pot greatly increased the heat transfer efficiency. This simple stove could be
set up on site as needed or could be covered on the outside with clay, or
another material, to stop leaks. The first version burned smokeless much of the
time. Replacing the support bricks with the bucket skirt added 6" to the
chimney, increased the draft, and made the stove burn smokeless almost all of
the time, as well as cutting the heating time by two-thirds. A metal liner or
the use of fire brick in the fire chamber area could extend the useful life of
the stove.
From my testing I came up with a general guide for minimizing smoke here.
Again, while the results of these tests are not conducted under precise, controlled conditions, this is another simple, non-critical stove design that almost anyone could build.
L.B.