

An Experiment with a Rocket Stove - page 4
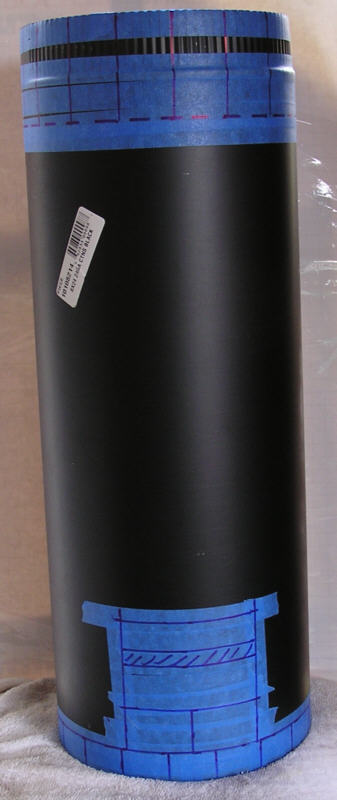
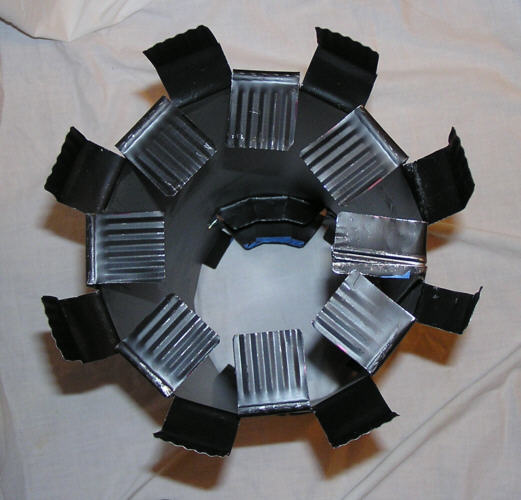
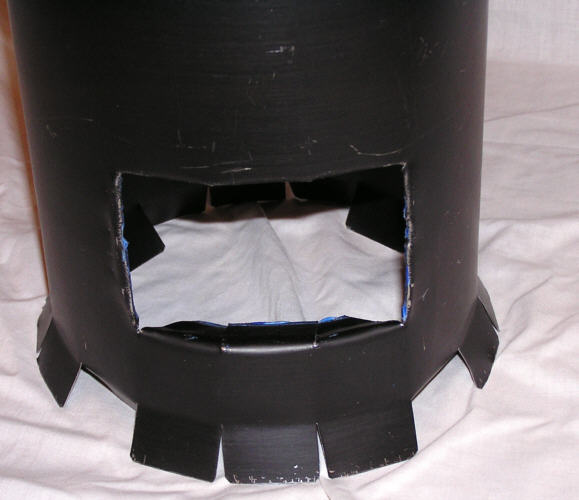
This is an experiment where I tried to make an easy to construct, efficient, very low cost stove for use by one person or possibly a small family. After some trial units, I simplified the design down to one that's made from a single, 8" diameter x 24" long, 24 gauge, black stove vent pipe. Retail cost about $6-$7, available at most large hardware stores. Galvanized vent pipe is not meant for these temperatures. It should not be used. Overheating it could pose a health hazard. Construction tools required - masking tape, marker, tin snips, pliers, measuring tape, and a square. Caution - sheet metal edges can be very sharp and cutting produces small slivers. This design changes the way that air enters the chamber slightly from the institutional-sized unit by eliminating the grille underneath the heat chamber. The air inlet is created by cutting slots in the bottom of the tube and bending the metal tabs to make the incoming air circulate around the hot ashes to pre-heat the air. This also gives a wider support for the bottom of the stove. Cuts are made every 1 5/8" (16 "tabs") around the top and bottom to form the legs, skirt, and pot support. Top and bottom cuts are staggered so that they aren't directly in line. The bottom cuts are 1" long. The top cuts are 3" long. The wood fuel inlet is 4 1/2" wide and 3" tall. It could be made a little wider if needed. The fire chamber is the 8" diameter vent tube. The chimney height is about 16" from the bottom of the cook pot support to the top of the wood inlet. The distance from the top of the wood inlet to the stove bottom is 6". This design could hold about a 10-11" diameter (7-10 quart) cook pot or a frying pan. The wood is held above the base by the lower side of the wood inlet to allow air circulation around and under the wood. Every fourth bottom tab is bent inwards to help keep ashes away from the air inlets. The stove needs to sit on a reasonably flat, heat-resistant material like compacted dirt or firebrick. It can be lifted up to clean out the ashes. If the wood is over a foot long or so, an external support for the wood, to keep it level or pointed slightly downward into the stove, is needed. The wood used should be about one inch diameter or less for best results.
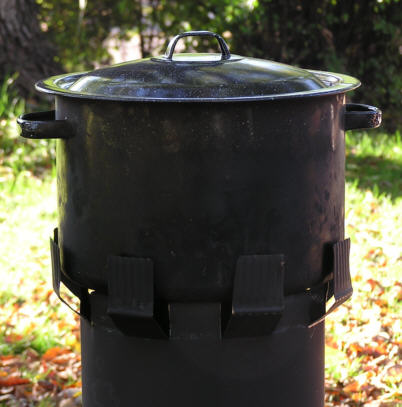
The test unit consists of a complete wood stove. A better skirt could be added for increased heat transfer to the cook pot. A 3-4" high sheet metal ring, slightly smaller than the inside diameter of the upper tabs, could sit supported by them. The insulating shield that normally goes around the chimney and the fire chamber area has been eliminated for simplicity and lower cost. The unit sat on fire bricks for the tests to seal off the bottom. How far the bottom tabs used for support are bent out can be adjusted to increase or decrease air. This design could be made smaller for better efficiency, or larger for greater heat. The larger the size, the greater the minimum flame that is required for the stove to remain smokeless. Three "L" brackets could be attached at the bottom to increase the stability of the stove. The stove could also be bolted down.
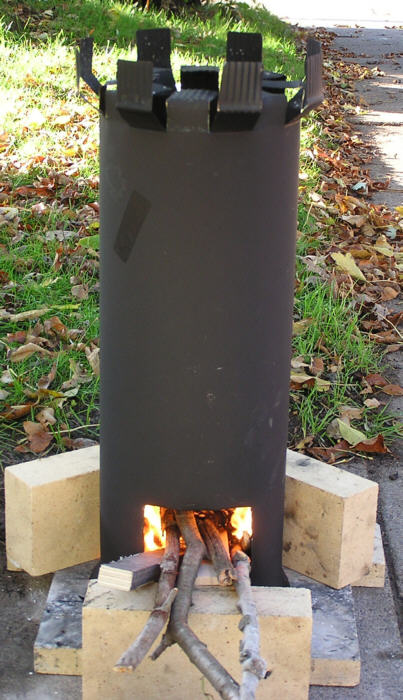
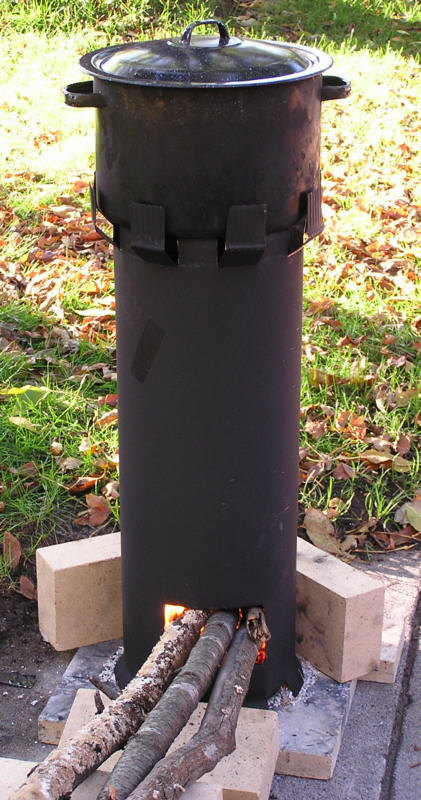
These are some pictures of a test on Oct. 3, 2007.
Conclusions:
This simple stove was made more for efficient wood use than very fast heating,
though using smaller diameter wood will give a very hot fire. Kindling will send
flames shooting out the top. Running the stove very hot may also shorten the
life of the stove. A test to heat one quart of water in a covered pot took about
7 minutes to bring the water to
a boil with dry, small ( About 3/4" -1" diameter) branches (Left picture), with little or no smoke after the
pot warmed up. It took over twice as long with larger branches (Middle
picture) and there was some smoke. The more surface area of the wood exposed,
the hotter the fire burn burns. With too much flame the efficiency drops and
unburned material will exit the stove. I found that allowing as much air as
possible to be drawn into the stove by the chimney draft is not the best way to operate the stove. The
air needs to be set somewhere between a large, unrestricted, air inlet (Hottest
flame) and starving the fire of air (More efficient use of fuel). The flaps on
the bottom can be bent to change the incoming air. This stove may not be quite
as efficient as the smaller rocket stoves on the first few pages, but it is also a
much simpler
design. Adjusting the rate wood is fed into the fire to minimize smoke may take
a little practice. Below a certain amount of flame there may not be enough heat
to remain smokeless. Operated properly, only a small amount of white ash will be
left after the fire has burned out. I used bricks to support the branches, as a
base, and to help keep the stove from being pushed backwards.
Jan. 2008 - Testing with a high-temp. type "K" thermocouple showed a maximum temp. around 1300 F in the center of the "fire chamber".
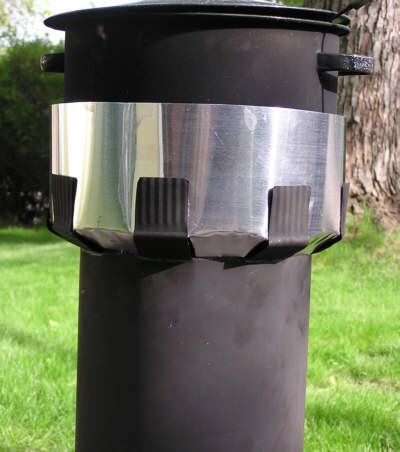
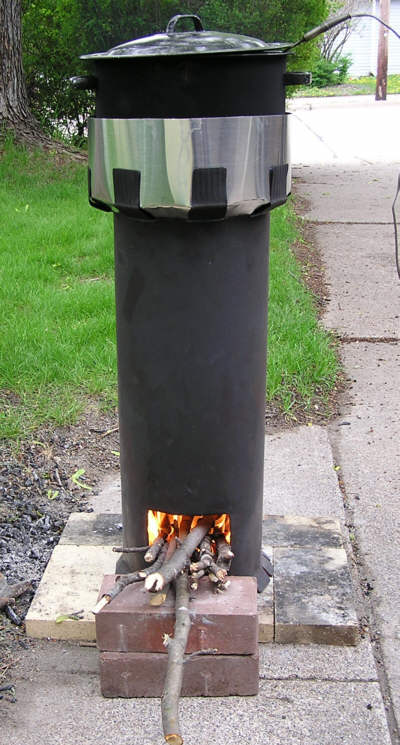
May 25, 2008 - Test with the addition of a skirt made from a 5" x 33"
piece of aluminum flashing.
Test to heat 1/2 gallon of water in 7 1/2 quart covered pot.
Air temp.= 68 F
Water temp.= 55 F
Light breeze
Wood inlet kept 1/2 - 3/4 full
About 3/8" clearance between skirt and side of pot
1:45 pm 55 F Start of test
1:52 pm Boiling
About 7 minutes to heat 1/2 gallon of water to boiling in a covered pot. Left pot covered until water boiled. Stove smoked a little for about 30 seconds after pot was put on. Flames touched bottom of pot for part of the test. Measured the temperature of the fire - about 1300 F max. with pot on, 1450 F max. with pot removed.
Ran the test again with a thermocouple probe in the water. The probe kept the cover partly lifted. Water took about 12 minutes to come to a boil.
Conclusions - The addition of a skirt increased the heat transfer. Keeping the pot tightly covered seems to be very important in minimizing the heating time.
While the results of these tests are not conducted under precise, controlled conditions, I hope you find the experiments I've done with "Rocket" stoves interesting and useful.
From my testing I came up with a general guide for minimizing smoke here.
L.B.