Restoration Details - Part Five
Dated: March 26, 2012
As I had mentioned earlier, we will explore how we removed the transformers from the chassis. How we prepped and painted them, and how we restored and recreated the original decals. Not only does this highlight this particular restoration, but also give the reader some insight that can be applied to any similar restoration work.
After inspecting the general condition of the transformers we decided we would fully refurbish the exteriors of all the transformers. The transformers passed all electrical tests, so all that was needed was to remove rust & corrosion, take steps to inhibit further corrosion, repaint them. In the process give them that "brand new" look.
- Removing Transformer from Chassis
Removing transformer can be either simple or more problematic. The simple one's are when the wiring is loose and easy to pull through the chassis. The transformer can be unscrewed and removed with little fuss other than desoldering and labeling of the wires.
Most transformers that have bell type housings have the frustrating fact that the wires are fed through holes, and not slots. This means in order to remove the outer bell housings, you need to completely remove the transformer from the chassis and disassemble them.
Another complication comes when the wiring in the chassis is accomplished with harnesses. The wires are bound together and held in place with wax covered lacing. This is the case with this radio.
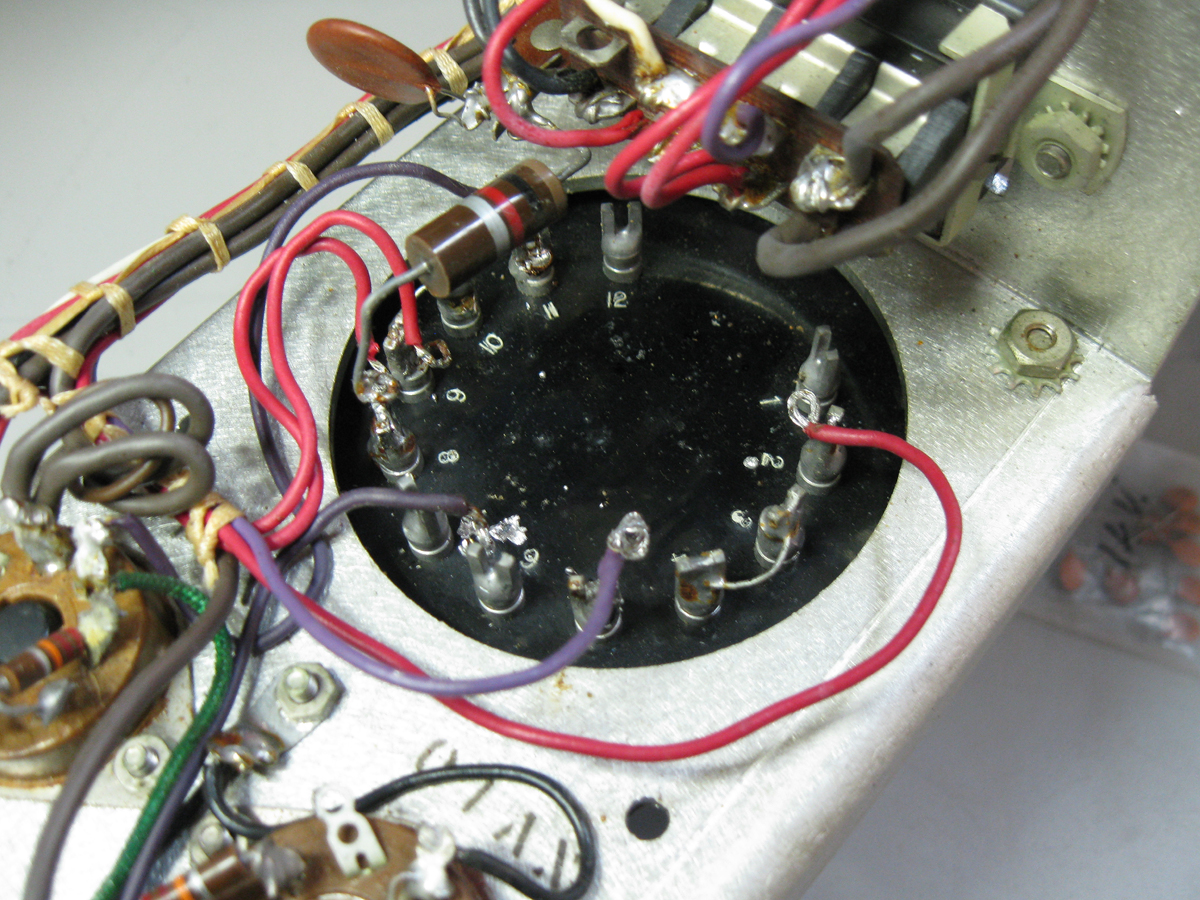
Below is an image of the modulation transformer as seen from the bottom, still in place. The wires were first desoldered, then the nuts and bolts holding the transformer to the chassis are loosened and removed.
 |
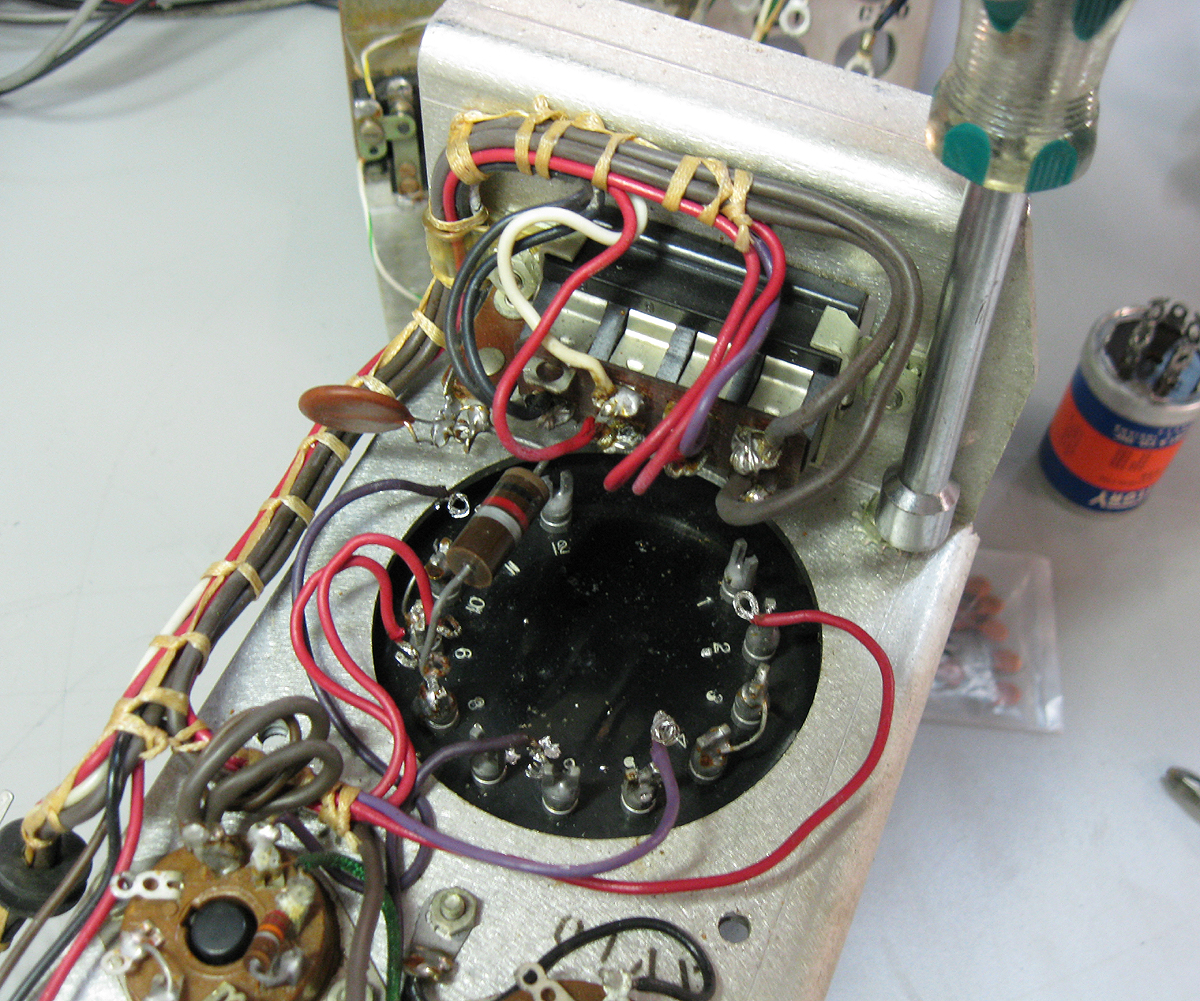 |
The transformer in this case removes very easily. It is a good idea, even though the wires stay in place well to label the wires, in this case with the numbers of the pins. Once you get the transformer out before you do anything remove all the old solder from the pins, using a desoldering iron, an iron and a sucker or solder wick. Do not wire brush! This can remove the good soldering surface already present and can send bits of conductive dust into the transformer. Just give them a good suck! ::)
- Preparation for Painting
The next couple of images show the prep and repainting of the modulation transformer. Special attention should taken in the preparation of any metal surface paint job. More time spent in properly preparing the piece to be painted will mean less paint needed to cover the item. By using light coats, in two coats, is mostly all that is needed. Additionally, thinner coats means a smoother finish, with no dripping and less "orange peel" effect. It also makes a smoother finish if you need to apply water slide decals (but more on that later!)
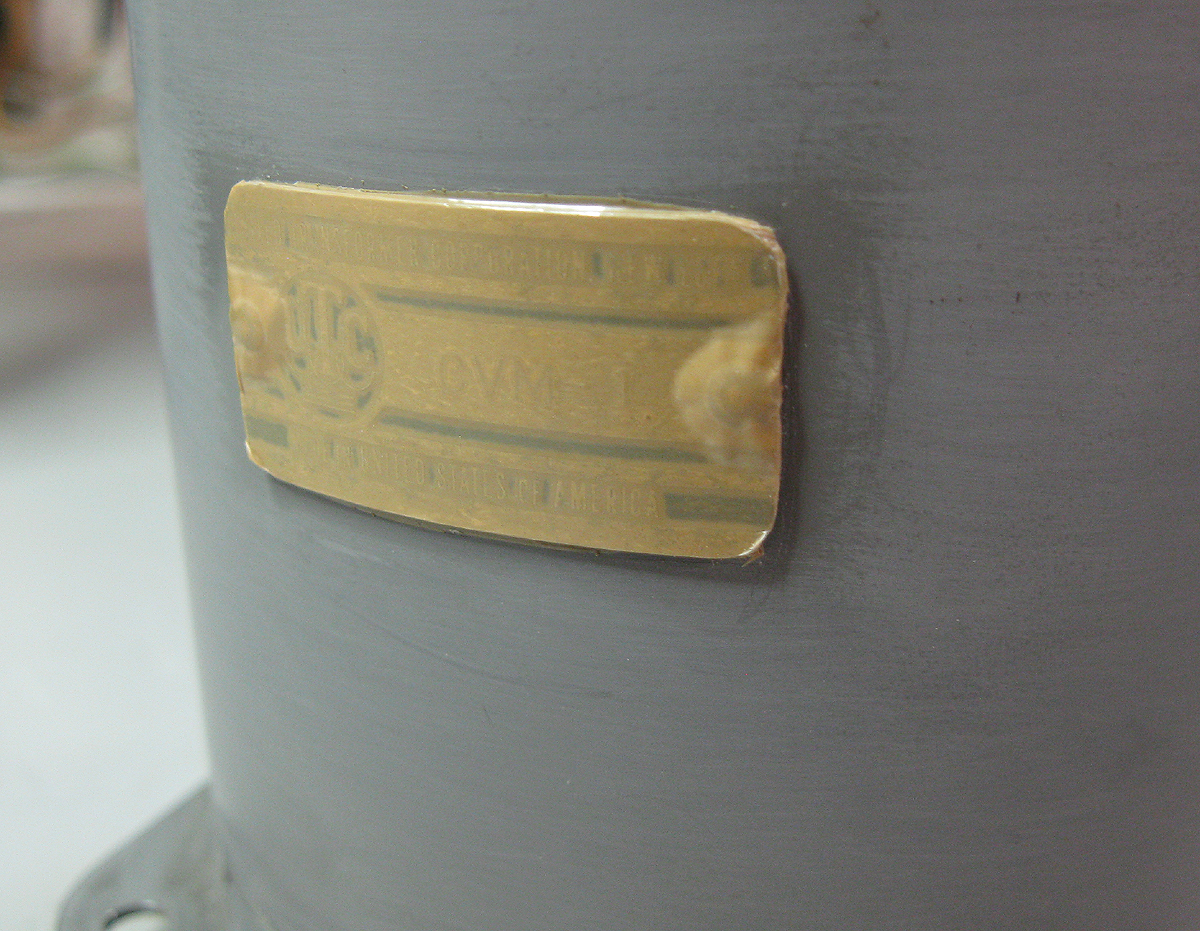
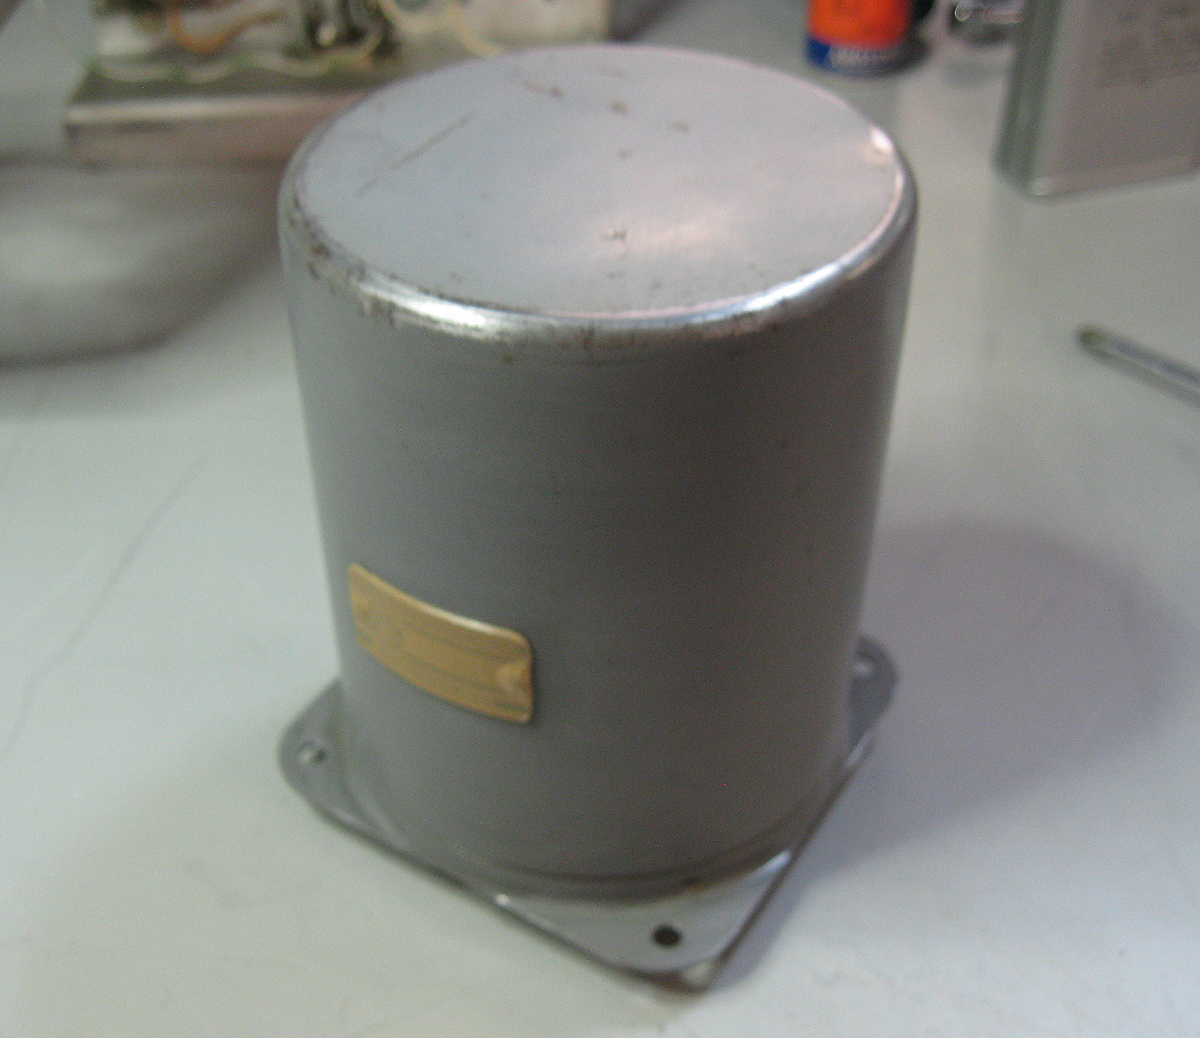
The modulation transformer was in fairly good relative condition compared to the others. So we opted a basic approach to prep. We first used 400 grit sandpaper to remove the rust and pitting, being very careful to avoid the aluminum plaque/label. You do want to run sandpaper over this. It will take the printing right off and take away any brushed aluminum look it may have. Avoid at all costs. We will deal with this separately with a different method. The two images below show the transformer and its label in their original state.
 |
 |
At this point it is good idea to convert some of the rust on the bare metal surfaces. Take a small amount of a good rust inhibitor like Eastwood Rust Converter and wipe only onto the bare metal that is exposed. You do not nor should you coat the entire surface where old paint remains. Only touch up the areas where you sanded away rust spots and pitting. Use only something called a rust "converter". Once this dries, and please do wait for it to dry completely, continue on with the sanding.
Once you have removed and converted the rust and pitting and smoothed out the old finish, it's time to remove the scratches from the heavy sandpaper. Use progressively finer grit sandpaper down to at least 800. When you are down to the finer grit, use water as a lubricant/coolant. The old paint will soften from the frictional heat of the sandpaper and either ball up or tear. This will create a lumpy surface when you paint. So use waterproof wet sandpapers, use them with water, and do not rub hard. Just smooth it softly and let the paper do the work. Wipe off the work with a clean rag occasionally looking at the finish. I cannot emphasize any stronger how important the technique in this last paragraph makes a difference on the final finish.
Once you are satisfied the surface is perfectly smooth, wipe the complete surface down with damp paper towels until you no longer see any dust on a clean damp towel. Now lets move onto the label.
Since this particular transformer is a seal "potted" type, it is not recommended to take it apart to remove the label, polish it and reinstall new rivets. So we have to prep it in place. With these labels you can use a small paper towel with a little bit of white compounding paste. Make sure you rub in the direction of the brushed aluminum. Also use a small amount of compound on a small piece of cloth, no bigger than the label. You want to avoid from getting compound waxes on the surface you will be painting later. As with the front panel buffing earlier it is important to pay great attention to the printing and to not rub too hard to wipe it out of existence. Only slight pressure is needed. This process will buff up the aluminum, make the printing blacker and remove any oxidation.
Once you are happy with the label, you will need to mask it off. On smaller pieces like this I like to use brown shipping tape. Masking tape will work, but you need to make small bends and tight fitting to cover these types of labels and regular masking tape is too "bulky" for this work. Place a piece of this tape over the label and carefully trim it close leaving a tiny strip around the edge to fold over and cover the edge as well. Using a razor (lightly to the extreme) will accomplish this. Below is an image of the tape (and a mistake which we will highlight later.)
If you look closely at the top & bottom edges you will see a small strip of tape that did not tuck under the edge of the label. Avoid this and make sure that either it gets tucked under or is trimmed clean. You can see the right side where the tape is properly masking the edges. This oversight, due to old eyes, lead to an obvious seam in the paint just above and below the label. And a real nuisance it is to correct later. It's like they say (whoever "they" are), it's all in the details! (I did correct this later, because I am just that persnickety.)
After you're done with your masking, it's time to give the item its final wipe down. For this you use a high purity isopropyl-alcohol (91% or higher.) Lightly dampen a very clean cloth, and wipe the entire surface again, looking for dust. Repeat until you see no more dust on a clean alcohol cloth. Be careful to use the alcohol sparingly, since you want to avoid loosening the tape on the label.
Your transformer is now ready for paint.
- General Information about Paint
Paint is a subject that has received a great deal of attention online. There are many types of paint available, designed for many uses. But as you have seen earlier, I like research. So, here's a couple of good tid-bits I have gleaned over the years.
Spray Paint
There is a literal plethora of spray paints out there. Most are crap, plain and simple. Krylon is great if you have stuff around the house that needs color. With Krylon and other consumer levels paints, it's all about the color and not about things like surface hardening & scratch resistance, gloss, or even consistency of finish.
Krylon is a fast drying paint. As a result it equates in the same way epoxy does. Fast curing, softer weaker epoxy. Slow curing, harder & stronger epoxy. Paint is same way. If is says "fast drying", I say "later"! The idea is if a home owner paints his table legs blue and they get scratched or chipped, he'll just take more spray paint and cover it. The initial finish hardness is not a priority when companies formulate paints for this market. Also the paint is soft in hardness to allow better adhesion of repainting. On smooth metal surfaces that are seen in close proximity, every detail in the paint surface is clearly evident. Also it is amazing how handling a piece will lead to fine scratches, especially on faceplates around knobs. Krylon and many consumer grade paints just aren't up to the task.
Good industrial paints made for prepared metal surfaces are always preferred, yet before the internet were harder to find. And yes they are more expensive. However, due to fact you have prepped your piece properly, and because industrial paints have a better "lay", you may actually use less over time. A brand I recommend is from a company called PTI (Products Techniques Inc.) In this case I used ENA213a Federal Gray Enamel Spray Paint. "Federal Grey" is a general US government standard specified color usually applied to most items used for military or government contracts. It was commonly used for many parts and components and faceplates for many communications equipment sold to the military. It was also used quite a lot in commercial products. My preference for PTI is that I have experience with it from the audio and satellite communications companies I have worked for over the years.
However during my research for this particular radio I discovered PTI was and still is a vendor to Gates and now Harris. According to PTI they also provided paints for Continental and Raytheon for a variety of products. You can also include Hammarlund, Hallicrafters, and Teledyne. They are also a big suppliers to the aerospace/aircraft industries.
My source for this, is again the general aviation supply industry, so try that online. Again I like Aircraft Spruce.
Applying Spray Paint
Once you have properly prepped your piece, it's time to apply your paint. A clean dust free environment is again crucial in making sure your finish come out smooth and pristine. A proper painting booth is ideal, but I understand what it is like in a home. We have a booth here, but let's not go there. Instead lets just say a cover over your work is one important tool. Gravity has funny way of focusing itself on your newly painted item, and forces all the dust and hairs right onto your paint. (This may be in some way related to birds and newly washed cars.) So a nice simple device is a clean cardboard box, laid on its side. Make sure you get all the bits of dust, pieces of paper and fibers out from inside your box every time you use it. One way to insure this is to spray the interior of the box with a clear spray paint in advance. This stabilizes any surface fibers and bits of paper. Then each time you use your little "booth" blow it out with compressed air.
Do the painting indoors if you can (with good ventilation.) Make sure the temperature is proper according to the ranges shown on the can. Place your item in the box and then leave for a while. Let the air settle. Come back later and move slowly into the room. Now you can paint without much worry about dust settling. Now unless you have a professional high-tech spray booth with an expensive air handling & filtration system, you will always get some dust on your work. Even we do. ($25K for the booth I really want ... ACK!) So just be clean and smart and this should minimize the dust you do get.
Spraying is important in its consistency and it's "weight". Weight is how much paint you apply in one pass. Even short strikes, moving your hand first, then pushing the button and releasing before stopping the movement. If you do not cover completely on that first pass, that is fine. Do not spray the same spot twice. The next few coats will cover that. The important thing is to apply as thin of a complete coat of paint as possible on each subsequent coat.
You can either apply the second coat a short time after or wait till paint fully cures, and apply the next coat. Follow the directions on the can in this respect. I prefer the latter, since this give the best hardened surface and the best finish.
Another good thing is to have is a turntable of some kind. I use one designed for pivoting small televisions. It's heavy enough and large enough for most heavy small items like transformers. This way you can turn the piece without touching it. On transformers two to three coats is plenty. I do not bake transformers as a rule.
Below you can see the completed Modulation Transformer and a close up of the label. (Note the bad paint edge on the top & bottom edges of the label due to the poor masking.)
 |
 |
- Water Slide Decals
The B+ transformer and choke were not in as good as condition as the UTC Mod Iron. They showed much rust and surface pitting. So instead of repeating anything from above I will only touch upon what we haven't written about already. Whew!
Triad during certain years and with certain contracts used Water Slide Decals for marking and labeling its transformers. Many boatanchors also have slide decals on various parts and locations. Now we know repainting is not that big a deal, and we also love the way a newly repainted radio looks. However there is always something glaringly missing when the decals are gone forever. So before we do any prep work on these Traid transformers we document the decals, in very precise ways.
Below is the choke transformer shown removed from the chassis and taken apart.

As you can see there are decals on the front and back housings. Before we do anything we need to get accurate images or scans of these decals. After that we will take these scans and convert them back into artwork to reproduce real Water Slide Decals. The best part it can be done all at home using a camera or scanner, special paper and your color printer. Hmm ... Do tell!
The Water Slide Decal has been around for years. It has fallen out of favor in manufacturing since printed labels or laser etching can be applied easier to products in our hands-off mechanized manufacturing processes we use today. Basically, a decal is a clear substrate with an image printed onto it. This substrate is bonded to a paper backing with a water soluble substance. The substrate is clear and was originally made from gum, which is why they were so fragile. We all had those models at home when we were kids that had the decal of the Iron Cross or Air Force Star which was kinda wrinkled and split because we let the decal sit in the water to long and it torn in half or turned to goo. GRRRRR ...
Today, you can get very fine thin vinyl or acetate as the substrate. And they can be printed either on a color laser or even inkjet printer. More on that later ...
Preparing your Artwork
Let's get going on the artwork to make the new decals. The key work here is resolution!!! As much as you computer can handle and as much as your printer can print. Now some wold think well my printer only has resolution of 600dpi, so I will take all the images/scans at that resolution. BONG! Nope. Printing images and digitally processing images are two different things. They require different levels of resolution & sizing. Now, the better your software, better you final product will come out. I use Adobe Photoshop. I use an old version 7 one. You can get this for free. Do not try to do this in WindowsPaint or some cheesy software like this. You will not be able to do what needs to be done in those kid oriented products. Any good image handling software is good like Adobe Illustrator, Macromedia Freehand, Deneba Canvas, or CorelDRAW and others.
In the case of the Triad logo we tried using a digital camera set for Macro (close-up) settings. You zoom out all the way and get real close. Here's the image of the logo. (this image is scaled down from the original image size.)
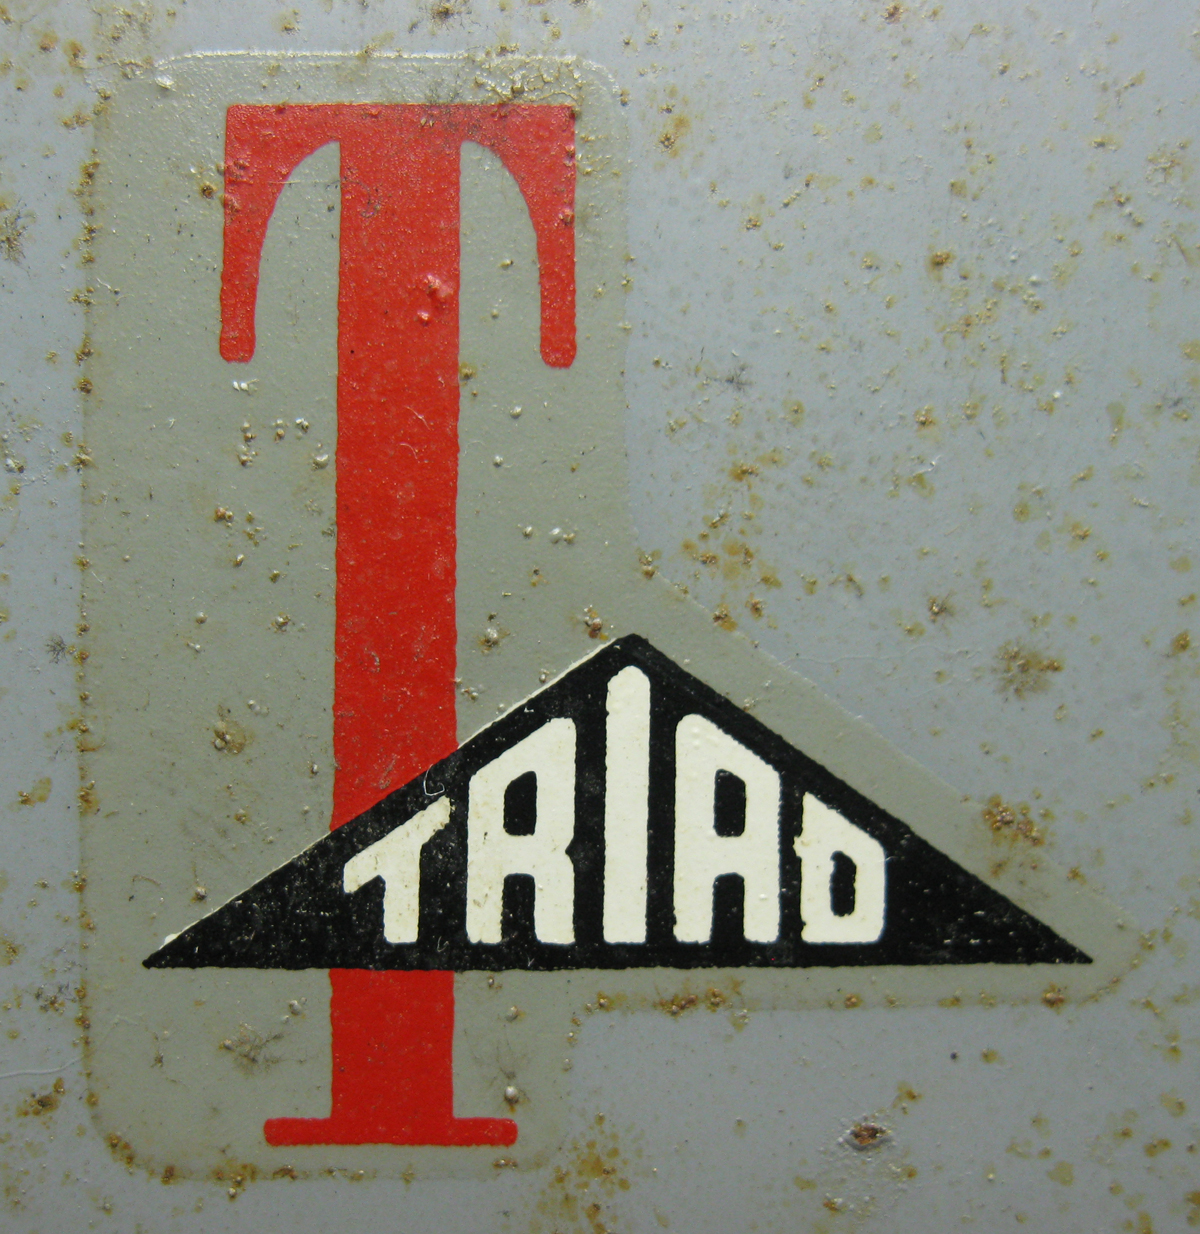
A few things to note here. Set your camera to its highest resolution. Use no flash. Light the item well and use the correct color correction in the camera. If you use florescent light, set the camera for this, incandescent use that setting. It is very important if you want the colors to be correct. Do not skip these steps.
One other aspect of using a camera for this is the issue of parallax. Sometimes depending on the lens and depth of field of the settings of the camera a fish-eye effect can occur. This will look like the outer edges are bulging outward. For instance, on a rectangular label with straight edges the outer edges will no longer be straight but bulging out in the middle. If this occurs, you should use a scanner instead. A scanner will make the image linear in its capture without any depth of field. This will yield straight edges. In this case, the logo taken with camera was OK, since it did not have straight edges on the extreme outside of the image. However, the specification decal, which was a rectangular box, did experience this problem and had to be scanned.
Also do not use an image that is even slightly out of focus, you will regret this when processing the image. Shoot another image till its perfectly sharp. You can forget about nice sharp edges if you don't. Once you get the image into your software do not use "sharpening". This will add pixels at the edges that will be hard to process. Just have perfectly focused focused image first. I will show the final image now so we will have a point of comparison.
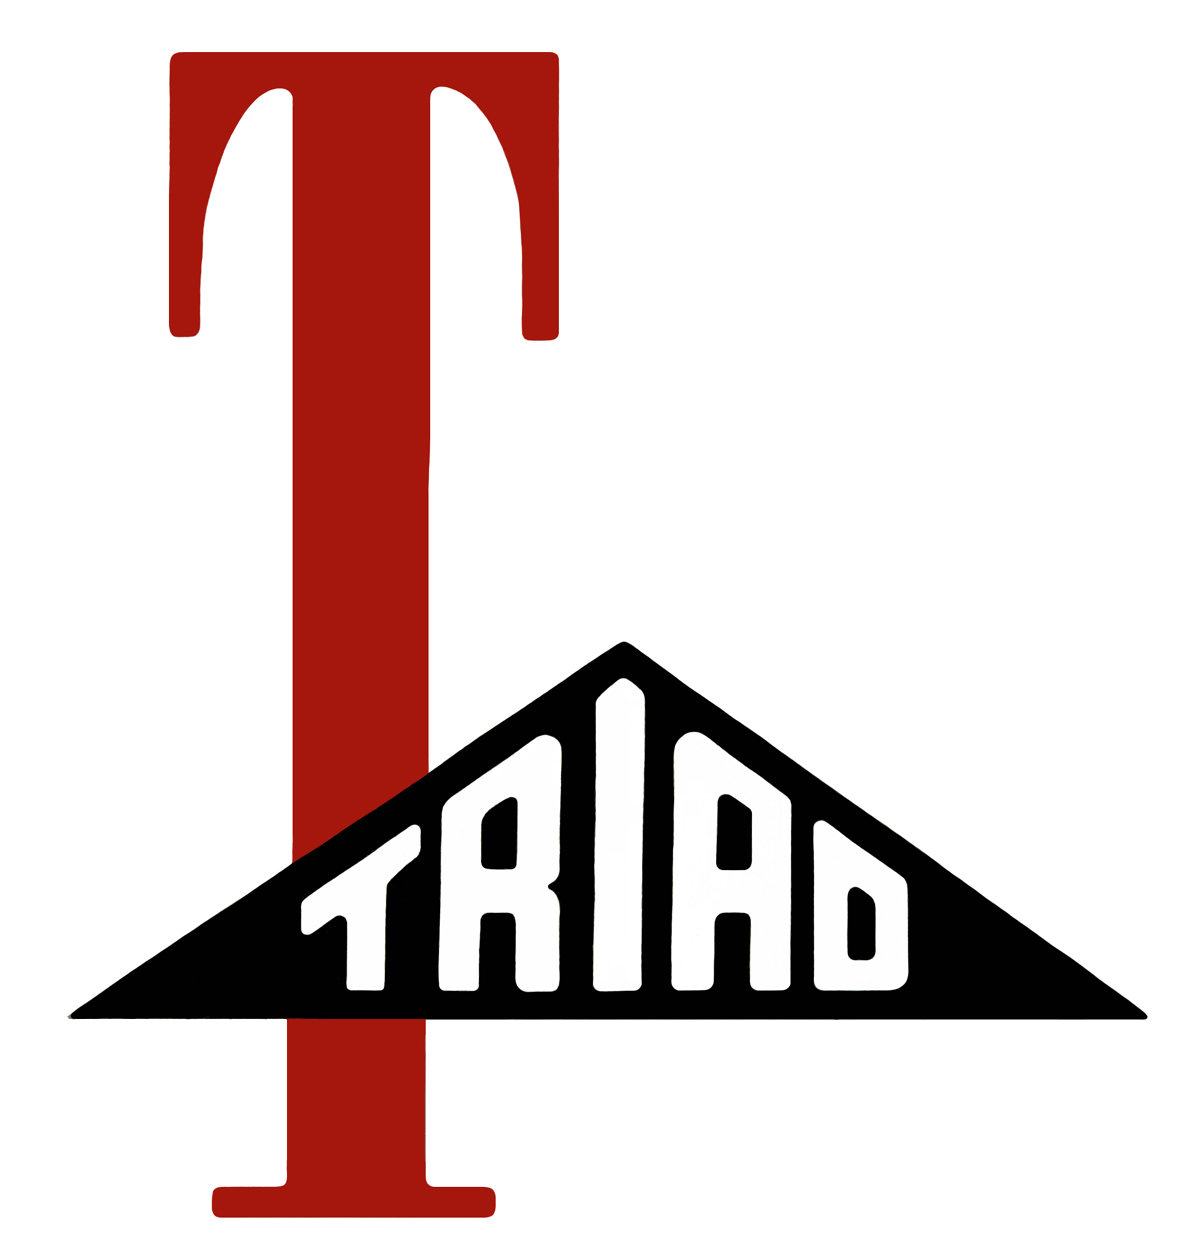
Since I used Photoshop I will be specific about what I did here. First the original image was opened in PhotoShop (PS). Next I opened the image size menu and changed the resolution from 600dpi to 2400dpi. This created a huge image file that was over 500Mb in size. I "saved as" and named the file. Next comes the tedious part. I zoomed into the image and went to the black area. I made a solid black square in the middle of one of the black areas. From that I used the clone tool and copied in the areas that were black, using different size tools and brushes, at times working with brush sizes as small as three pixels. I repeat the same process with every section. The red areas I first used the smudge tool to smooth out one area of red. Like a painter mixing colors on a palette. From this I derived the red color which I used the eyedropper tool and filled in the red "T" area.
This also included the "white" area that spells Triad. Outside of the logo itself, I had to remove all the white and make the image transparent in these areas. Otherwise when printed on the particular printer I use the area will print as white. The Alps printer I use has white ink. If you use a normal color inkjet or laser printer, you do not have to delete the white outside, but you do have to still replace the white areas with white fill, so as to not have the image of the rusty bumpy pitted transformer image in the lettering. The point is you want to replace all aspects of the original image with solid true colors, using the original only as a template to draw over. You only have to consider your printer type, and then choose either solid colors or transparency.
I should point out here that I have a printer that prints the color white. I use an Alps MD-5000. The Alps printer is a high-res 2400dpi Thermal printer that can print in standard CMYK colors plus black, white, gold and silver and other cartridges. I bought this for the sole purpose of creating decals. Sometimes decals use white on items where the background is black or dark (or in this case gray.) White will print as clear on normal color inkjet or laser printers which assume most printing is done on white paper. Some of the decals I have come across (like on guitars) also use metallic gold & silver which I can reproduce in the Alps. So if you have a regular printer but want the white when you use these decals on dark surfaces, you have to physically paint the surface white in the right spots before applying the decal to it. Bear this in mind.
The Decal Paper
The paper used for this is available from a variety of sources. If you do not have a printer that can print white you can get the standard decal paper. If you can print white they make one with a blue background that lets you see the printed white color. Buy the thinnest decal substrate they offer. This is more like the original decal materials available in the 1950's.
There are various sources online where you can purchase this paper. You may also find it at various hobby shops, particularly those who cater to model builders. Believe it or not you can do a search for "Mug Decals" and find a bunch. The thing is make sure you buy decal paper for your particular type of printer, inkjet, laser or Alps.
Take this final images and copy it and paste multiple copies onto one image, or what is called step & repeat. This is shown in the image below. It is a good idea to make a single image with its size set to 11.5"w x 8.5"h with resolution set to the maximum your printer will produce.
How to print:
- Begin by printing your image(s) from your computer onto your laser printer, color copier or ALPS printer with using blank laser printer paper.
- Check the scale of your decals once you
print a sample to make sure they are of the original
size.
- If you have a clear transparency product this is better for checking the final print quality, but is not necessary.
- Print on the glossy side of the blank paper. Note: You should feed your printer one sheet at a time to avoid jamming the printer since this paper is thicker than regular paper. If you take it to a copy center, instruct the operator to feed the copier one by one the sheets into the copy machine.
- Allow the ink to dry and set into the paper for at least five minutes and it should be ready for application.
- Cut out the image(s) as close as possible to the actual design. I like to try and use the original cutout outline for these type projects. Place them in lukewarm water for approximately 30 seconds. Hold the decal carefully to avoid tearing. You will begin to feel the printed image start to slide off the white backing paper. This means it is ready to apply onto your surface to decorate.
- Gently slide the decal into place. Use a clean damp cloth or paper towel to wipe off excess water and remove any air bubbles that may appear. Allow setting time of about 3 hours. Your decorated object is ready! Note: You can speed up drying time by placing your decorated object under/near a fan.
- If you wish to protect your decorated item
from surface scratches, moisture, or fading then spray your dried
decorated surface with a Clear finishing spray. I do recommend
you use the spray that is sold with the particular brand of decal
sheet you buy.
One supplier I do recommend is Papilio (http://www.texascraft.com/hps/home.php). They have a good selection of types, have one the thinnest varieties available and offer reasonable priced complete starter or sample kits that even contain the finishing sprays.
So what about the very rusted transformers and their repainting ...
The paint had not fully hardened at the time I wrote this section. Preparing the decal artwork would be the first step anyway. A more thorough prep was needed on these transformers, which included chemical stripping of the old paint, heavier sanding and rust conversion. We will cover that, and the decal application in more detail in Part Six.
Once the paint dries on the transformers I will post images of the finished transformers and I might even make a little video showing the printing, cutting and application of the decals ... But don't get your hopes up.
Stay Tuned.
73'
John LeVasseur, W2WDX
All text and images contained herein are under strict copyright.
Reprinting or publication in any medium is not allowed without express written consent of the author.
Copyright 2012 John LeVasseur