In
the "bench" area of my "Shack", I work at an old
metal-topped table with an anti-static mat under my work. A metal table is
not the best choice, but it's all that is available for the moment.
In
the "bench" area of my "Shack", I work at an old
metal-topped table with an anti-static mat under my work. A metal table is
not the best choice, but it's all that is available for the moment.
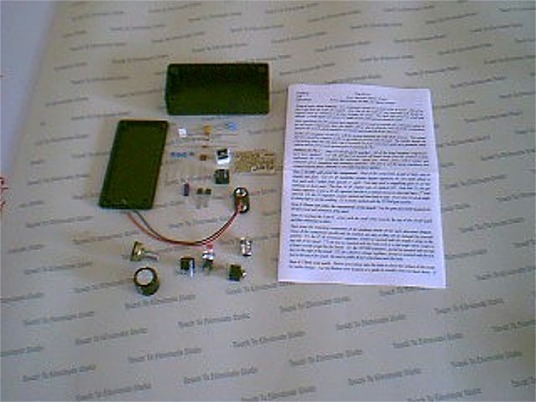
In this picture, I'm taking inventory of all of the parts when I started building the K1. It's important to get your self organized and comfortable with good light. I estimate that it took me 30 to 40 hours to complete the K1. It was my very first kit, so I took my time and worked as slow as I needed to to be sure I got it right the first time.
So that this page will load in a reasonable time, some of the pictures below are low resolution versions. If you would like to see the high resolution version, just click on the image.
![]()
Current Projects |
|
|
Some of the current projects are, well, not quite current projects yet. Actually, they're kits that I have on order and expect to begin them in the next couple weeks, or ones I have received and will be building them soon. |
|
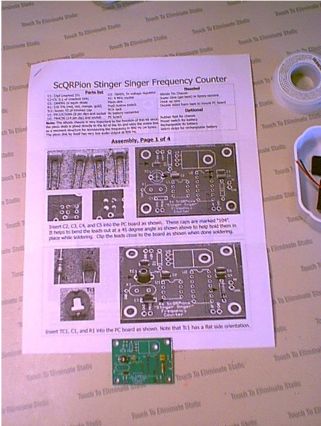
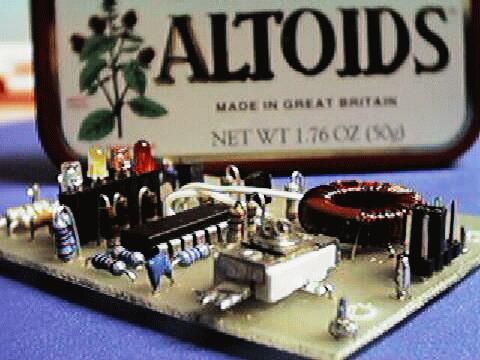
Az ScQRPions Stinger SingerThe Stinger Singer is a CW audible frequency counter - in other words, it reads an RF signal fed into it, reads the frequency and instead of displaying on a meter or LCD, it sounds out the frequency in morse code. Very small (fits in the requisite Altoids Tin with a 9-v battery and room to spare) and light - perfect for the QRPer. I ordered the kit from Bob, NK7M, and got the kit in the mail in just a few days. When I received it in the mail last week and opened up the padded envelope that it came in, I found a couple pieces floating loose. When it was packed originally, all of the parts were in a small zip-lock type bag, but the zip wasn't locked! I didn't do an inventory then like I know I should have, so today when i went to build the Stinger, I found one of the capacitors missing. Shucks. |
 |
| The picture above and to the right is the bag-o-parts
resting on page one of the excellent instructions. The assembly
instructions are prepared so that even the most inexperienced could
succeed the first time out with this kit. Beautiful job!
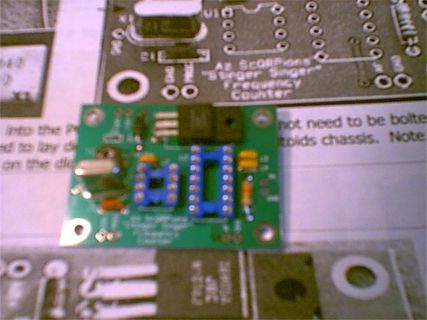
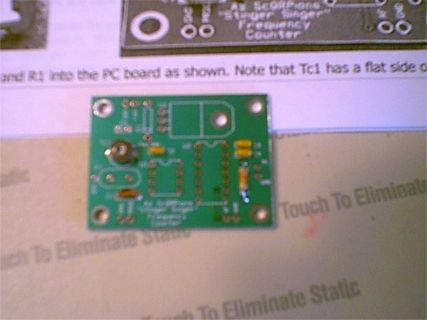
Following are pictures of the board after completing page 1 (below on the
left and right top) and page 2 (below right and right bottom).
|
|
 This
is the board nearly complete - only the IC's need to be plugged into the
sockets and the board mounted in the Altoids tin. This
is the board nearly complete - only the IC's need to be plugged into the
sockets and the board mounted in the Altoids tin.
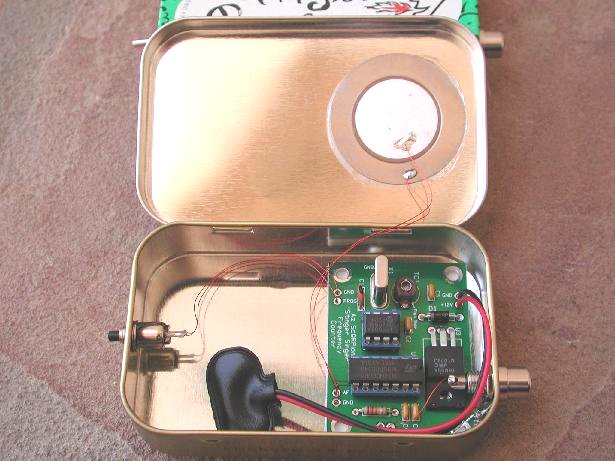
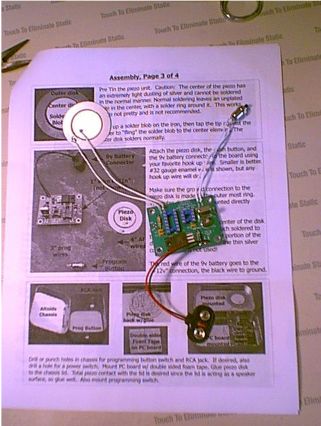
The audio is pretty cool - the piezo is the silver disk you see in the picture. The piezo gets glued flat to the top of the tin's cover, and the entire Altoids Tin becomes the resonant chamber for the speaker. |
Final pictures of my Singer Stinger in it's Altoids Tin will
be coming soon - as soon as I clean some space in the garage and find my
drill, that is. Instead, here's a copy of what the final product
will look like (picture copied from NK7M's Az
ScQRPions Stinger Singer data page.
|
FOXX-3The FOXX-3 from Kanga is also a single-band, QRPp radio - I'm building this one for 20-meters. As you can see from the picture, the PCB for the FOXX-3 is designed to fit perfectly inside an Altoids tin. The FOXX-3 kit was very complete, the only pieces I needed to supply
are a battery and and Altoids tin. The instructions were very
complete, taking the builder through five separate stages - the Audio
Amplifier, the Keying Circuit, the Sidetone Circuit, the Crystal
Oscillator and finally, the Power Amplifier and Filter. I've completed the FOXX-3, but I haven't permanently mounted the radio in its' enclosure yet (of course it's going into an Altoids tin!), and I'm still testing it. I have not made any contacts with it yet; it's more sensitive to interference from broadcast radio than I expected, although I was warned. I think it is not quite working the way it is meant to; I can not adjust the Rx offset control very much - it needs to stay at nearly the full clockwise position. |
 |
Pixie-2"The $10.00 radio". The Pixie-2 is a fully functioning QRPp transceiver which can be built for different bands - I'm building the 40-meter band version. The Pixie-2 is small enough that it could fit inside a tic-tacs box. I think I'll put mine in something small, but big enough to hold a battery. I actually have three of the Pixie-2's for 40-meters - one for Lane, one for Josh, and one for myself. The QRPp International club is putting on an very basic "Elmer 001" course, a beginners' course in Amateur Radio kit building and operational theory, and the Pixie-2 radio is the core part of the course. We'll wait for the course to build the radios. |
 |
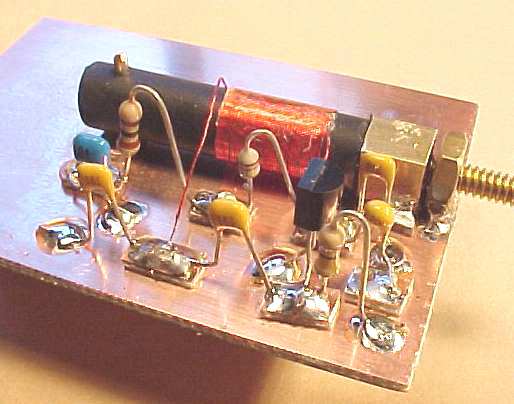
WA6OTP PTO/VFOThis Permeability Tuned Oscillator (PTO) Kit designed by James McNutt, WA6OTP will add a little flexibility to the radio kits that I'm experimenting with. It will tune over a wide range - 500 kc +. About 13 kc per revolution of the tuning dial. With this added to the FOXX-3, Pixie-2 or Tiny-Tornado, they won't be "rock-bound" any longer. As you can see from the picture, the construction style is "Manhattan" style. In addition to all the fun, this little kit will give the three of us - Lane, Josh and myself - some more "learnin" on how things work. Last night in a period of boredom, I decided that I just couldn't wait any longer to tackle the PTO, so I pulled out the kit. Wouldn't you know it! The first one I pulled out was missing the transistor! Shucks. The other two kits had the part, but I decided I'd leave those for the boys. I wound the wire around the form, inserted the brass screw (with it's O-ring), after first filing it down a little so the O-ring on the screw just fit into the glass form, and got that all mounted to the "L" bracket. I stopped there, because unlike the other kits I built, this one does not have a "parts-placement" diagram or a prepared PCB. With this kit, I need to read the schematic, put some pads onto the circuit board, and put the pieces in the right places. I was a little mush-brained last night, so I quit while I was ahead. |
 |
Tiny-Tornado
|
 |
VE3DNL Marker GeneratorThis is a small kit put out by the Fort Smith QRP Group. The design originally came from Glen Leinweber, VE3DNL, who posted a simple circuit diagram for a crystal controlled marker generator on the QRP-L forum. The kit I'm putting together is a slightly updated version. Since a marker generator puts out a signal at known frequencies, or "markers", they can be used as a signal source to align newly built receivers and transmitters, dial calibration, etc. A handy tool to have around. I put one of these together last night (I got two kits) before playing with the PTO/VFO kit. I've decided to put a switch on it to switch between it's frequency options - 5K, 10K, 20K and 40KiloHertz. I'll probably need a slightly larger enclosure that I originally thought about. I originally thought I'd use a small pill bottle - I have one that the PCB will fit into, along with a 9-volt battery. I'll have to see how much space will be needed when I add the switch. |
 |
WA1FFL DDS VFOJames Hagerty, WA1FFL, described in the January 2001 issue of the ARRL's QST magazine a DDS VFO. I was intrigued enough by the article that I ordered on of Jim's partial parts kits. As soon as it arrives, I'll get it put together. Unfortunately, it's designed for single-band use, so it will be somewhat limited in application. Another really smart guy is working on another implementation of a DDS VFO that will be more flexible. In the mean time, this one ought to prove to be very educational. The kit arrived a couple days ago, but I didn't really look at it until last night. I'm actually pretty jazzed about getting this put together. Before I can though, I need to get my hands on some more "pieces/parts", such as the LCD display. I don't know how long that will take. |
|
![]()
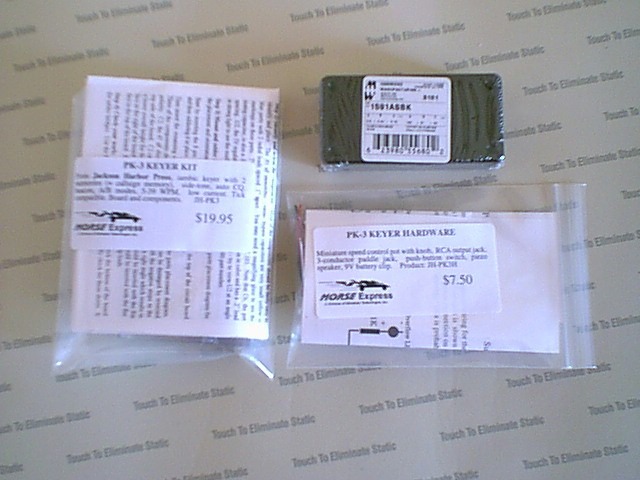
PK-3 Memory KeyerThis was a kit from Jackson Harbor Press and sold by Morse Express. This was the first project I did, partly because I needed a keyer to use with one of my radios - the Kenwood TS-130s HF radio, and partly as a quick warm up before the Elecraft K1 arrived. It only took a couple hours to build, at it took that long only because I was savoring the experience. Here are some pictures I took while building it.
|
|
|
Elecraft K1-4I can't say enough about the kits produced by Elecraft - in fact, I can probably boil it down to one word WOW! I couldn't do justice to the K1 kit. All I can say is that the kit is extremely professionally designed, the packaging well thought out, the assembly process documentation very professional and easy to follow. All in all, building this kit was extremely fun, and at the end of the project having a radio that meets or exceeds the quality and specifications of some of the equivalent mass-market radios is extremely satisfying! Here are some pictures taken after the basic radio was completed. After these first two pictures were taken, I completed and installed all of the options - the noise blanker, antenna tuner, and internal battery options. The K1 has become my main radio! Since I completed the K1 I've only turned on my Kenwood TS-130s a couple times - once when I wanted to see what kind of activity there was on the 10-meter band, and yesterday I decided to play a little with PSK31 on 20 meters. PSK31 requires SSB, and SSB is not an option on the K1. When I do build a K2, I suppose I'll have to put the SSB option in, just to have it - and who knows, maybe I'll want to run PSK31 some time again. |
![]()
(the following pictures are all low resolution to save load time)
At the head of my wish list is the Elecraft K2 HF Transceiver. This kit radio has performance that meets or exceeds the performance of the "big-boys". And I get to build it!

Elecraft K2 HF Transceiver Kit
![]()
Second on my wish list is an interesting project published in the ARRL's QST Magazine by Bob Larkin, W7PUA - a software-defined multi-mode rig for 2-meters. The DSP-10 is a DSP-based, software defined 2-meter transceiver that operates on the SSB, CW and FM modes with features tailored to weak-signal operation on VHF, UHF and Microwave frequencies (using transverters). For more information, see Bob Larkin's web site, copies of the QST articles (in 3 parts), or take a look at the TAPR web site. TAPR is kitting out the DSP-10.

![]()
Next on my wish list is a "Warbler" transceiver for PSK31. This little transceiver has been made available as a kit by Small Wonder Labs, and is now available for 20, 30 or 40 meters.

![]()
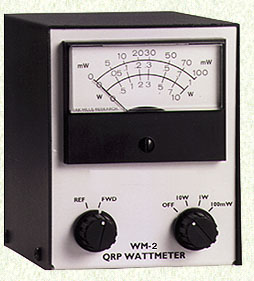
Oak Hills Research QRP Wattmeter Kit
Rainbow QRP Antenna Tuner Kit
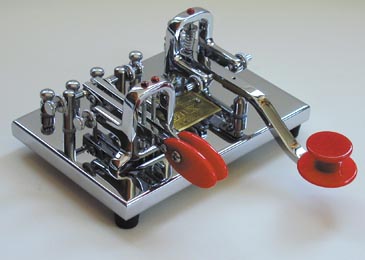
Vibroplex double key
Palm Radio's Mini Key (paddles) to go with the K1 radio.