FLOOR FRAMING
| Hard as it
was to believe, it was 14 May before the first permanent nail was pounded home. At
that point, I had less than 5 weeks remaining to get things to a state where I could leave
them. I had promised Wesley I would be back in California by 17 June, and I intended
to keep that promise. I had made a work schedule for myself with daily milestones to be met, and there was no escaping the crack of that whip on my back. In the end, I managed to beat my own schedule by a whole two days. Going into it, though, I didn't know what surprises might be in store for me. I took no chances, and could be heard hammering and sawing from 6 in the morning until 7 at night, every day of the week. The joy of carpentry work is that things happen quickly. Where one day there is nothing, a few days later one can take pride in the structure that has emerged. The pictures at right tell the story. |
May 27, 1999 |
| This
picture might not look exciting if you've never done this kind of thing before, but it was
a new adventure for me. Those sheets of plywood are 3/4" pressure treated
plywood, and they are heavier than I could carry by myself. For months I had
wondered how I would ever get those sheets up on the deck. At one point, I even
considered breaking the immigration regulations and hiring some moonlighting Jamaicans to
carry them up for me. I didn't though, and eventually figured out a way to drag them
up onto the platform. Each one of the sheets is glued to all of the joist and beam edges it touches, and then nailed with ring-shank nails spaced every 6" apart around the edge and 10" down each joist in the interior of the sheet. Care to calculate how many nails I had to drive with those 39 sheets of plywood? My arm still aches! |
June 3, 1999 |
| I was quite
proud of this piece of framing when I finished it, though I realize it is nothing to a
professional carpenter. This shows the joists for the porch with the hatchway for
the cistern entrance framed into it. The joists to each side of the hatchway are
doubled in order to support the weight of the headers on the front and back of the hatch
opening. The header to the rear of the opening takes the load from the two joists
attached to it and distributes it to the two doubled joists at its ends. Inside the
opening there is a frame for the hatch itself. It turned out to be trickier than I
thought trying to get that frame to be flat and to slide in and out of the opening easily.
Later, when I put down the porch decking, I was able to do it so that the grain matches between the hatch and the deck surrounding it. It is now almost impossible to see the hatch from the top unless you can spot the cut edges on the outline of it. |
June 6, 1999 |
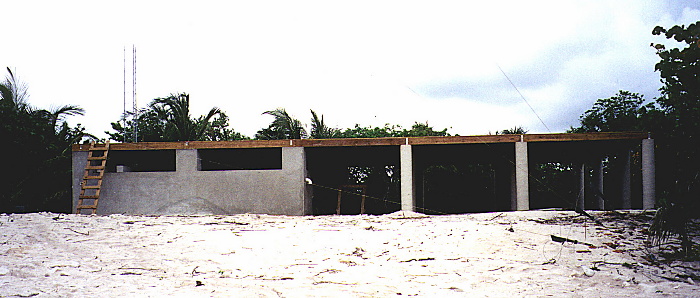
| This shows
the finished platform as seen from the ground. The ladder is made from 8' long
2"x4", so you can use that to get a feeling for the elevation of the porch above
ground. The concrete pad under the ladder is where the rear staircase will begin. That staircase will be the very first project for November, 1999. |
June 10, 1999 |
| I tried in vain to get a garage door shipped to me from Tampa. That will just have to wait for November '99. In this shot, I have stashed as much as I could into the garage and am preparing a frame for the opening so I can screw plywood onto the frame and thereby seal the garage for the summer. |
June 13, 1999 |
| This is a view from the beach of the way things were left in the middle of June, when I came back to California. People keep asking, "Are you finished yet?" Well, not exactly. It's nothing but a giant plywood platform as of this writing, but it's all ready for the walls to go up. |
June 13, 1999 |
| In the time
I had left after sealing the garage, I was able to indulge in a little bit of folly.
I took a roll of cheap aluminum duct tape and outlined the walls and doorways on
the platform. That gave me a chance to walk from room to room in the house and try to
visualize how much space each room afforded and to see what views were possible. This picture is taken from the tower, looking down and toward the east. The ocean is, of course, to the right. The room at the bottom left, which is just barely visible, is the guest bedroom. At the bottom right is the ham shack. Both open into the living/dining area, which faces onto the ocean. The guest bathroom is on the left, just above the guest bedroom. After that, I realize it gets harder to see the outlines and picture the rooms. If you're interested, it might help to go look at the computer-generated isometric view I put in the "Permit" section. |
June 14, 1999 |