
Flyfisher's Great Auk Project Page

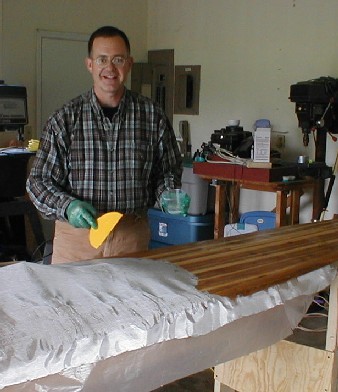
The bottom is stripped out.
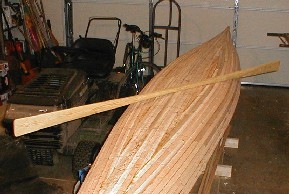
I also took an hour out to make a Greenland Paddle.
(a $2.29 paddle!) Plans and techniques are here.
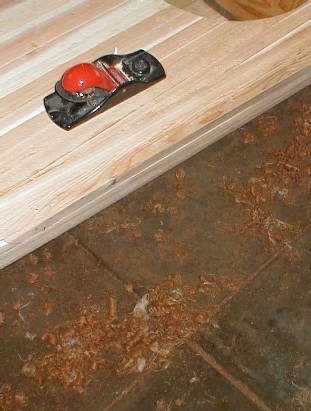
I must admit to taking a drastic short cut. I cut all my own strips from “inland red cedar” from the local Home Depot store. I did not have a cove and groove set of router bits and did not want to wait for them. So I glued them up with just the occasional use of a plane between the strips. I am running the risk that the whole thing will go SPRONG when I release the staples to do the planing and sanding. If it does, I’ll go back to cutting strips again. But if I can get it sanded and inside fiberglass/epoxy, it should be strong enough. I have received a great idea for a jig for planing the edges of the strips at 5 degrees. I will try that next time.
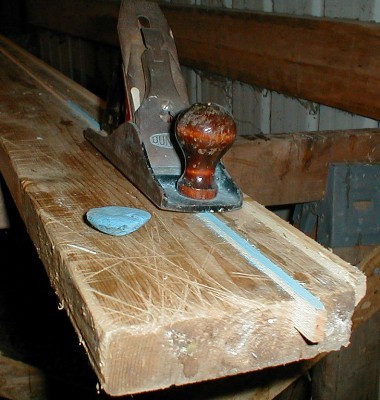
Strip Planing Jig
Post #2
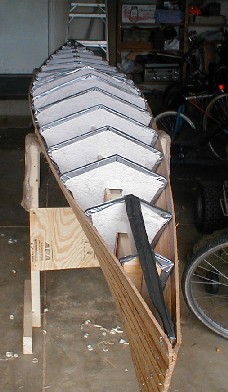

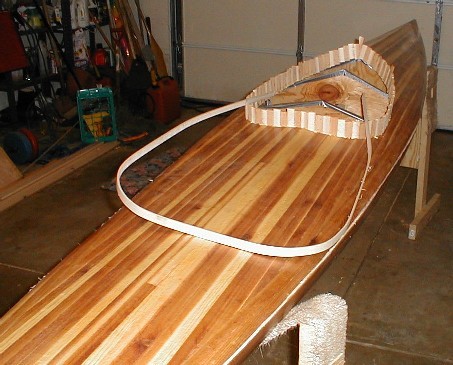
31 May, the deck is starting to come together.
I have put in orders for most of the rest of the kayak materials.
Glass cloth, 24 yards of 38” 6 oz. cloth ($90), some 2 inch tape (~$15), and a hold down kit ($20) from Noah’s Marine
1.5 gallons of no blush epoxy from Progressive Epoxy Polymers ($55) I had previously asked the builder’s group about their experience with Progressive because none of the kit makers use it and because I had never read about them. I received no answers from the group, but a search of the internet found no warnings or scam alerts. I will let the group know how this very inexpensive epoxy works.
Cabosil ($7.30) and footbraces ($35) from Newfound Woodworks.
I went to the local building supply store and bought some mohair rollers, squeegees, roller frame and pan, some more gloves, and a second bottle of glue. So far I have spent about $100 there for the wood and other materials.
I still need to order some Minicel® foam for a seat, thigh braces and bulkheads. I found the best prices at John R Sweet.
Costs so far:
Home Depot $100
Noah’s 125
Progressive 55
Newfound 43
Minicell (est) 37
Shipping 40
Total ************$400
To this I guess I’ll need to add $40 for inspection and registration and another $40 for doodads. Not too shabby when I read of builders who offer solo kayaks strip built kayaks for $4-5K.
Post #3
2 June 2002 update:
I found the easiest way to make all the angled cuts for the deck pieces was to mark them with a pencil and then take the piece to the band saw to make the rough cut. After a little experimenting, I could make most of the cuts without needing to trim up with a plane.
Deck work:

Post #4
5 June Update:
Staples are out, the trick was using a “church key” sharpened to get the point under a flush staple. I did the first half with a pair of pliers and ended up with a blister on my right 4th finger. Planing and sanding are coming along. I have received the shipment of epoxy and cabosil. Still waiting for the fiberglass from the supplier.
The epoxy comes from Progressive in a metal paint can. That was a small surprise. I went to the farm supply store and bought two 60cc syringes to measure out the resin and hardener. I cut off the small piece where a needle usually gets attached to the syringe with my pocketknife. Then I used a 3/16 inch drill bit by hand to enlarge the hole in the end of the syringe so that it is more appropriate for the thick epoxy. The owner of Progressive suggested another possibility: use the “church key” opener on the bottom of the paint can and then pour from there. A boat-building friend suggested buying a couple gallons of windshield washing fluid for a buck a gallon, filling all the cars’ reservoirs, wasting the rest, and rinsing out the bottles with water and denatured alcohol. Then transfer the epoxy to the two plastic containers.
I recently read again the process of using epoxy. I found out that I do not need the roller pan I bought. For the small amounts of epoxy mixed, just pour the epoxy on the wood or glass, spread it out with a spreader, and then roll on from there. That should avoid the waste of the epoxy in the roller pan. Thanks to someone who contributed the idea of cutting out a squeegee from the wall of a milk container so that you have one which is not so stiff as to dry out the cloth too much. I will try that. Thanks also to the poster who mentioned using credit cards as spreaders. What a nice use for the tons that come in the mail!
My boat-building friend also suggested starting an epoxy session by putting a couple ounces of resin in several plastic cups. Mix the hardener into one of the cups, use it, and then move on to the next cup. He says this process seems to flush the epoxy which will harden out of the roller and allows prolonged use of a roller as one works down the boat.
Speaking of rollers, I should record here the suggestions I got for cutting roller covers in half. The winner in my mind goes to the contributor who suggested keeping the plastic cover on the cover, taping over it tightly with masking tape, and then cutting with a band saw. This looks like it will cause the least amount of dust in the roller to me.
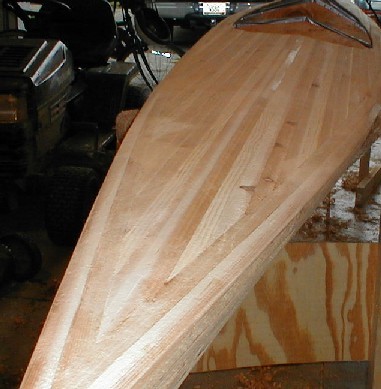
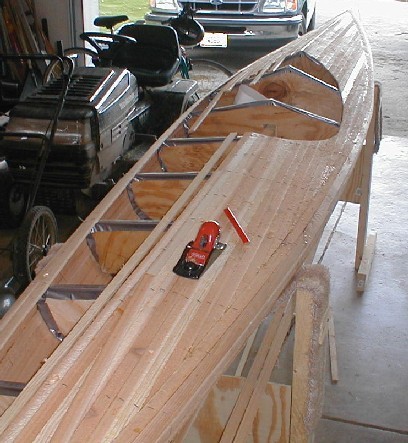
The Joy of Wood Curls Sanding makes it start to look like a boat!
Post #5
The next great hurdle turned out to be easy. Applying a wetting coat to the wood with epoxy was easy. I mixed 3 oz batches (4 of them) with the syringes. 60cc of resin, 30cc of hardener each. I put on plastic gloves and I mixed the two liquids in a clear disposable plastic cup with a tongue depressor for 60 seconds, making sure to get into the corners and both sides. It was fun seeing the mixture clarify as it got very well mixed.
Then I poured a half ounce to an ounce on the kayak at a time, and used a plastic dry wall knife to spread it evenly over all the wood surface. Then I evened it all up with a roller. A cold front had just come through and the temperature in the garage was a bit below 70 degrees. It was nearly 5 hours later when most of the tackiness of the surface had finally gone away.
Here is the required shot of the wetted out surface of the kayak:
Post #6 – 9 June 2002
The weekend was spent on fiberglass and epoxy. It was important to have an area set aside for epoxy mixing. I used the mental image of using a red cup for the resin syringe, but it was most useful to have the larger can of resin on one side and the smaller can of hardener on the other. In later batches I used two 60cc syringes of resin and one of Hardener to make up 6 oz cups of epoxy.
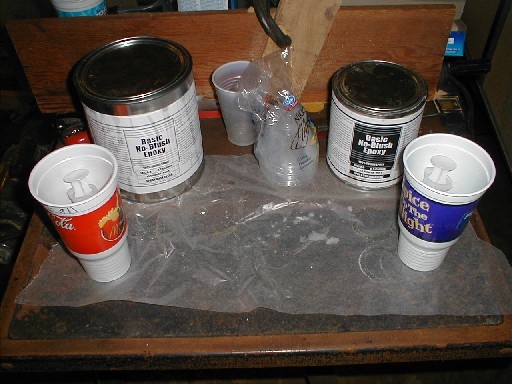
Epoxy Mixing Station
I did the deck glassing in two steps, wetting out the wood and then following after partial cure with glassing. On the hull, I just wet out the glass directly on dry wood using a squeegee. I got a better finish with this method and will likely use it in the future. Both methods use about the same amount of epoxy. Once the deck had cured, I could begin working on smoothing the inside of the deck while the hull was curing.

Glassing Who left that mess on the floor?
Post #7 – 11 June 12, 2002
The boat is glassed inside and out. I have used 5 of the 6 quarts of epoxy I have. I will probably get by with just the remaining quart, but think I will go ahead and buy some more epoxy… This is good material for a large number of projects around the home, and it will last almost forever!
I got a heat gun from Grizzly (1800 watt for $19) and experimented some with bending wood with it. Cedar: Does not bend much. Hardwood plank from the barn, probably oak, not too good, poplar from the Handy Man store: Very Nice bending. Rim of the combing will be poplar. (Note: maybe the oak will bend better if I soak it in water for a day or two.
I have noted that the color of the cedar changes several days after the epoxy cures. The whites stay white, but the reds loose much of their rich red color and move toward a browner tone. I do not know why.
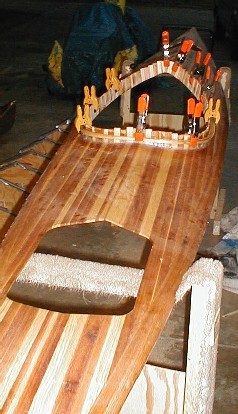
The combing coming together and and experimental piece of bent poplar:
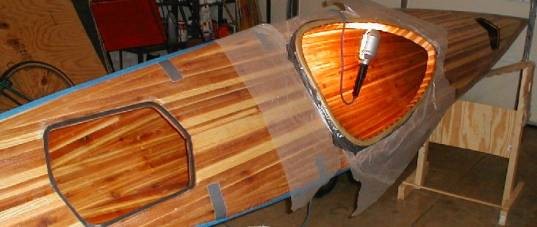
Post #8 – 13 June
It was painful to rotate that saw into the deck and cut the holes. All went very well, though, and the hatches should be pretty. The cockpit combing came together with 5 strips of poplar bent with a heat gun. With the prebending, not so many clamps are required. Also, the wood can be glued up right after bending instead of needing to wait and glue it after drying. This weekend I should be ready for the taping of the deck to the hull, but may have to wait for a new shipment of epoxy ordered on Wednesday. 1.5 gallons is just a bit short for this builder. 2 gallons would have been plenty.
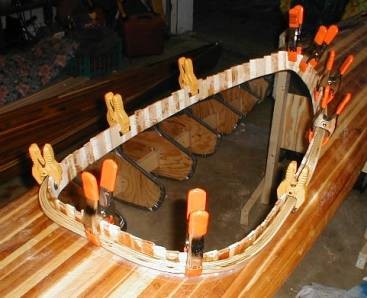
Hatches cut Poplar combing rim glued in place
Post 9 – 25 June 2002
Unfortunately, I ran just a bit short of epoxy, and a weekend came and went without being able to work further on the main building process. I had a bit of epoxy, so I worked on the hatch receivers, cut the slots for the loops that hold the outside bungees, and put in the Leidy style interior hold downs for the hatches.
Then the shipment of epoxy came in.
Next stage was finishing the combing and gluing two halves together. I read many comments about the inside strip of fiberglass. Nick recommends soaking a roll of fiberglass tape and unrolling it along the seam. Rob Mack recommends just laying the strip down and applying epoxy to the dry cloth. Others have recommended a few drops of hot glue along one edge to hold the tape in place. I used this last suggestion. It went very easily, but I would recommend applying a bit of stretch to the tape as you lay down the drops of hot glue. I found that a 1/8 inch drop of glue every 6-8 inches was all I needed to keep the tape in place. I applied it only to the hull edge just before laying the deck on top of it.

Then came the fiberglass tape of the outside of the seam and 3 coats of epoxy on top of it. Then sanding and sanding and sanding… Then a short break for amateur radio field day, and finally 4 coats and sanding and sanding and sanding of Helmsman Spar Urethane.
Somewhere in there, I put in two waterproof bulkheads and fitted a seat of minicel.
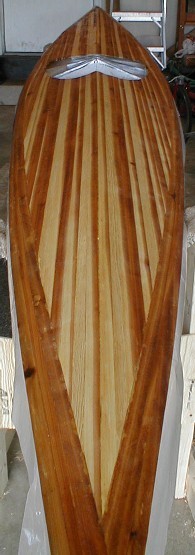
Here is the final result: She is known as Kingfisher:
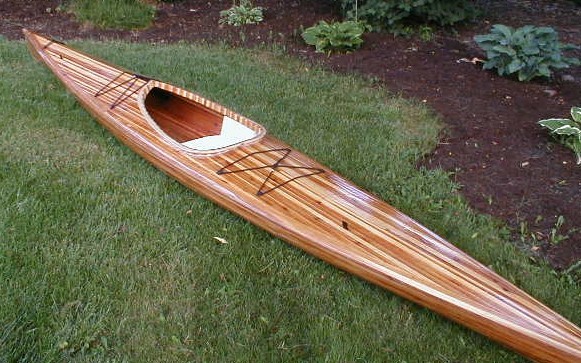

Launching was at 1700 25 June at Caesar’s Creek Lake, near Beavercreek OH. The boat tracks well and is fast on the water. More news after I have the opportunity to paddle it in the wind.
Post 10: 28 June 2002
Some comments on Progressive Epoxy for those who are trying to find reports on this epoxy. I posted this information on the Kayak Builder’s Board several days ago:
When I was researching epoxy makers for my strip built
boat, I looked at the System 3, West, East, MAS and
several other epoxy suppliers. I really enjoyed
reading the System 3 on line manual.
I found a small supplier of epoxy in New England, by
the name of Progressive Epoxy. The company is the work
of Mr. Paul Oman. They have a number of products, but
the one I was interested in was the Basic No Blush. It
is inexpensive compared with everyone else's epoxy,
especially when compared with their no blush ones.
The material did work well. There was no evidence of
blush despite high humidity on many of the days. It
was crystal clear and of medium viscosity. I had no
problem with bubbles and it wet both cloth and wood
very well.
Progressive says you should put on the next coat
between 6-24 hours after the previous coat if you do
not sand. That is important. I was a bit sloppy
putting on the epoxy for my combing against the deck
epoxy which was more than a week old at that point. I
did not sand the deck. Big mistake! I had a lot of
chipping of new epoxy to do after I found that there
was no bond between the two coats. When I worked on
the sheer strip later, I sanded just a few hours
before applying the epoxy and used masking tape to
mask off the unsanded epoxy. This worked well and I
had very strong bonding.
The material comes in either a 1.5 or 3 gallon kit.
The resin is in a 1 gallon metal paint can and the
hardener is in either a half gallon or gallon paint
can depending on the kit size. I found 1.5 gallons to
be just a little shy of what I needed for a Great Auk.
While I was originally put off by the metal paint
cans, they worked just fine. I did my measuring with
plastic syringes. I kept them in a plastic cup next to
the can, and just put them into the surface of the
liquid in the paint can to pull up the appropriate
volume as necessary. Occasional (every few days)
wiping of the end of the syringe and replacement of
the plastic cup made this a neat and clean process.
This is Progressive's least expensive epoxy and does
contain some nonyl filler in the hardener. The mixing
ratio is 2 parts resin to 1 part hardener. They do
have other products at slightly higher cost which have
no filler.
BTW, I have absolutely no connection with the company
except being a satisfied customer. In all the reading
I have done about strip built boats, I have not seen
Mr. Oman's company listed as a source. Paul was
available by phone and by email to answer all my
questions. I can personally recommend looking through
their products and considering even the least
expensive "Basic No Blush" Progressive Epoxy as a
potential epoxy source for a kayak project.
I have had some problem with leaking of the hatches. I used open cell foam as a seal for the hatches and they leak like a sieve. I asked the builders group for suggestions and read the past posts. One member suggested I find closed cell weather stripping at a truck supply store. It is sold for use in tool boxes. Another series of posts shows the use of silicone seal. I am presently trying that solution out.
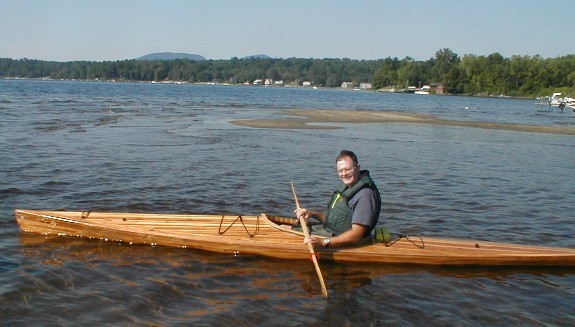
Here is a picture from a trip to Schroon Lake, NY. I had the opportunity to spend a week with the boat in conditions including a bit of wind. I remain very satisfied.
Comments can be passed to me at [email protected]