Flyfisher's Skin on Frame (SOF) Canoe Page
I began to dream of a way to make a very lightweight canoe for the next trip to the Boundary Waters. Kevlar canoes are available for $2000 to $3000 that weight 30-40 pounds. My Grumman Canoe from the 60s weighs 67 pounds, though it is considered a lightweight!
Reading the book on strip built canoes finds me looking at canoes in the 60 pound category.
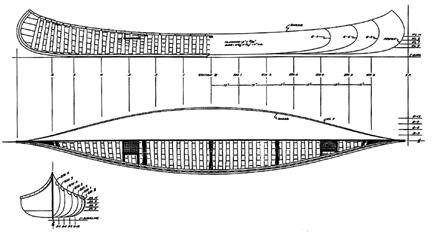
Morris, on the other hand, describes his Canadian Canoe as about 30 pounds. This SOF canoe is detailed in his Skin on Frame Boats book, from which I have already built the Greenland kayak.
4 September
I had a number of questions after reading the part of the book that deals with the canoe. I posted the following questions on the kayak builder's page. None of them were answered before I began the building process.
1. I will need to steam 2 2x2s for the gunwales. He recommends cedar. He recommends a 7-8 foot steamer. How long do I steam? 2 minutes per 1/4 inch gives me 16 minutes. Do I do 2 or 4 minutes per end swapping ends for a half hour, or do I just steam the central 8 feet? The purpose of this steaming is to be able to shape the gunwales with an 18 inch bend over 16 feet.
2. What is the best way to lash the ribs to the gunwales? Single hole through the larger gunwale? Two holes, one each side of the rib?
3. Description of the upper dowel used to pin the rib in the two gunwales on page 245 is opposite of the drawing on page 244. Which works better?
4. For sewing on the skin, Morris describes using either stainless steel staples or screwing on a rub strip with brass screws spaced every 2 inches. Has anyone (successfully) tried sewing the skin on like he describes sewing the cockpit coaming on to the Greenland Kayak??
5. I am considering using single or doubled dental floss for the lashings. The cord I used for my Greenland kayak seem like overkill. Anyone else use dental floss for lashing together their Greenland kayak??
6 September 2002
Bought the wood from the lumber store in downtown Dayton. They have no cedar except for knotty cedar used as siding. I bought their best quality pine. The bill for wood came to $56 total.
8 September
To make the canoe, one must shape the gunwales by steaming them and bending them before separating the 4 gunwale pieces.
Steaming the gunwales:
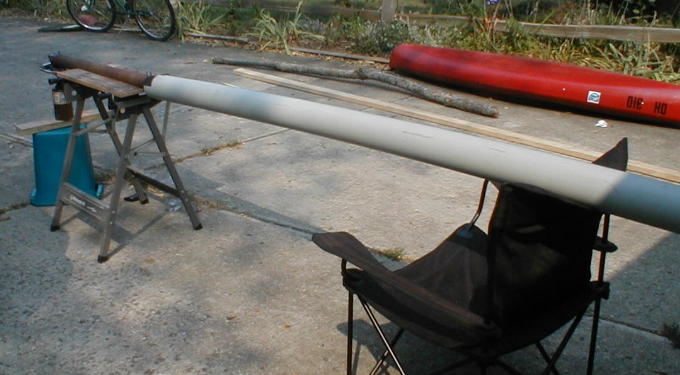
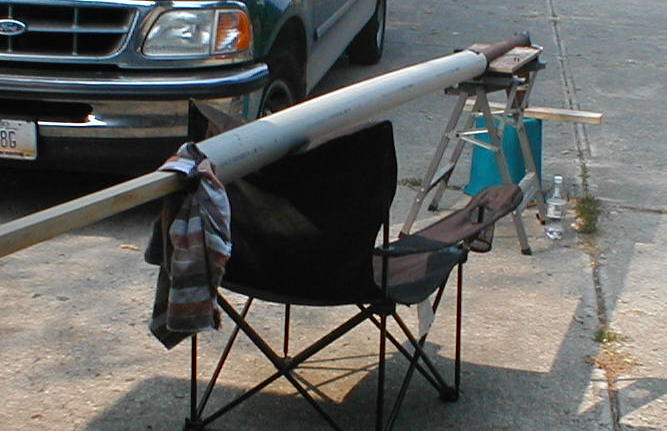
I made an extension to my steamer by using a piece of thinwall PVC pipe 9 feet long. About 11 feet of the 16 foot gunwale piece fit in the steamer. After 15 minutes, I swapped ends of the stick in the steamer and cooked it for another 15 minutes.
That is the answer to question #1 on my list.
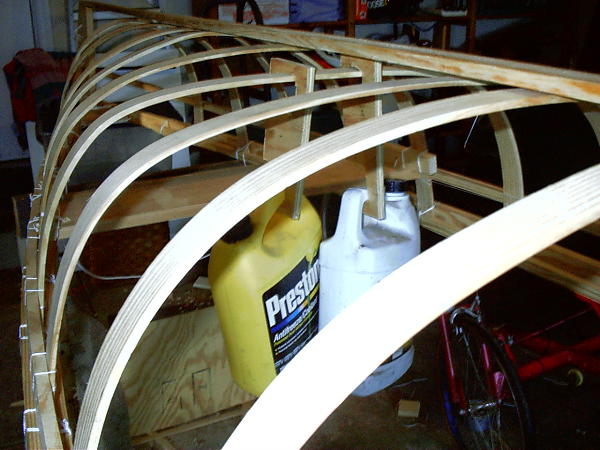
Bending the gunwales
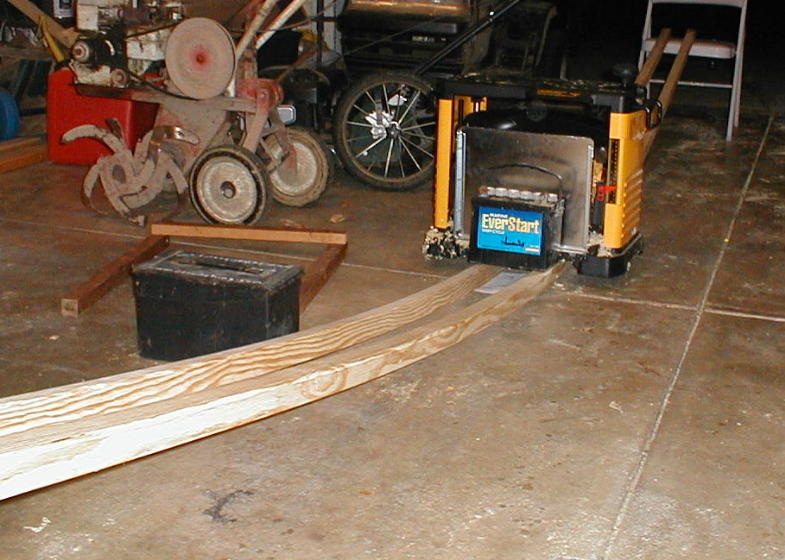
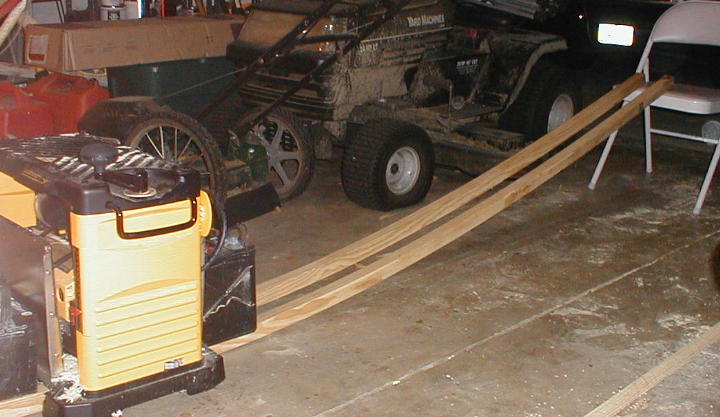
It takes a lot of weight to hold down the bend 1.5 x1.5 inch sticks. That is a portable planner, a trolling battery and a tractor battery holding the pieces down. I will let this stay in place for a day or two while it dries.
16 Sep 2002
Lots of progress made over the weekend. First great joy was installing a new saw blade on the table saw. I used a thin kerf carbide tip blade which is SO much nicer than my 20 year old blades. Most cuts do not even need to be run through the planer.
I was able to rip the gunwales as per Morris, and then to rip the two halves of the inner gunwale and rub strip. Morris had suggested using a bandsaw, but the table saw worked very well for this task. The amount of bend is within tolerances for using the saw along the bend.
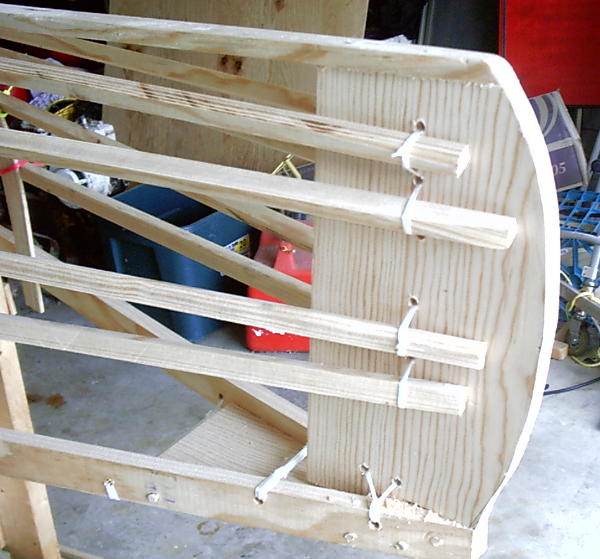
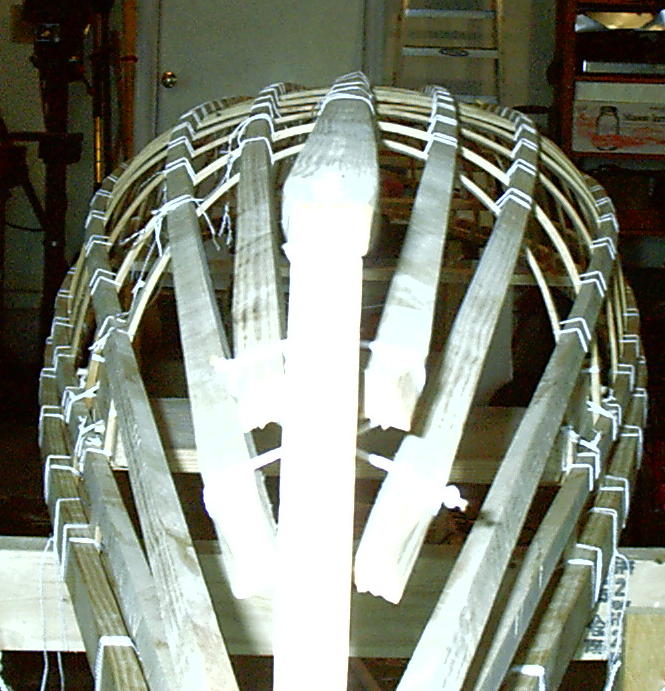
I made changes from Morris, not gluing the ends of the gunwales and not gluing the breast hook to the gunwales, using a lashing and dowels instead. I imagine the glue would have broken anyway. I plan to bring the cloth over the breasthook on each end and this should add further strength.
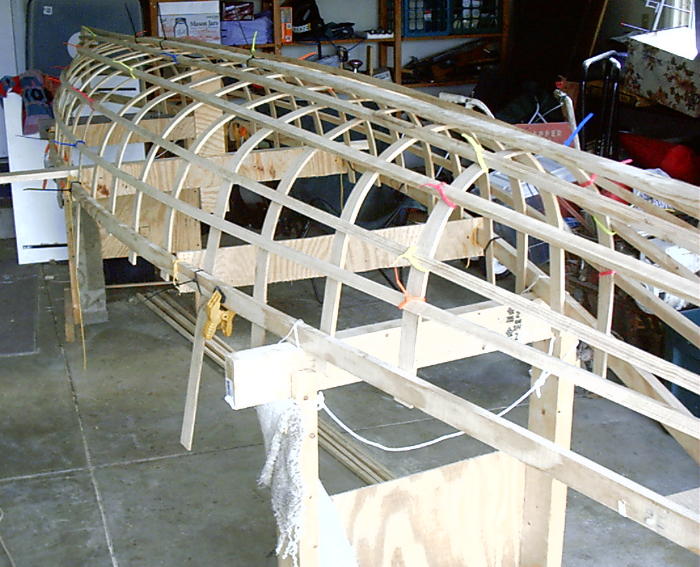
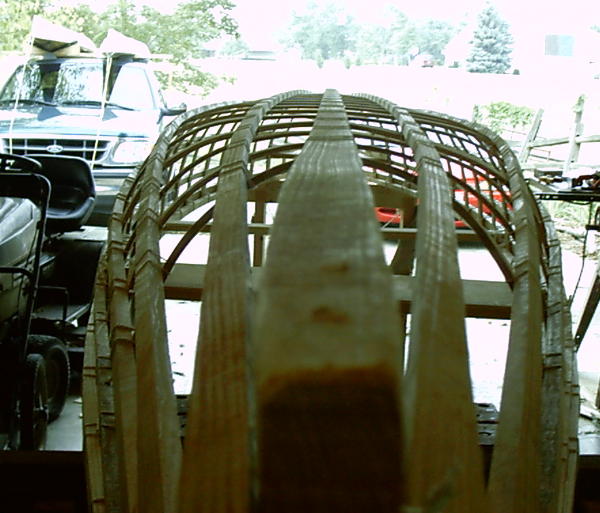
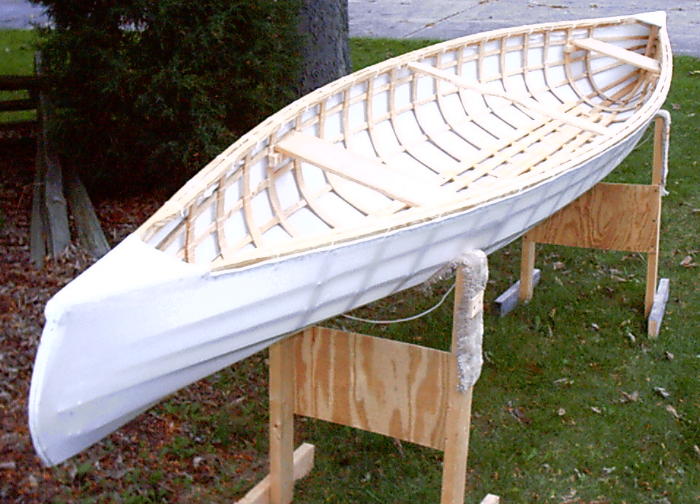
Here are pictures of the keelson in place and the first few ribs. The lashing under the breast hook can be seen in the pics.

I have found it useful to steam the ribs for 2 minutes and pre-bend them (around the wheel of my riding lawnmower!) Final shaping and adjustment of the rib is done with heat gun. The two techniques are very compatible with one another. The steam gets water well into the rib and the heat gun then works better, without causing "Mack's Spots."
Time so far: 10 hours
17 September
I have a couple days of vacation to spend. What better way than to get a head start on the canoe? First thing this morning, I called Dyson, Baidarka, and Co. for 18 feet of 12 oz ballistic nylon. That, two needles and shipping came to about $73. I am now $128 into the project.
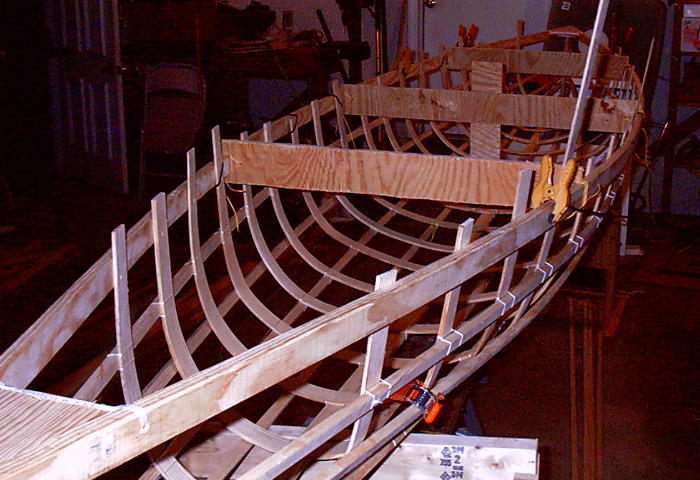
It was a day of bending ribs and tying stringers.
After several ribs were in place, I was able to install the stringers so that they can act at guides for bending the rest of the ribs.
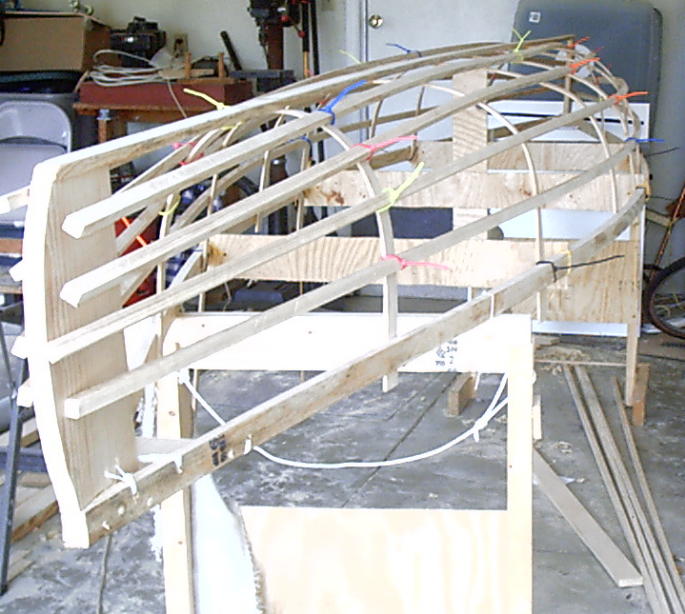
Next I got the rest of the ribs into place. I steamed them all, pre-bending around the wheel of my riding lawn mower where I judged the major curve to be, keeping a flat bottom to the boat.
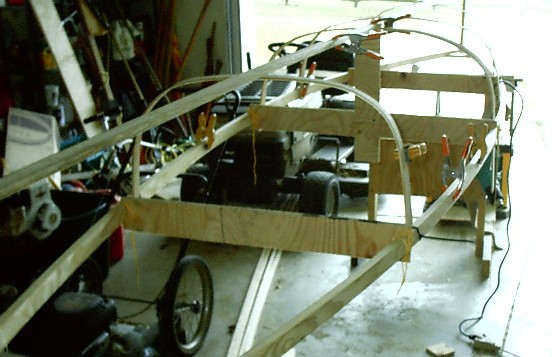
It begins to really look like a canoe! Next step was to tie the ends of the stringers into the stem pieces.
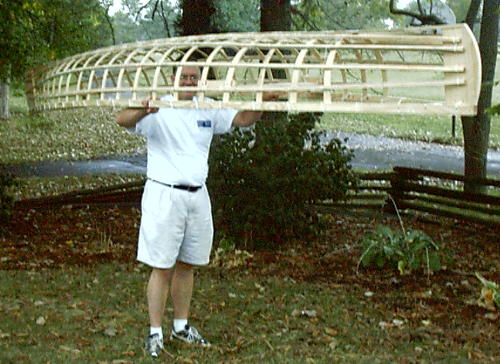
And then began the task of tying all the stringers in. I got 2/3 of the tying done before I got tired and decided to call it a night. But first, I had to see what the beastie looks like upright.
I think I may get finished with the frame tomorrow. Time invested so far, 18 hours.
September 18
Another day of work on the canoe. A full 8 hours today. Now 26 hours. What a lot of lashing there is! But I finished the frame. Put plastic on for a saran wrap test just before a thunder storm came up. That test will need to wait until tomorrow.
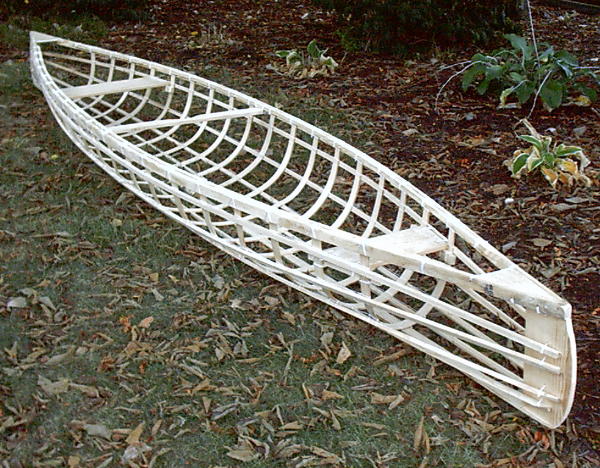
Real purty
Weight of frame: 38 pounds
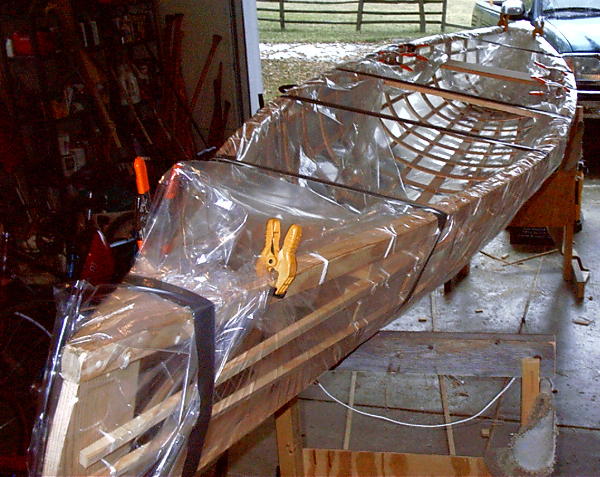
Saran wrap test will need to wait until tomorrow.
September 19 -Black Thursday
The saran test proceeded this AM. Picture of 1mil plastic:
Unfortunately, the test did what it is meant to do. It found a flaw in the shape of the canoe. There was almost no primary stability, which is what I feared, but did not have the guts to admit to myself. Well, sitting on that seat this morning, I admitted it! I found that there was no stability at all! Good thing I have practiced my braces!
The shape of the bottom of the canoe had ended up far too much like a round log. The way this happened is a problem with the Morris Method for this canoe. You add ribs to the canoe by pulling the rib up between the gunwales. This induces a bend in the middle of the rib. For any one who follows my adventure, I would suggest making sure you pull back down hard on that rib to make sure the middle is flat.
Here is what the bottom of the canoe looked like for Saran Wrap test #1:
The solution was simple! Make the bottom flatter. Which required cutting out the keelson and 6 of the stringers! That really hurt. Then the Rob Macks heat gun treatment saved my buns! I hung a couple gallons of evil ethylene glycol from the middle of each rib and started bending the rib anew with the heat gun. No "Macks Spots" either! Maybe they are unique to poplar.
After 3 hours of patient fiddling and an hour to lace the whole thing back up, it looked much flatter!
Note the background... I don't just build. Diane and I took a couple hours this afternoon to do some paddling on Caesar's Creek Lake
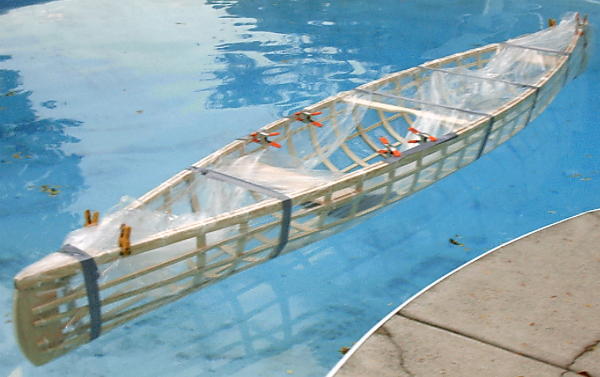
And the required second saran wrap test - this time with a tarp - showed the stability of the boat to be well within my comfort level.
Now THAT is what a canoe is supposed to feel like!
The cloth is still in Washington State tonight.
Oct 10, 2002
After a long trip the cloth finally arrived last Sunday evening. I have spent the week sewing and varnishing it. I just finished the last (4th) coat of waterborne polyurethane varnish. Now it is curing for 3 days...
Here is a post from yesterday about how I put the skin on:
I varied from the Morris techniques for attaching the skin. Keeping with the goal of no glue, no fasteners, I am sewing the skin on just like Morris recommends sewing the coaming on the Greenland Kayak.
I drilled 1/8 inch holes 3/4 of an inch apart and 1/2 inch from the bottom of the gunwale. After draping the skin over the overturned boat, I used small finishing nails through a hole and then the cloth to hold it in place. These nails were spaced every 18 inches or so.
I cut the skin about an inch longer than the top edges (bottom while upside down) of the gunwales - I knew I need some extra cloth to fold under. I cut with a cheap steak knife (wood handle) heated with propane torch until part of the blade, about an inch from the end, was dull red. I found I could cut a couple feet before I needed to heat the knife to red again.
Then I went between each of the finishing nails and turned the edge of the fabric in about an inch, using a finishing nails to hold the folded cloth. Of course, now the original nails could be removed, the cloth folded under, and the nail reinserted. I tried to keep a bit of tension on the cloth at this step, pulling out the wrinkles. No real hard pulling, just a little tension. (The cloth will shrink a bit with its first dowsing with water/drying, before the first coat of varnish.)
Then I started in the center, near the yoke/thwart, and sewed the folded over edge (about a half inch from the fold) down to the gunwale with dental floss. I used the stitch recommended by Morris for the coaming, with two needles. Each hole has a thread pulled in, and a second thread pulled out, the two threads alternating back and forth. As I sew the seam, the nails are removed as I come to them.
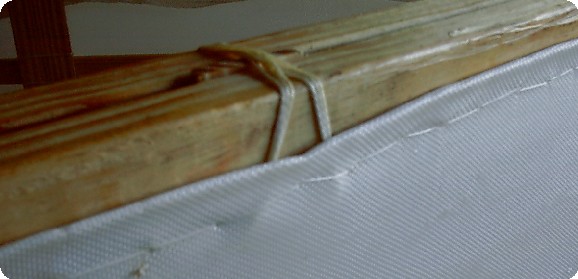
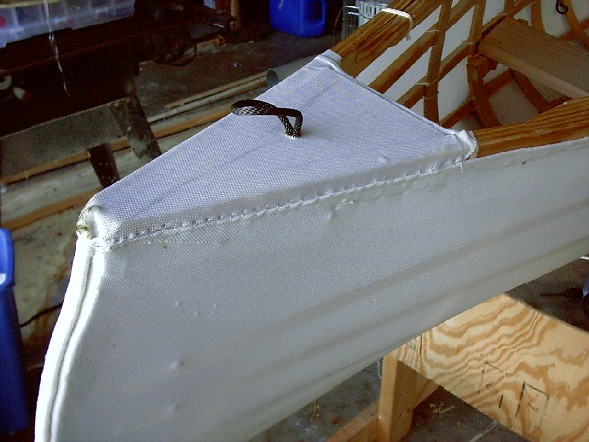
Upon reaching the ends, the breast hook is covered with cloth from one side and the cloth from the other side is used to stretch it. Finally the end itself is sewed up.
This is different from the two suggestions by Morris: In one he uses stainless steel staples covered by a rub strip held in place with marine adhesive. In the second, he suggests a rub rail held in place every couple inches with brass screws.
The method I am using is a bit simpler and makes more sense to me as a technique to be used in SOF construction. It certainly seems no harder than screwing a rub rail down. And there will be no brass to oxidize and leave green streaks on the white fabric. As to the staple and adhesive solution, what can I say except that such an approach is offensive to my personal concept of "back to pre-industrial simplicity". It would leave me with the same negative feeling as looking in a department store chest of drawers and seeing that the drawer has been stapled together.
(disclaimer: I already realize that use of nylon, table saws, dental floss, and electric drills also violate the simple approach. I am not fully committed to the simple ways. I don't build organic craft. But still: staples!?!)
Skin and Varnish on!
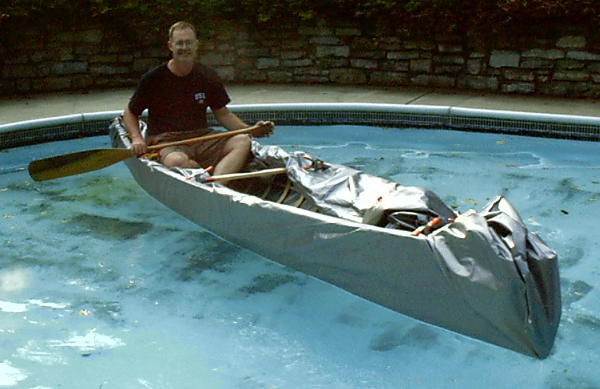
Launch: 13 October 2002
I am not a believer in 13th unluck... However, Launch was at Caesar's Creek Lake while I was on a group paddle with the Columbus outdoor club. It floated, but very unsteadily. To do much at all I had to sit on the floor. It is totally unusable as a crusing boat for now. I will lower the seat by about 4 inches to see if that gives enough stability. If that does not work, I think I will put it out on Ebay as a restaurant decoration!

It Floats! Ever so unsteadily...But isn't it pretty??
14 October 2002 Success!
In the shop, I lowered the two seats by about 4 inches, bringing them level with the next stringer down. I also moved the seats a little further toward the middle of the canoe. This was successful. I was able to paddle solo from the front seat (seated backwards) and also with William using the canoe tandem. It is a little more tipsy than my Grumman, but it very controllable. I think we have a winner!
Learning from mistakes is always a good thing. One of the considerable advantages of the SOF methods, is the ability to quickly make a change without major reconstruction. To move the seat, all I needed to do was cut a couple lashings, drill a couple holes in ribs, and then lash the seats back in. I used the same bow seat, and needed to cut a new stern seat. It took about an hour to make these changes.
Total time on the boat was about 30 hours. I look forward to a longer paddle to see how it feels.
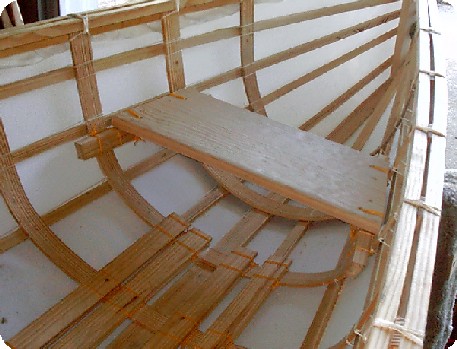
Here is the new back seat. You can just see the holes in the two ribs back and up from where the seat is now.
That is where the old seat supports were about 30 minutes before I took this picture.
It is also a pretty good view of the lashings used to hold the inwale and outwale together at each rib.