| Click here for the sound of SSTV :) Please print this article and use it as a hand out at Club talks and lectures |
|
It supports most of the common modes,
Scottie 1&2, Martin 1&2, Robot 36&72, AVT 24,90&94 and Wrasse. It stores
60 thumbnail images for TX and handles 4 on RX. You can prepare a picture while you are receiving or transmitting another. It has the ease of full windows
conveniences like drag-and-drop, mouse control, Save and Load windows, and many more functions. The system can
Auto-Receive pictures, modes, and will even sequentially number the images in
Auto-Save Mode. |
| But first check out your computer. The system requirements are: |
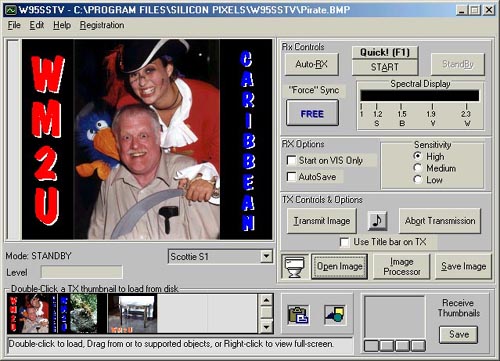
| From the screen shot above. 'File' on the menu bar leads only to the exit! The 'Edit' menu allows you to configure the system, and 'Help' contains the release note which I urge you to print off and study. Now click on Edit then Settings, and select your active Com Port. Although there are more settings that I want you to know about, simply activate your Com Port for the time being. This is enough to get ya! going. To load an image into the main Tx/Rx window, drag an image from the Tx Thumbnails onto the main window. Hey! would you believe you can have 60 Tx thumbnails available! Now the trick is to get a nice personalized image into the Tx thumbnail cell. |
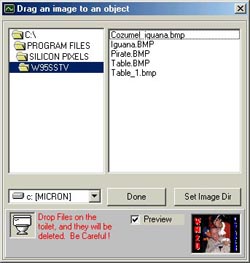 |
Lets get a picture to play with eh! Click on the button named Open Image. The folder window on the left opens. |
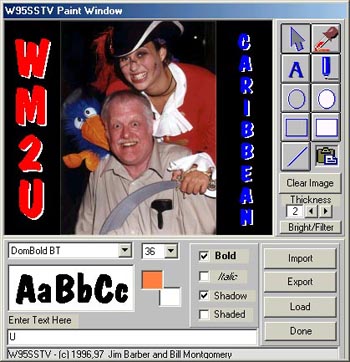
The Paint Window offers you more than adequate image editing capability. |
 |
Well! enough of that. Lets do it eh! |
| Right! first things first eh! Before you do anything else, you need to interface your radio to the computer. Please go to my Interfacing page where you will find detailed instructions on how to achieve this. Now configure the software to tell it where to find stuff. Edit>Settings and select your active Com Port. I will assume you have made some really nice interesting images for transmission and you have them all ready in the Tx thumbnail cells. Tune your rig to 14.230mHz, and watch and listen for a few minutes. Practice receiving images, clearing the screen, starting the image Rx, and using the Auto Rx feature which will start the image Rx by recognizing the start, sync pulses. Oh! at this point is your Rx picture slanted? If so go to Edit>Settings and click on Adjust Slant. Slowly drag the slider either right or left until the picture is straight. Click Finish and don't forget to Save. Use the locked together option for Rx and Tx, this gives the best results in most cases. Drag an image from a Tx thumbnail cell into the main Rx/Tx window and with a dummy load connected, click Transmit Image. Set your rig volume to an easy level and adjust the sound card Volume, Mic amd Wave levels for the desired output. Remove the dummy load. Your now with an SSTV group on frequency, and it's your call!..... well go on .... hit the Transmit Image Button :) |
It works. It works well. The freq's are 3.845, 7.171, 14.230, 21.340 and 28.680. It is no use me continuing with this epistle as Jim, N7CXI has done an excellent job with the help files. Please read Release.txt, where you will find a lot more settings and operating tips that you should know. I have only scratched the surface here, enough to get you on line and operating. |