This first part will deal with the rear Camber and Toe In.
This information should help you to get it so it may be adjusted to the correct range. According to my shop manual, there is only the one adjuster on the lower control arms, near the differential. After doing a complete check, I found that this is WRONG.
The first thing you will need is a large carpenter square to get a rough idea on how much negative Camber you have to start with. Put the car on a flat level surface, and place one edge of the square on the ground, and the other vertically, along the side walls of the tire. Make a measurement at a spot on the top part of the tire, and remember where you took it, and what the gap is. If your tires bulge some at the ground contact point, shift the square forward or rear some to get clear of this area
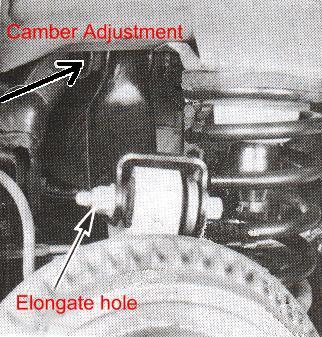
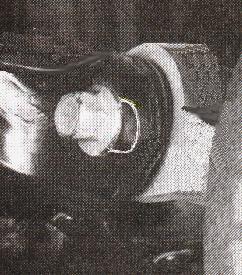
The upper control arm HAS a Camber adjuster hidden in the mount, near the differential. This has no markings on it, but it has an eccentric mount in the arm. Mine had some adjustment left, and with my Bird being lowered only 1 1/2 inches, it was able to bring the camber to "0".
The rear camber bolt is keyed to the eccentric, so if you turn the bolt, you will change the camber. To adjust, loosen the nut and turn the bolt till the camber is correct, then hold the bolt, and tighten the nut.
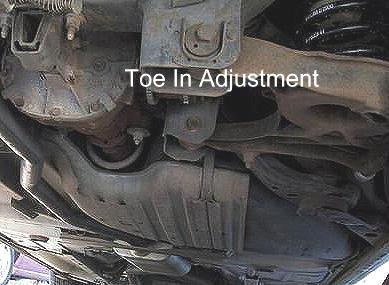
I do plan on lowering mine more, so looked for a way to get more adjustment. There are a few ways of doing this, but the easiest and safest are both the same, so this is directed at that. Below is a picture of the rear suspension, and the area we will be working on.
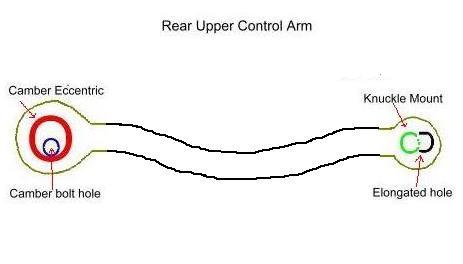
The rear upper control arm connects to the rear knuckle near the top of the brake backing plate. This is where we will make the modification. Raise one of the wheels of car, and support it with jack stand. Remove the long bolt and nut going through the control arm and knuckle. The hole in the upper control arm will need to be elongated in towards the knuckle as indicated in the below picture. The elongated hole should only be extended about 1/4 of a inch towards the knuckle. It is shown more than this so you can see it easier only.
You can remove the bolt from the other end of the upper control arm to allow you to remove the arm, and elongate it on the work bench.
The hardware needed will be:
1. (2) new 14 mm x 100 mm long bolts
2. (2) new 14 mm self locking nuts
3. (4) new 14 mm HD washers
(the washer should be about the same thickness
as the control arm. If not, use two.)
If you are going to elongate the upper arm at the knuckle, you should center the camber adjuster prior to reinstalling, so you can adjust it either way when you are done.
Place 1 washer on the bolt and reattach the knuckle to the upper control arm. Place another washer on the bolt, then the self locking nut only snug. You will now need to apply pressure to move the knuckle to the end of the elongated slot in the control arm, and tighten it. The washers will be welded to the control as the last step..
Put the wheel on, and lower the car from the stands. You will now need to do a rough Camber check using a large Carpenter Square like before. One edge on flat level ground, and the other edge vertically, along the side walls of the tires. If you are at "0" camber, it will touch the tire on both top and bottom., or be very close. Reposition the washers and bolts if needed.
Do the other side when you are satisfied that the first one is good.
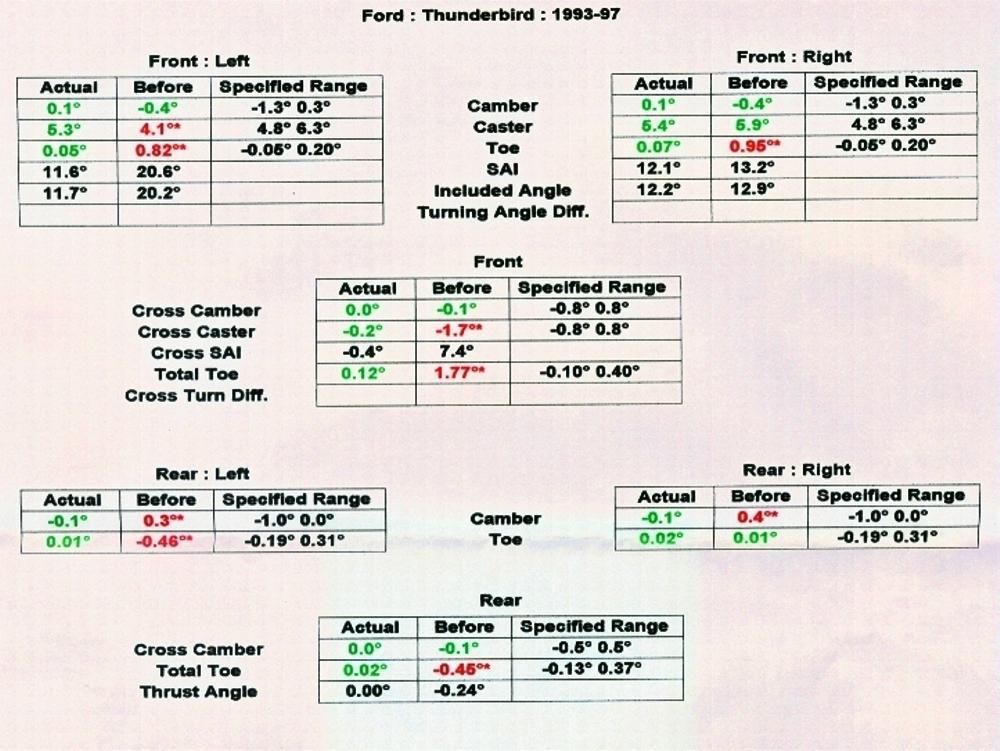
After both side are at "0", its time to rough in the Toe In. If you have the same size tires on the front and rear and no spacers, you can get it close. Tie a string to one of the wheel spokes, and then run the string around all four tires about 3 inches off the ground. Use the small notches on the tire edges to help support the string. With the front wheels pointed straight ahead, and the string tight, you should have the string touching all the tires on two places. The rears are most likely not touching on the front, indicating too much toe in. Use the adjusters on the lower control arms, near the differential to adjust the Toe in. After its close, recheck the Camber one last time.
Once the Camber is correct, and there is adjustment remaining, the washers will need to be welded in place.
Now even with a 2 1/2 or 3 inch drop, you will be able to use the upper control arm adjustment to get the camber correct.
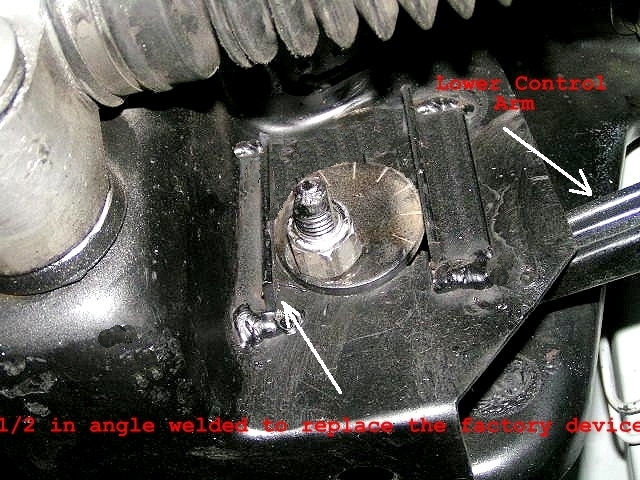
What is needed, is to elongate the K-member hole more towards the center of the car on the front and rear of the K-member about 1/2 of a inch, and remove the horseshoe alignment brackets from it temporally. Reassemble it with the camber adjuster in the midway position, and leave about 1/4 inch space in the new slot area. Now with it on the alignment rack, loosen the adjuster, still keeping the cam at mid point, and move the bottom of the wheel in, or out to get "0" Camber. Now spot weld the horseshoe shaped alignment device back on over the cam, and then turn the cam to the normal position. Now recheck the Camber, and make final adjustment. What you want,is the camber to be "0" with the adjuster in the midway position when done. This will allow you to do any adjustments you may need in the future. You may have to grind off some of the horseshoe piece that goes towards the center of the car to get it to fit properly.