
I really love it when a plan comes together.
And so it is with the Norcal keyer I purchased.
I opened the package to find the usual parts, PCB, and instructions.
The instructions are well written and are formatted and printed professionally.
None of the parts were missing.
I installed an 8 pin DIP socket for the PIC IC first.
Then I installed all of the caps, then the resistors.
I replaced the supplied 2N2222A with a 2N7000 but used
the stock voltage regulator. I then plopped the PIC into it's socket.
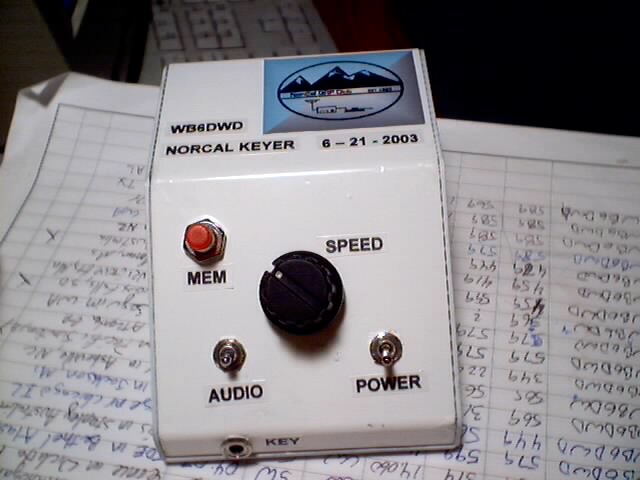
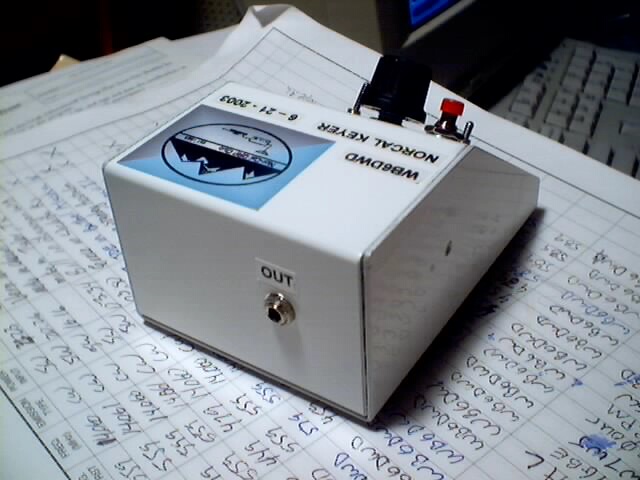
I found an attractive case to Fry's Electronics which
I painted white, drilled holes, and affixed the usual labels.
I drilled a small hole in the side to let the sound from the piezo
unit to emit more efficiently. I ended up perma-bonding the piezo
unit to the inside of the case over the hole.
For power I decided on using a 9v transistor battery.
I found a suitable battery clip at RS which I glued to the
inside of the enclosure with some epoxy.
To mount the keyer PCB inside the enclosure
I used a single stand off with the appropriate nut,
screw and lock washer (10-40?).
I decided to use a 100k pot for speed control which
I mounted in the middle of the front of the enclosure.
Adjacent to the speed control I placed an on/off switch,
a switch to cut out the piezo, and the mem switch.
Two additional holes were filled with the connectors
for the key and the output to the rig.
When I performed the 'smoke test' - no smoke...
just the sound of the keyer sending 'FB' in morse code.
Ahhhh, music to my ears. To make the keyer recognize
the speed control pot, I needed to make a change
in the PIC's default settings. So I used the manual to
guide me through the menus (menu P) to change the speed input.
This took me several tries because I wasn't sure as to
the exact length of a PAH, but I finally got it.
What was left? Put the screws in and make a contact.
Which I did. I called CQ a few times (14.060) and then
K5JFV in El Paso TX was kind enough to respond.
We chatted for about 20 minutes then dinner was ready.
I programmed a CQ sequence into memories 1 & 2 and then
configured the beacon mode to send them both. This also works FB.
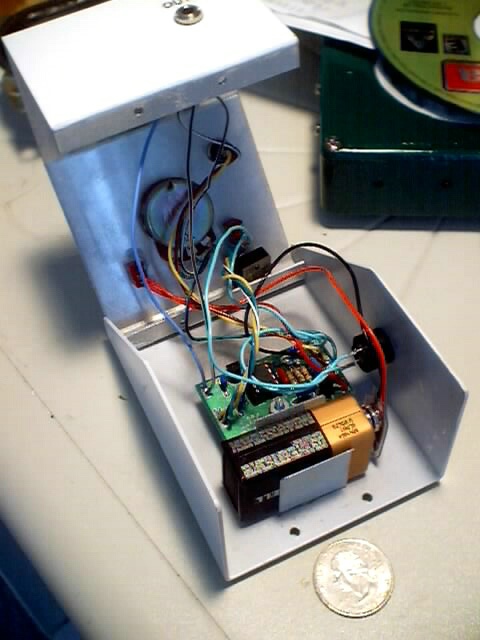
And here's a shot of the unit just befor I put the screws in.
The PCB is mounted on a standoff and the 9v battery clip is glued to
case with epoxy. You can make out the speed pot in the center of the picture
This keyer is a great value. I had a fun time putting
it together and I'm having even more fun using it.
Thanks to all who made this this kit available and for
bringing a little extra joy into my hamming world.
73 & 72
dit dit
[Home] [QSL] [QRPP] [Projects] [Links]