Here's a few pictures of how I build my boats

The place to get fussy.

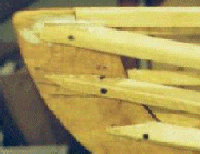
The deck joint is made by setting the deck piece into a
cutout in the bow and stern pieces. Since these boats
continually flex, I get rather fussy about this joint. It is
one of the few places were a joint failure will ruin a boat.
The longrons are taper fitted to the bow piece by trial
and error. The gunnel piece may go all the way to the
front if you wish, but a little space will make fitting the
trim easier. Lower pieces should stop before the end.


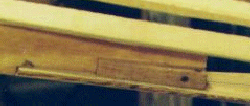
   The floor to bow joint.

The floor joint is made by setting the floor piece into a
cutout in the bow piece. A small hardwood piece is
glued and screwed into place on each side, and
tapered to avoid proud spots. I have tried alternate
systems, but I find this to be the strongest.

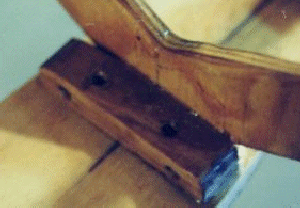
   The floor to rib joint.

The floor is attached to the ribs by an oak block
which is glued and screw into both pieces.
Should you fall into a boat, which I often do in
the winter, a really secure joint is required here.
I have considered using brass bolts and nuts in
this location, but have yet to do it. Note the
center line on the floor and rib.

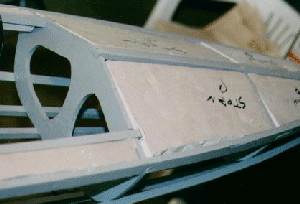
The Grandchildren's Boats.

The boats for my grandchildren have two inches of
closed cell foam under the decks. I simply cut it to
shape and glue it in. This not only adds tremendous
floatation to the boat, but it will float in an upright
position when full of water.     Look Here

The kids have never tipped a boat, but we all feel
better knowing they can sit in them, if they should
dump one someday.

Some Chat on how and Why

If you look closely at some of the photos you will notice a center line on the floor piece.
This is the first thing that is done when I start a boat. The board used for the floor, be it
8" wide plywood or a 1" piece of ash, is marked before it is even cut to length. These
are fun boats to build, and can be built by virtually anyone with very few tools. You may
even make a lot of mistakes while building, and still come up with a decent little boat.
However, you must make the same mistakes on both sides, or it will be a disaster.
This permanent line enables you to do just that. This line and the stern end of the floor
are the only reference points you have while building. You do not want to erase the line
until you are happy with what you see and the skin is ready to go on.

Generally I will assemble a boat with just the screws and let it set for a few days. Often
the ash longarons will stay just right, and I will then glue it up. But occasionally the wood
has a mind of it's own and will need to be replaced. It is not wasted, I simply rip it to
quarter inch and use it somewhere as trim.

Since these boats are so simple, and require so few tools they are ideal for introducing
novices to kayak building. Also by simply shifting the location of the ribs in reference to
the stern, the shape can be readily changed to meet the eye of the beholder. This gives
the new builder a sense that it is his or her unique boat. I have had the pleasure of
teaching six people how to build their kayaks since moving here. It is very pleasing to
watch, as they explain how they built them, to the other kayakers we meet on the
lakes and rivers.

See My Disclaimer

The Details
The detail pages are still under construction, but they may be of help to you.