This is just to show that not all projects have to be complicated to be fun. And after all, having fun is what the hobby is all about...
The beginning...I've always wanted a Heathkit Cantenna. In my early teens, I would thumb through the Heathkit catalog thinking about just what I'd order for my perfect station if money wasn't an object. And, of course, the Cantenna was always a key part of the test equipment I'd need in my dream station...
Food for thought...
It all started with getting an Altoids tin from my wife for the FOXX-3. Then I asked her for the can I used to house the Tuna Tin 2. A while back she was at the store and found a cute little can of cinnamon that she brought home and asked, "Can't you build some kind of radio thing in this?"
I wasn't sure what to do with it until I was in the middle of tuning up my Ten-Tec 1340. I've got a small dummy load, but I wanted something that could more easily handle 5 watts for minutes at a time (without breaking out the 200 watt dummy load) and with a built voltage divider to feed the o'scope.
So, what about a QRP Cantenna?
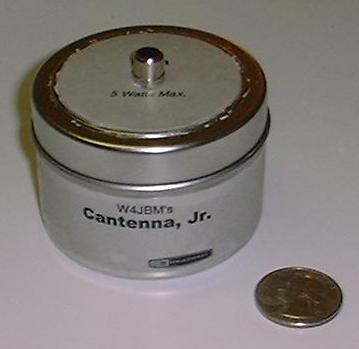
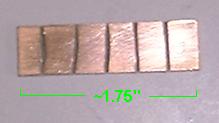
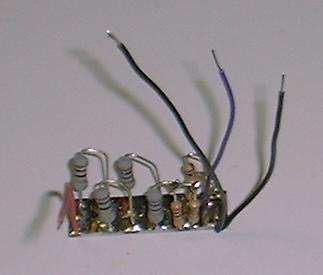
Well, I'm now the proud owner of the first Cantenna Jr.! It's fed with an RCA jack on the top. There is another jack on the back that has the voltage divider output. The guts are built on a small piece of circuit board. I used a Dremel tool to separate into islands.
I used four 10 ohm, 1 watt resistors and four 10 ohm, 1/2 watt resistors. The half watt resistors were used in pairs to give me the 5 ohms I needed to get the divide-by-ten. Below is the guts before I attached it to the bottom of the enclosure using super glue.
The label was a result of my increasing experience in packaging my projects. It was designed in a computer drafting program (Visio), printed on a laser printer, glued to the enclosure, and sprayed with a coat of Rust-Oleum Crystal Clear Enamel.
I learned two lessons in the process. First, I'd put one coat of clear enamel on prior to gluing the label on if I was doing it over again. It's very easy to get a bit of glue on the front of the label when you're gluing it on and that part of the label is a slightly different color than the other parts. Secondly, make sure you use the minimum amount of glue. If it starts bleeding around the edges, you've got too much. On my Tuna Tin 2 I felt like I didn't use enough because you can see when the paper is glued to the tin and where it isn't. The best solution isn't to use more glue, but instead to use a slightly heavier cardstock (instead of regular paper) for the label.
Why do you call it a dummy antenna instead of a dummy load?
As several radio books will point out, while it's a dummy antenna it is in fact a real load. To be honest, I'm as likely to call it one as the other. But I did want to be as accurate as I could here, so dummy antenna it is...
Why the voltage divider?
My oscilloscope goes up to 5 volts per division and has 8 divisions vertically. That gives me 40 volts peak-to-peak. At 50 ohms, this would be a power of 4 watts. I wanted to be able to use the o'scope to make measurements and look at waveforms for signals in the 5-10 watt range, so I needed some type of external divider. The Cantenna Jr. is easier (for me) than using a voltage divider probe.
Copyright © 2001-2009 by Jim McClanahan All rights reserved.
All trademarks and brands are the property of their respective owners.