It is illegal to operate outside the limits of your class license or permits.
Upon completion of this modification and turning power back on, the TS-890S will need a full reset, returning all memory contents and menu settings to their original factory default values. Please refer to user manual for Full Reset procedure.
To enable the MARS capability of the TS-890S, the transceiver will need to be placed upside down so that it rests on its top cover. Before performing this modification, take some time to arrange a suitable work surface clean of anything that may scratch the cover. The TS-890S is heavy, seek help to move and turn the transceiver in a careful manner to avoid any damage to the covers and front panel.
1. Disconnect the power cord, antenna(s) and any other cables and devices attached to the transceiver.
2. Carefully turn the transceiver over so that it rests on its top panel.
3. Remove the bottom (6) and side (6) case screws. That�s a total of 12 screws that need to be removed and set aside in a small container.
4. Carefully remove the bottom cover, and set it aside in a safe place and position as not to become scratched or dented.
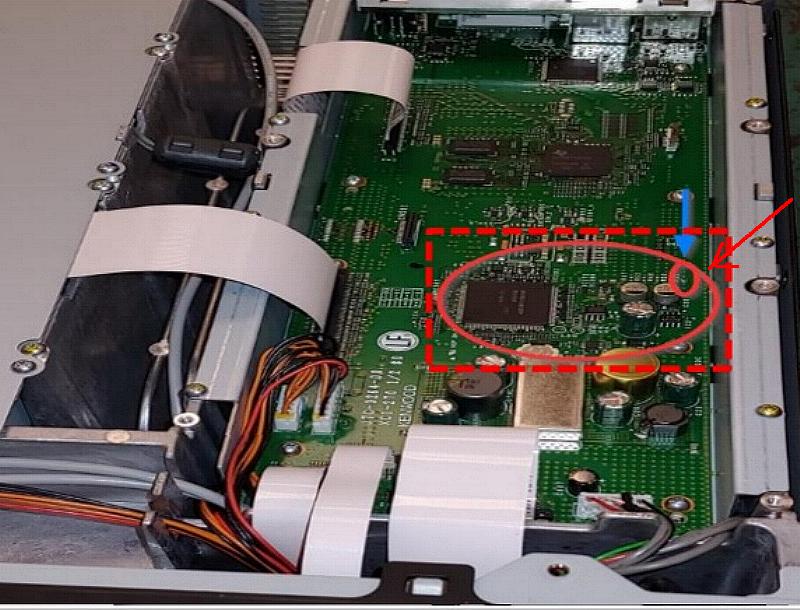
5. On the right hand side of the transceiver locate a shield plate that covers the Control board. Remove the 7 shield screws and set them aside in a small container.
6. Carefully lift up on the shield plate and remove it from the transceiver. Take note of the cushion placement under the shield plate that holds down the flat cable. You will need to reposition it in the same place upon assembly. Now you can set the shield plate aside in a safe place.
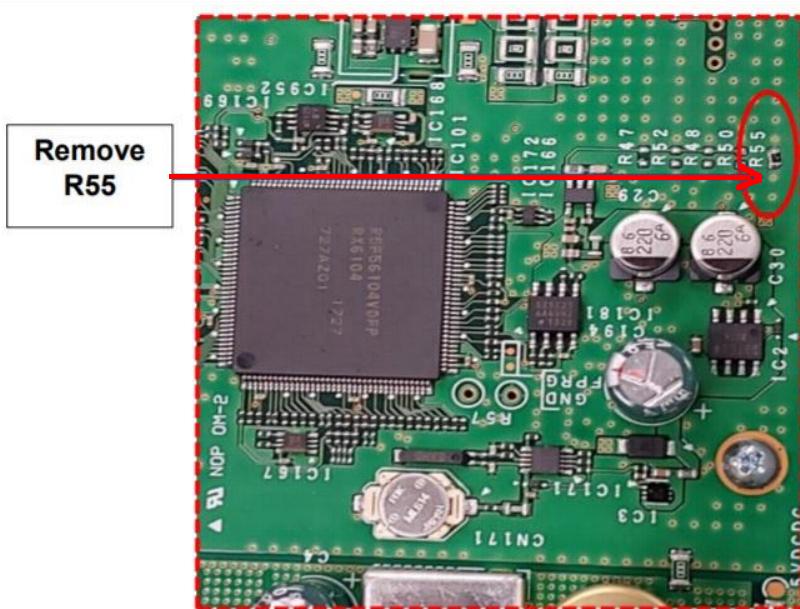
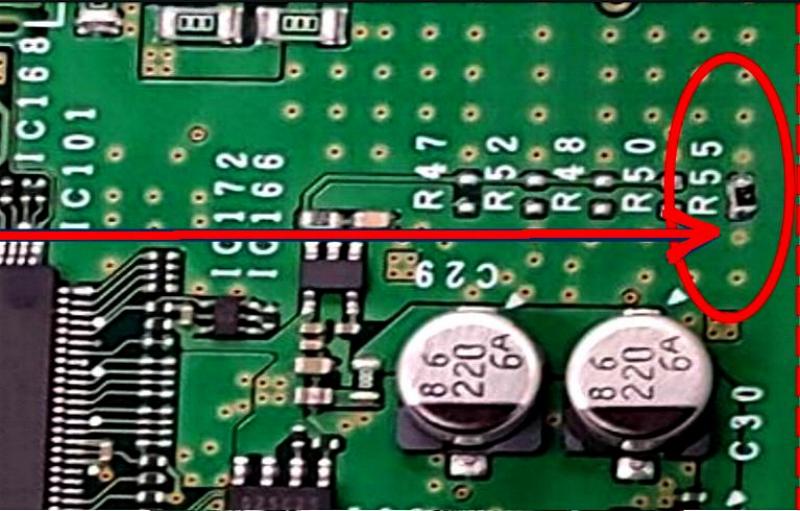
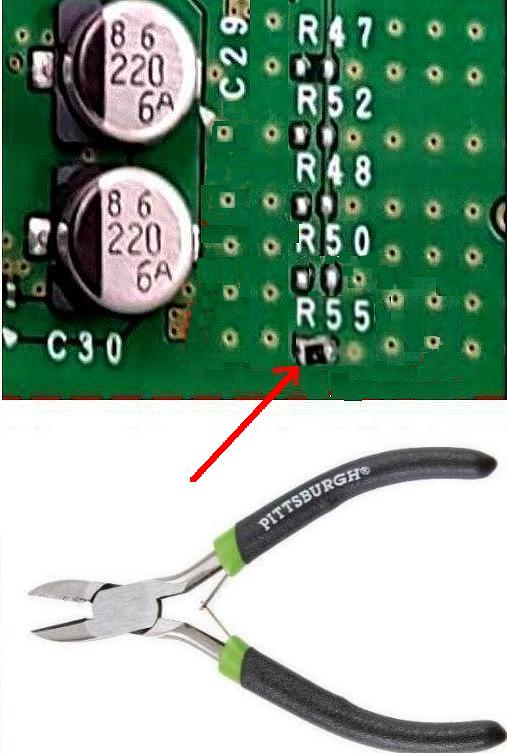
7. Locate R55 on the control unit (see the 3 photos below).
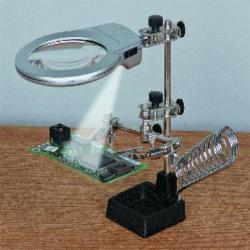
8. Using surface mount soldering techniques and soldering tools, carefully remove R55. You may want to use two soldering irons or one soldering tweezer tip to heat the solder on both sides of R55 at the same time to lift it up. Be careful that you do not tear the foil traces. Also be careful to not pull, or rip any ribbon cables as you work to remove the resistor. You can also use a smallpair of cutters as shown below, being careful to not touch the circut board while cutting R55.
9. Assemble the transceiver by reversing the steps above. Carefully squeeze the sides of the bottom panel to fit them inside the top panel. Loosely insert all case screws and align the fitting of the bottom cabinet before tightening all case screws.
10. Connect DC Power and perform Full Reset to the TS-890S before operating with the MARS modification.
Transmit Operating Ranges:
LF Band: 100kHz to 522kHz
LF Band can only transmit from drive out terminal, not the antenna terminal.
HF Band: 1.705MHz to 30MHz 50MHz Band: 49MHz to 54MHz. You will now have the new 60m Band also.


| Mods for the IC 706mk2 Radio |
| Mods for the IC 7100 Radio |
| Mods for the IC 7300 Radio |
| My 40m Wire Yagi |

