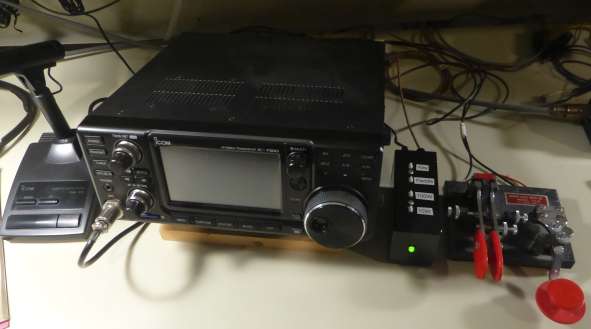
ICOM Commander
I acquired my IC-7300 in 2017. It is a fantastic radio in my opinion, 5 stars. It does have a few quirks and I found an article recently called IC-7300 Paddle or Key by ON7DQ that tries to address a couple of them. One is switching from low to high power, the rotary encoder changes 1 watt per step so it takes quite a few cranks to accomplish your goal. The other is switching from straight key to keyer mode. My old IC-746Pro had separate jacks for each type of key, but the 7300 has only one which requires a trip through the menu system to make the change. ON7DQ provides both functions using an Arduino Nano and two pushbuttons.
I gave the Arduino project a try (version2 provides both
functions) and aside from the fact that I dislike Arduino in general, I
was not completely satisfied with the result. Each button requires
either a short or a long press so 4 commands can be issued. As you can
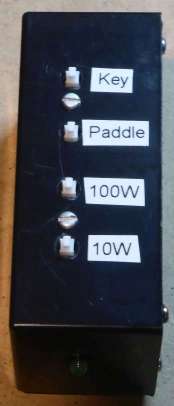
see from the photos below, I chose to make a unit with 4 buttons and
large easy to read labels.
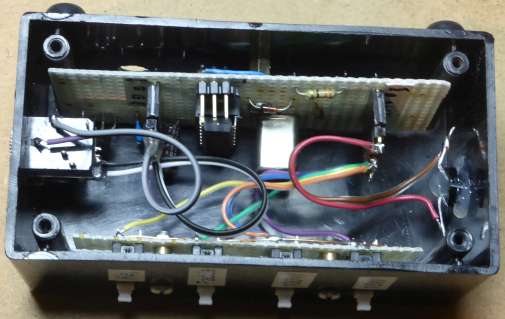
The project provided a few challenges which I enjoyed. I chose to use an ATtiny84A since it is small and has enough I/O for the project. However there is no UART, so I had to implement a bit-banging solution using one I/O port. Fortunately the project only sends data to the radio, it does not receive anything. I got some help from Marcel Meyer-Garcia who provided a module for the same processor and clock speed I used. I just had to add a simple routine to send blocks of data (rather than strings or characters), and tweak the baud rate a bit. I chose to use an external 8MHz crystal oscillator rather than the internal clock, the idea being it is more accurate so one less thing to worry about.
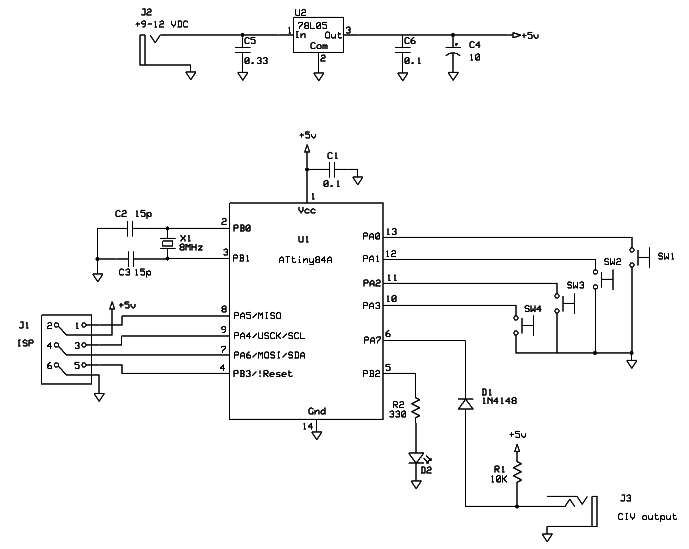
There are a few customizations you can make to the code. If your radio is a different ICOM model, you must change the define TO_ADDRESS in main.h to whatever the address is for your radio. You can also change any of the 4 CIV commands in main.c to different commands of your choice by updating the data in function serial_send_cmd(). The command formats can be found in the ICOM manual under Remote Control (CI-V) information.
Download WinAVR C source code for the Controller