Icom 706 modification 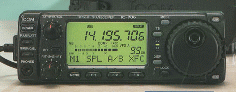
MODIFICATIONS
WARNING: Improperly performed modifications can severely
damage your
radio. I have performed these modifications successfully, but
I
offer no guarantee or warranty for them. Proceed at your own
risk.
TOOLS NEEDED:
1) Small philips-head screwdriver 2) Tweezers
3) Magnifying glass 4)
Low-wattage (15 watt) soldering iron 5) Long-nosed
pliers
MODIFICATION 1: Enables out-of-band transmit for 1.6 MHz to 54
MHz.
This does not enable extended VHF transmit This does not enable AM or FM
broadcast band
transmit. Your memories will be cleared after this
modification,
since you need to reset the CPU.
1) Open the top of the
radio by removing the 3 top screws and 2 side
screws. Look at the radio from
the with the front panel facing you.
screws.
2) Gently pull up the speaker
and set is aside without damaging the
speaker or the wires that attach it to
the rig.
3) Note the silver rectangular box near the middle of the PCB
marked
something like "9 MHz SSB Filter".
4) Move your eyes up from this
filter toward the back of the radio.
Just before you get to the "D 108"
marking, you will see two tiny
diodes, two blank spaces, and one additional
diode. They look
something like this:
D108
[XX] [XX] [ ] [ ]
[XX]
Remove this diode ^^^^
5) The second diode from the left needs to
be removed. I did this
by crushing it with long-nosed pliers. You can also
heat it with a
low-wattage soldering iron and pull it up with tweezers. Be
sure
not to damage the other diodes or the PCB. Be sure that you
don't
apply too much heat, since the heat can damage the PCB and the
other
diodes.
6) Re-assemble the radio. Reset the CPU by pressing and
holding
down the UP and DOWN buttons on the front panel and pressing
POWER.
Improved VHF recieve
mod:
154-200 MHz RANGE
To open up the 154-200 range,cut the yellow
wire on the plug labled "j-4" on the right side of the radio on the bottom,the
book points to this connector.
I did this and it opened up the rx between
154-200 mhz.
For those who like to scan VHF Hi-band, there is a mod that
restores sensitivity, but at the cost of reduced sensitivity below 120
MHz.
This allows the filter to switch at the corner frequency (apparently
around 129 MHz) as you tune.
PROCEED AT YOUR
OWN RISK
There are no guarantees you won't trash
your radio.
Remove the radio top and bottom covers according to the
manual.Remove the speaker. Now with the radio facing you and right side up,
you'll see a single connector with discrete wires at the rear of the control
board. The fourth wire from your left should be a yellow wire (caution,
the 5th and 6th wires on the other end of the connector are yellow too, don't
get confused). Disconnect this wire from the connector. This will enable the 2
meter band-pass filter to work outside the 2 meter band, and will restore
sensitivity between about 130 MHz and about 165 MHz (above and below that range,
sensitivity still stinks, especially above 165 MHz). Before this mod, a low pass
filter with a corner frequency around 129 MHz was in the circuit all the time
except when you were actually tuning inside the 2 meter band, and that killed
high band sensitivity completely. Before removing the yellow wire, sensitivity
at 155 MHz was 30 uV for an S1 indication,after the yellow wire is removed,
sensitivity increases so that only 0.5 uV is required for a S1 reading. At 165
MHz after the mod,sensitivity is 3 uV for an S1 reading, before the mod, a very
large signal was required for an indication.
Disconnecting the yellow wire
has the unfortunate side effect of reducing sensitivity between 60 and 129 MHz
since the radio never switches from the 2m bandpass filter to the low pass
filter. Signals below 60 MHz don't go through either filter and are unaffected
by the mod.
Now here's how to get the low pass filter back when tuning
below 129 MHz. On the bottom board, right behind the MENU button,
there are 5
SMD transistors. These transistors apparently switch the VCOs for the various
band segments. The one in the middle of the 5 apparently switches the 60-129 MHz
VCO. The single pin (one side of the SMD transistor has 2 pins the other only 1)
switches to 5 volts when this VCO is active, and is low otherwise. This is
exactly what we need to feed the yellow wire. There's a board trace coming from
this pin over to a feedthru hole near J8. Connect the yellow wire you
disconnected earlier here.
The filter should now toggle between low pass
and 2m bandpass as you tune below and above 129 MHz, and you should have good
sensitivity both above and below this frequency (at least up through 165
MHz).
Remember, CAUTION WARNING
This is tiny SMD stuff. If you
trash your radio, you're on
your own.
I have an Icom IC-706 and did the mod.
I did this mod and
it works great!!!!
As far as FM Broadcast intermod in the Aircraft band,
I noticed the IF is a little overdriven into compression, so I turn the preamp
off(greeen to no light---preamp switch), and noticed no difference in
sensitivity, intermod in aircraft band disappeared.Running the preamp in the
Aircraft 118-129 does not really help sensitivity, even though the S-meter shows
higher signal levels (jumps around alot due to saturating IF when signals are
not there!!! )
the noise floor actually, degrades, thus I leave the switch
(no preamp-black instead of green). Leaving it on green is just driving the IF
into saturation, with worst dynamic range.
Now connecting it to the VCO
switch bank, the radio performs to my satifaction, hearing the weather at 162,
forestry at 171, TV audio
near 200Mhz and remembering to turn the preamp off
in 118-129 aircraft region, no 2 meter images any more in 82-83Mhz area from 2
meters.I can listen to FM broadcast in the 88-108Mhz area.
Q:Does this mod affect HF or 6m?
A:The mod affects
only frequencies above 60 MHz. If you just cut or remove the yellow wire, the 2m
bandpass filter is used all the time.
After the mod you can listen to the
airport on 134 MHz but 128.4 is still drowned in intermod from the FM BC
band.
Proceed at your own risk
The receiver sensitivity above 120MHz (except the
band between 144-148MHz) is very poor and also the transmitted FM deviation for
NARROW FM is too small; therefore I did some tests and came to the following two
modifications.
To carry out these modifications it is necessary to use
the IC706 service manual, which can be bought at any ICOM dealer.
1. When choosing
NARROW at FM, then during transmitting the max. deviation is reduced from 4.8kHz
to 2.4kHz. It is still desirable to choose NARROW at FM because the receive
performance is better then.
After changing resistor R272 from 1K to 8K2. (at
the bottom side of the MAIN UNIT), then the max. deviation during transmitting
goes from 4.8kHz to 4.3kHz when choosing NARROW at FM.
The modulation at AM
is also changed now, but this can be corrected with potmeter R271.
2. To
improve the receiver sensitivity between 120 - 144MHz and between 148 - 200MHz
the following modifications can be carried out.
At the PA UNIT, change the 60
- 200MHz bandpass:
1) Remove C53(20p), C152(20p), C153(12p) and
C154(20p).
2) Short-circuit L49(82nH) by soldering an interconnection at the
place of the removed C153.
3) The inductance of L16, L17, L18 and L19 must be
reduced somewhat.
This can be done by separating the windings somewhat with a
small screwdriver.
Now the sensitivity is good up to about 175MHz. Also
the sensitivity in the airband is much better now.
For receiving above
175MHz the low-pass filters at the ANT2 input have to be changed (components
around L16, L17, L18, L19. I would not recommend that, because the spurious
suppression during 2M transmitting becomes worse then!
To expand the
band on the VHF portion.
(I have not tried this mod.I received this
infomation via e-mail)
Caution: This is quite involved. If you are not too
good you might be advised to get someone who has the experience to handle this
mod!
1. Remove the main board from the unit. Keep the cutout hole away
from you. This I consider the top of the board.
2. Remove the shield from
the top of the board. There are 30-40 solder
points from the shield to the
board.
3. Under the board on the top of the board, remove R-353 and Q-38.
They are located to the left of the IC-36 chip on the top of the board under the
shield.
4. On the underside of the board, Locate IC-32. There are two IC
chips.
IC-32 will be just down and to the right of the shield.
5.
Using a pointer, point at the left upper pin, and go toward the top of the
board. You will find a trace that stops. It comes out from under IC-31, and
stops. It should be the sixth trace up from the top of the Chip.
6. Using
a Xacto knife, (or something similar) Cut the trace the bend
halfway between
IC-31 and the solder point.
7. Make a jumper wire, and jump the
connection, from Pin 11 of IC-32 to the newly isolated trace.
8.
Reassemble the radio.
Transmit from 200 Hz to 200 MHZ
continuous!!!
Back to main page