Toroid Winding for the Dexterously Challanged
by D.A.Reid
Introduction
Winding Toroids can be a real hassle for those of use who are left-handed or not so dexterous as we once were.
So, In this article I hope to enlighten you to one way which works well for me. (I am left-handed...)
I have just completed building my Elecraft K2 and there are a lot of toroids to wind. In the past, I have fiddled around with small toroids (<1/2 ") (usually dropping them on the floor while winding them - thus having to start the count process all over again) and I never had a neat job or really satisfactory results.
So, being a practical sort of guy, I developed a method which always produces nice neat toroids without the fear of dropping them on the floor or losing count of the number of turns I require.
The Required Tools
For this procedure, you need to have a small bench vice, a peice of paper and a pencil - that's all. (A quiet room where you will not be disturbed also helps - but is not essential).
The Procedure Described
First, I will describe the procedure, then I'll run you through the procedure using photographs. For the procedure, I used a 1/2" white toroid - as this stands out in the photographs better.
The procedure is really quite simple to perform, but more dificult to write down, so bear with me.
I place the toroid to be wound into the vice and clamp it LIGHTLY in place across the lower edge. You do not want to break the core, so be careful and just clamp it tightly enough so the it doesn't move around. This is really important as most toroids are very fragile and can shatter if squeezed too hard.
With the toroid securely clamped in the vice, I take my wire (pre-cut to the correct length plus a couple of inches spare) and from the front left bottom side of the toroid, I feed most of the length through the toroid leaving about 2 " on 'my' side of the toroid. Holding this short wire with one hand (or a piece of tape), I then mark one tick on the paper, using the pencil - this denotes the first turn through the toroid.
Still holding the short wire on 'my' side of the toriod, I take the long end and bring it to the left, around the edge of the toroid and pull it to shape. Then I feed the long end through the center of the toroid and pull it taut.
Another mark is placed on the paper - denoting the second turn... This process is repeated for as many turns as required, until the required number of turns on toroid is achieved.
Once the required number of turns are on the toroid, I remove it from the vice and adjust the spacing between the turns so that the whole winding covers about 85% of the toroid.
The two free ends of wire are cut to length and (using a butane lighter and a pair of needle nosed pliers to scrape the deposits and soot from the wire ends) cleaned and tinned with the soldering iron.
After tinning, there is usually a little bit if black deposit left, it is released by the flux in the solder, I scrape this residue off between my fingernails to leave a clean tinned lead.
That's all there is to it... and best of all...it works!
A Pictorial View of the Process
-
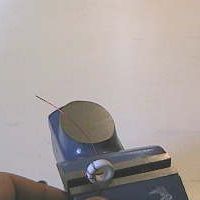
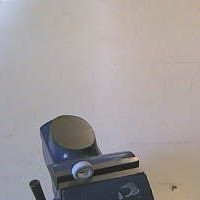 The toroid is clamped in the vice, securely, but not over tight!
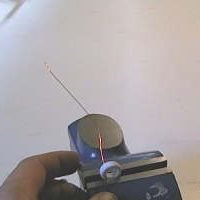
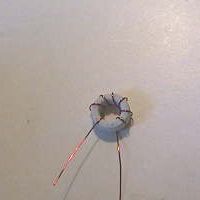
 The wire is fed through the center toroid and held in place with one hand. A mark is made on the paper - denoting the first turn.
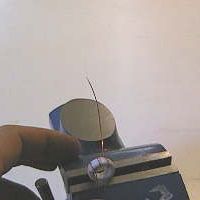
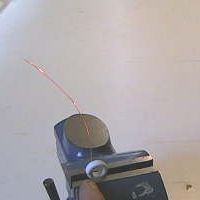 The wire is wrapped around the core to the left-side of the toroid, above the first Turn, and poked through the center of the toroid and pulled tight.(Don't let go of the short end of the wire, as it will pull through the core as well and you have to start over) - (After about 4-6 turns, it is no longer necessary to hold the short wire - friction will do the job, instead). A mark is made on the paper - denoting the second turn.
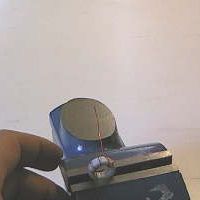
 The wire is poked through the center of the toroid and pulled tight. Each subsequent turn should be placed above and to the left of the previous turn, until the center point is reached, at which time, they must be wrapped below and to the right...(try and position the center turn so that it is in the center of the toroid. i.e., if you are winding ten turns, try and align Turn 5 with the 12 o'clock position on the toroid). A mark is made on the paper denoting the third turn is completed.
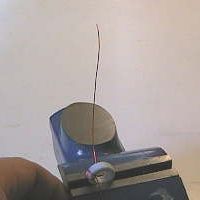
 The wire is pulled tight again and the process is repeated... as per the following photographs:
 Turn 4 Turn 4 |
 Turn 5 Turn 5 |
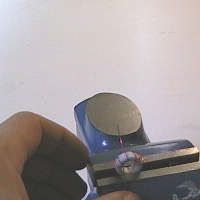 Turn 6 Turn 6 |
 Turn 7 Turn 7 |
- The final steps are to remove the toroid from the vice and adjust the turns for equal spacing
 trim, strip and tin the wire ends - install in the PCB.
Conclusions
Well, this method is far easier than trying to hold the toroid in one hand and thread it with the other - You can't go too far wrong and it really takes the worry out of toroid winding... This method helped me complete my K2 tranceiver in record time - 21.5 hours from opening the box to my first 40M QSO!. I hope it helps you too.
If you have questions on the process or suggestions to make it even easier, I'll be happy to hear from you...Dave Reid - PA3HBB / G0BZF