|
|
Installing a Tower | |
|
|
|
|
At some time in every Amateur's life, there comes a
time when thoughts turn to towers. Antennas always need some type of
structure to elevate them. Some hams use nearby trees or the old TV mast.
Push Up poles are still available and work well due to their ability to
telescope into shorter sections. With satellite TV almost a requirement in
rural areas, many towers have been taken down and reused for other purposes.
When I was a Novice back in the 1970's, a person one block over from me wanted to take their CB tower down. They tried to lower a 150 ft. tower by cutting the bottom and lowering it with a pickup truck. Naturally this was a disaster. I missed the actual event but, it was a site to see I'm sure. Me and a buddy were able to pick though the wreckage to get about six good sections. This gave us three sections each to use at our stations. I was young and it was really not that difficult to put that amount of tower up myself. Thirty feet of tower worked pretty well for me and my meager novice setup. HF or shortwave was always my primary interest. I used wire antennas that could be attached to existing structures like buildings or poles. I lived in apartments for years and got pretty good at configuring random wire antennas. When I became a homeowner, a tower was definitely in my future. My back yard is about 100 ft. by 200 ft. with no trees and my interest in VHF/UHF had increased. Any serious VHF/UHF fanatic will tell you that elevation is a must. Also, HF antenna performance increases somewhat if they can be raised at least 50 ft. on a tower. I have some push up poles, but I found them lacking when it came to using large wire antennas. They require extensive guying and tend to bow with too much load. These poles work well as supports to suspend the end of wire antennas though. I got lucky and found some tower that was almost like new. It was cheap too. The only drawback was that it was Rohn 20g. Rohn 20g is about the lightest tower they manufacture. It is meant to be used unguyed with a large TV antenna. Hams have used 20g for years in amateur service and I was not planning on going up more than 40 ft. so, I decided to give it a try.
When my home was built, the builder put some two inch pvc pipe in the foundation for me. Four inch would be more suitable, but it would not fit inside the wall. I decided to put the tower where the PVC pipe would exit the foundation. When the conduit was located, I started to dig the hole.
Rohn suggests a 4 ft. x 4 ft. x 4ft. pit. That is a lot bigger hole than I thought. It took a while to dig the pit. It was in August so the weather was hot. It was also a rainy August. I bailed the pit more than I dug it. I added a pvc elbow and brought the conduit up out of the pit. I decided a ground rod might be in order while the pit was open.
After the pit was dug, I boxed the hole in with scrap lumber. Next I had to make a decision about concrete. I always used bagged cement in the past, but it was going to take a lot to fill in the pit. After a few calculations, I contacted one of the local cement companies and found it was cheaper to let them send a truck out. The concrete company told me there is usually some left onboard after a large delivery, so they were nice enough to sell me just what was needed.
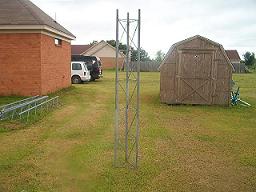
There was still work to do before the concrete truck arrived. The bottom of the pit was filled with loose gravel. This allows for drainage under the concrete. I then obtained an old section of Rohn 25g that was damaged. It was perfect to place in the pit and get encased in concrete. Two feet of 25g would stick out of the top and give something to mount the 20g to. Rohn 25g and 20g have similar dimensions that made this possible. A wooden bracket was worked up to mount to the eave of the house while a section of 20g was inserted into the section of 25g. This allowed the tower base to be leveled and held in place when the concrete was poured.
It is important to note that concrete trucks are very heavy even when almost empty. I had to sign a form not holding the concrete company responsible for driveway damage. The truck did damage my driveway on the way out, not in. So go figure that. Anyway, the driver was a big help and now I had my concrete poured.
Notice the angle iron, ground rod, and the PVC pipe. I decided an enclosure was important to keep the weather and critters out, so I used an old telephone terminal enclosure to cover everything.
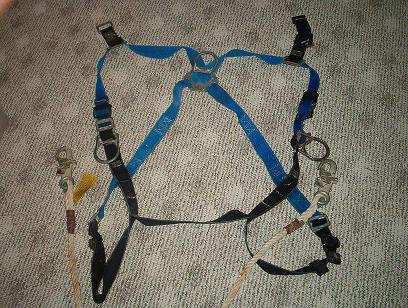
I let the concrete set for thirty days before I began to stack the tower. I located a safety harness at a pawn shop and borrowed a gin pole from a fellow amateur. Never climb a tower without some kind of safety belt or harness.
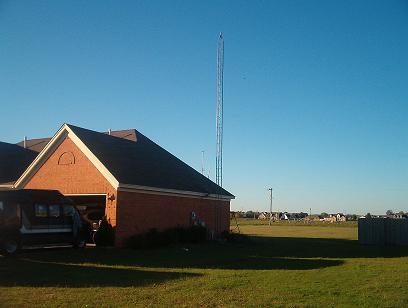
I put two sections together and walked them upright beside the house. I climbed to the roof and inserted the two sections in the base. I then used the gin pole to put up the next section. It went like clockwork. Next the top section went up. This section was not easy as it took two attempts to place it.
I have to say that the tower project turned out very well. I have 40 ft. of tower that will hold what I intend to place on it. If I want to place my HF tribander and stacked thirteen element VHF yagis, I can add one set of guy wires to the structure. I have always felt that 50 ft. of tower is adequate for amateur radio. I came out a bit short but can get by with what's there.
Would I have done anything different ? Oh yeah ! For one, my tower is too close to the gas meter. It is a good idea to stay a good distance from the gas supply. Two, I put the tower up alone. This was a very bad idea. It is always good to have a partner when doing a tower erection. Three, I would have used a heavier type of tower. A tower is an excellent thing to have as a ham. However, it is not a must have sort of thing. There are other types of structures to mount to a roof or plant in the ground. I have seen chimneys used as towers as well as old telephone or power poles. Part of being a radio amateur is being resourceful. Use what you have to the best of your ability and ham radio will always be fun.
|