ICOM IC-208H Radio Installation
in the
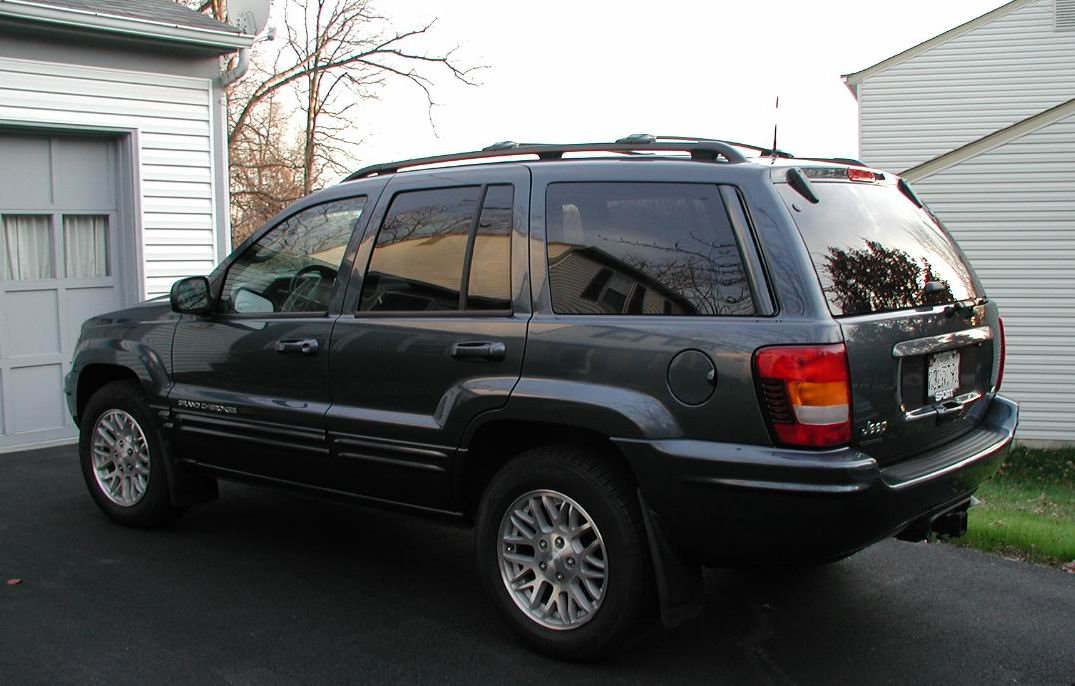
The Icom VHF/UHF Ham installation described here was done in my 2004 Jeep Grand Cherokee. This site is not meant to provide a detailed step-by-step set of directions, but rather as a way to show you what worked for me. I hope some of the ideas presented here can help in your particular installation. I had several ground rules I wanted to follow for this installation:
-keep all (or most) wires hidden
-keep irreversible mods or changes to the vehicle to a minimum
-make the radio and/or control head look like a factory installation
-select an antenna that would be fairly efficient and still allow me
to use the garage
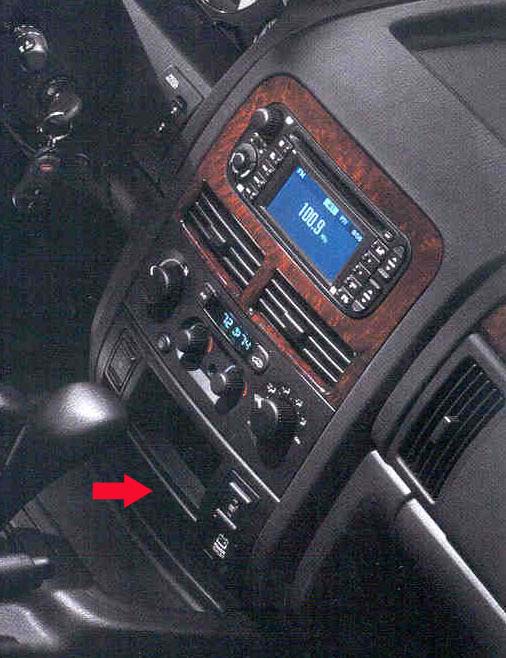
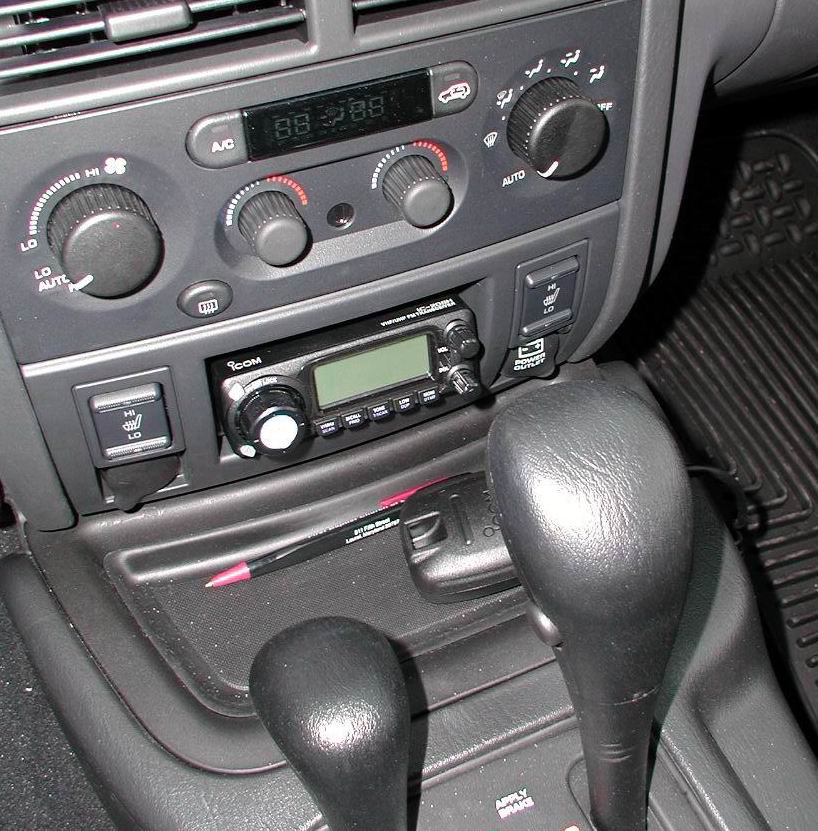
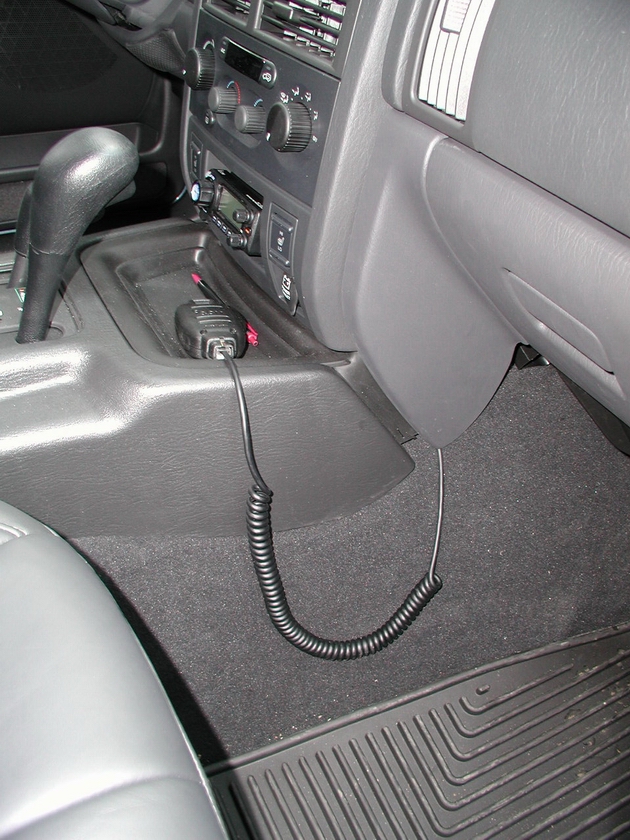
The Grand Cherokee comes from the dealer with a small open storage area in the console. This area appeared ideal for mounting of a detachable control head from the transceiver. A search of what was available on the market turned up the Icom IC-208H; I didn't find any other rigs with the right size control head. The storage area has a rubbery type of mat in it, which is easily removed. The rear of the opening has a small rectangular slot (where the mat snaps into) which needs to be elongated to allow for running the control head cable behind the console. I used a small fish wire which I pushed through from the console side, then taped it to the control head connector and pulled it through. Next, a small bracket was cut out of aluminum and bent, and painted black. This bracket has slots cut in it to allow clearance for the control head wire, and is bent at an angle so that the control head aims up slightly. The bracket is mounted using double-sided tape (I used Scotch exterior mounting tape which is extra-strong); the 3/4 inch hole in the front allows your finger to press down on the bracket when you get the tape/bracket in place. Then the control head itself can be mounted to the bracket using the same kind of tape. Finished control head mounting looks like this.
Next, I mounted the Icom SP-10 accessory speaker underneath the dash on the driver's side. Only two holes needed to be drilled in the bottom of the dash, both out-of-sight. When the speaker is mounted it's not visible, but provides good sound dispersion. There is some empty real estate behind the dash at this point, so there is room for the Icom speaker; orient it so the speaker grill points down towards the floor.
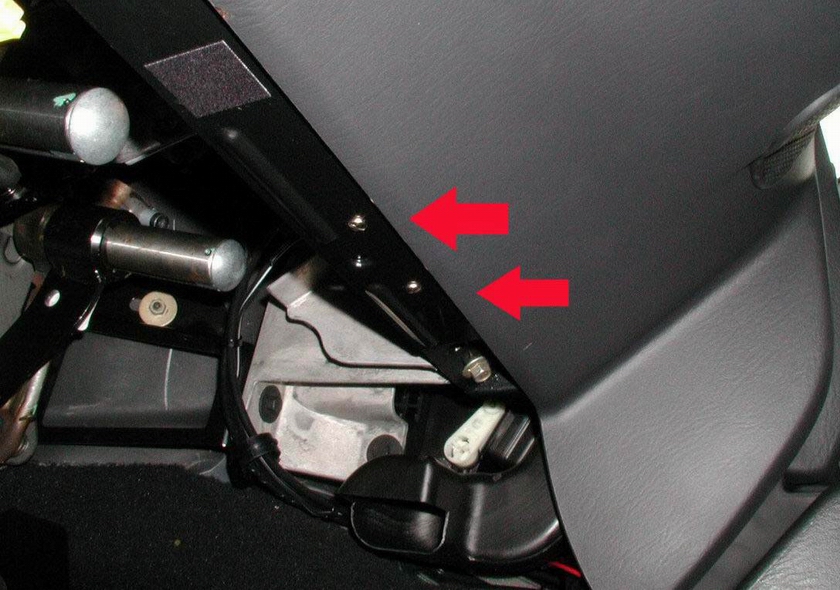
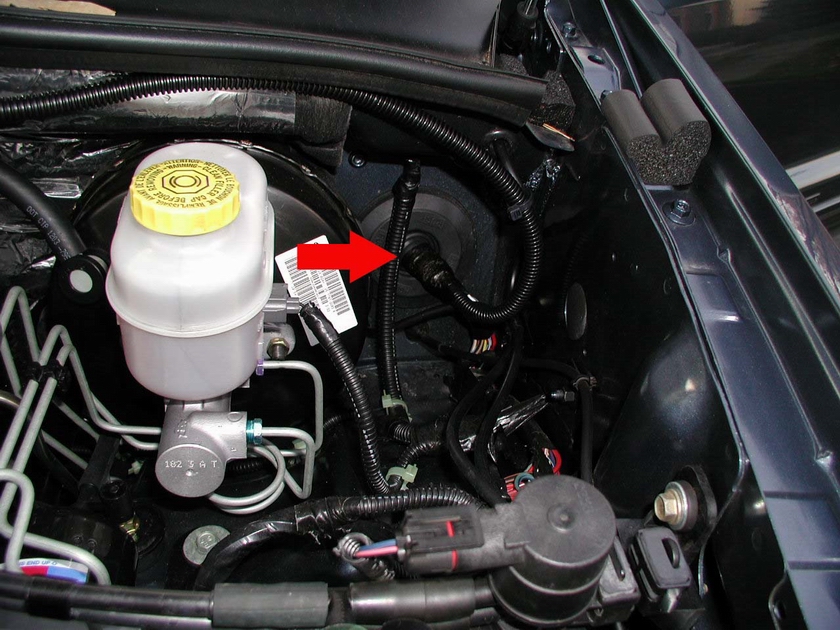
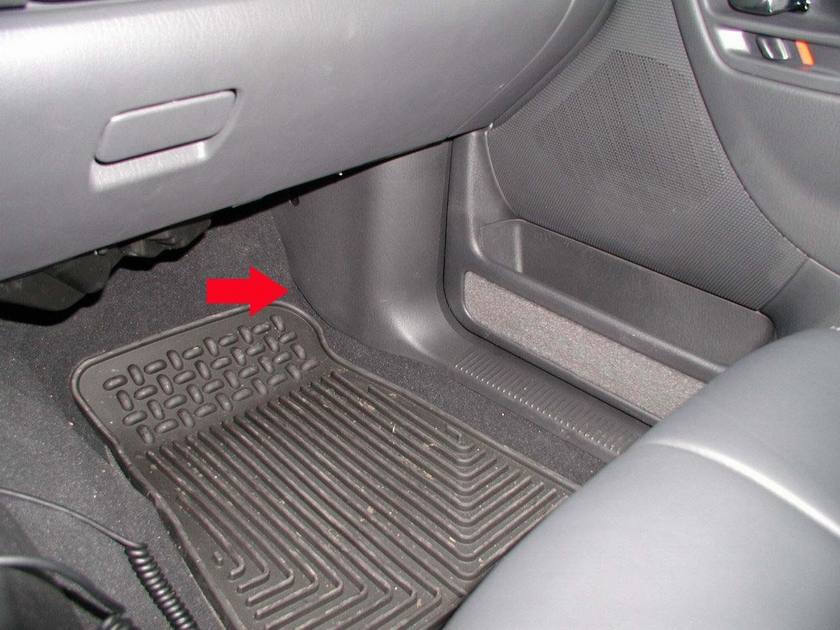
My next task was to do the under-hood wiring. At the battery end of things, I have a couple fuses (one on the hot side and one on the ground side). The two #12 wires are terminated with spade lugs and mounted to the battery terminal clamps; the wires are taped and covered with plastic cable protectors, so their presence looks like a factory harness. I was able to find enough room (barely) in the factory wire bundle going through the firewall (under the power steering fluid reservoir) to push the two power wires through. I then ran these wires under the dash, behind the console, and over to a Radio Shack 275-226 power switching relay (with the 900-2396 harness connector). I decided on using the relay because I wanted to remove power to the Icom when the Jeep ignition switch was off; click here for schematic. If you carefully remove/pry out the console's front panel, which is held by four hidden clips (it's the section containing the cigarette lighter socket/heated seat switches, and power outlet socket), you can tap into the cigarette lighter 12 volt red wire. This wire is energized whenever the ignition switch is in the ON or ACCY position; so that's what energizes the relay which actually switches the 12 volts from the battery to the Icom. I decided to mount the relay behind the passenger side kick panel. This allowed me to run the power wires underneath the door molding and behind the plastic side panels, all the way back to the indented area under the rear passenger-side window. The other cabling -- control head wires, mike extension cable, and speaker cable -- were also run along with the power wires, using the same molding and side panels to conceal the bundle. The microphone extension cable connector was tucked behind the console side, which allowed the microphone cord to just "disappear" underneath the side of the console.
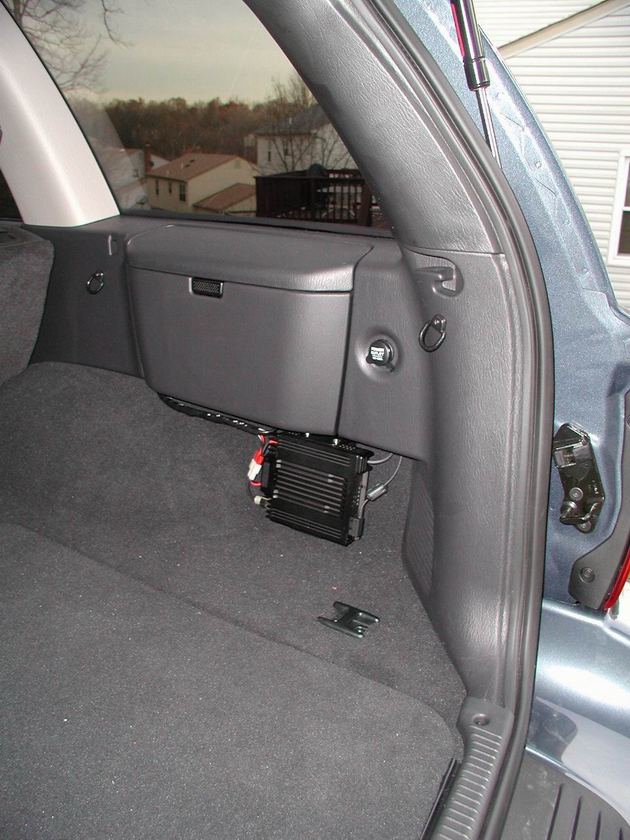
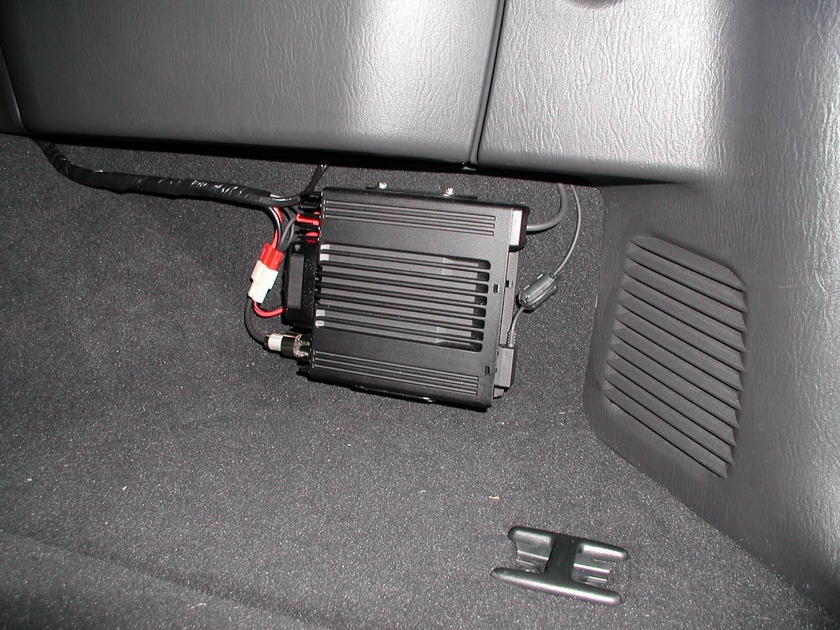
The transceiver itself mounts in a vertical position using the Icom-supplied bracket, under the CD changer in the rear of the vehicle. The carpeting has sound deadener behind it, and is stiff enough to drill through and mount the radio bracket using #6 screws, washers, and nuts. Here is a close-up of the transceiver mounting.
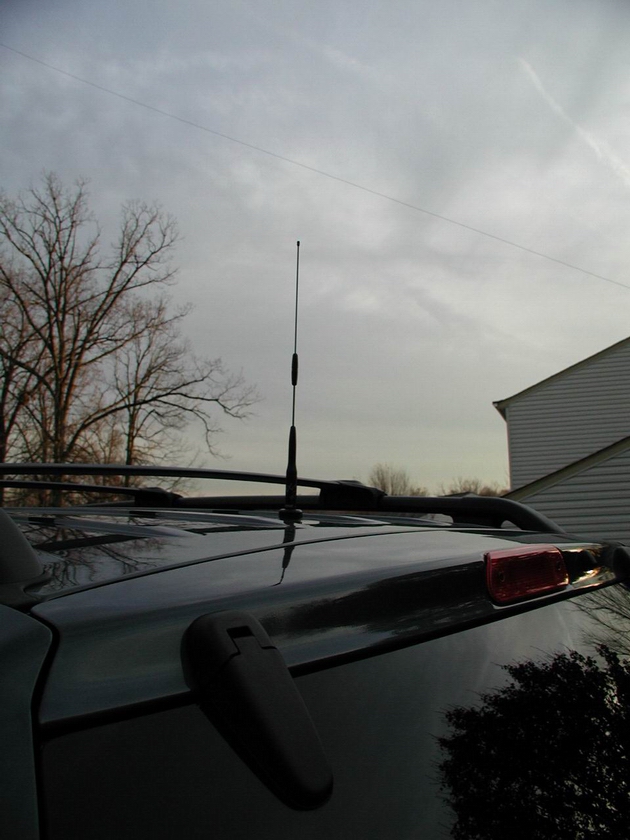
I considered several types of antennas, including glass-mounts and edge (lip) mounts. After seeing how easy it was to remove the Jeep trim in the rear area, drop the headliner slightly, and have enough access to the inside roof, I decided to bite the bullet and drill a 3/4 inch hole using an Antenex HS-34 hole saw. I then installed an NMO mount, and ran the antenna wire behind the existing Jeep trim, down to where I could hook up to the transceiver. For the antenna itself, I considered the Comet B-10; it's 12 inches long, but it was only rated to 50 watts; the Icom puts out 55 watts. Specs on a very similar antenna, the Maldol EX-104B, showed it to be rated to 100 watts; it's a dual band antenna which covers 144/430 mHz. Total length of this antenna is about 15 inches, which allows me garage access. With the NMO mount, it's also easy to unscrew or even install another higher-gain (longer) antenna for road trips farther away from repeaters you might want to use.
In summary, all the installation goals were met; if need be all the steps above could be reversed and the vehicle returned back to almost stock condition. The rubber mat in the console cutout would cover the elongated hole used for control cable routing, the two speaker mounting holes are pretty much hidden, and the NMO mount could be capped or used for a cell phone antenna. All other wiring and mounting brackets could be removed without visually impacting the Jeep. I found that the antenna installation was much easier than I thought it would be, and that running the 12 volt power wires from the battery was much harder that I initially thought, because of getting access through the firewall and the contortions needed for working behind the dash..
Contact N3CW for more
information on this installation.
last updated
May 4, 2014