
7. Once the 10MM bolts are removed, unscrew the two phillips head screws at the top of the panel.
7.
Once the 10MM bolts are removed, unscrew the two phillips head screws
at the top of the panel.

8.
Finally for this panel, there is a 10MM nut that must be removed up
inside the center area.

9.
Now the whole glovebox panel can be carefully pulled out releasing
two locking clips, and set aside after disconnecting two electrical
connections.
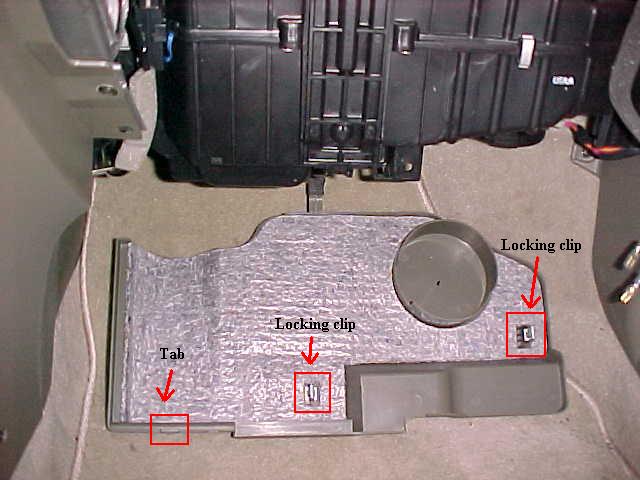
10.
The bottom panel must also be removed by carefully releasing two
locking clips and a tab that hooks onto the front lip of the blower
housing.

11.
The access door is removed by simply pulling down and outward on the
bottom lip.

12.
When the access door is removed, you can see where the cabin air
filter assembly slides into the blower housing.
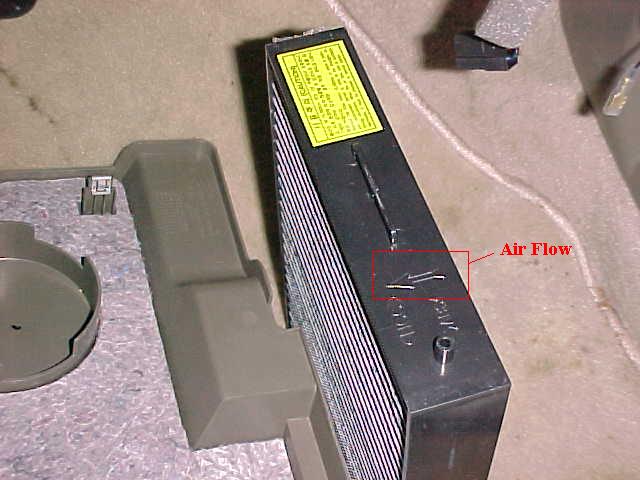
13.
This picture shows the end of the filter that will be facing out.
Notice the arrow that shows proper air flow direction and the round
peg that helps position the cover. The yellow label states the filter
should be replaced every 15,000km (12,000mi) or one year, even though
this is not shown in the maintenance log.

14.
The filter slides into the opening as shown. It will be flush with
surrounding flange when fully inserted. Sidenote: For removal, notice
the small handle.

15.
The access door can be seen here to illustrate how it is held into
the blower housing.
Cabin Air Filter Part No: 97619-38000 (Before 7/1/00 Production Date)
Cabin Air Filter Part No: 97619-38100 (After 7/1/00 Production Date)