ALT-512 Firmware
Update Procedures
Before you begin:
1. Copy the firmware update
folder to a convenient location in your Windows computer,
such as the desktop or a folder of your choice.
2. Connect the radio to an
antenna or dummy load.
3. Turn the radio on.
4. Set band 20m or any other.
5. Select USB mode or any other.
6. Determine which COM Port the
radio is connected to:
a. Open the computer’s Device
Manager (found in the Control Panel).
b. Find the line for “Ports
(COM & LPT)” and double-click it. In a drop-down
menu it shows you the current active ports on your
computer.
c. Connect a USB cable between
the radio and the computer.
d. Allow 30 seconds or so for the
computer to find and recognize the radio.
e. Automatically the screen of
the Device Manager will refresh and show a list of the
ports again. You should see a new USB Serial Port
(COMx). The “x” is the number of the COM port that
the radio is connected to.
REMEMBER this COM port
number (write it down).
7. Turn the radio off.
Now you are ready to run the firmware
update. The update takes 3 or 4 minutes to run.
Do not touch the computer or the radio while the update
is running.
BEGIN UPDATE:
1. Push the PAN button and hold
it pushed, and then turn the radio/RED button ON/OFF/
while continuing to hold the PAN button pushed.
2. Continue holding the PAN
button until you see a message on the screen that reads:
“Bootloader 2.0
Waiting for the update to start … “
3. Locate the firmware update folder on
your desktop (or whatever location you stored it in).
4.
“updatefirmware2.0.0_x86.exe” 32 bit
“updatefirmware2.0.0_x64.exe” 64
bit
Double-Click the firmware update
folder. This will open the folder and show its
contents. Usually there are two files, the update
program (application) called “updatefirmware X.Y.Z
(ALT-512), and the update software file itself (ALT-512_vX.YZ.fw)
where X.YZ is the firmware version that will be uploaded
to the radio.
5. Double click the application
updatefirmwareX.Y.Z (ALT-512).
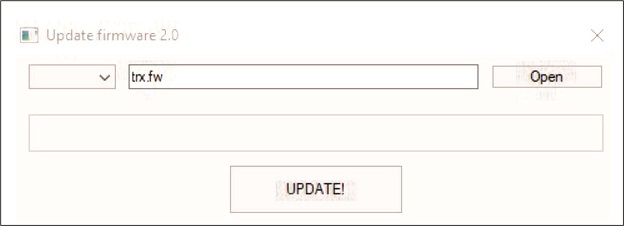
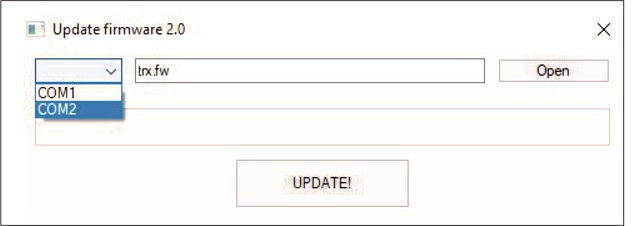
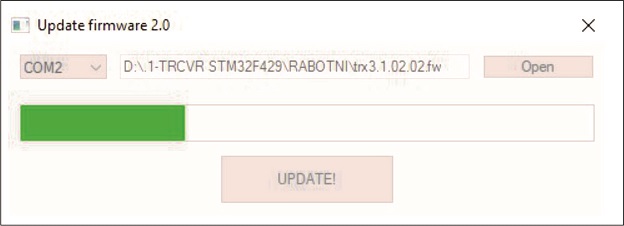
6. Click the tiny down-arrow to
the left of trx.fw . This opens up a drop down menu
showing the available COM ports.
7. Select the port that connects
to the radio. This is the port you identified and wrote
down in step 6e under “Before you begin”. Click on
this port. In the example here it is COM2. The next
screen appears:
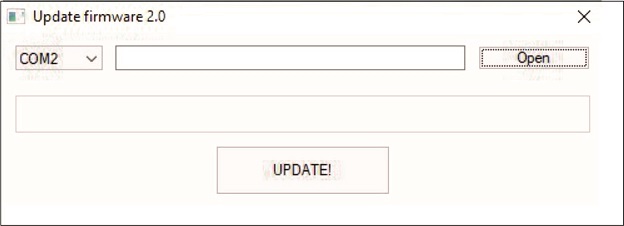
8. Click “Open”. This opens
the windows explorer browser. Browse to the location of
the update folder and find the update software. In this
case it is trx3.1.03.10.fw. Double-Click the firmware file. This
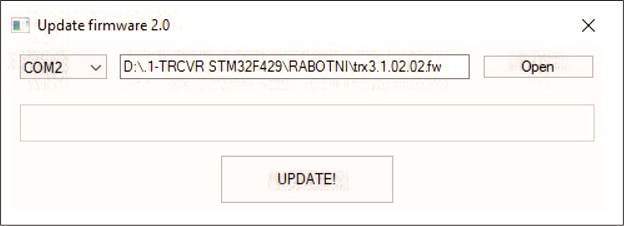
inserts the filename into the Update window:
9. You are ready to begin. Remember
not to touch the radio or the computer while the software
is running. Click “UPDATE”
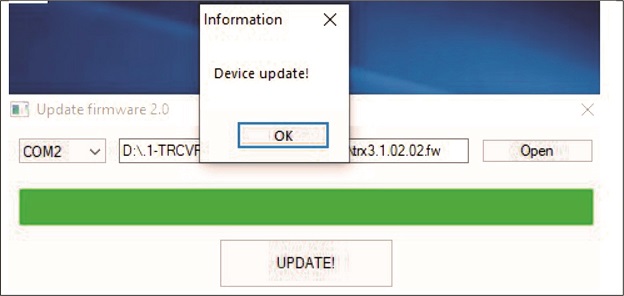
10. The Update begins. Its
progress is displayed as a slow moving green bar above
the word “UPDATE”.
11. After 3 or 4 minutes, the
green bar reaches the right end of the scale and the
firmware update is complete. You will get a device
update confirmation screen as follows:
12. Turn the radio OFF.
13. Wait 10 seconds, and then
turn the radio on again. The new firmware version is
shown in the startup logo screen.
14. This confirms that the
radio has updated successfully. You are ready to go
with the new firmware version.
created by Doby LZ2TU
2019
|