That Time I Built an Allstar Node

Some Background on Radio
In the world of amateur radio, there are 2 main kinds of radio signals – line-of-sight, and long-distance atmospheric propagation.
When something is line of sight in the radio world, I essentially mean that the if you can see it with your eyes, you can get a radio signal to it. If you can not see it, you can not get a signal to it. (UHF and VHF).
Long-distance atmospheric propagation (We will call this HF or High Frequency signals from now on) is just a fancy way of saying “signals that bounce off the atmosphere and back to earth, then they bounce off the earth to the atmosphere and back to earth repeatedly until then run out of energy. Have you ever thrown a rubber ball really hard at the floor and had it bounce off the floor to the ceiling and back again? What happens if you throw the ball too hard? It might break through the drywall on the ceiling and not bounce back. At the right frequencies, radio waves do the exact same thing. If the radio wave is too high of a frequency, it will just go through the atmosphere and not be able to bounce around the world.
I am sure that you can think of several situations where these different types of signals might come in handy. My favorite part of the radio spectrum to play with is the HF spectrum. It allows you to talk to people all around the world. Unfortunately, the antennas that are used for HF radio are large and cumbersome. On the flip side, the antennas for line-of-sight frequencies are small and easy to move around. If only you could have the benefits of HF signals in the size of a walkie talkie. This is a problem that I set out to solve for myself.
What is Allstar?
Allstar is a technology that uses a special version of Voice Over Ip to allow line-of-sight radios to use the internet to communicate with radio stations around the world. Using it is simple too. You just find a frequency that has an existing node on it, you send the DTMF number of the node you want to connect to. Then BINGO! You are connected to that other place through the node radio on your end.
The area that I am living in doesn’t have any Allstar nodes, and I know plenty of people around the USA that live near other nodes. After complaining about not having a node in my area, I decided to construct a simple Allstar node of my own. All you need is an amateur radio (I recommend the 440 or 140 MHz bands), an antenna, a sound card, a raspberry pi, an SD card with the AllstarLink software, and a stable internet connection. In theory, you put all these bits together and it just works. Unfortunately, my journey was a bit more complicated.
Planning
You can buy premade Allstar nodes that just work but they start at about $200, and the good ones are closer to $500. A goal that I had with this project was to keep it as inexpensive as possible. This means buying as few things as possible for this project and using as much of what I had on hand as possible. I had a 144Mhz mobile FM transceiver (Kenwood TM-241a) lying around, as well as a raspberry pi 4b. At the time, these were the 2 biggest costs of the project, so I was already starting ahead.
I knew I needed a sound card to take the audio from the radio and the push to talk signals and pass them to the raspberry pi but I didn’t know where to look for one that would work. I went to YouTube and found out that it was common to modify a cheap $10 CM108 usb fob to work in this way. I also talked to a few people I knew who ran multiple nodes and they suggested that I do anything but use the CM108 trick. W7FED pointed me to the RA-25 soundcard which had been designed for this exact purpose. It was a little expensive fully assembled but luckily you could get a discount if you bought it as a kit to assemble yourself. That is what I ended up doing.
I now needed a cable to connect the radio to the soundcard. I needed to interface with the microphone connection and convert it to a DB-9 connector for the soundcard. I cannibalized a VGA cable for this. Unfortunately, I needed an additional signal that the Mic connector didn’t have. I had to disassemble the radio and find a source for COS. COS is a high or low value that indicates whether or not the radio is hearing a signal, and this was necessary for my node to work correctly. Luckily after a few days of asking around and probing around, I was able to find a place to tap into for this and add it to the cable.
I connected everything up and then installed the software. It took a little bit to configure but I was able to figure It out. I can now connect to any Allstar node in the world with just a walkie talkie here in Rexburg.
Node V2
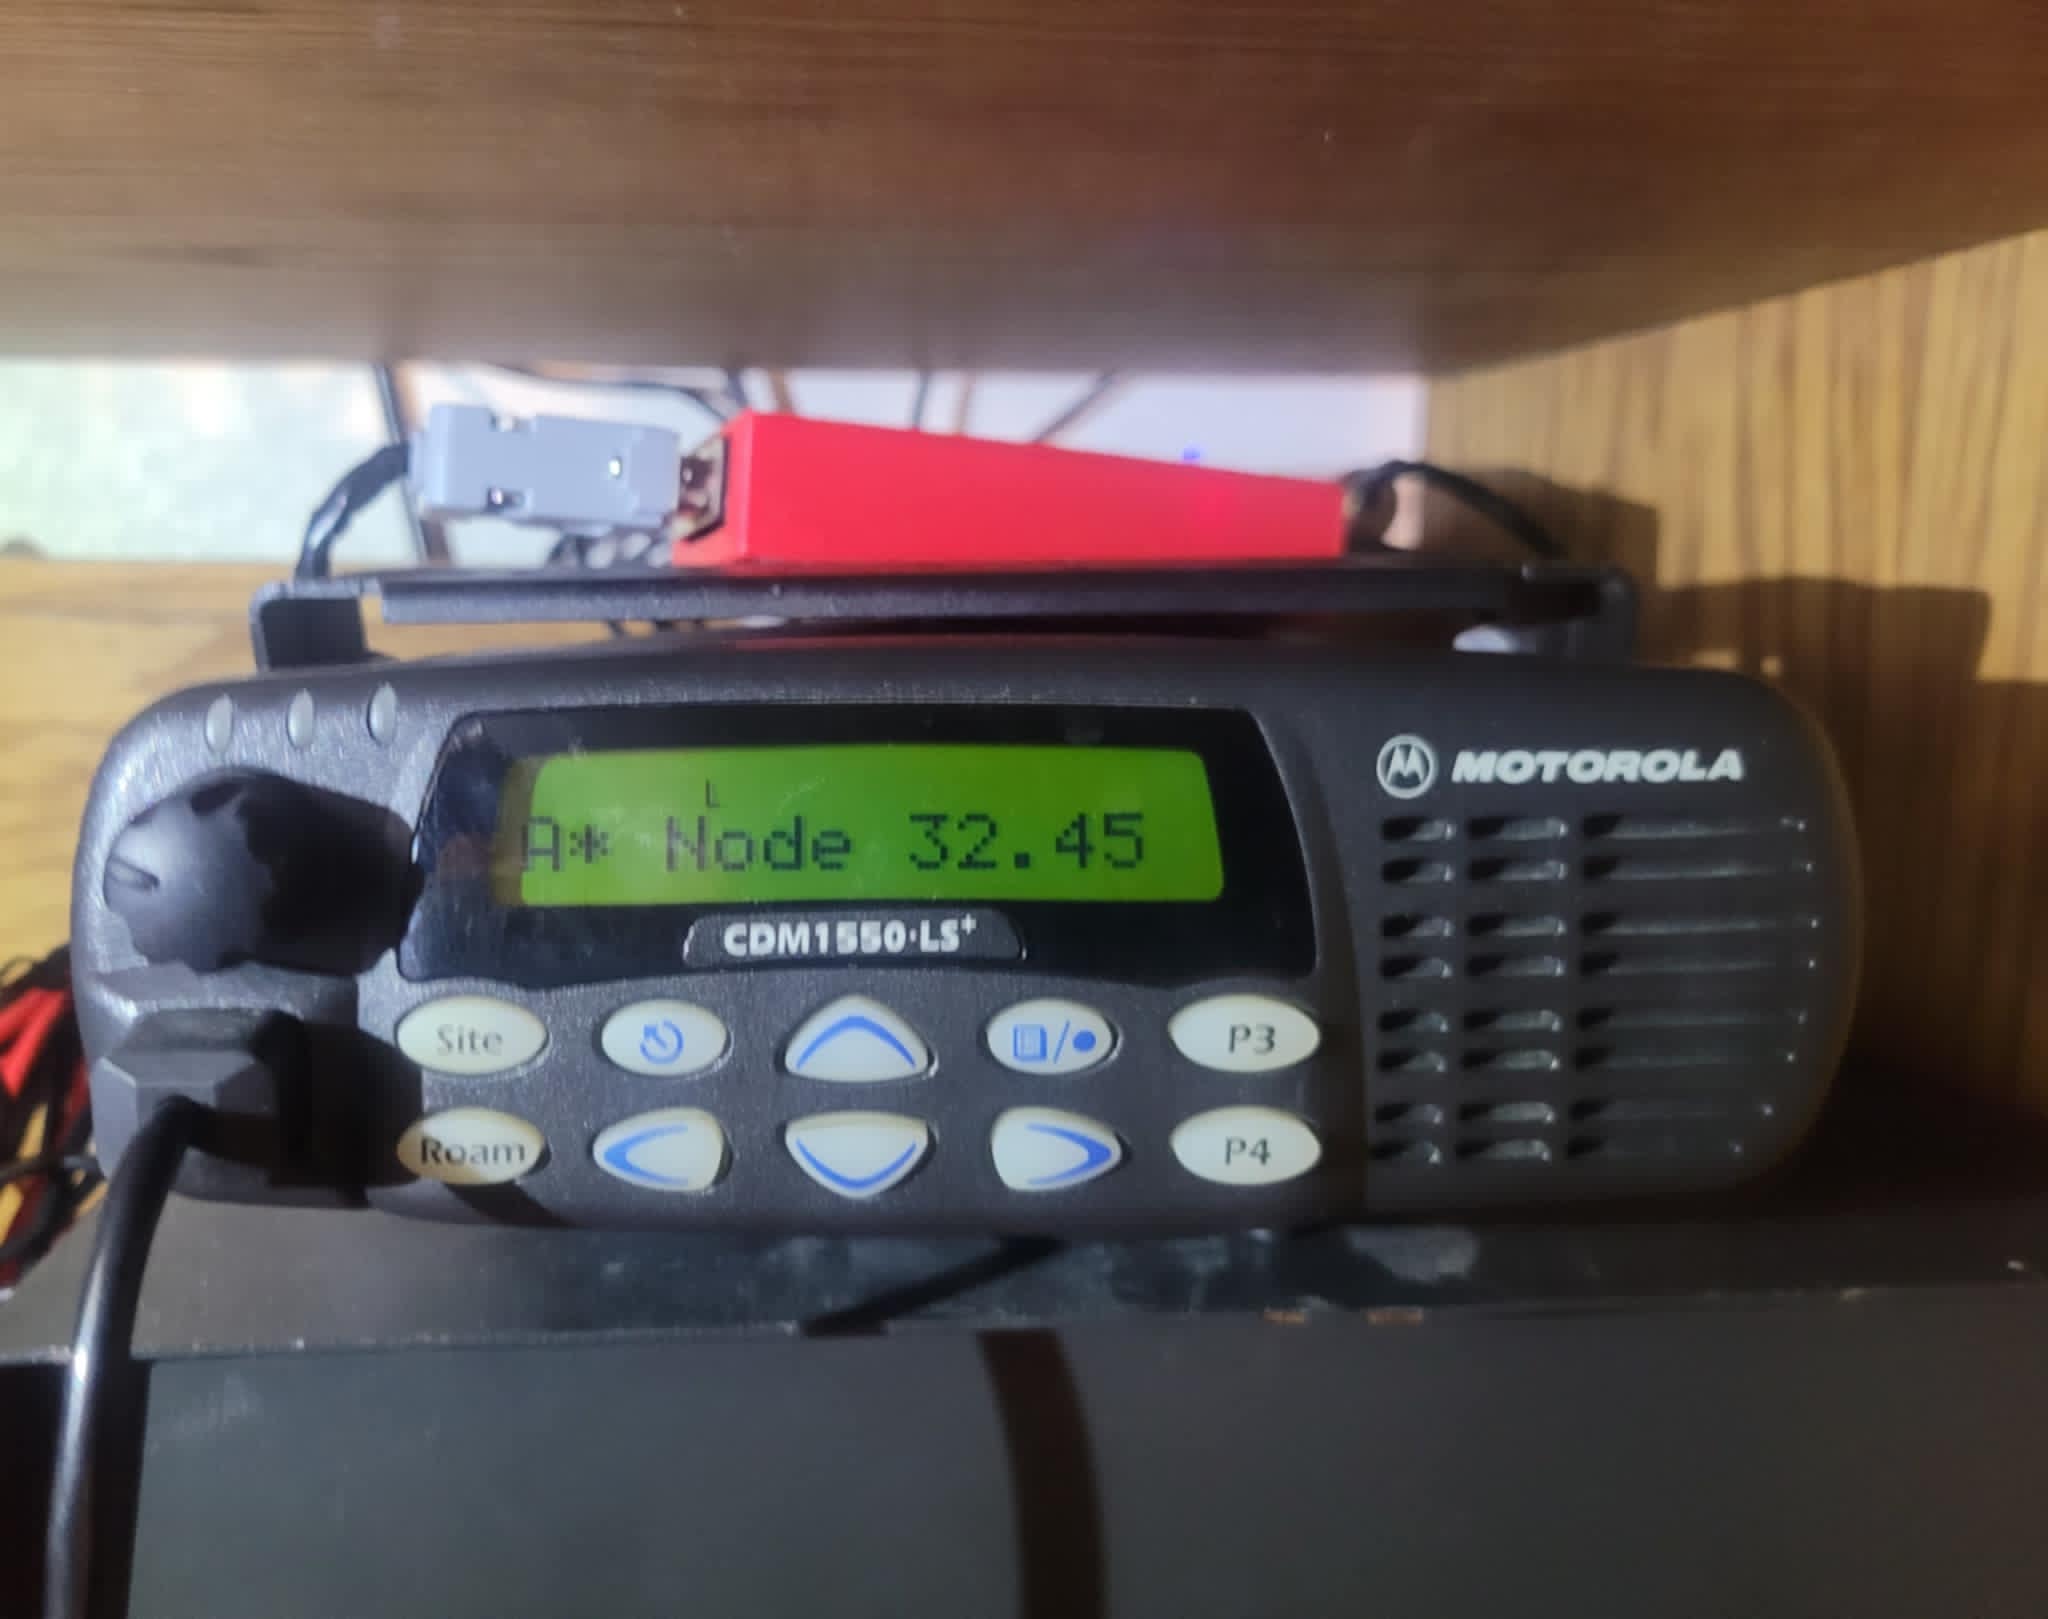
After a few months of using my node this way, I discovered some issues with the 2m band in my housing complex. I had a verry high noise level and I would occasionally find my fire alarm chirping when the node was running at a higher duty cycle. Obviously the later was a somewhat serious problem for an apartment complex so I decided that I needed to convert my node to 70cm to avoid this. On a modern dual band 2m//70cm radio, you would just change the frequency and be off to the races. Unfortunately, the TM-241 is a 2m SINGLEBAND radio so I needed to find a radio that would cover the 70cm band and that wouldn’t break the bank. This would also give me the opportunity to find a radio that offered COS from a port instead of needing to hardwiring a tap.
I made a few calls to hams that I knew had made repeaters or similar nodes and did a ton of research on my own too and decided to use a Motorola CDM 1550LS+ radio. This offered everything that I was looking for and had the bonus of a larger heatsink than my old Kenwood TM-241. Any radio in the CDM series for the 70cm ham band would have worked well but I had found a good deal on the 1550.
I programed the radio for my frequency and power output of choice. The last thing that I needed to do was make a new cable to connect my existing RA-25 and the CDM 1550. After everything got connected, I made some adjustments to my AllstarLink audio settings, and we were off to the races.
In the future, I plan to add a second radio and a duplexer to this setup to make it into a simple, low power repeater.
How to connect to the node?
Please see the KIT5LZ Allstar User Guide for current node info. It is open for public use!