Radio Direction Finding by KH7O
Radio Direction Finding comprises of RDF
equipment and the art or skill of using various pieces of radio gear. It
requires discipline and skill in the interpretation of Radio Signals. The basic
components are the Receiver, Antenna, Attenuator, compass and Map. It is one of
the more fun things to do in Amateur Radio that presents challenges of the
operator's skill and ability to "feel" the radio waves and get a sense
of how radio signals radiate, reflect, and attenuate.
There are a lot of web sites already on the internet that
can be googled. This page is not intended to duplicate a wealth of information
already on the internet but rather a summary of what , when, and why certain
equipment is used, what can be built in the Ham Shack. This is from being in Ham
Radio for 32 years and first hand knowledge of DFing. A good video
Most Difficult is in a dense building area where signal
reflections make it difficult to get proper bearings.
Least Difficult is on the open ocean.
WHAT YOU NEED:
1) I first take multiple Signal strength readings looking
for maximum peak signal value not direction
2) with that knowledge in hand then proceed to
directional beam readings only from ridge lines or spots less likely to have a
stronger reflected signal, never low spots where you can get reflections,
EXAMPLE: use places like round top, KCC to get the 2 intersect readings, then go
to airport end of lagoon drive and take a reading back in toward the land mass,
after carefully plotting the path on a map with beam headings you should narrow
it down to within a mile of the actual transmitter if its in Honolulu area (good
for bearings between Red Hill and Diamond Head) if you are in town and have to
split the difference fast then go to Magic Island or similar, somewhere where
you are away from the building and can get a reading 50/50 between signal from
the East or the West from that point,
3)get to the general area from step 2 switch to near
field detectors / antenna which should place you essentially on top of the
signal.. being in a small search area, its a matter of just narrowing it down to
the exact spot by again using Signal Strength combined with Directional antenna.
4)rely more on relative signal strength rather then
actual bearing of yagi antenna when you are in the city area with a lot of
reflections.. Although the beam headings taken within the city will give you
more WRONG directions then correct directions, one thing for sure is that signal
strength in a general area will always be stronger in an area where the
transmitter is located rather then a reflected signal from a building...
If you are driving from one area of condensed buildings
taking signal strength readings and move to another area also strong with signal
readings you can safely say the transmitter is where the signal is the
strongest. This doesn't mean taking a signal strength reading from a static
position using a beam!! This means taking the signal strength from a wide area
like several blocks or miles say with a mobile omni antenna.. so as you drive
just mark down the signal strength averaging what the strength is in an area,
then the next area etc.. FOLLOW steps 1 and 2 above.. don't convince yourself
that a signal is somewhere that it isn't!!.. take the logical approach
 Akihabara
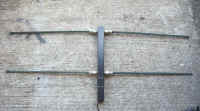
folding elements heavy duty
Akihabara
folding elements heavy duty 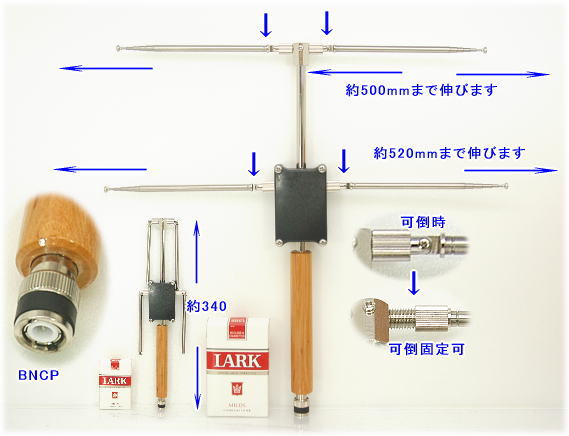 NATEC NY144X recent
purchase from Akihabara
NATEC NY144X recent
purchase from Akihabara
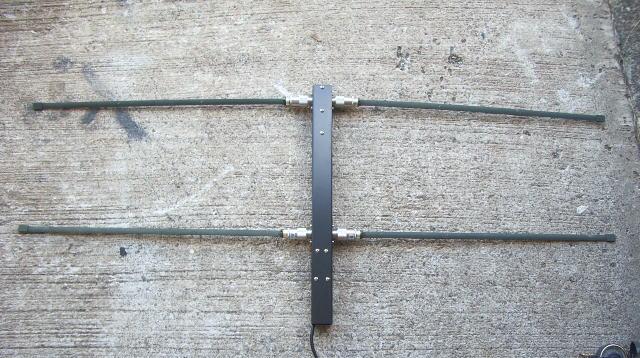
Antenna similar to HB9CV, have not tried it yet.. Still waiting for the next
Hawaiian Fox Hunt
Roanoake Doppler type mobile direction finder, needs strong signal for
bearings and may still give bearing on reflections. Built these two different
models with different circuitry but did not have favorable results when in areas
of reflections from buildings or mountains.
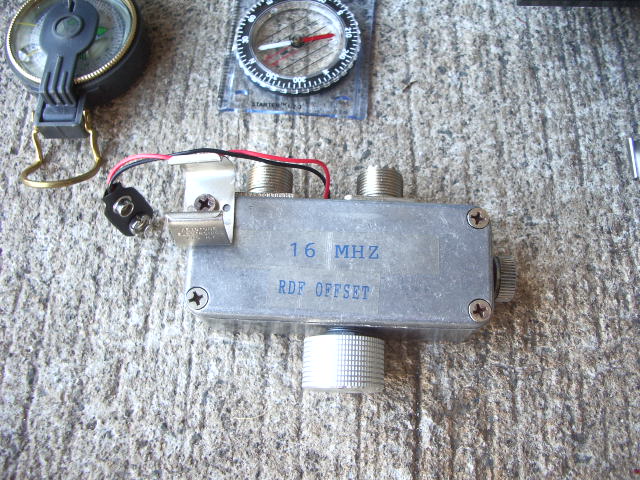
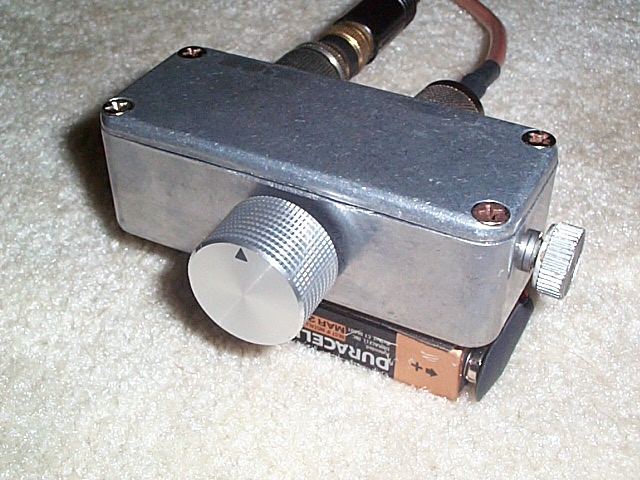
 OFFSET
ATTENUATOR easy to build
OFFSET
ATTENUATOR easy to build
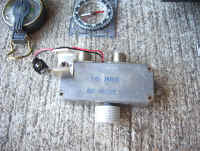
Used when getting real close to the transmitter. Your receiver will start to
pick up the beacon even without an antenna when you get close to the
transmitter. Once that happens you will not be able to get a bearing since you
are dependent on the antenna pointing in the right direct. This Offset
Attenuator is a must have to attenuate strong signal when near to the
transmitter. Easy to build, just use a clock oscillator module from an old
computer board. Any frequency will do, just tune your receiver above or below
the transmitter frequency by whatever the clock oscillator frequency is.
Put this inline between the receiver and directional antenna and continue to
narrow down the location which should be in walking distance at this
point. The Offset oscillator in the picture has a 16 mhz clock module so
you would just tune in Receiver 16mhz off the transmitter frequency and adjust
the gain control. You can make the signal weak enough to find the high power
transmitter feet away. Or buy one from the web from such places as ARROW
ANTENNAS
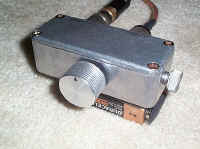
This is a TDOA Time Differential of Arrival home brew DFer. Basically 2
quater wave whip antennas are placed on the roof of the vehicle that are fed
into the antenna switching box (silver chasis) which has PIN diodes that are
electronically toggled and fed via a single coax to the main control box (black
with meter) All this box is doing is switching the antennas fast and measuring
the phase relationship between the signal hitting both antennas which is
displayed on the meter on the black box or if you are driving I got a
"BIG" microamp meter that can be placed on the dash of the vehicle and
plugged into the black box to the MTR connection which displays the same thing
just on a bigger display.
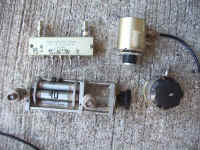
Above are various attenuators that can be found in surplus stores, Dayton,
Ebay, old surplus equipment or can even be built from kits available. You gotta
be a pack rat like myslef to collect this stuff when needed.

Above is a Chinese made 80 meter RDF receiver, how can I describe it.. well it should
sell for $20 at best.. cheap plastic case.
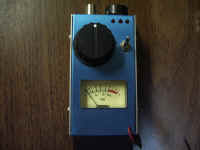
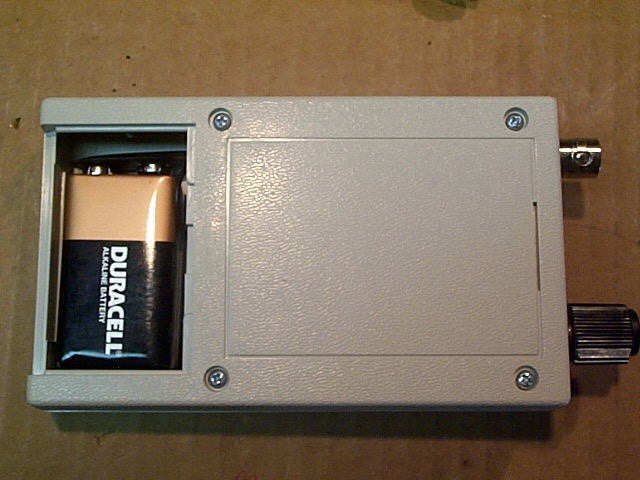
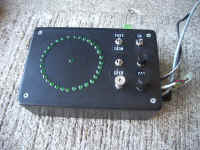
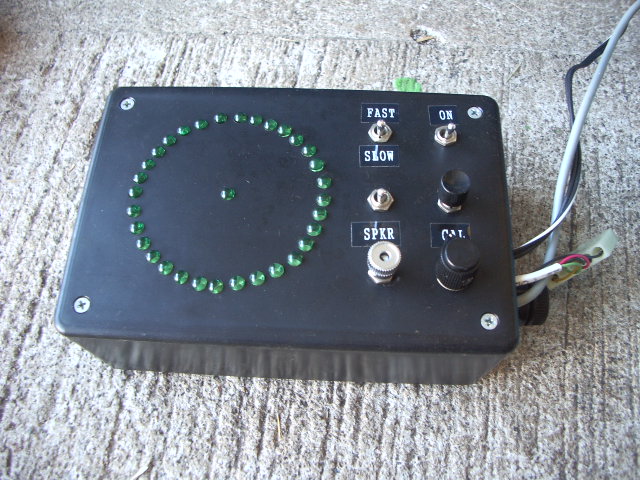
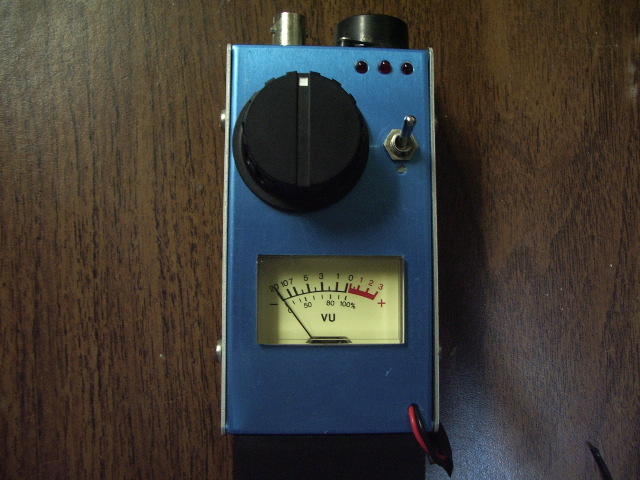
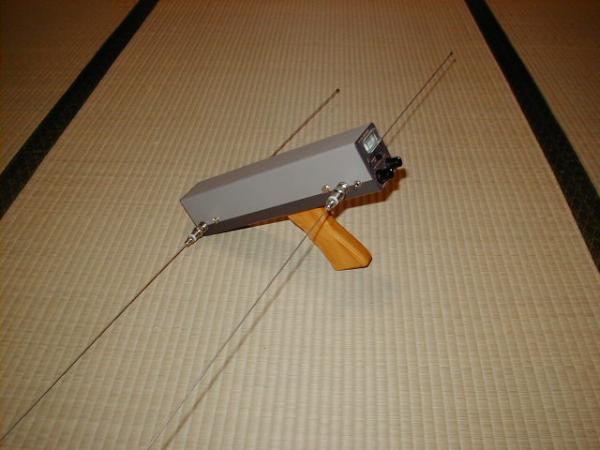
This is a Japanese near field detector for 2 meter frequencies only . Very good selectivity,
sensitivity AND that big black knob will take the signal down to nothing if
there is a strong transmitter. It is as good as the offset oscillator / receiver
combo but the advantage of this one is that it has visual LED indicators, Beeper
on the top of the unit, BIG Signal meter on front.. When getting close just
switch this puppy on and your there. very light weight, comes in Kit form, found
in Akihabara for around $60 US. Chassis is very strong aluminum precision
made. The chasis comes with the holes punched and everything except the battery
itself was included in the kit.
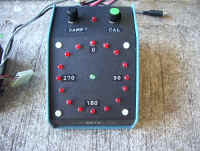
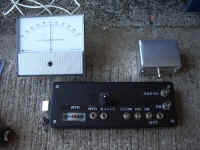
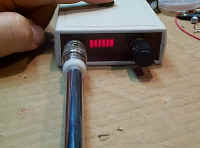
This is a fantastic fox hunt DFer, Manufactured by Mizuho it is very
accurate, frequency agile. Notice the 5 LEDs on the front. Just so happens in
Official fox hunts there are 5 sequential transmitters that are spaced by time.
The LEDs will toggle by internal timer once the fox hunt starts, therefore you
will have a visual indicator of which fox transmitter is on the air.. How sweet
it is.. Now for the bad news, I got this rare Mizuho off of interent. It is no
longer being manufactured. ugh....

AD8307 by Analog Devices Low Cost DC–500 MHz, 92 dB Logarithmic Amplifier,
fantastic for a cheap near field detector. I used a Radio Shack remote control
project box that has a sliding door battery compartment to replace the battery..
I think I could sell this gadget on the market. August 2000 QST.
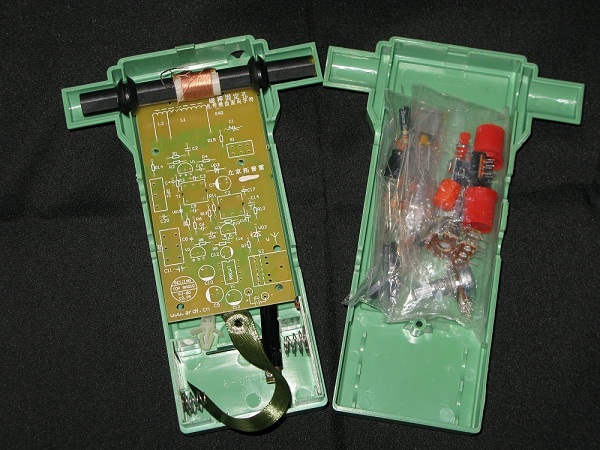 Chinese 80m kit
 Akihabara
folding elements heavy duty
Akihabara
folding elements heavy duty 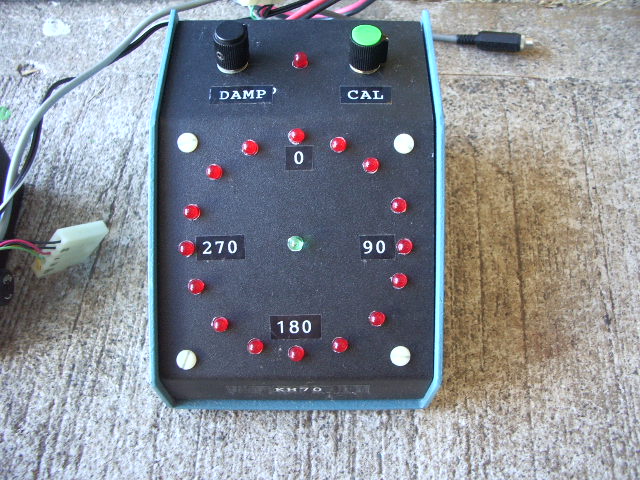
 OFFSET
ATTENUATOR easy to build
OFFSET
ATTENUATOR easy to build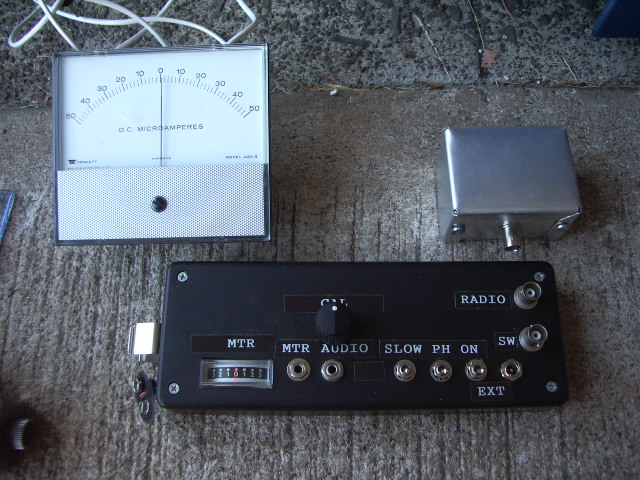


 FRXWebsite here