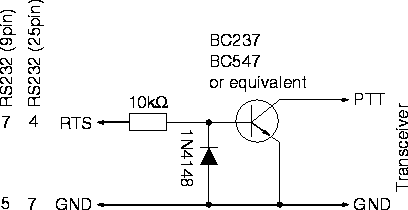
Direct Keying Schematic

(The resistor
value is 4.7k)
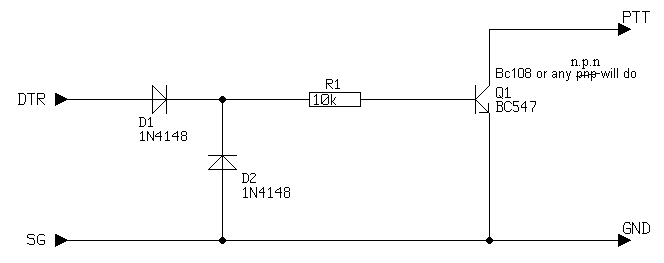
Optic
Coupling Schematic
(electrically
separates the computer from the radio)

Thanks to G4UXD for the following schematics.
Use a diode-protected relay with mains-powered rigs
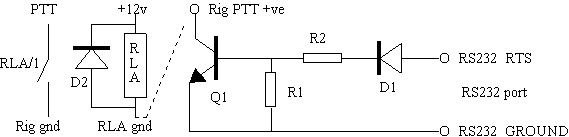
RLA: Miniature high-speed relay (not suitable for fast Morse)
Q1: Almost any low-power NPN switching transistor (e.g. BC108)
D1, D2: Small silicon diode, +/- 16 volt swing
R1, R2: The values depend on your equipment, but are not critical. Try 47k (R1) and 100k (R2)
The collector of Q1 (indicated by "Rig PTT +ve) may be connected to a reverse-voltage diode-protected miniature relay as indicated in the diagram.
#2 - Sophisticated keying
interface:
Circuit due to WA5LOD (QST February 1990)
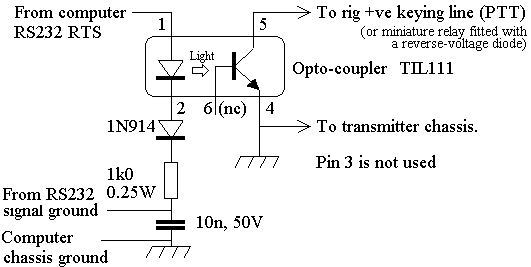
This is suitable for high-speed keying. It is set up for the (usual) positive PTT line. If yours is negative, then reverse the output lines from the opto-coupler and disconnect the line to the transmitter/oscillator chassis, or use a relay.
If keying your rig involves switching a voltage greater than 12V then you must use a relay (with suitable diode protection against reverse-voltage transients) in place of PTT.
If in doubt use a relay. It is assumed that, as a Radio Amateur, you have the competence to wire things correctly.
Here is a basic keying circuit from KC3MN that he uses in his eQSO gateway.
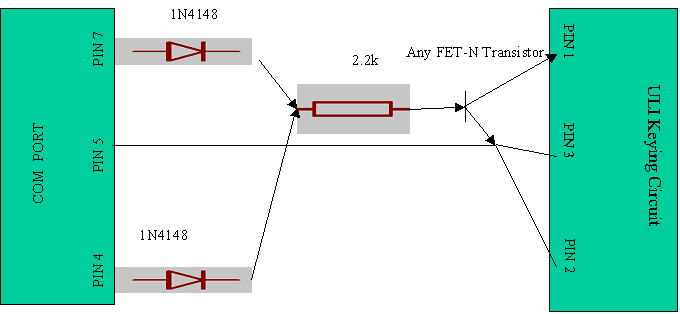
This is an effective switching circuit. Keep in mind that there are only two pins on the internal keying circuit of the ULI board. The internal most pin will be the hot pin, and the second pin will be your ground. That is why 2 and 3 are wired together.