
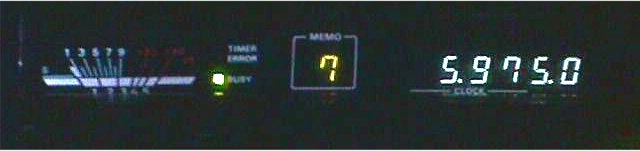
This next picture shows
the
meter and the digital display for comparison:
R-2000
LED For Bulb Swapout
Mod
Submitted by Terry
Vin = 15V
I = 20mA = 0.020A
Vled = 3.6V
15 Vin - 3.6 Vled = 11.4V
available
Volts/Amps = Resistance,
so we have 11.4V/0.020 = 570 Ohms
I could have gone as low as 600 Ohms, the nearest, higher resistor that I had on hand. I put a 600 Ohm resistor in series with a 1000 Ohm variable resistor. I then reduced the resistance until the LED reached a brightness that I liked. That worked out to about 980 Ohms. I then substituted a fixed 1000 Ohm resistor.
This next picture shows
the
meter and the digital display for comparison:
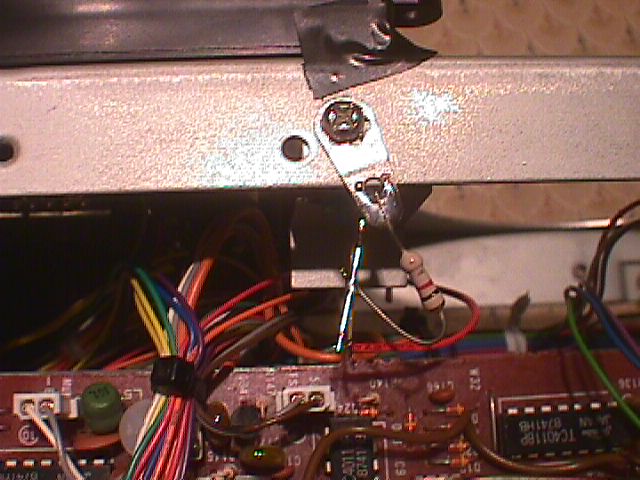
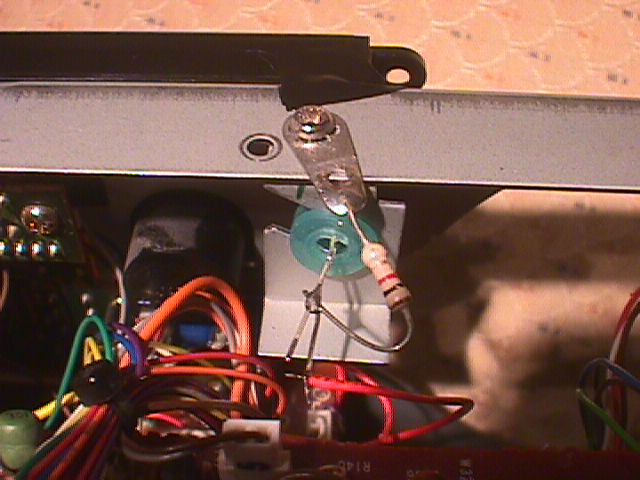
These next two pictures show the 1000 Ohm series resistor, the rear of the LED and the ground lug that I used to hold the LED in position, and for grounding the negative side of the LED:
This was a very crude first step. I did this modification fairly late at night and I've decided to live with the LED for a couple of weeks before I clean up my work. I will use heat shrink tubing to cover all the solder junctions. I may have to use some sort of glue to hold the LED in place, but I think the original rubber grommet will serve nicely.
If you compare the photos with the same view in a non-modified unit, it will be apparent that I used the original lamp bracket. I rotated it 90 degrees, and moved it toward the speaker about 1/4" closer and to the front by about 1/8". The original illumination was from the side of the bulb. With these two changes, the LED light is directed straight into the plastic "light pipe" and a greater brightness is achieved at a much lower LED current.
This next picture shows my very crude use of black electrical tape to cover the edges so as to keep the LED light from spilling through the small seams between the bezel and the case:

In this case I will likely clean it up with a good clean coat of black Liquid Tape. Liquid Tape will block the excess light, yet can be easily removed if the need arises.
This is how I chose to modify my R2000. The standard disclaimers apply: If you are uncertain as to your technical ability, do not attempt this or any other modification. It is all too easy to damage something and ruin a good receiver. This modification is pretty straight forward and a beginner should be able to pull it off, especially if they take their time and don't try to rush.
Suggestions, comments, corrections or additions may be emailed here.