INTRODUCTION:
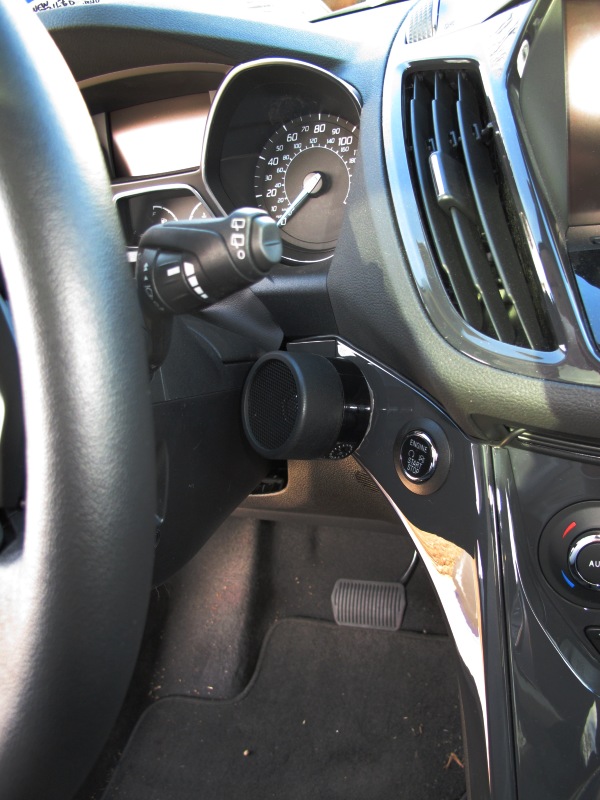
My mobile station is operational on the 40m through 10m HF bands and the 2m and 70cm VHF/UHF bands. My commute to and from work each day is a 64 mile round-trip. My travel time averages an hour each way, and even longer if the weather's bad or there's an accident on the highway. If I didn't have a mobile station, the time I spend on the road would otherwise be wasted. So, instead of stewing about the traffic or listening to depressing news reports on the broadcast radio, I happily tune the bands in search of contact with the outside world! It's a great cure for "road rage". The majority of my mobile operation takes place on HF, and the VHF/UHF radio is at the ready when the need arises. On road trips, I monitor 146.52 MHz, listening for possible calls from other motoring hams who've spotted my license plates or antennas. THIS PHOTO shows an overall view of the operating position, as seen from the driver's eye.
My vehicle:
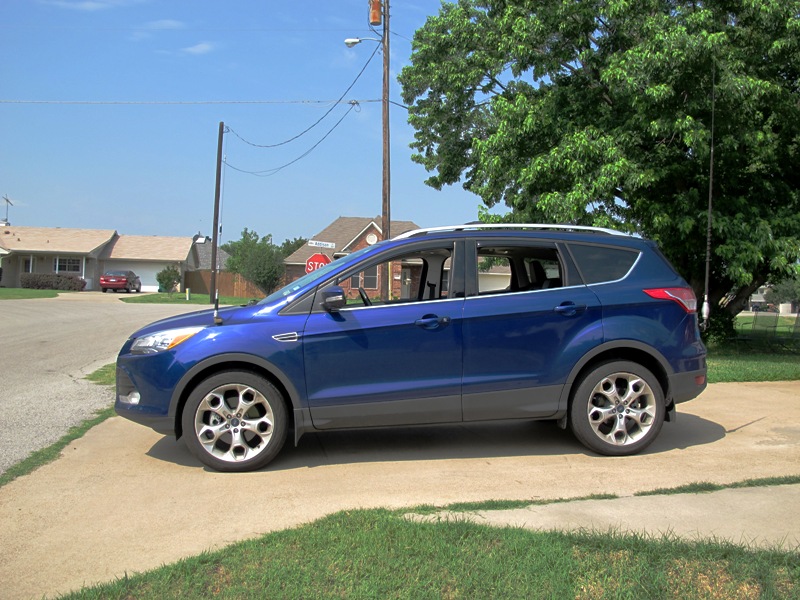
My vehicle is a 2013 Ford Escape. It is the Titanium edition with the 2.0 litre EcoBoost turbocharged engine and four wheel drive. The color is called "Deep Impact Blue".
HF transceiver:
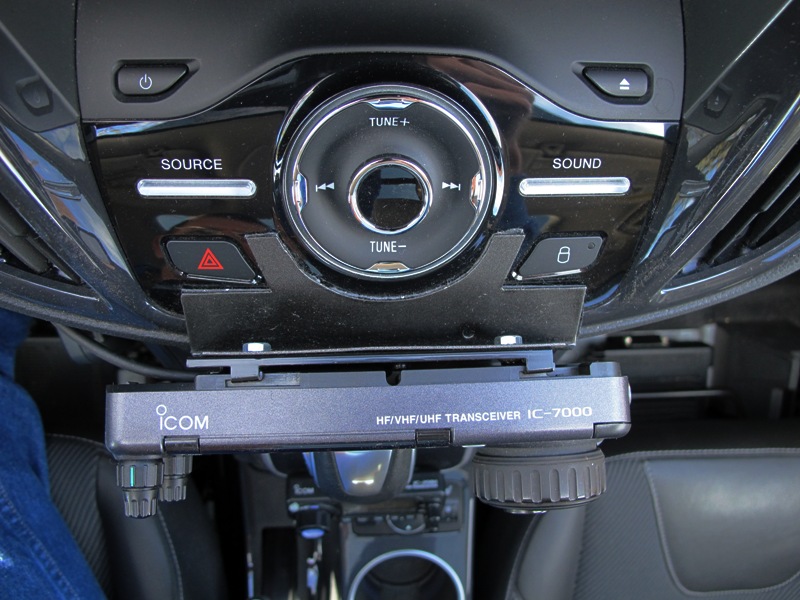
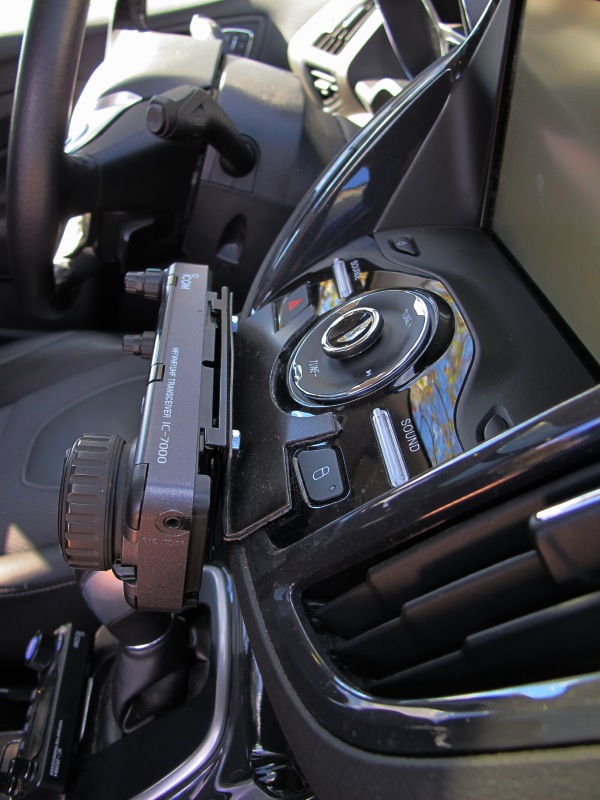
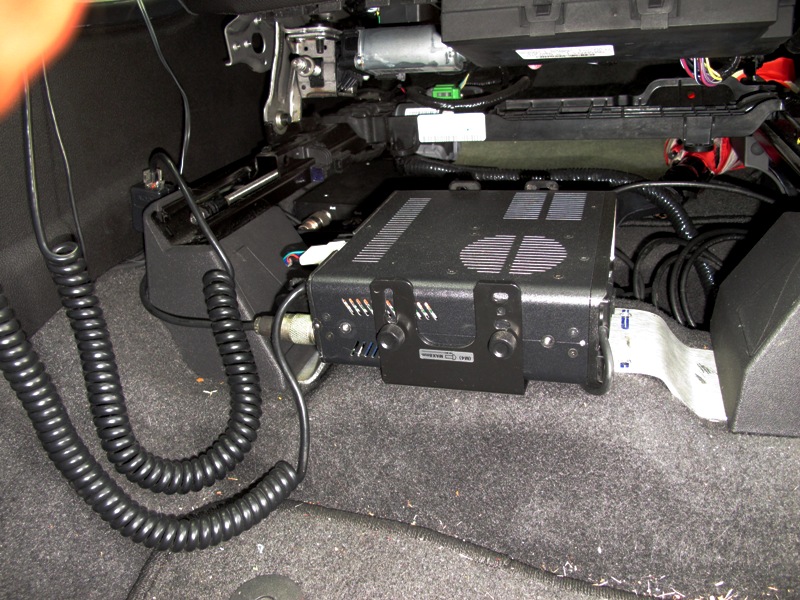
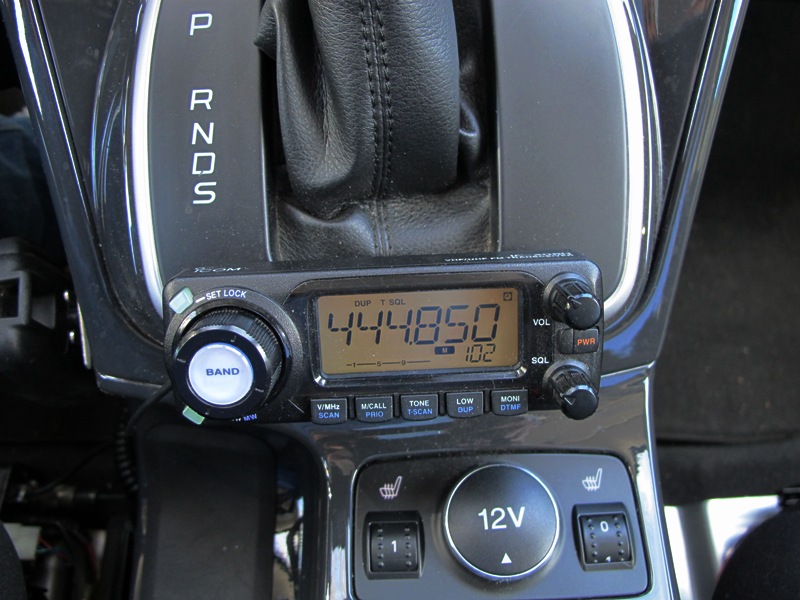
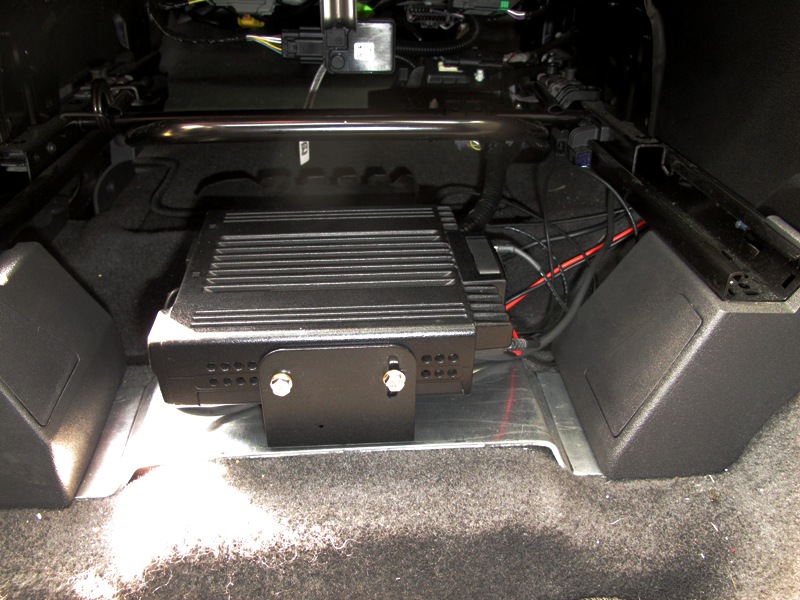
My HF radio of choice is Icom's fabulous IC-7000 transceiver. The radio's control panel is bolted to a homemade steel bracket which is affixed to the dash using 3M autmotive trim adhesive. THIS PHOTO, shot from above, and THIS PHOTO, shot from the right, show the mounting arrangement. The radio's main chassis is installed under the driver's seat. It is mounted on a baseplate made from 3.5" wide 16 gauge aluminum stock which is sandwiched between the seat mounting plates and the vehicle floor and held in place by the seat bolts. The plate is bent to accommodate the contours of the floor. All of the wiring is hidden under the lower lip of the center console. THIS PHOTO shows how the radio is installed. The camera is resting on the car's brake pedal, looking straight aft. You might notice that I drilled some new holes in the IC-7000's mounting bracket in order to lower the radio down as close to the floor as possible. There isn't much space under that seat! (but there's enough)
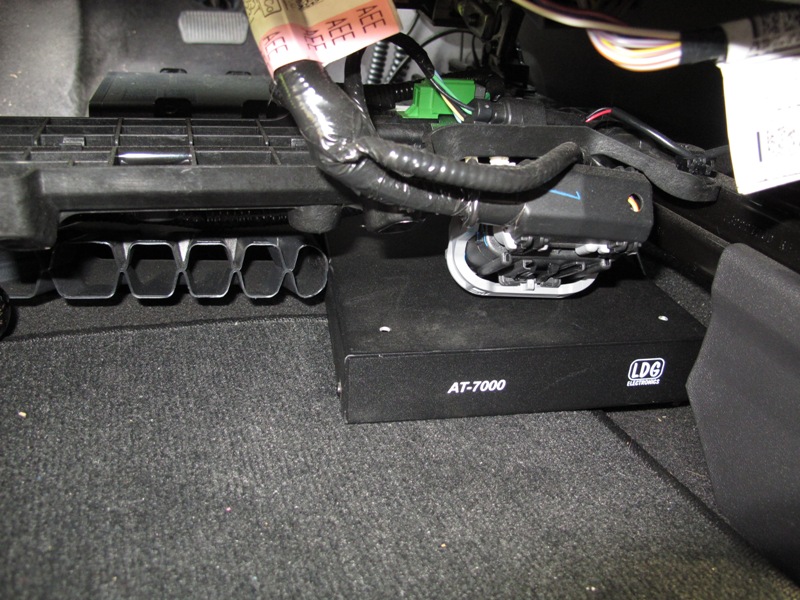
A compact LDG Electronics model AT7000 automatic antenna tuner sits on the floor under the driver's seat, as seen in THIS PHOTO. It's not bolted into place, it just sits there. A ground wire made of 14 AWG stranded wire is connected between the tuner's ground terminal and one of the seat mounting bolts, providing a ground connection to the vehicle body. This tuner was designed specifically as a mate for the IC-7000. It is no longer available new, but LDG now offers their model IT100 which is designed to be plug-and-play with most modern Icom radios, including the IC-7000.
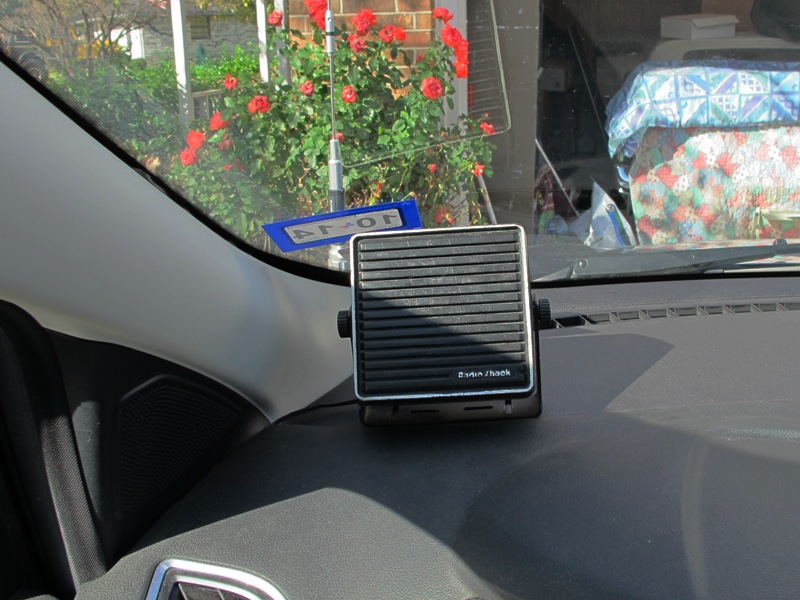
My external speaker is a Radio Shack 4" CB-type unit that's attached to the top of the dash using 3M auto trim adhesive, as seen in THIS PHOTO. Despite how it looks, given the camera angle, the speaker does not block my view.
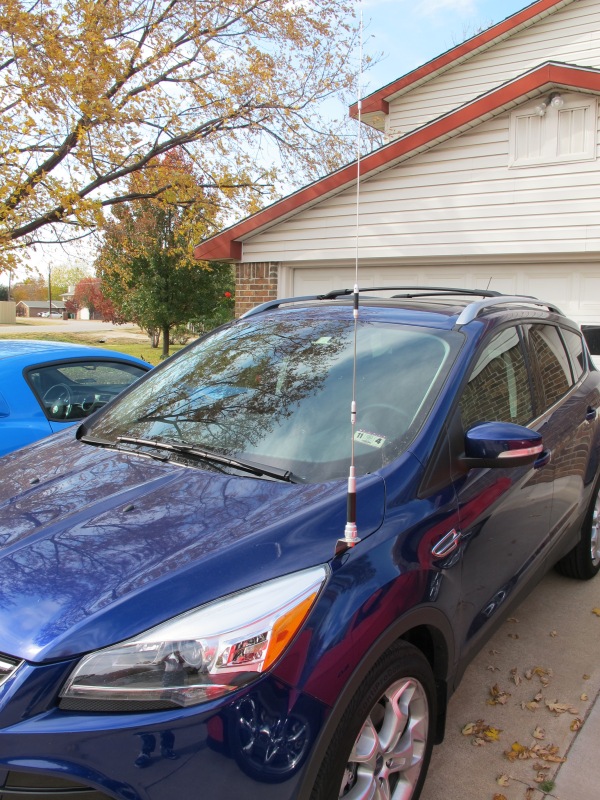
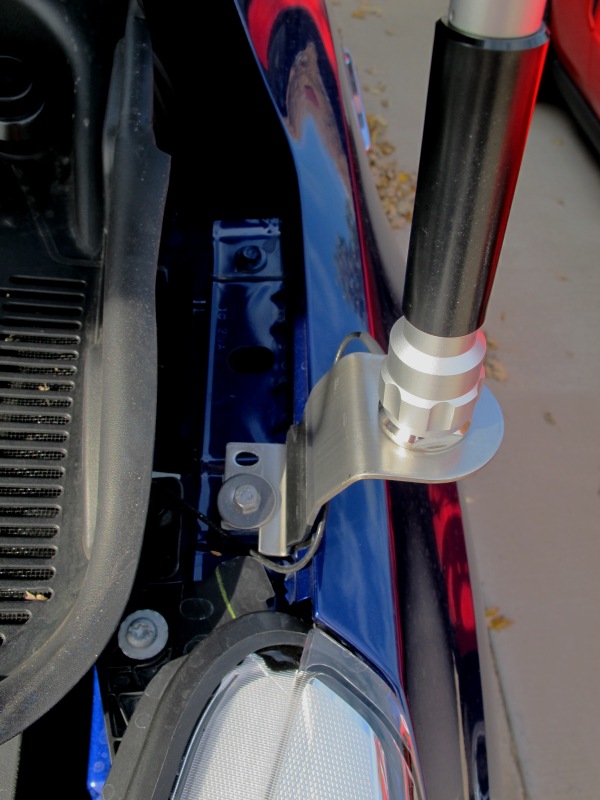
My HF antenna is an Outbacker Perth. This is a center-loaded antenna with a 4 foot main section containing the band taps topped by a 3-1/2 foot whip stinger. I've owned this Outbacker since the mid 1990s and have used it on four different vehicles. Although it wasn't cheap, this antenna is as tough as they come, and it performs very well for me. I have the stinger set at a point where I can simply select a band tap from 40 through 10 meters without having to adjust the stinger. I'm not a fan of 75 meters, so I haven't bothered to set up the antenna for that band. The antenna is mounted on the left side of the car's liftgate using a Diamond model K400 mount. This arrangement allows me to easily reach the band taps, and the antenna does not hit the top of the car when the liftgate is open. Here are two pictures showing the antenna with the liftgate closed [PHOTO] and opened [PHOTO]. Here are some detailed images of the mounting arrangement: [PHOTO] [PHOTO] [PHOTO] [PHOTO]. The ground wire seen in the photos enables the antenna's built-in matching transformer, which I find provides a better match than operating without it, especially on the lower bands. The spring is a 1950s Antenna Specialists product which I picked up via an eBay auction. There's nothing special about it, other than being a real classic olde-tyme part. The coaxial cable (Mil-grade RG-58C/U) is routed along the inside edge of the liftgate, down the body, under the car, and up through a plastic body plug into the interior, and then routed along the left side of the car. It is completely hidden from view inside the passenger compartment.
I'll readily admit that this installation is far from being the "ideal" setup. BUT... it works very well, and it is infinitely better than no antenna at all! I work my share of DX, perhaps even more than my share, and I receive plenty of unsolicited compliments on having a great mobile signal, especially from DX stations (who are surprised when they hear me louder than many of the fixed stations who are calling them!).
VHF/UHF transceiver:
My VHF/UHF mobile rig is an Icom model IC-208H 2m/70cm mobile transceiver. Its very small detachable control panel works perfectly in my installation. The control panel is affixed to the center console using 3M auto body trim adhesive tape, as seen in THIS PHOTO. There is no bracket for the control panel. You just stick the control head in place. The main chassis is under the passenger's seat, as seen in THIS PHOTO. The baseplate was fashioned from a piece of scrap 12 gauge aluminum plate, 3 inches wide. As in the HF installation, the bracket is sandwiched between the seat track frame and the floor. For an external speaker, I'm using a 2" diameter commercial speaker that's attached to the dash using 3M auto trim adhesive, as seen in THIS PHOTO.
VHF/UHF antenna:
I am using a Comet model CSB770A antenna mounted on the left front fender of the car, as seen in THIS PHOTO. This antenna is 50 inches tall and offers 4.4 dBi gain on 2m and 6.9 dBi gain on 70cm. It requires an SO-239 style mount. The antenna is installed on a Diamond model C213SMA base/feedline assembly, which provides a 13.5 foot length of RG-316/U Teflon 1/8" diameter coax. This thin cable fits nicely through the gap between the car's fender and hood with no chance of crimping. The stainless steel mounting bracket is an Accessories Unlimited model AUF1L which was designed for use on 1997 through 2003 Ford F-150 pickup trucks. These three photos show some detail on the mounting arrangement: [PHOTO] [PHOTO] [PHOTO]. I had originally used this stainless bracket to install a CB antenna on a 2003 F-150 that I used to own. I did a little modification to adapt it to fit the Escape (which involved some bending and some modification of mounting holes), and then opened up the antenna mounting hole to fit the SO-239 mount. The size had to be increased from 1/2 inch to 5/8 inch. This was done on a milling machine by a professional machinist. The bracket is attached to the car with stainless steel hardware using the mounting hole and captive nut used to attach the fender to the car body. A 1/4 inch thick spacer was required between the mount and the car body. It is 1 inch square with a 1/4 inch hole in the center. I made this out of a piece of scrap aluminum. THIS PHOTO shows a closeup of the bracket and how it is attached to the car body.
Installation Notes:
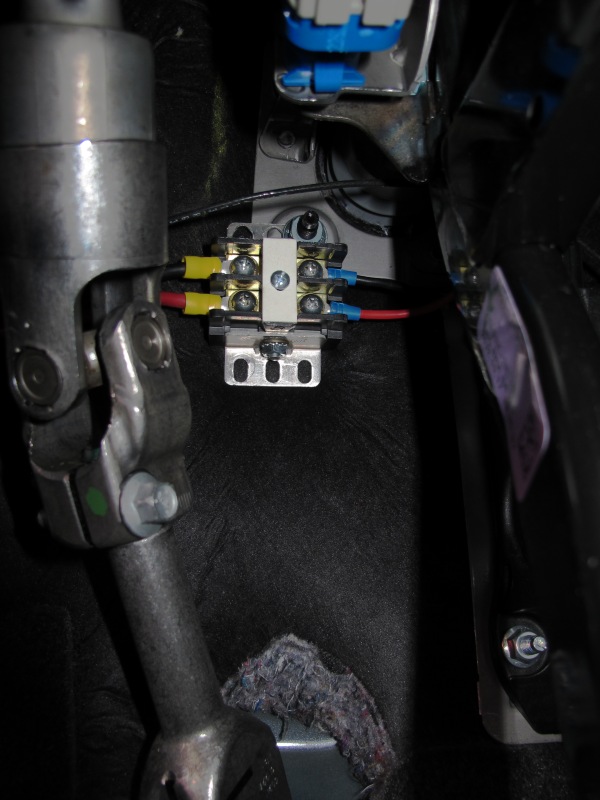
DC power comes directly from the vehicle battery via #10 AWG twin-lead wire. The power feed terminates in an commercial type electrical junction block, as seen in THIS PHOTO. The junction block is mounted on the inside of the firewall, piggy-backed on an existing bolt with a nut and washer added. Both the positive and negative DC power leads run all the way to the battery, and I have an outdoor-grade weathertight fuse holder installed in the positive lead right at the battery.
I *never* use the vehicle body or chassis as the return path for my DC power! Doing so just begs for noise to be introduced onto the power leads! I also *never* power any permanent mobile gear from the fuse panel or cigar lighter. I do have a filtered, fused cigar lighter power adaptor for my Yaesu handheld so that I can use it in rental cars, but I would not want to depend on cigar lighter power to be a permanent solution, even for powering a handheld. Today's computerized vehicles are very noisy, and that noise almost always ends up getting out on the DC power bus. Power your permanent installation directly from the battery and you'll never be sorry.
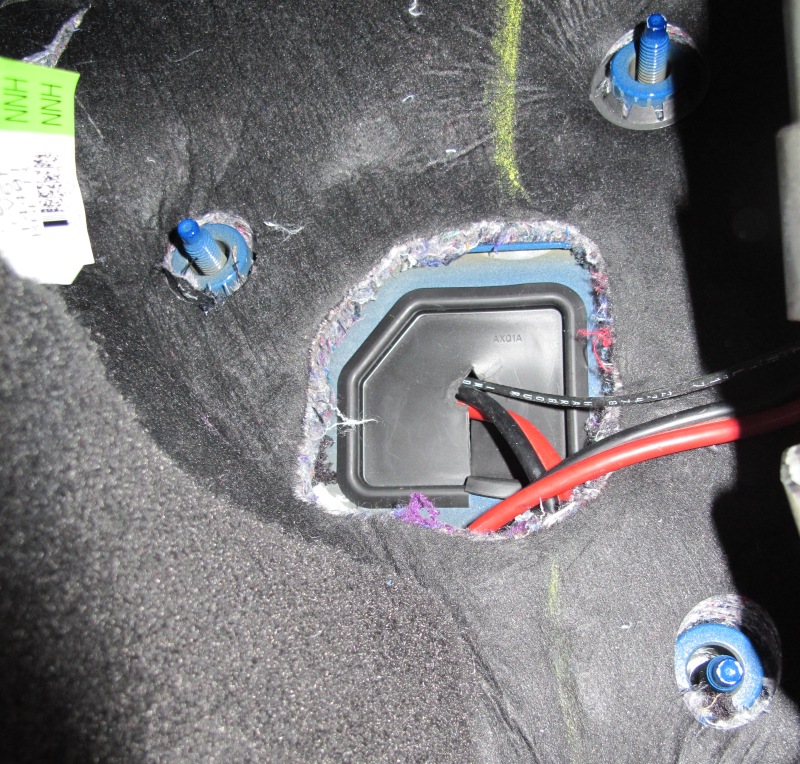
The DC power cable and VHF/UHF antenna feedline enter the passenger compartment through a large rubber hole plug that Ford conveniently placed there, which you can see in THIS PHOTO. The hole plug is hidden under the firewall insulation blanket, but in my vehicle, there was a die-cut removable piece of insulation which covered the hole plug, as shown in THIS PHOTO.
I am proud to say that I did this entire installation without drilling any holes in the car, other than a poking holes through a couple of replaceable plastic body hole plugs to permit cable entry! This whole installation is proof that: (1) you can install an amateur radio station in today's small cars, and (2) you can do it without drilling any holes or making any permanent modifications to the car. When you're planning your installation, think carefully about it. Look at what others have done, and apply their lessons-learned to your installation. If you take the time to engineer it carefully, your mobile installation will be successful.
![[PHOTO]](images/m_hf_ant_hatch_closed.jpg)
![[PHOTO]](images/m_hf_ant_hatch_open.jpg)
![[PHOTO]](images/m_hf_ant_mount_1.jpg)
![[PHOTO]](images/m_hf_ant_mount_2.jpg)
![[PHOTO]](images/m_hf_ant_mount_3.jpg)
![[PHOTO]](images/m_hf_ant_mount_4.jpg)
![[PHOTO]](images/m_vhf_uhf_ant_2.jpg)
![[PHOTO]](images/m_vhf_uhf_ant_3.jpg)
![[PHOTO]](images/m_vhf_uhf_ant_4.jpg)