® Rangr 450 UHF mobile
WWW.QSL.NET/K4MBE/geran450.htm
How I modified a GE RANGR-450 (450-470) to 70cm HAM band.
 Copyright 1997-2004 - Sterrett Carter
DISCLAIMER:
This document is for informational purposes ONLY!
If you choose to follow the steps outlined herein, you do so at your own risk.
I cannot, nor will not, be responsible for damage to equipment caused by modifications YOU
make to the radio as a result of your reading this document.
OVERVIEW:
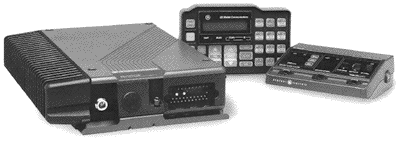
The GE RANGR-450 is a robust 2 piece commercial radio which
continues to be manufactured and supported by Ericsson Communications in Lynchburg, VA.
Parts and manuals are available from the manufacturer. The Parts
Identification section can be reached by telephone at 804-446-5005 08:00 to 17:00 eastern
time.
The control head is intended to be mounted within easy reach of the operator and the transceiver is intended to be trunk mounted. With the S-8xx series control heads the radio is capable of 16 "modes" of 16 channels (256 channels total). The transceiver can be loaded with 16 channels (one mode) at a time complete with transmit and receive frequencies, CTCSS (PL) tones and 8 character Alphanumeric channel identifiers. With the S-5xx series control heads, the radio is capable of 16 channels but the transceiver must FIRST be downloaded (programmed) using a S-8xx series control head with the frequency information. On the S-5xx series control heads the channel is identified as a number only.
These instructions were developed and tested on a 2 ppm RANGR-450 (450-470 MHZ). They should also work with any RANGR-450 which is in the 450-470 MHZ range.
WHAT IS NEEDED TO DUPLICATE WHAT I DID (BARE MINIMUM):
1.   The use of an S-8xx series control head.
2.   A RANGR-450 transceiver (450-470 mHz).
3.   The interconnect cable (control head to radio).
4.   A dummy load capable of handling 100 Watts for at least 2 minutes.
5.   A Watt meter capable of measuring 150 Watts in this frequency range (440-470 MHZ)
6.   RF cables to connect the radio to a watt meter and then to the dummy load.
7.   A receiver (scanner or 70cm HT).
8.   One small sharp knife (X-Acto type)
9.   A non-metallic flat blade radio alignment tool (like a small screwdriver).
10.  A 12Vdc power supply (or battery) capable of delivering 30 Amps for 10 minutes of
       intermittent 5 second transmissions.  (E.G.. Jumper cables from a vehicle's battery.)
11.  The PC software for the S-8xx series control heads, the PC to radio interface box, and the
       correct programming cable to go between the PC interface box and J5 on the control head.
          OR
       Access to someone (or some company) who has the software and interface and interface
       cable.
12.  An assortment of TORX drivers (T-10 to T-30).
What would be nice to have:
1.   A frequency counter.
2.   A friend to report on "test transmissions".
STEPS FOR THE CONVERSION:
1.   Program a S-8xx series control head with 440.0500, 446.0000, and 448.9750 mHz
      transmit and receive frequencies.
     A)   Configure the control head software telling it that the RANGR IS a 450-470 radio.
          1)   The control head  MUST be told exactly what the transceiver (radio) IS,
                not what is desired.
     B)   Enter the frequencies listed above in the Receive and Transmit areas of the
            on-screen display.  If the ENTER key is struck, the software will prompt that the
             frequency is 'OUT OF RANGE'.  Use an undocumented feature of the
             programming software to "force" it to accept the "out of range" frequency.  This
             feature is CONTROL-E instead of ENTER.
     C)   Load the configuration into the control head and disconnect all cables.
     D)   Take the control head, transceiver, and the radio interconnect cable to the location
            where the power supply is.
2.   Remove the top cover from the transceiver using a TORX bit/driver.
3.   Connect the control head to the radio.  Connect the radio and head to the power supply.
4.   Connect a jumper from the antenna connector (SO-239) to the watt meter.
5.   Connect a jumper from the watt meter to the dummy load.
6.   Depress the control head power switch (RED on the top left corner) to turn on the radio.
     Verify that the control head/radio is set for 440.0500 MHZ.
7.   Inside the transceiver, locate and observe the LED labeled (CD-711).  If the VCO is
       locked on frequency the LED will be out.  (See DRAWING A for help locating this
       LED).
8.   Set a scanner/receiver for 440.0500 MHZ and set it within 2 feet of the dummy load.
9.   If there is a frequency counter, turn it on and place it the same distance away from the dummy load.
10.  Key the transmitter for a few seconds and observe the same LED (CD-711).  If the VCO
       is locked on frequency the LED will be out. (Skip to step 16A).
11.  If the VCO is not locked (LED is on or flickers is steps 7 or 10 above) power the radio off
       and remove the power leads from the supply.
12.  Locate CV-201 and CV-202 under the factory seal.  (See DRAWING B for help locating
       these adjustment points)
13.  Use a small sharp knife to cut the seal away from the holes and remove the piece was just
       cut out.
14.  Reconnect the power supply and power up the radio.
15.  If the LED was not out in step 7 above, adjust CV-201 until the LED is out when in
       receive mode (this adjustment may not be necessary).
16.  If the LED was not out in step 10 above, adjust CV-202 until the LED is out when in
       transmit mode.
         A)  Observe the frequency counter (if available) to verify the stability of the
             transmitter.  Listen to the transmitted audio through your receiver to make sure it is not
             squealing (oscillator instability) and the audio quality is good.  If the VCO is causing a
             squealing on the transmitted signal, carefully adjust CV-202 until the transmitted audio
             squeal stops.  (See DRAWING B for help locating this adjustment point)
17.  Verify that the VCO is locked throughout the 70cm band by retesting on 446.0000 and
       448.9750 mHz.
18.  Power off the radio and remove the cables from the power supply.
19.  Re-install the top cover.
 **CONGRATULATIONS! THE TRANSCEIVER CONVERSION IS DONE!**
POWER OUTPUT ADJUSTMENTS:
The GE RANGR-450 is available in many power output
configurations. I have the 100 Watt version which I turned down to 48 watts.
This extends the life of the RF final amplifier transistors and keeps me from
unintentionally raising repeaters up and down the East Coast ;-). The 100 Watt radio
has three RF amplifying transistors on the output board (connected directly to the PL-259)
arranged with two right next to each other. RANGR-450's with two (total) RF
amplifying transistors are rated for approximately 35 Watts output power and can be turned
down, if desired, to 25 to 30 watts to save "wear and tear" on the finals.
The following explains how to turn down the power on either version...
1. Remove the bottom cover using the same TORX bit used to
remove/install the top cover. (Four screws - one in each of the mounting
"pads").
2. Locate a small variable resistor labeled RV-1 (near the exact center of the
radio next to ribbon cable jumper J4).
See DRAWING C
for help locating this adjustment point.
3. Reconnect the power supply and power the radio on.
4. Key the radio and take note of the output power on the watt meter.
5. Using the non-metallic alignment tool - Adjust RV-1 counter-clockwise until
the power output is what is desired.
My 100-Watt radio would not go below 30 Watts.
I chose 48 Watts so it is under the 50 Watt guideline for routine RF safety surveys
(but I check the RF field concentration anyway).
6. Re-install the bottom cover.
FINAL STEPS:
1.   Reprogram the S-8xx series control head with your chosen frequencies.
2.   Install the radio.
3.   Download them into the radio (It's AUTOMATIC!).
          =>AND<=
4.    Have fun saying I DID IT MYSELF!
IF THERE IS ONLY A S-5xx SERIES CONTROL HEAD TO PERMANENTLY INSTALL:
1.   Program a S-8xx series control head with 16 favorite frequency sets (channels).  See programming steps
      at the beginning of this document.
2.   Connect it to the transceiver, download the frequencies to the transceiver by powering it on.
3.   Turn the control head off.
4.   Remove the S-8xx series control head and install your S-5xx series control head.  The 16 "channels"
     (TX/RX frequency sets) will be stored in the X2212 NVRAM/EEPROM in the transceiver.
 73, Sterrett (K4MBE)
Email: [email protected]
	carter_sjATjuno.com
Back up to the Conversions Main Menu.
Copyright 1997, 2004, Sterrett J. Carter