How_To revitalize an old KLM KT34XA and other Yagi antenna
My KLM yagi is more than 15 years old (in 2006) and has survived to all heavy storms passed here in the last years,
specially the heavy one at the end of december 1999.
Due to its old age and the sea corrosion, the performance was not more significant.
In the spring of 2000 I took it down for inspection. That time I had not jet a digital camera.
At once I discovered that all the contact points under the
straps were oxidized and loosened.
The decision to clean all the parts was easy to take, but how ?
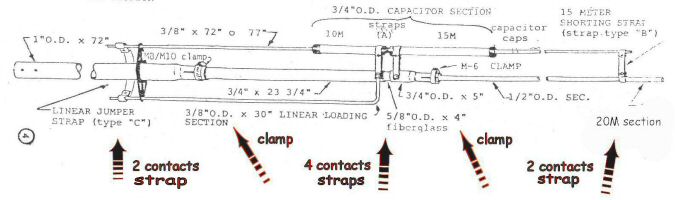
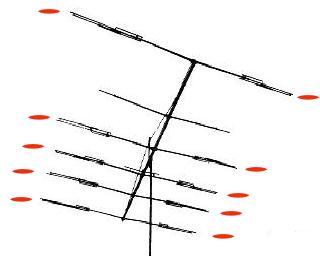
In the above image I have marked all the contact points .
Follow
this link to download the full element drawing about 1600x470 pixels :
half_element
in full
There are 8 most important contacts plus 2 clamps per
half element and there are 10 half elements on the whole antenna.
That means 80 points for the straps and 20 points
for the clamps to be cleaned and re-fastened.
Part 1: cleaning.
Beside all the usual tools that everyone has at home it is needed
a
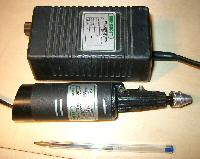
Mini_Grinder or Dremel like tool with variable speed.
Here is the one I use.
Its
dimensions are compared to a pen .
This work could be also done with some most modern Balck&Decker
drill
but the choice is yours.
link to large picture
|
|
link to large picture 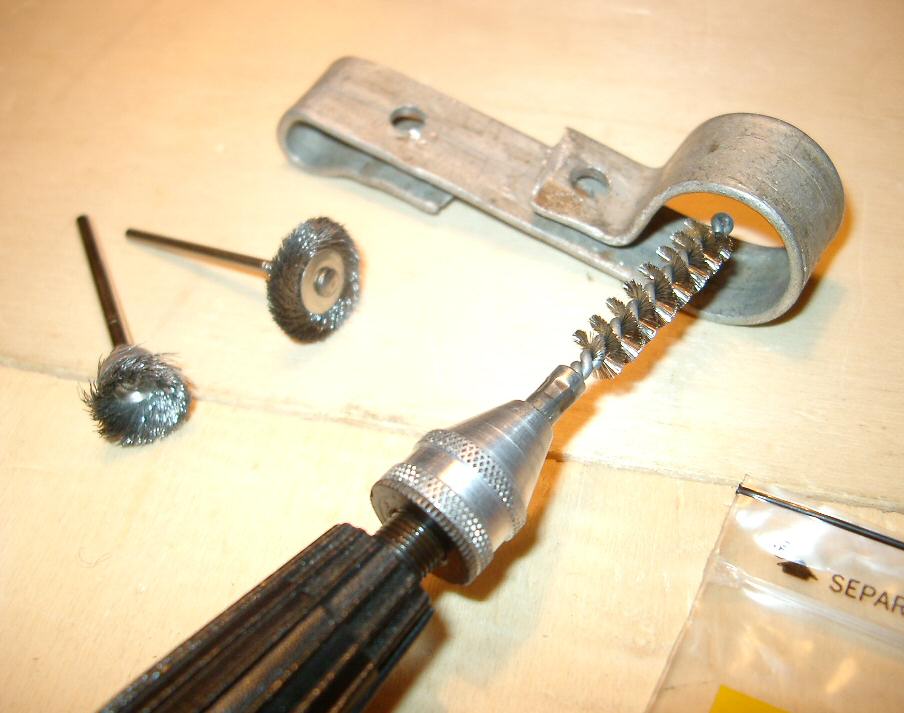
|
This 5+1 ele. yagi is a BIG Thing, almost 70mq to seat on the roof . But if you have it you already know!
Cleaning the internal points of each strap by hand was discarded after some testing with various sand_papers.
In my hardware equipments I have a mini_grinder dremel like tool, the idea was fine.
If I could use those small brushes of the kit I could expedite all the cleaning work.
But the dremel brushes (shown just above the tool) are too "gentle" to do such a hard work.
After some guessing came to me the idea on how to clean the "straps" in a quickly way .
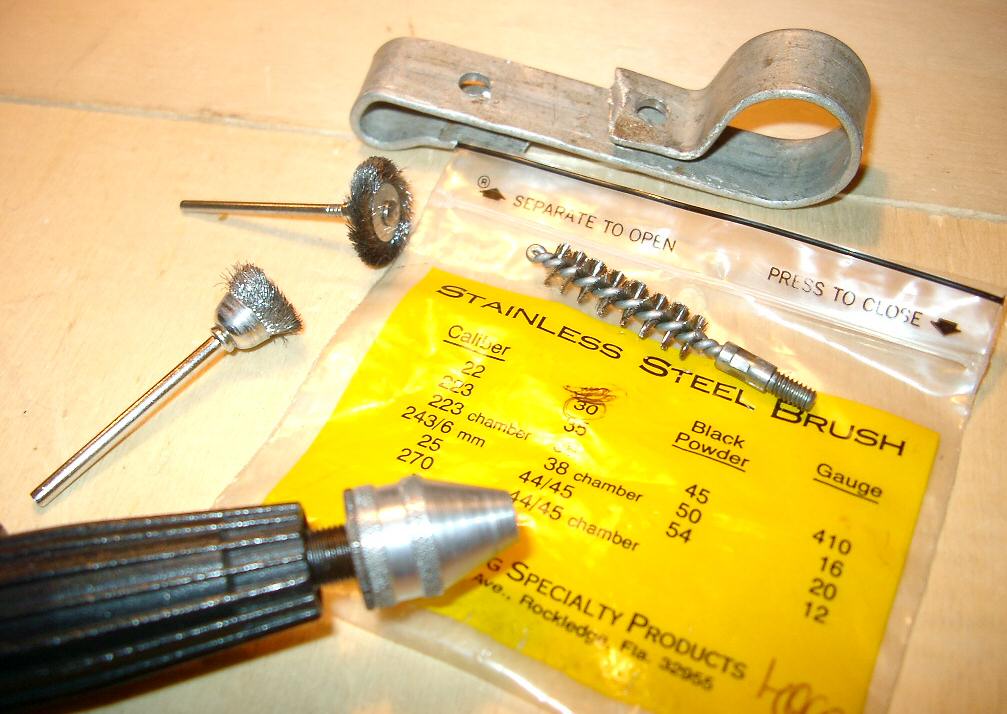
From my gunsmithing hobby I took some rifle brushes and after some tests I decided that a steel_brush was
hard enough to do the work than those of bronze or copper .
The steel rifle brushes are very easy to obtain. The caliber could be anyone from cal.30 or nearer.
I have tried also some cal.22 but are too small.
When you go to the gunsmith-shop take the dremel head with you and try various brand of brushes
which one seats firmly into the Tool's head.
The pictures in the above table are self explanatory. The speed of the tool will be chosen on the field.
Be very carefull because the brush must be well centered in the Tool's head.
*** WEAR PROTECTIVE GLASSES , Dust Mask &
Gloves ***
The brushes hairs and alluminium particles
fly all around during the polishing process
Be also prepared
to use many brushes, so buy 10 pieces of them if you live far away of
a gun-shop.
If I remember well I used 5 to 7 pieces to polish all
the antenna straps.
The grinder helped very much and the work was
completed in a couple of days.
Part 2: fastening.
Fastening was the second problem: almost all of the straps have become loosened
due to the torsional movement
of the antenna. This problem was
much more complex to solve because the aluminium straps were not more so
solid
to keep its round forms as when it come out of the box at
its "young age".
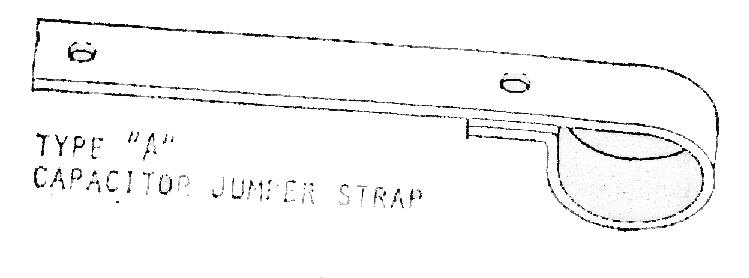
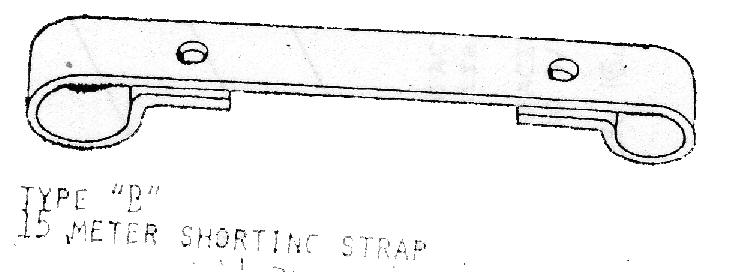
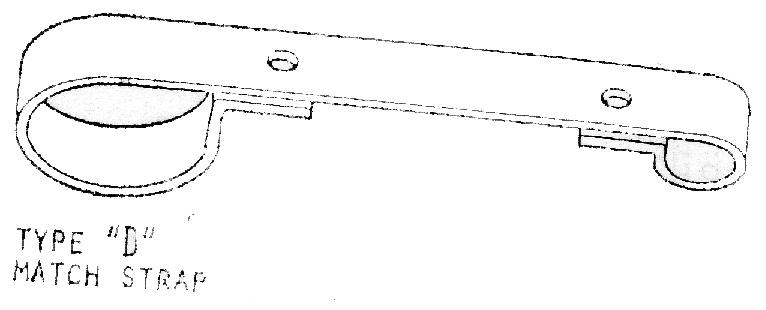
Here are the drawings of the straps:
|
|
|
|
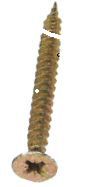 chipboard screw chipboard screw |
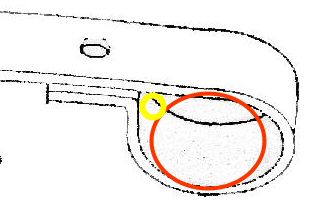 RED circle = antenna tube, RED circle = antenna tube,Yellow=free space |
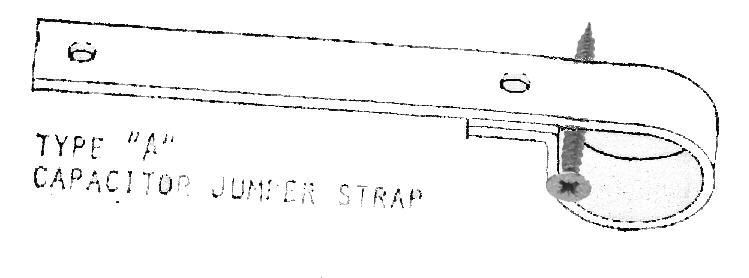 screw insertion, cut the head ! screw insertion, cut the head ! |
Of course the screw's head has been removed ... and the idea proved to be successful.
In my case I had to use some screws with 4 millimetres and some also with 6 millimetres of diameter.
That because some straps had been very loosened and the free space was very large.
Of course some strap's connections as for the type B and C there was no need to add a wedge
After such a cure the old antenna has revitalized itself as if it were new, well almost new.
Now in 2006 it is up on the tower since 6 years and the performance is still very good.
The antenna's flexibility is keept at its optimum.
At the present, 2009, the antenna is sitting in the garage waiting for the update with the M2 (m squared) update kit .
Still uploading...
I am writing this article in Nov.2004 + Feb 2005 lug.2006 and waiting for updating on 2009