ADS-B
![]()
THERE ARE SEVERAL PROFESSIONAL ADS-B ' BOXES ' AVAILABLE - AIRNAV RADARBOX AND KINETIC SBS1 MODE S RECEIVERS ARE PERHAPS THE BETTER KNOWN ONE'S.
THE OTHER WAY TO GO IS TO USE ONE OF THE CHEAP RTL2832 TV DONGLES WHICH ARE AVAILABLE FOR A FEW EUROS.
YOU CAN THEN RUN A PROGRAM CALLED DUMP1090 WHICH WILL RUN ON A PC OR ON A RASPBERRY PI. THE OUTPUT FROM DUMP1090 CAN BE DISPLAYED ON SCREEN. IT'S ALSO POSSIBLE TO FEED PLANEPLOTTER AND VIRTUAL RADAR SERVER WITH THE DATA RECEIVED FROM DUMP1090
DUMP1090
INSTALLING DUMP FOR WINDOWS FOR USE WITH A RTL2832 DONGLE WILL REQUIRE A SPECIAL DRIVER WHICH CAN BE DOWNLOADED FROM THE SITE ZADIG AGAIN READ THE INFORMATION ON DAVID TAYLORS SITE IF YOU HAVE ANY PROBLEMS INSTALLING DUMP FOR WINDOWS. BUT YOU MUST USE THE ZADIG DRIVER OTHERWISE THE DONGLE WON'T WORK. ONCE DUMP1090 IS WORKING YOU WILL SEE A SCREEN SIMILAR TO THE BELOW ( WINDOWS/RASPBERRY PI WILL BE THE SAME )
DUMP1090 FOR WINDOWS ( A ZIP FILE WITHIN THE RASPBERRY PI DUMP FOLDER ) )
THERE ARE A FEW DIFFERENT VERSIONS BUT THIS VERSION WILL GIVE YOU ALL YOU NEED TO HAVE TO GET YOU GOING IN THE FIRST INSTANCE
YOU CAN FEED PLANEPLOTTER / VIRTUAL RADAR SERVER FROM YOUR DONGLE AMONGST OTHER SOURCES

THE ABOVE IS VERY DATED NOW - BUT IT STILL INSTALLS ON A RASPBERRYP PI3 B+ RUNNING BUSTER
A GOOD RUN COMMAND IS BELOW
DUMP1090 IS NOW OUT DATED SO YOU WILL BE BETTER INSTALLING FLIGHT AWARE/SKYAWARE YOU DO NOT HAVE TO UPLOAD TO THEIR SITE IF YOU DO NOT WISH TO, JUST DON'T CLAIM THE INSTALLATION AND IT WON'T UPLOAD
![]()
YOU CAN USE CHANGE THE SERIEL NUMBER OF YOUR DONGLE IF YOU WISH TO RUN TWO DONGLES I.E ACARS AND ADS-B ON THE SAME RASPBERRY PI
sudo apt-get install rtl-sdr
At the command line type < rtl_eeprom -s 00000007 >
the above will change the seriel number of the dongle to
00000007
look at the final line of output where it will basically ask confirmation to go
ahead (y) and enter
do this for all dongles giving them a different seriel number -
![]()
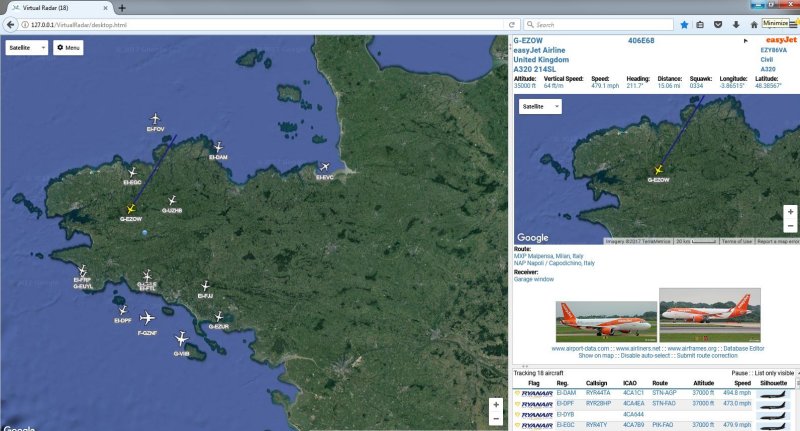
VIRTUAL RADAR SERVER
BELOW IS A SCREEN SHOT FROM THE VIRTUAL RADAR SERVER SCREEN THE SCREENS LOOK THE SAME ON A PC OR ON A RASPBERRY PI - MAYBE THIS IS ALSO A BIT DATED NOW
![]()
INSTALLING VRS ON A RASPBERRY PI
TO INSTALL VIRTUAL RADAR SERVER ON A RASPBERRY PI ( ALSO THE PLUGINS AND THE PICTURE FOLDER AND FLAG FOLDER ) HAS NOW BECOME VERY EASY - OPEN A TERMINAL AND TYPE IN THE BELOW COMMAND
bash -c "$(wget -O - https://github.com/mypiaware/virtual-radar-server-installation/raw/master/virtual_radar_server_install.sh)"
![]()
FLIGHTAWARE / PI AWARE
( INSTALLS ON RASPBERRY PI - INCLUDING A PI ZERO )

ABOVE IS A SCREEN SHOT FROM THE PI AWARE PROGRAM - IT WORKS VERY WELL - INSTALL IT FROM THE OFFICIAL SITE
You can download Flightaware's SD card image, but you do need to
modify a config file to put your router details in i.e password and ssid
Visit their site to check how to install the software https://flightaware.com/adsb/piaware/install
DON'T FORGET TO REGISTER ( SIMPLE PROCEDURE ) IT'S ALSO IMPORTANT TO SET YOUR QTH
sudo piaware-config feeder-id ( i.e 27xxxxxx-xxxx-4ff5-xxxx-123axxyxxxxx )
![]()
|
sudo piaware-config feeder-id sudo piaware-status sudo service dump1090-fa stop sudo apt-get remove piaware |
![]()
TO SET YOUR QTH AND RANGE RINGS
sudo nano /etc/default/dump1090-fa
modify the decoder options line
DECODER_OPTIONS="--lat 56.19 --lon -09.72 --max-range 360 --fix"
Ctrl-o and enter to save, Ctrl-x to exit
USE YOUR LAT/LONG NOT THE ABOVE
sudo reboot
![]()
ALTERNATIVE INTERFACE
sudo bash -c "$(wget -q -O - https://raw.githubusercontent.com/wiedehopf/tar1090/master/install.sh)"
Look at the web site for further information
https://github.com/wiedehopf/tar1090
![]()
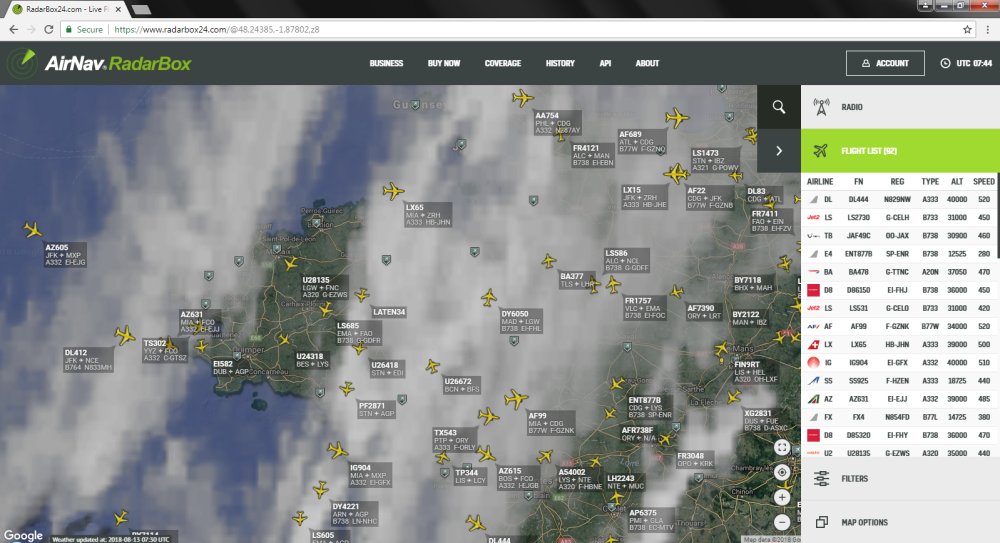
AIRNAV RADARBOX 24 ON THE RASPBERRY PI
IF YOU HAVE A RASPBERRY PI RUNNING DUMP1090 ALREADY, THEN YOU CAN ALSO UPLOAD YOUR DATA TO THE AIRNAV RADARBOX SERVER CHECK THE BELOW SITE TO SEE HOW TO DO IT
https://www.radarbox.com/raspberry-pi/guide
DON'T FORGET TO 'CLAIM' YOUR NEW INSTALLATION BY GOING TO THE BELOW LINK
https://www.radarbox24.com/raspberry-pi/claim
IF YOU HAVE A SHARING KEY ALREADY IT CAN BE SET BY DOING THE BELOW
sudo rbfeeder --setkey ‹your sharing key›
AIRNAV RADAR24 COMMANDS
sudo systemctl stop rbfeeder
sudo systemctl restart rbfeeder
sudo apt-get remove rbfeeder
sudo rbfeeder --status
sudo rbfeeder --showkey
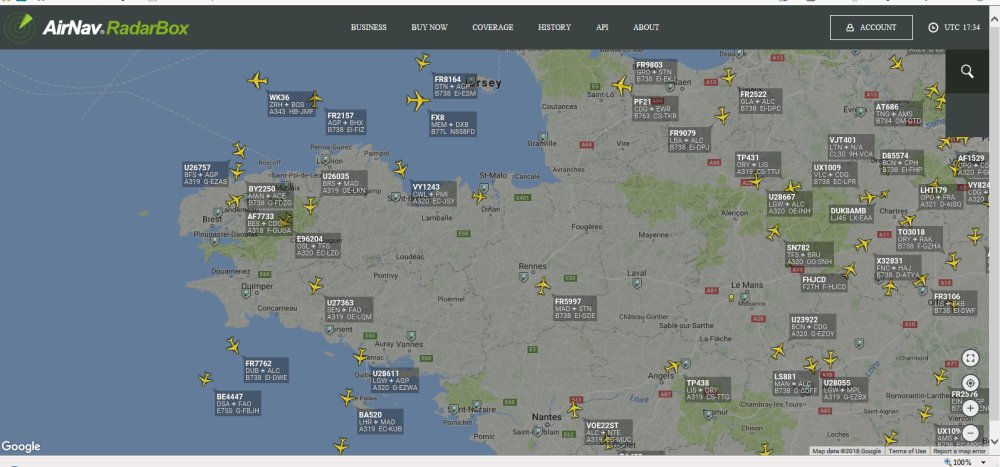
THE ABOVE SCREEN SHOT SHOWS THE INTERFACE

THE ABOVE SCREEN SHOWS WHERE YOU CAN CONFIGURE YOUR OPTIONS
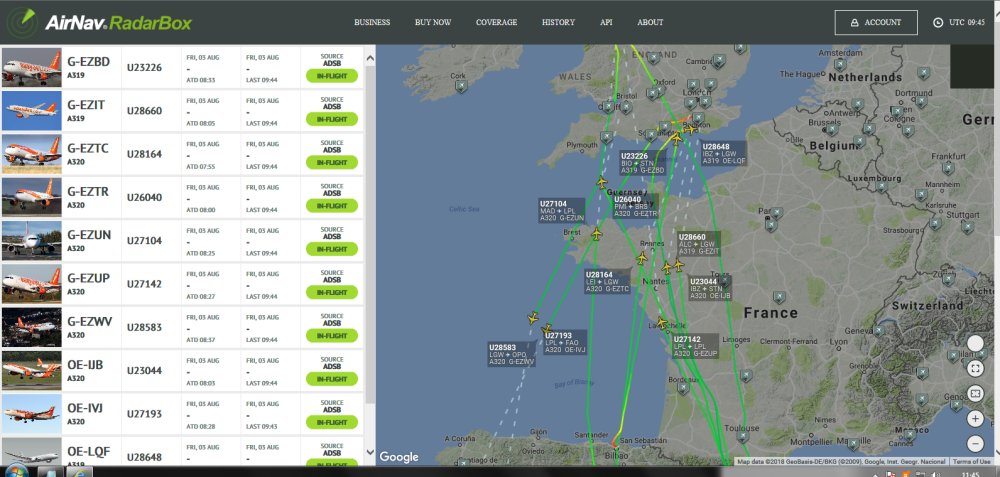
WITH A BUSINESS ACCOUNT ( FREE IF YOU UPLOAD DATA ) YOU CAN TRACK UP TO 10 PLANES FREE
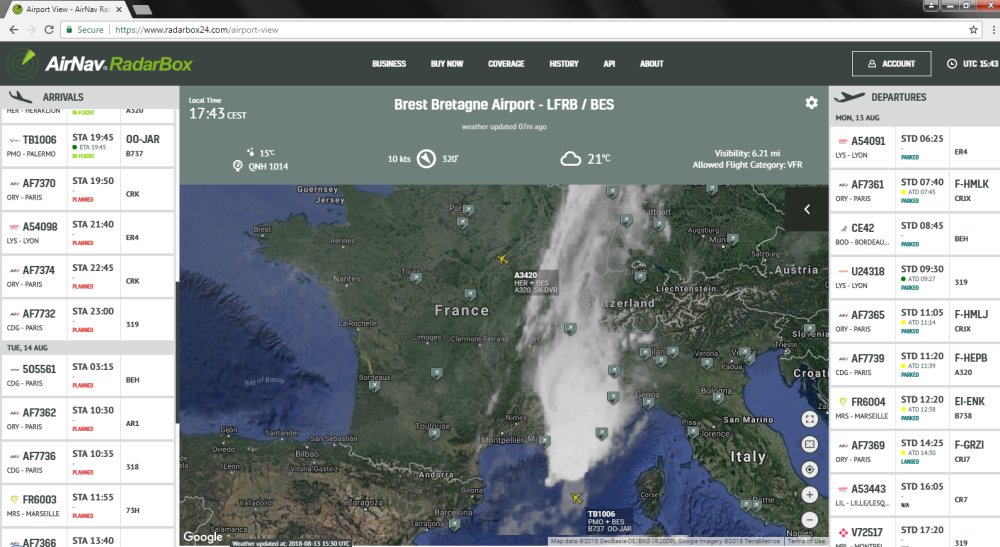
CHECKING ARRIVALS - IN THIS CASE AT BREST/LFRB
YOU CAN VIEW RADARBOX24 ON YOUR RASPBERRY PI / PC ON THE FOLLOWING LINK https://www.radarbox24.com/
![]()
ADS B RECEPTION USING MULTIPSK & SDR DONGLE

ABOVE IS A SCREEN SHOT OF MULTIPSK DECODING ADS-B SIGNALS - A FUNCUBE DONGLE CANNOT BE USED AS ITS BANDWIDTH IS TO NARROW.
![]()
RASPBERRY PI ADS-B
![]()
BEFORE YOU ATTEMPT TO DOWNLOAD AND INSTALL DUMP1090 OR ACARSDECO2 YOU MUST INSTALL THE RTL2832 DONGLE CORRECTLY.
* SO PLEASE READ THE INSTRUCTIONS ON DAVID TAYLORS WEB SITE AND ALL WILL WORK AS IT SHOULD DO *
YOU CAN FEED THE OUTPUT FROM DUMP1090 INTO THE PLANEPLOTTER PROGRAM AND ALSO THE VIRTUAL RADAR PROGRAM
![]()
![]()
LE SITE EST ENCORE EN CONSTRUCTION - MAIS TOUS LES LIENS TRAVAILLERONT
![]()