Advanced
Path Setup of Unproto address:
after checking
your range on HF with the default RELAY,WIDE3-3
you should change the path! the reason is that if you use RELAY you
create a lot of HF traffic because every stn is a RELAY!!
- change to APRS,WIDE,WIDE3-3 or
APRS,WIDE,TRACE3-3
if you can work a WIDE-digi direct!
- if there is a known 24hr operating
WIDE-digi within your area / or RELAY if you can't reach a WIDE
directly, change the first PATH entry to the WIDE/RELAY digi-call!
e.g. if you are within the range of DB0xxx and you know this stn
act 24hr as a APRS digi change your path to APRS,DB0xxx,WIDE3-3 or
APRS,DB0xxx,TRACE3-3.
- use RELAY,WIDEn-n or
RELAY,TRACEn-n ONLY for mobile use.
- Trackers like TinyTrack should use WIDEn-n instead of TRACEn-n
because the path is not of interest!
- do NOT USE RELAY after WIDE!
e.g.: APRS,WIDE3-3,RELAY
- do NOT USE WIDEn-n and TRACEn-n
in the same path!!
e.g: APRS,WIDE3-3,TRACE3-3
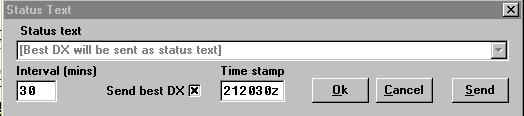
- use Beacon Interval with a time
of 30min because within 30mins all user should see all active
stn on their screens!
- use TRACEn-n only if you wish
that everyone can TRACE your path!
|
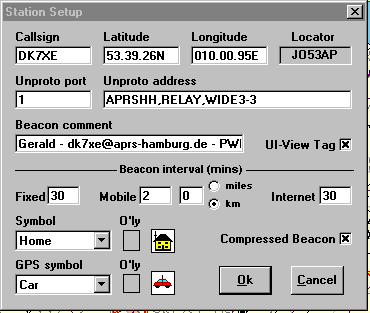
- type your CALLSIGN in the Callsign
Field.
- set the Latitude (= Breitengrad)
to your QTH's value. insert the value as DD.MM.DM[N]
(degrees/minutes/decimalminutes).
- set the Longitude (=
L�ngengrad) to your QTH's value. insert the value as DDD.MM.DM[N]
(degrees/minutes/decimalminutes).
- your Locator appears in the
Locator Field.
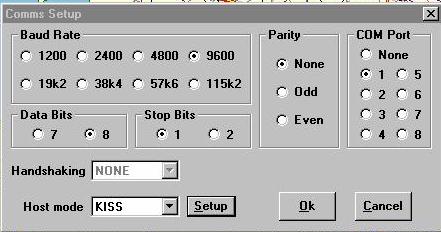
- set Unproto port to 1 (if
you have 2 ports then set it to 1,2 and so on for more
ports).
- type in your Unproto adress:
- for NEW Stn: APRS,RELAY,WIDE3-3.
pse read Advanced
Path Setup!
(with RELAY,WIDE3-3 you normally could be seen within a range of
150-300km. you can increase to WIDE5-5 or use TRACEn-n ..see online
help for details! see also the Digipeater Setup section!
- If you have more than one port you can
specify 2 different Unproto addresses seperated by a |.
example: APRS,RELAY,WIDE3-3|APRS,RELAY.
The following beacon now will be send out:
On port 1: APRS,RELAY,WIDE3-3
On port 2: APRS,RELAY
- set your Beacon comment (should
contain your Name, other info optional).
- check the UI-View Tag
checkbox to identify you as a UI-View stn.
- set Beacon interval Fixed to 30
min.
- it's recommended that fixed stations should send at minimum every
30min!
- select a Symbol (Home
default for UHF Stn).
- check Compressed Beacon.
- for the other Boxes check out the
UI-View online help! (not needed for normal use at Home on UHF/HF)
- click on OK. -> Station Setup
will close.
|
 |
NOTE:
in priciple every APRS Station should act as a RELAY-Digi!
pse DO NOT act as
RELAY if there is a (24hr operating) RELAY-digi within 5km!
pse DO NOT act as
WIDE if you do not have a range on HF >50km OR if there is more than one other 24hr operating WIDE-digi within a
range of 50km!
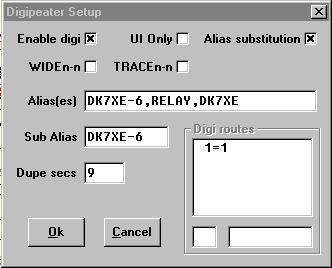
- check the Enable digi
checkbox.
- uncheck
the UI Only checkbox!
- check the Alias substitution
checkbox.
- if you act as WIDE-digi check
WIDEn-n AND TRACEn-n.
- set Alias(es) to RELAY,<YOURCALL>,<YOURSUBALIAS>.
Extend the string with ,WIDE if you act as WIDE-Digi.
- set your Sub Alias to your
CALLSIGN (with SSID).
- set Dupe secs to 28 if you
act as WIDE.
- set Digi routes to 1=1.
(if you have more than one port than also add the other ports.
e.g.: 1=1;1=2;2=1;2=2. this setting will digi all frames heard on port
1 or 2 on the port itself and also on the other port - crossport
digipeating).
|
|
| Miscellaneous |
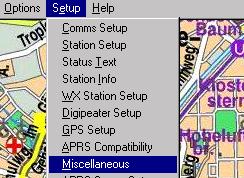 |
- Go to Setup
in the Menu-Bar and select Miscellaneous.
|
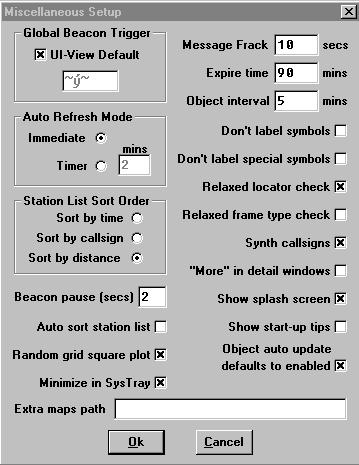 |
- Set Expire Time to a value
between 60-90min. this specifies the expire time of a Station's
Icon on your screen after the last Beacon was send by this station.
- set Object interval to ~30min.
this specifies the interval for sending out Object information.
- if you have a fast PC set Auto
Refresh Mode to Immediate. Otherwise set it to Timer
and specify the time in mins.
- Set your Station List Sort Order
for all your Station Lists.
- uncheck Auto sort station list.
this is necessary if you connect to an APRSServer via Internet.
- check Minimize to Sys Tray if you
want UI-View running minimized shown only in the Sys Tray.
- uncheck Show start-up tips.
- for all other settings please read the
UI-View Online Help.
|
|
| APRS
Server Setup (only important if you want to connect to a Internet
APRS-Server) |
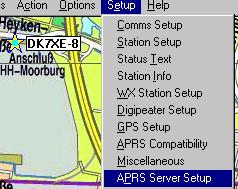 |
- Go to Setup
in the Menu-Bar and select APRS Server Setup.
|
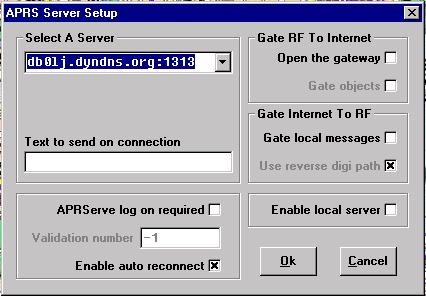 |
- type the Server you want to connect into
Select A Server.
db0lj.dyndns.org:1313 will show you DL/PA/OE/ON/F stations.
- if you want to connect to the server you
must go to Menu Bar -> Actions -> Connect APRServer.
|