Getting Started with the FunCube Dongle Pro+
on
Ubuntu 12.04 LTS (precise)
Step 1 – Making sure Ubuntu recognizes your FCD Pro+
Without installing any software just plug your FCD Pro+ into an available USB port. There should be no notifications or warnings of any kind.
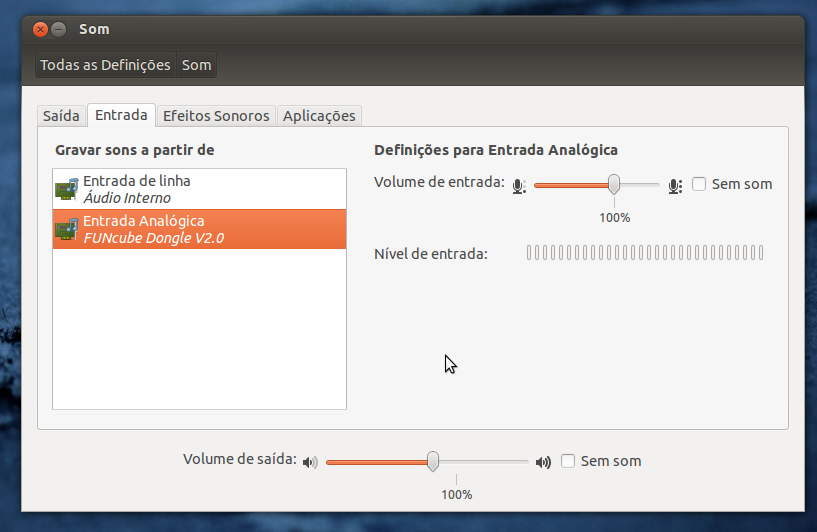
Now go to Sound Settings (clicking on the volume control) and choose the Input tab, you should see FDC Pro+ detected like a device from which is possible to record.

Now open a Console window (Ctrl-Alt-T) and type arecord -l
You should see the FCD Pro+ listed.

If all is OK proceed to Step 2.
Step 2 – Installing and testing qthid 4.1
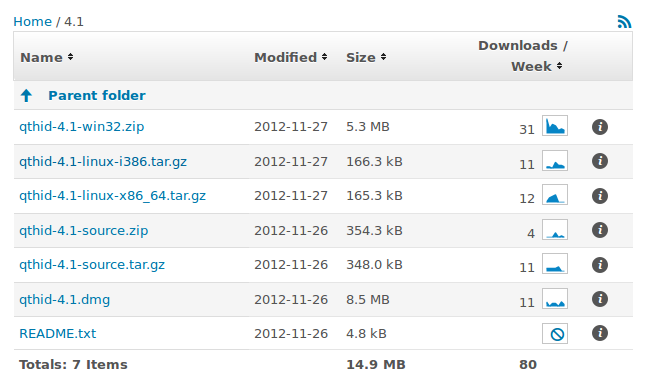
Point your browser to http://sourceforge.net/projects/qthid/files/4.1/ . If you are running the 32bit version of Ubuntu download qthid-4.1-linux-i386.tar.gz . If you are running the 64bit flavour choose qthid-4.1-linux-x86_64.tar.gz .
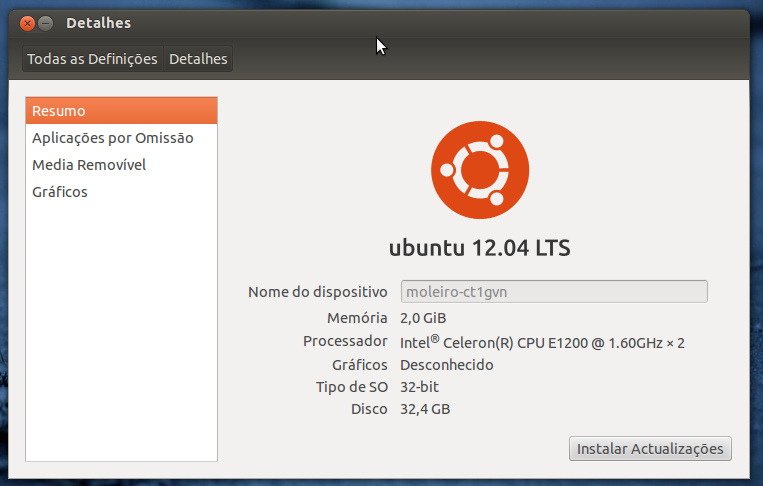
If you are unsure which version you are running go to All Settings / Details.
After downloading double-click on the .gz file. Drag and drop the contained folder into anywhere in your personal folders.
Now open a Console window (Ctrl-Alt-T) and change into the folder you just created with the cd command. (In my case I have put it inside the HAM folder.)
After changing the current directory type sudo cp funcube-dongle.rules /etc/udev/rules.d/
This command is necessary for using qthid and access the FCD Pro+ as a regular user (not admin).

If you get a message saying that you are not on the sudoers list you should follow the instructions on this page: http://www.pendrivelinux.com/how-to-add-a-user-to-the-sudoers-list/
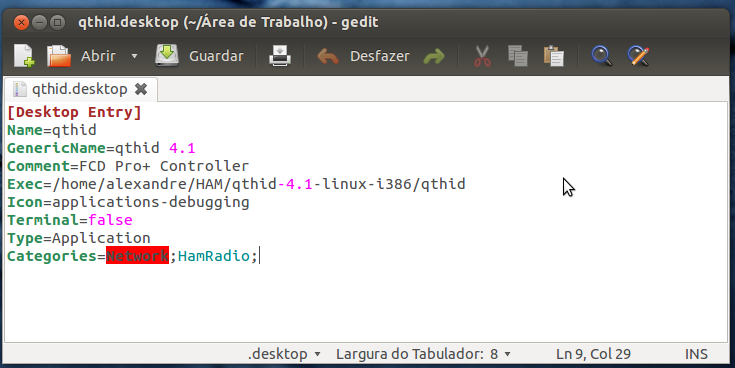
Now open a text editor (gedit for example) and insert the following text, making sure you change the folder in the Exec line to reflect your installation path:
[Desktop Entry]
Name=qthid
GenericName=qthid 4.1
Comment=FCD Pro+ Controller
Exec=/home/alexandre/HAM/qthid-4.1-linux-i386/qthid
Icon=applications-debugging
Terminal=false
Type=Application
Categories=Network;HamRadio;
Save the file in your Desktop folder using the filename qthid.desktop
In the Console window change to your desktop folder with cd ~/Desktop and then type the command sudo chmod +x qthid.desktop

You have just created a desktop shortcut to qthid!
Now just double click on the shortcut you just created, it should open the qthid 4.1 user interface.
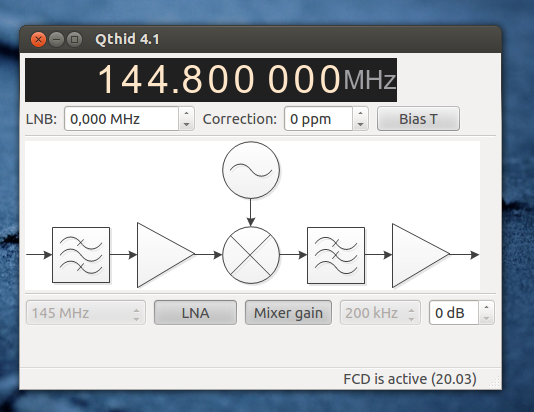
If the status bar reads “FCD is active” Congratulations, you have a working FCD Pro+
If the status bar reads “No FCD detected” try closing qthid 4.1, removing and inserting the FCD Pro+ and opening qthid 4.1 again. If that fails try repeating Step 2 from the beginning again.
Step 3 – Installing and configuring quisk
NOTE: this step only works in 32bit Ubuntu, for the 64bit version you need to recompile quisk or skip to the next Step
Go to http://james.ahlstrom.name/quisk/ and download the quisk-3.6.14.tar.gz file. After downloading double-click on it and drag and drop the contained folder into anywhere in your home folder.
Open a Console window and change into the just created quisk folder using the cd command.
Then type python quisk.py

You will probably get an error message, like I did.
Before proceeding you need to open Ubuntu Software Center and install the following packages if they are not already installed on your system (just type the names on the search box and they should appear):
python2.7
python-wxgtk2.8
ruby-fftw3
Go back to the Console window and try running quisk again.
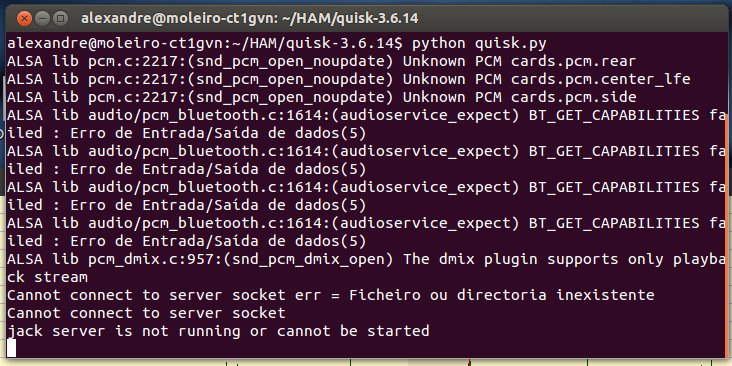
After a few seconds you should get some errors on the console but also a nice graphical window with quisk running.
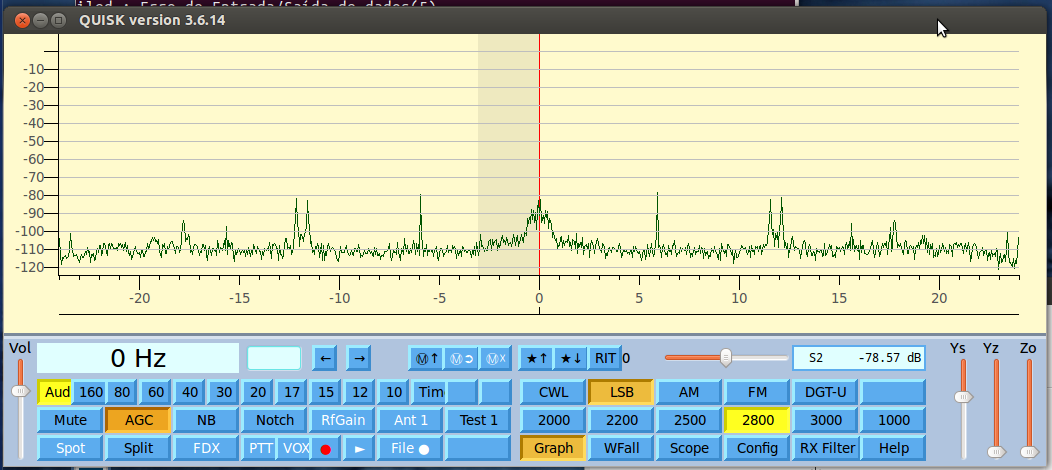
Also you should be hearing some audio from your regular sound card, make sure you can adjust that audio level with the Vol control on the left side of quisk.
Now click the Config button on quisk, and the choose the Sound tab.

Write down the hw code you see for the FCD Pro+, in my case hw:1,0
Now close quisk window, you should get the prompt back in the Console window.
Using a text editor (gedit for example) open the file quisk_conf_model.py that is located on the folder where you installed quisk.
Change the values so they look like these:
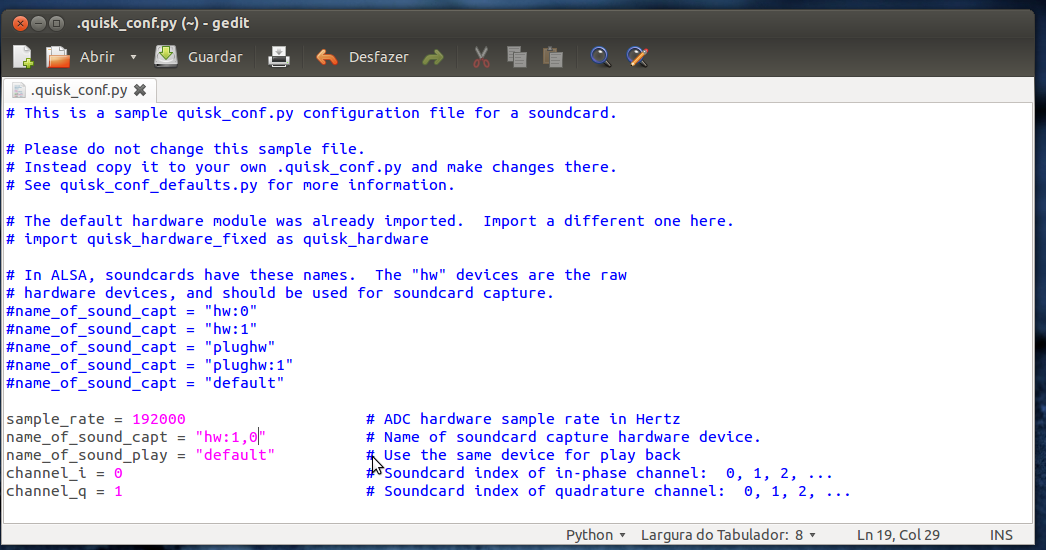
Replace the “hw:1,0” with whatever code you wrote down earlier.
Don't save over the original file, use SAVE AS and save the file in your home folder with the name: .quisk_conf.py
Only if you save it in your home folder using exactly this filename will the configuration become active.
You can close the text editor.
Now go back to the Console window and start quisk again by typing python quisk.py
After a few seconds quisk should start and you should be hearing some noise, this time from the FCD Pro+ !
Next we need to create a script to launch quisk without having to type python quisk.py everytime we need to launch the program.
Using the text editor enter the following commands making sure you replace the folder to reflect your own installation.

Then save the file as runquisk.sh on the folder where you installed it.
Open a Console window and change into your quisk folder using the command cd
Then issue the following command sudo chmod +x runquisk.sh

This will make the runquisk.sh file executable.
Next we need a desktop shortcut, so open the text editor and type (make sure you change the Exec line to reflect your instalation path):
[Desktop Entry]
Name=Quisk
GenericName=Quisk
Comment=Quisk SDR Receiver
Exec=/home/alexandre/HAM/quisk-3.6.14/runquisk.sh
Icon=applications-python
Terminal=true
Type=Application
Categories=Network;HamRadio;
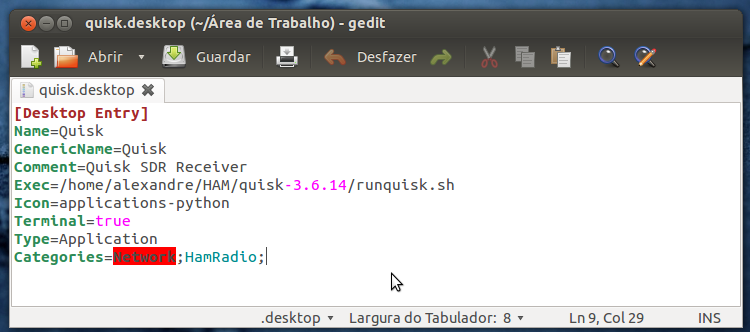
Note: you can change Terminal=true to Terminal=false if you don't want a console window to open with quisk
Save the file in your Desktop folder under the name quisk.desktop
Back in the console, change to your Desktop folder and issue the command:
sudo chmod +x quisk.desktop

You should now have a desktop icon for quisk.
Now launch qthid and then quisk. You can now control the center frequency with qthid and use quisk to demodulate signals from the passband.
Note that quisk doesn't directly control de center frequency, so even if you click the buttons to change band the center frequency will be allways the one set by qthid.
In the example below I was listening to 14.185 MHz USB, the center frequency of 14.175MHz is set in qthid plus 10kHz set in quisk.
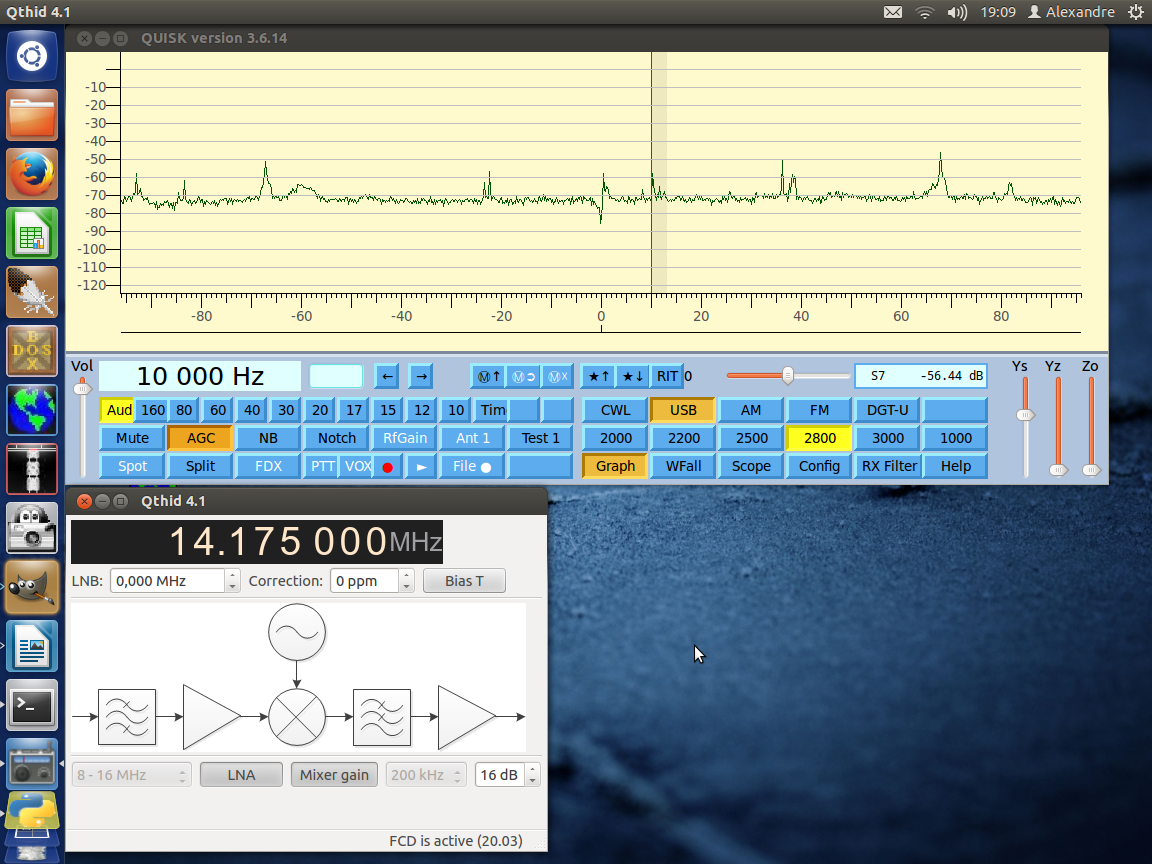
This completes the basic configuration of quisk.
Step 4 – Installing and configuring gqrx
First you need to add the Personal Package Archive of gqrx so that Ubuntu can find the required files. You need to open a Console window and type
sudo add-apt-repository ppa:gqrx/releases
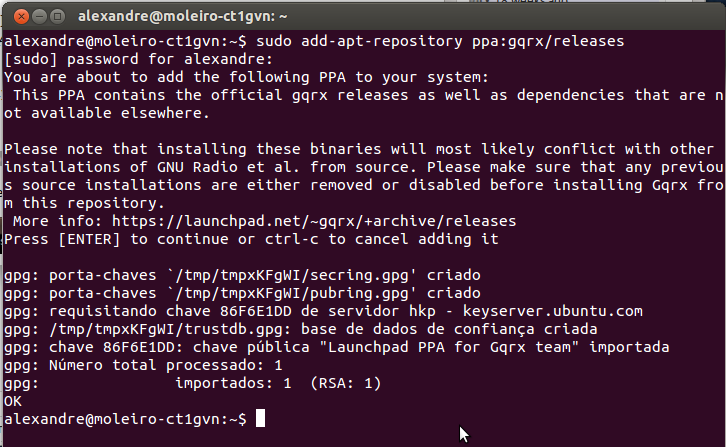
Again, on the Console, you need to issue the command sudo apt-get update
This will update the list of available packages, it may take some time, wait till it finishes.
Now go to Ubuntu Software Center and search for and install the gqrx package.
After it finishes installing open a Console window and type gqrx
You should get a configuration window, use the following values:
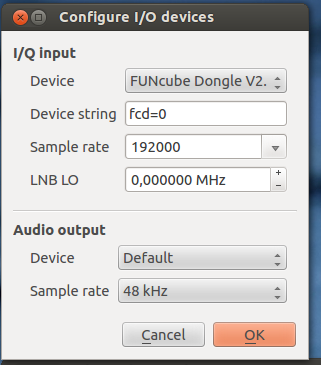
After you press ok you get the gqrx main window.
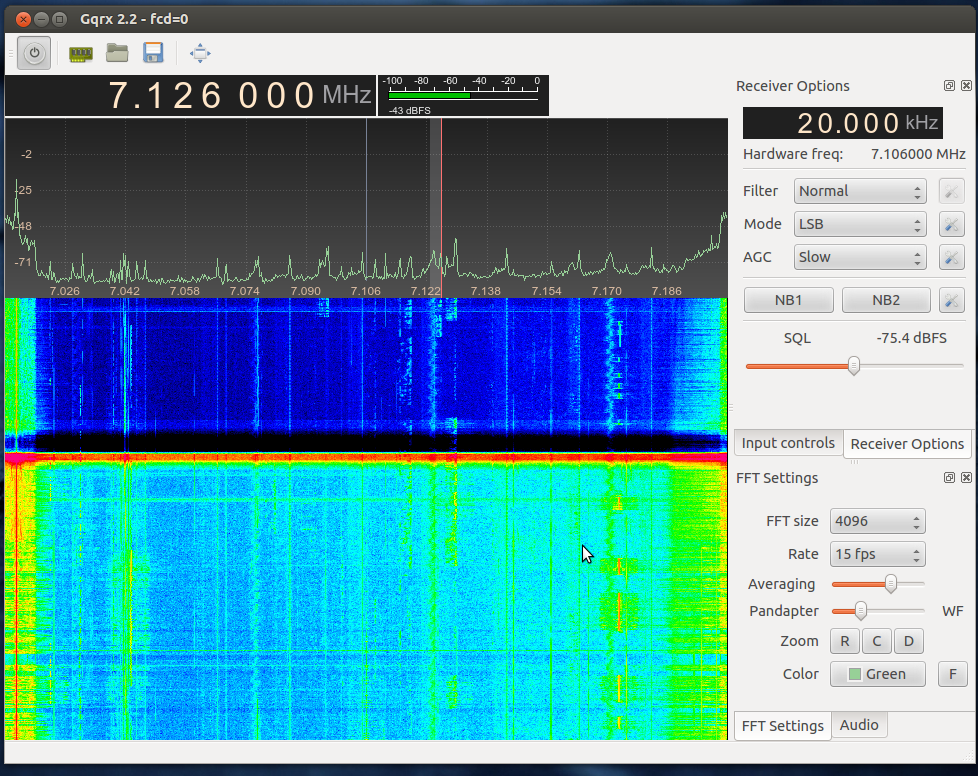
Last step is to create a desktop shortcut to gqrx.
Using the file manager navigate to the folder /usr/bin and find gqrx
Then, drag and drop while holding Ctrl and Shift the gqrx icon to your desktop.
With gqrx you can directly control the center frequency of the FCD Pro+, so you don't need to use qthid.
You should also try some of the settings in the Input controls section, selecting DC Cancel helps reduce the spike at the center frequency.
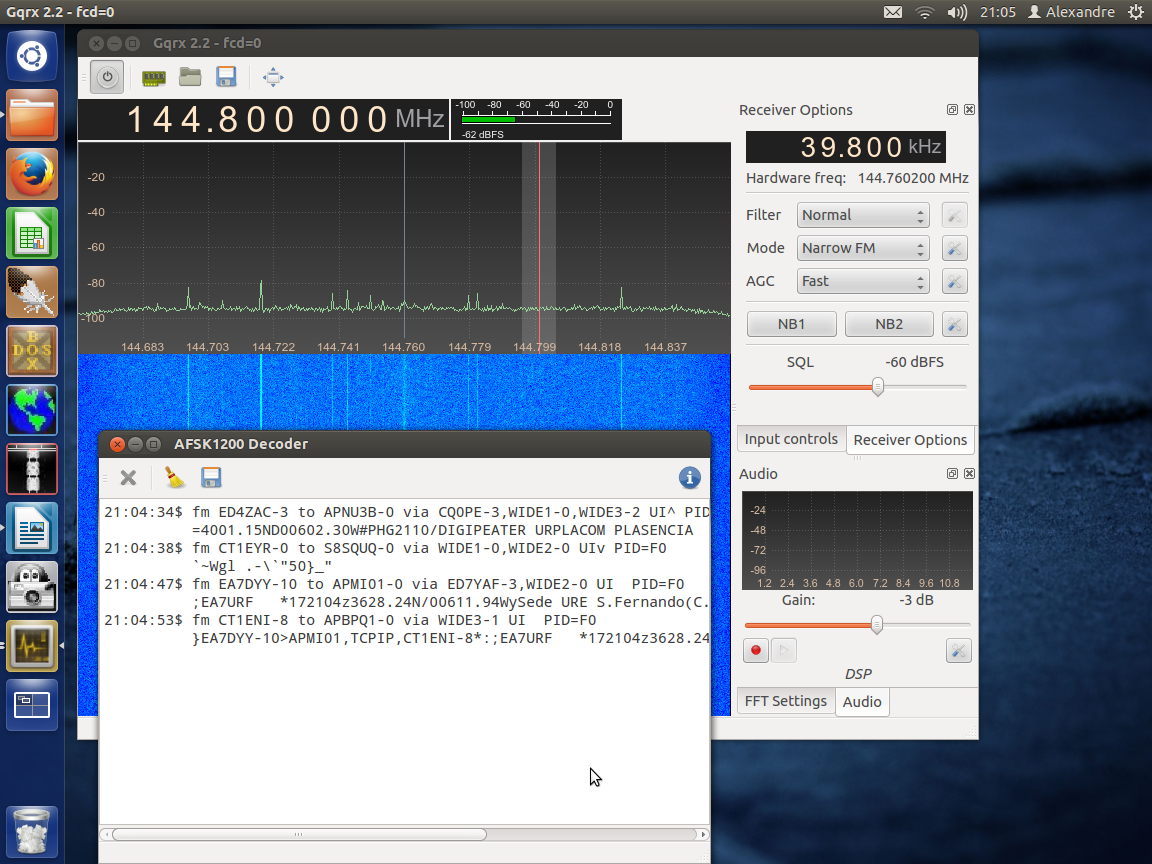
Also, with gqrx you can directly decode Packet radio signals at 1200 bps, just tune into an APRS frequency and open the AFSK1200 decoder from the Data menu.
Step 5 – Receiving digital modes by feeding decoded audio to applications
If you completed Steps 2, 3 and 4 you now have two fully functional receivers with AM, FM and SSB capabilities.
For receiving digital modes you need dedicated programs.
You also need to feed the audio output of quisk or gqrx into a digital mode dedicated program.
You will need the pavucontrol program, so first go to Ubuntu Software Center and install it.
Then, open a Console window and type: pactl list sinks
Look for something like alsa_output.pci-0000_00_1b.0.analog-stereo in the output of the command, copy the code to the clipboard by selecting it and using right-click.
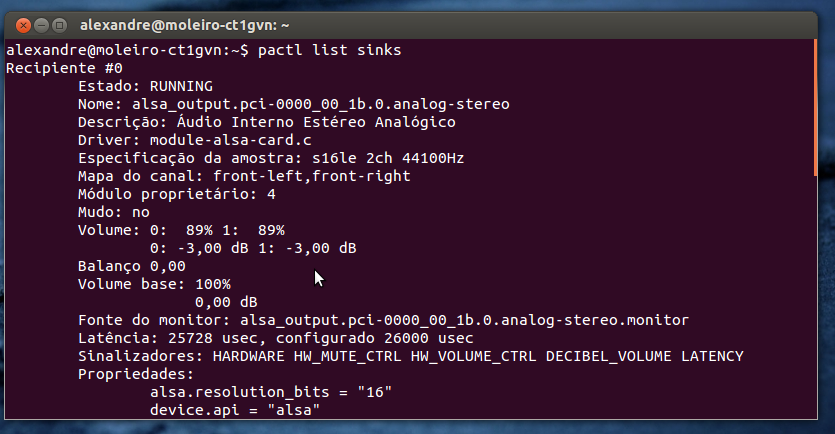
Now issue the command (all in one line):
pactl load-module module-remap-sink sink_name=secondary master=alsa_output.pci-0000_00_1b.0.analog-stereo
Making sure you replace the code after master= with the code you've copied, again use right-click.
The command should output some number, thats OK.

Start quisk or gqrx and tune into a digital mode frequency using the appropriate mode (usually USB for HF digital modes e.g.).
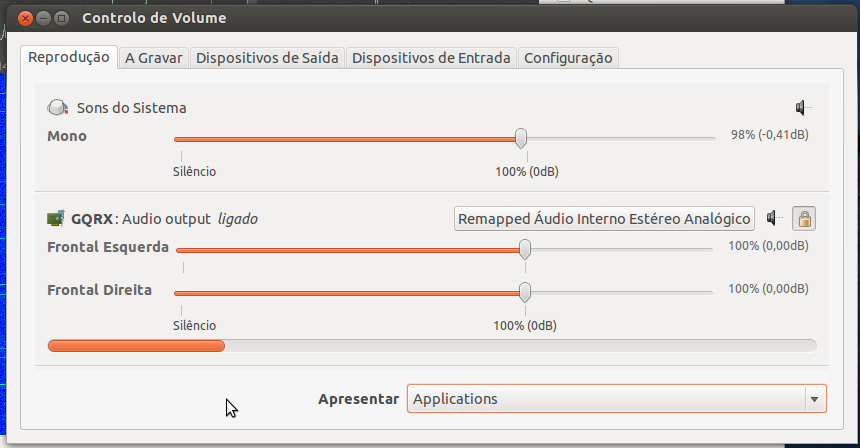
Now open pavucontrol (just type pavucontrol in the launcher) and select the Playback tab.
Find the application that is playing audio (quisk or gqrx) and change from normal audio to Remapped audio.
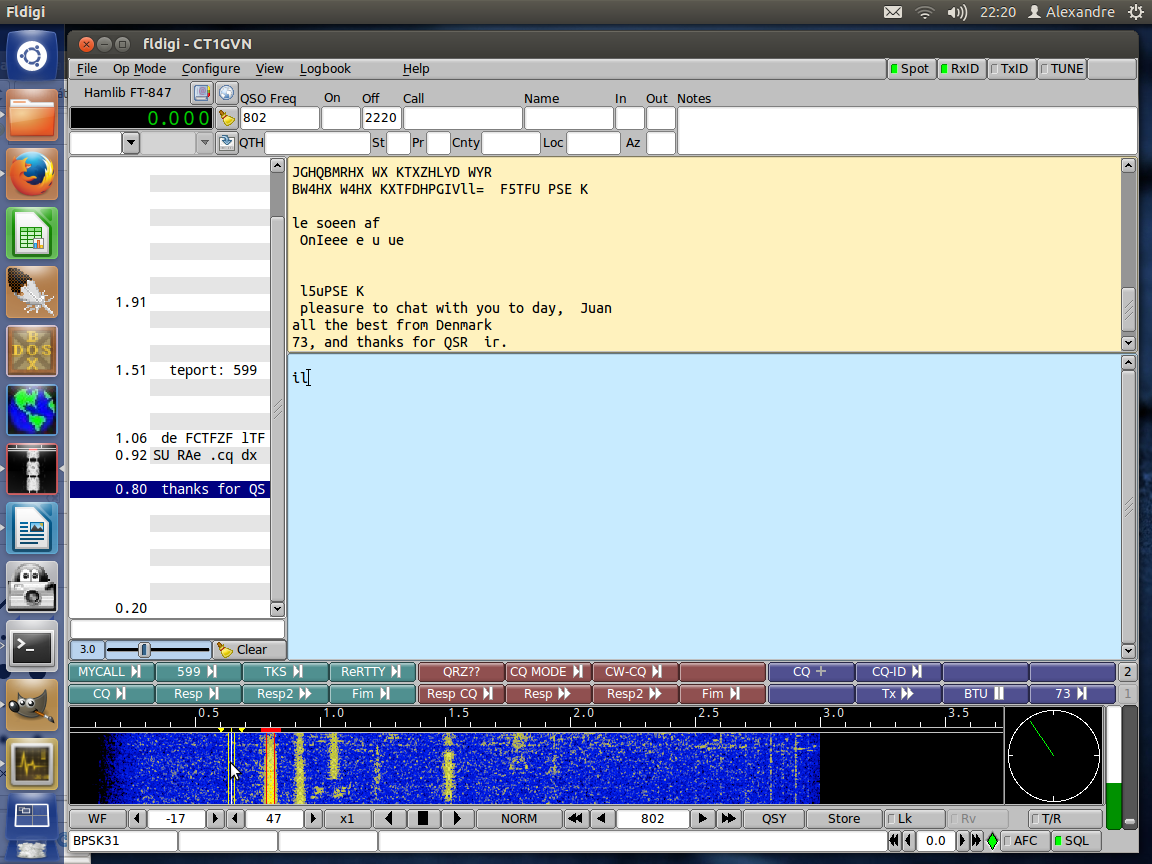
Then open the application for digital modes and start decoding. In this example I will use fldigi.
NOTE: Installation and configuration of a digital mode decoding program is not covered in this document
In pavucontrol now click on the Record tab. You should see the digital modes program recording audio. Change to Monitor of Remapped Audio.
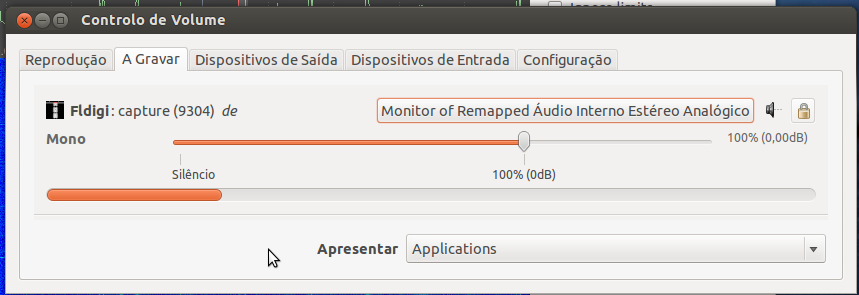
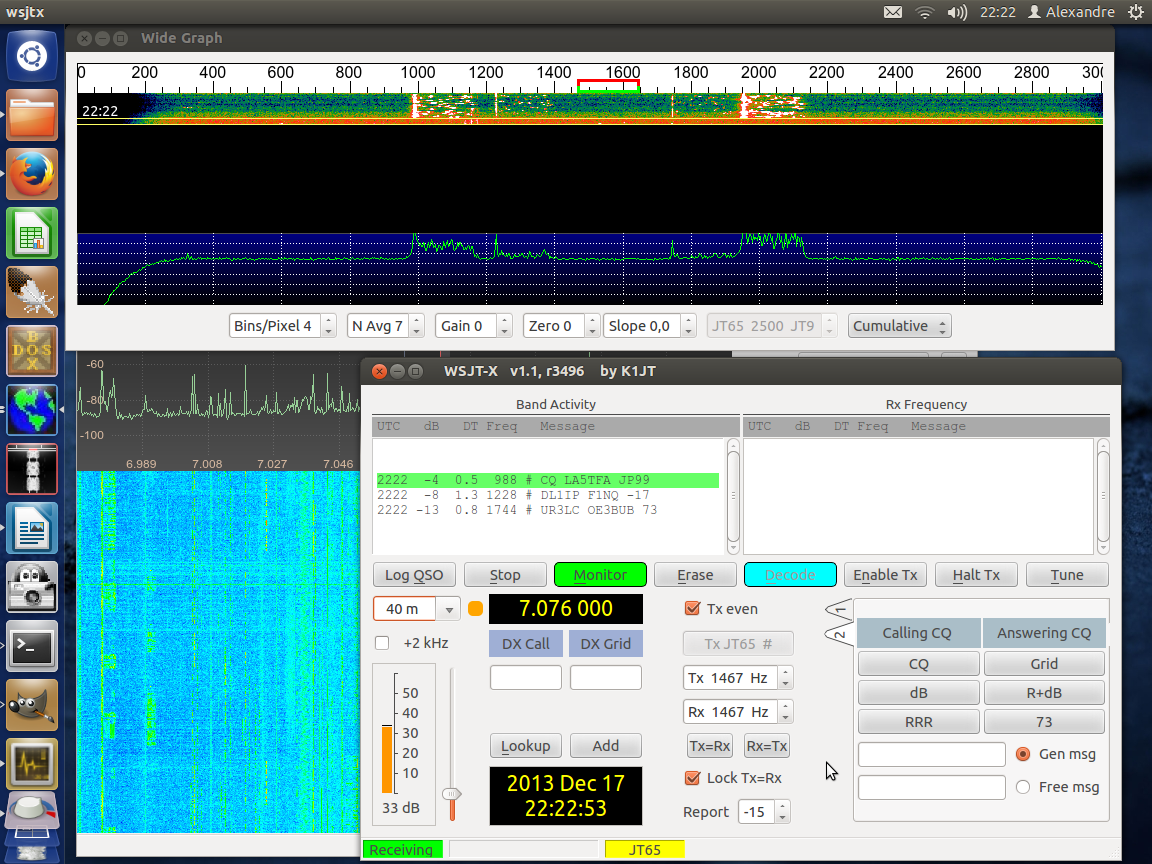
If all went well you digital modes decoding program should be now be “hearing” the output of quisk or gqrs.
Example with fldigi
Example with wsjt-x
Happy SDRing!
73 de Alex - CT1GVN