


Links:
QRZ Latest
Solar Activity
WWV
Solar Forcast


|

|
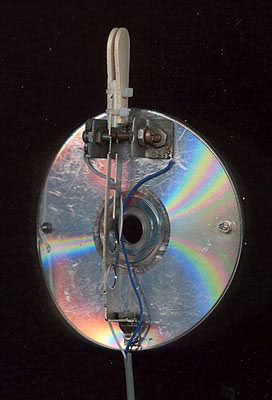
AG4RQ's Homebrew Single-Lever CW Paddle
 Parts List:
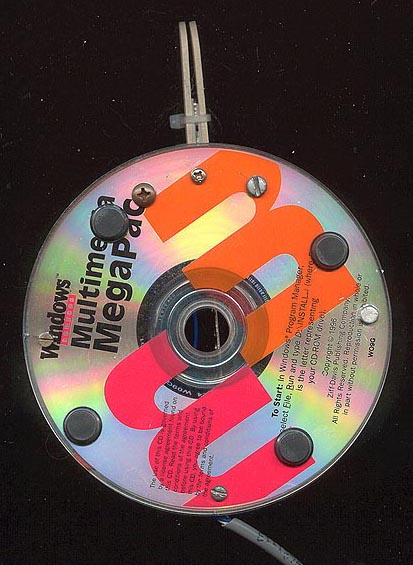
- Six junk CD's or a 5" x 5" piece of plywood.
- Four small machine screws with matching nuts. Screws should be just long enough to go through the CD's with enough threads sticking up for the nuts to fasten them.
- A medium size machine screw and nut.
- Four longer machine screws about 3/4 inch long with 6 matching nuts.
- Two star washers.
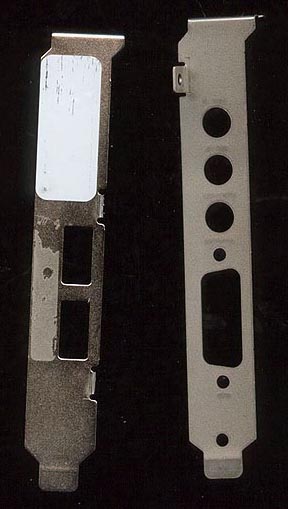
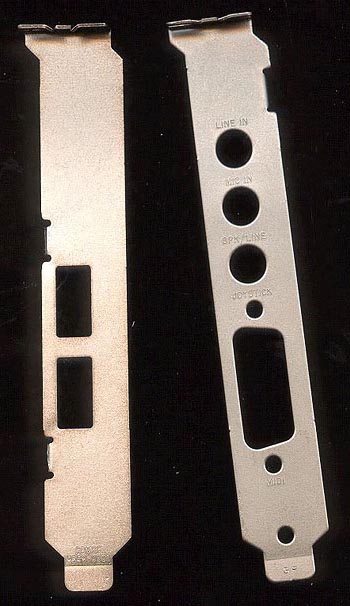
- The metal faceplate from a computer card (the part that bolts to the computer case).
- Double-sided adhesive foam tape from Radio Shack.
- A wooden double-sided ice cream spoon or thick popsicle stick.
- Two wire ties.
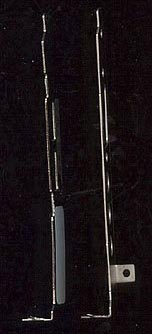
- Scrap steel that can be bent with locking pliers.
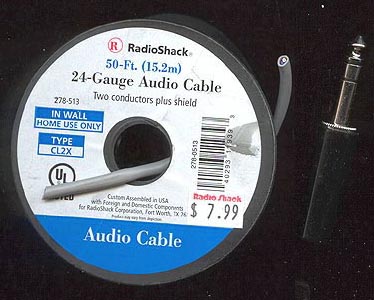
- A spool of two-conductor shielded wire.
- A 1/4" stereo plug.
- Four rubber feet.
- A drill with bits for drilling steel.
- Locking pliers.
Building the Paddle:
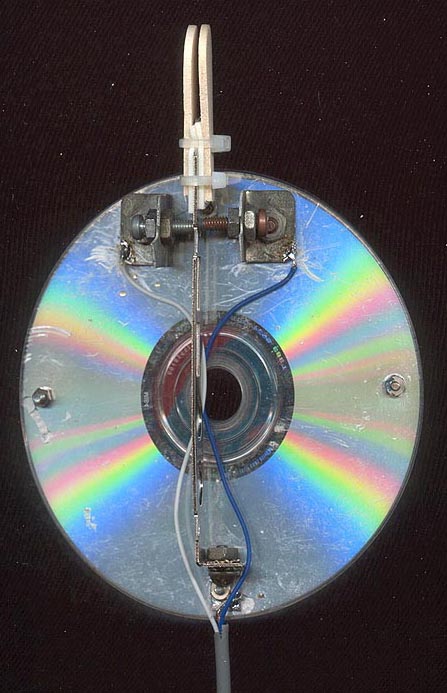
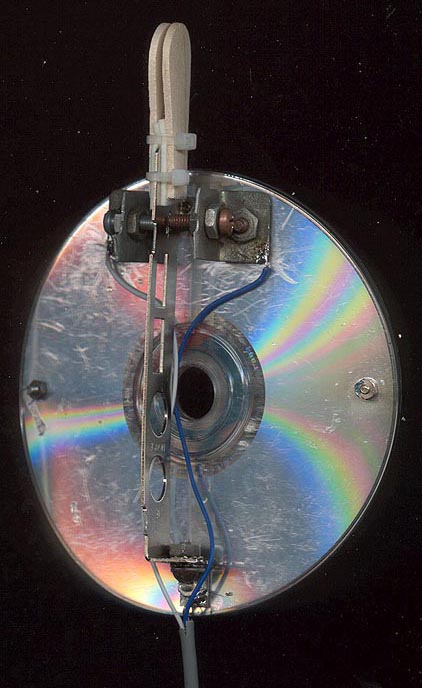
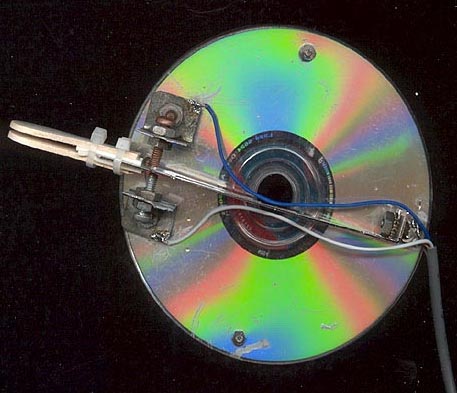
Drill four holes about 1/4" from the edge of the CD's. Use the four small screws and nuts to bolt the CD's together. If using plywood, this step is obviously not needed. Take a small piece of scrap metal and make a 90-degree angle bracket. Drill 2 holes in the angle bracket. Bolt one side of the angle bracket to the top of the CD's. The other hole in the angle bracket should be perpendicular to the CD's. Take a metal cutter or plier and cut off or break off the perpendicular stubs from the metal computer card faceplate. These stubs are where the screws fasten the computer card to the faceplate. They only get in the way, so cut them off. Bend the end tab of the faceplate straight. They are all on a slight angle so they fit into the slot of a computer case. Use the medium size screw and its matching nut along with the 2 star washers to fasten the computer card faceplate to the other hole in the angle bracket. Make 2 more angle brackets larger than the first one. Drill a hole in each end of the angle brackets. At the bottom of the CD's, about 1" up from the end of the computer card faceplate, drill holes in the CD's 3/4" from the computer card faceplate, and fasten the angle brackets to the CD's. Place a nut on each screw all the way up. Slide each screw through each angle bracket and fasten with the other nuts. The computer card faceplate should rest evenly between both screws. Use these screws and their nuts to adjust the distance between the screws and the computer card faceplate. Cut a length (length is your choice) of the two-conductor shielded wire. Attach the stereo plug to one end. Make a note of which color wire is connected to the tip and which color wire is connected to the ring. At the other end, you should have a short stub of shield and two 5" lengths of of insulated wire. Solder the shield to the top angle bracket that the computer card faceplate is attached to. The wire that is connected to the ring of the stereo plug needs to be soldered to the angle bracket on the left side (dahs). The wire that is connected to the tip of the stereo plug needs to be soldered to the angle bracket on the right side (dits). Take your double-sided ice cream spoon and cut it in half. Take 3/4" of the double-sided foam tape and place on both sides at the end of the computer card faceplate. Stick the 2 ice cream spoon halves to the tape. The spoon halves should be on both sides of the computer card faceplate. Fasten with 2 wire ties. It would be a good idea to either glue or fasten the bottom of the paddle to the table or a larger piece of wood to keep it from moving around when you use it. What I do is put a couple of weights on top on both sides of the CD's to keep it from moving around. I like mine portable. The operation of this paddle is similar to any single-lever paddle attached to an electronic keyer. It is not iambic. But it works quite well for the minimal investment you make to build it. Mine originally didn't cost a dime to build. I originally used a junk CB mike cord that just happened to have a stereo plug on the end. Some of the older CB�s used a �� stereo plug for the mic connector. I later decided to go to Radio Shack to buy the spool of shielded 2-conductor wire and the stereo plug because I wanted a 12-foot cable rather than a 5-foot coiled CB mic cord. Nothing can take the place of a finely precision-made professional paddle or bug, but if you�re short on cash, or just like to homebrew stuff, this will work quite well.
|