 This
is the first window that appears.
This
is the first window that appears.
Manual for the user of DBLog
This
is the first window that appears.
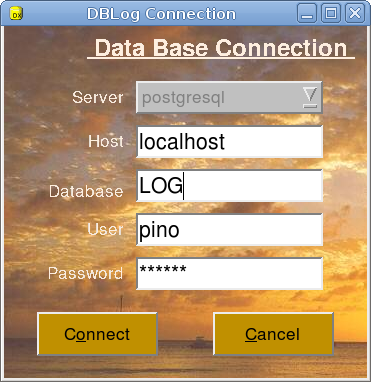
The first thing to do is to connect to a database on the PostgreSQL server.
The server can be on the same computer (localhost) or on a remote one. In this second case the user must provide the internet address of this server or its symbolic name.
The user can have many databases. Each one has a different name.
If the database name provided does not exist DBLog will ask the permission to create a new one with that name.
User and Password are managed by the PostgreSQL server, so they must have been configured there by the database administrator.
If the connection succeeds three windows will appear.
The
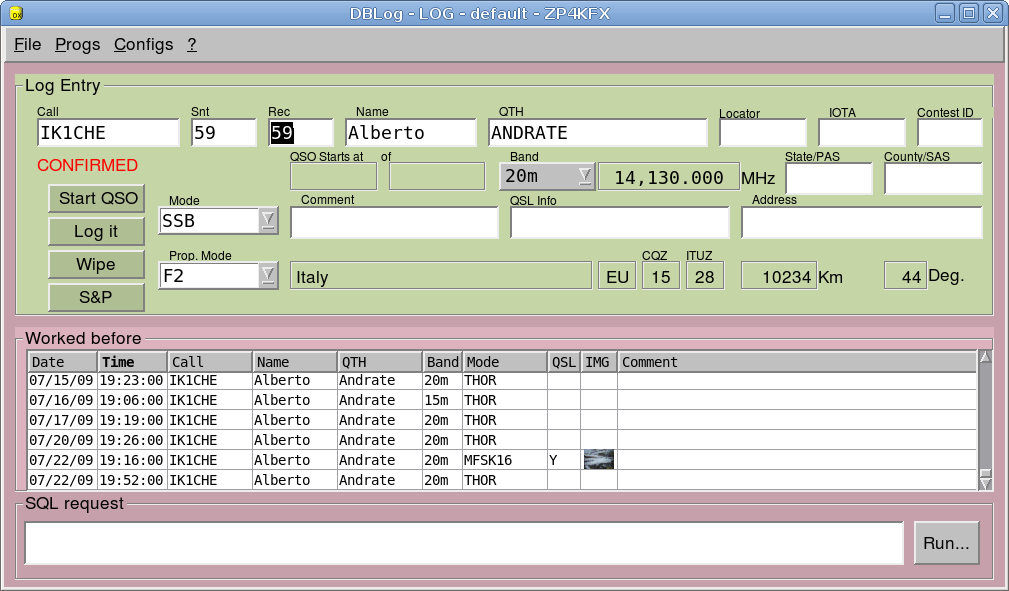
Main logging window
The Main Logging window is divided in three parts:
-- The Data Entry on the upper part,
-- The Worked Before in the center
-- The SQL query window at the bottom
As you enter a call into the "CALL" box the database
will be searched. If the call was worked before all the previous
QSO's will be listed in the central part.
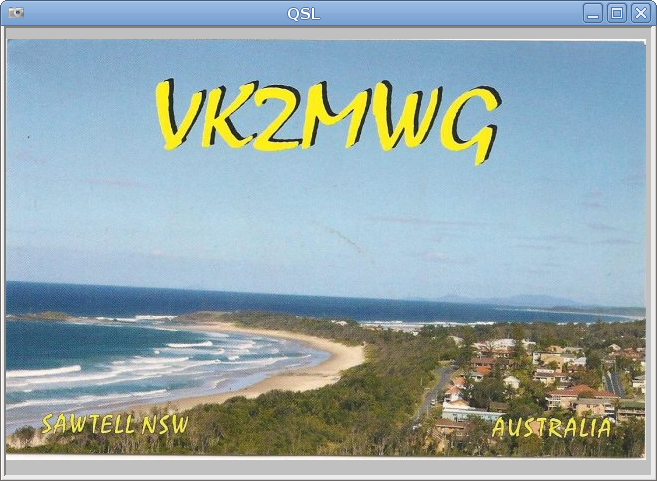
The QSL and IMG columns
show the confirmed QSO and, optionally, the image of the QSL.
Clicking on the thumbnails image the QSL will be shown at full
size.
A double click on the QSL image will show the back side.
The SQL Query box allows to write whichever SQL query sentence to get detailed informations about the contents of the database.
For instance the sentence:
SELECT call, qso_date,
mode FROM qso WHERE band='80m' AND call ILIKE 'PA%' ;
will
list in another window all the QSO's made in 80m with PA stations. In
my case I get: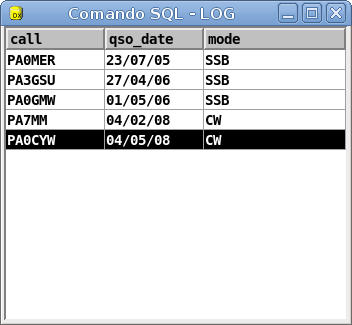
The study of the SQL query language will make you appreciate and exploit the full power of the RDBM (Relational Data Base Manager)
Of course prudence is important in this case because
you have the full power on your data's...
To get the
maximum you need to know the name of the tables of the database and
the name of the fields of the most used tables: "qso" is
the name of the main table that stores all your QSO's. Its fields
respect the names of ADIF fields.
SELECT call,
qso_date, mode, qslsdate from qso WHERE qsl_sent ='Y' AND qsl_rcvd =
'';
will list all the QSO's for which you have sent
the QSL but did not receive the answer.
Of course you can use other tools to query the database, like "psql" or better "pgAdmin III" or "TOra"

The QSO List window:
The QSO List window shows all the logged QSO's.
You can browse the full log using the buttons on the right side.
In alternative you can look for a call writing it into the "CALL" box and pressing ENTER.
If you click on a row the data's will copied to the white box for editing.
saves changes. ![]()
A right-click on a row will allow you to delete a qso.
For changing the QSL informations just select a row then press the button QSL.
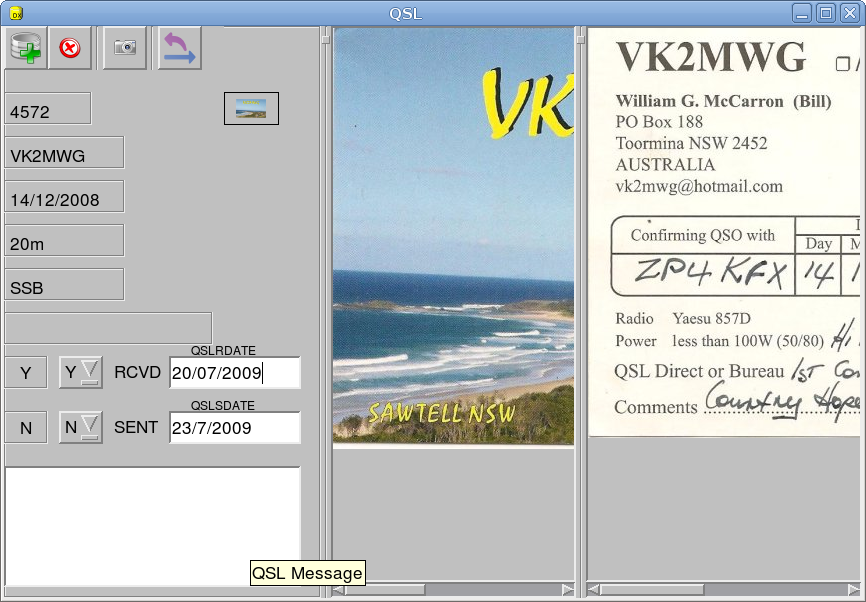
With
this window you can load the scanned images of the QSL and update the
other informations.
The best result are with an image of about 640X400 pixel. Anyhow all other formats are accetable. You can also save here the small photos received in MFSK16 or SSTV.
Clicking on the thumbnail image in the IMG column will show the QSL at full size.
 A
double-click on the image will turn the QSL
A
double-click on the image will turn the QSL
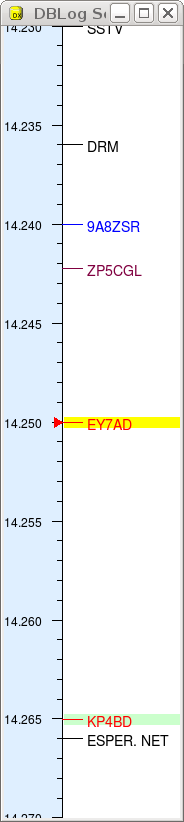
The
Scale window:
The Scale window is an analogical representation of the radio tune.
This window is scalable and click-able. A click will set the radio VFO.
A right-click will enable the zoom function.
The full power of this windows is available when the cluster is activated.
The locally created spots are shown in dark-red; just write an heard call into the CALL box of the main logging window and push TAB to have the call stored for about one hour.
If the QSO is done and stored than the color of the call will became gray.
The blue calls are receved from the cluster by XDX.
Spots with a yellow background are received from the cluster and are "First Ones"; spots with a green background are new in the tuned band.
The black ones are permanently stored...more on this describing the Spots window.
CLUSTER 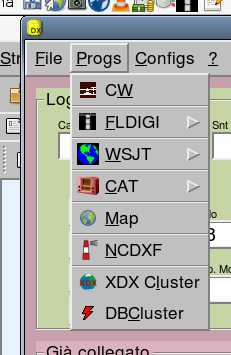
Beginning with version 1.3 there are two options for accessing the cluster: the old one uses “xdx” by PG4I and a new one using an internal program. At present both are available as the new one is still in alpha test. The advantage of the new one is that allows to spot the contacted or heard station.
Clicking on Cluster will appear two new windows
and will run the program "xdx"
by PG4I
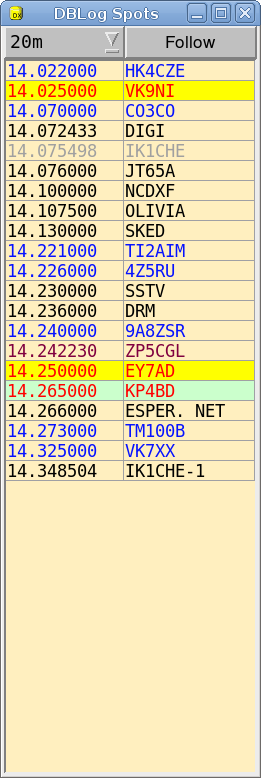
The
Spot windows and the Cluster window.
The Spot window shows, ordered by band and frequency the spots received from the cluster (in blue), the locally generated informations (in dark-red) about heard stations and some permanent entry (in black) that you might like to set
Contacted stations saved to the log became gray.
Calls with yellow foreground are new-one for you. Calls with green foreground are new in the active band.
Normally this window shows the spots in the tuned band, but, changing Follow to Select will let you select the band of interest.
A Left-Click will tune the controlled radio.
A Right-Click allows to delete an entry, to spot it or to make it permanent.
Normally spots live one hour in this table.
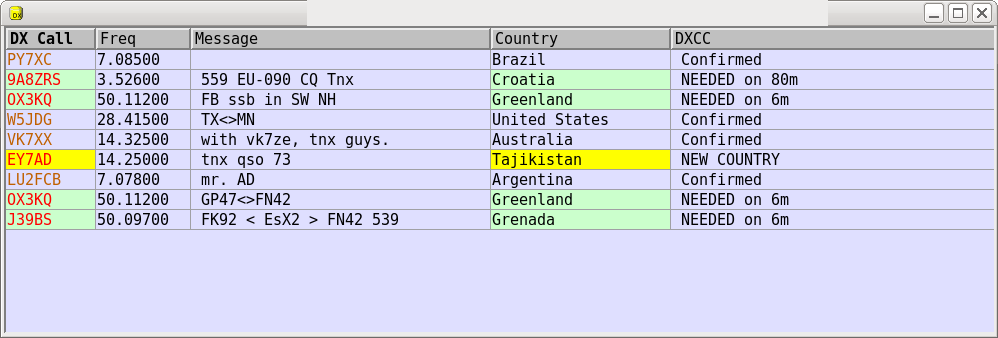
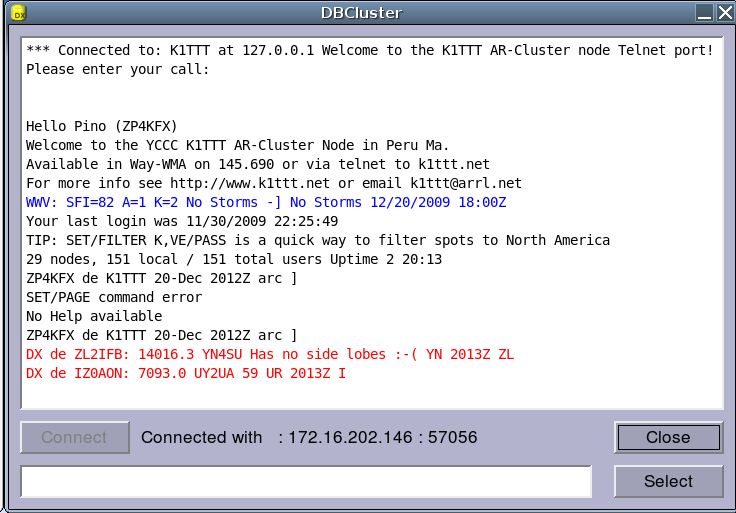
The Cluster window repeats the spots received by xdx but adds informations about the country name and the DXCC useful information.
Also here, clicking on a row, will set the radio.
DBCluster window is here displayed.
Here is the “Send Spot” window
It is possible to write a message.

The
mode is automatically set and this works also when fldigi
is active. The frequency, when in PSK31, is very precise but many
cluster do round it at 100 Hz unfortunately.
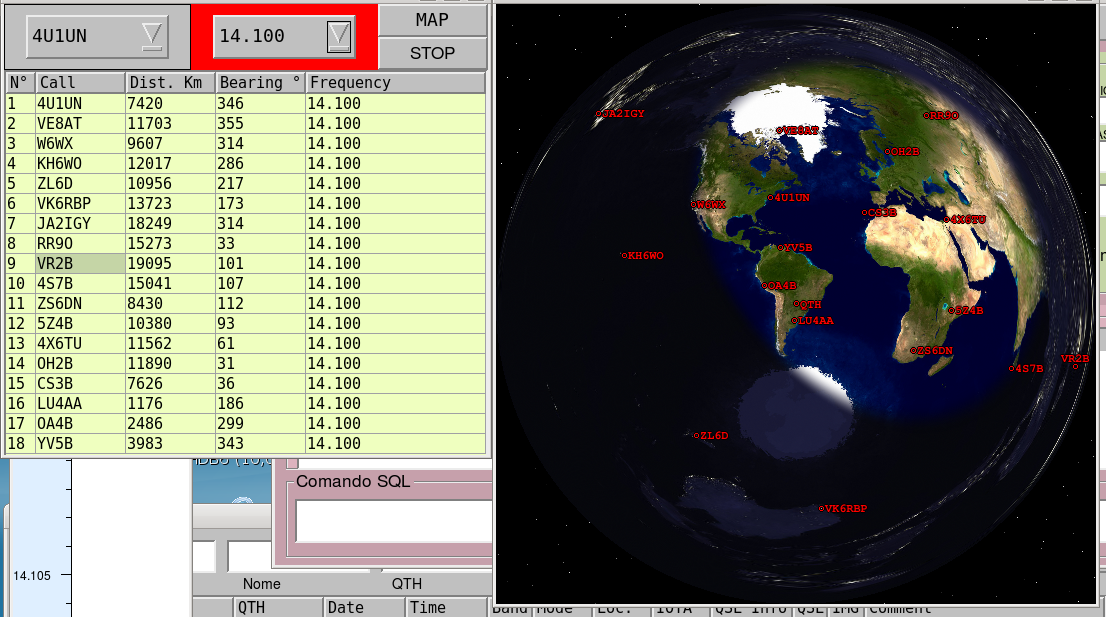
MAP
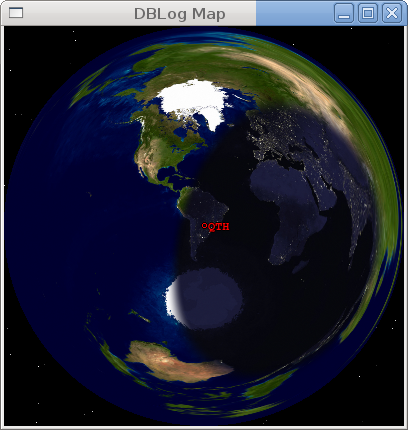
It is a sclalable window that shows the Earth as seen from your QTH.
NCDXF
Beacon scanning can be done by band or by beacon.
The left combo-box let's select the beacon; the right one the band.
The scanning is atctivated selecting or the band or the beacon.
Of course the computer clock must be well syncronized with Internet time servers.
Stop the scanning before closing the window.
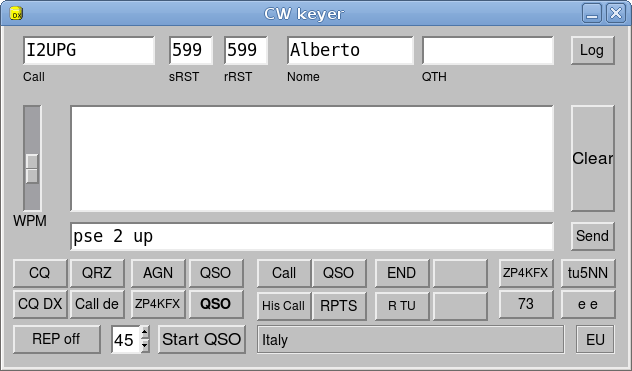
CW Keyer
The use of the CW keyer is quite straightforward.
Use ENTER key to jump from one field to the other.
Write text to be sent into the big central window or ose the key for pre-formed messages. Esc stops the sending.
The WPM cursor let you change the speed sending and listening dots in the radio.
REP on / off is for the automatic CQ repetition.