| Click here for the sound of SSTV :) Please print this article and use it as a hand out at Club talks and lectures by Kirk Swartfiguer, N2LGE and Ernie Mills, WM2U |
|
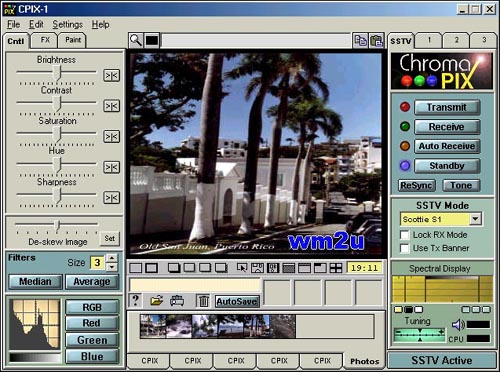
ChromaPIX is a Slow Scan TV workstation. It is a full 32 bit Windows 95/98/NT application. It offers multiple graphical user interfaces (GUI's) allowing image Tx or Rx while loading, composition or processing on other front panels simultaneously. It uses advanced DSP techniques producing superior performance. The adjustable filters let you tailor the software to meet signal and propagation variations. Familiar Windows drag and drop technology is utilized throughout for easy fast operating, and brightness, contrast, hue, saturation and sharpness controls added for easy image processing. The Paint module is fantastic. It has the normal Windows� fonts, bold, italic, and size instructions, as well as most of the common functions. It includes advanced drop shadow, and rendered image frames. A full toolbox of special effects is also included. Disk storage is handled by a thumbnail tray of images which can be drag and dropped into the GUI, and an integrated slide show allows you to easily display your image collection. |
| Ok, lets get started. First off check your computer to see if it meets the minimum system requirements. | |
|
Now download the software from Siliconpixels. You must uninstall any older version before installing a new version unless you are installing an Update Patch. Ok, unzip this file into a temp folder then simply run setup.exe. Since this web page will not cover the details of every aspect of this program, please print off the help files. These are really well written and very complete. The screen shot above shows the Graphical User Interface (GUI), and multiple GUI's can be opened at the same time. This will allow for Image Tx or Rx in one GUI, while loading, editing or processing in another. Since you will probably only have one sound card, a SSTV Active/Inactive button is included at the bottom right of each GUI. This will switch the sound card from one GUI to the other as you need. |
|
From the top! |
|
| The above settings are only suggestions that will guarantee you a working system, however this program is extremely powerful and I suggest reading the help files, become familiar with the options and play around with them to configure the system to your needs. |
| Connecting the sound card to the Radio is easy. All the information you need can be found on my interfacing page. |
| Ok!, so you have downloaded the software, Installed it, Configured it and interfaced your Computer to the Radio. What we need now is a picture to send eh! | |||
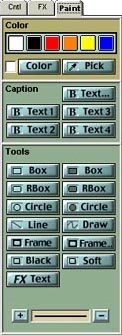
From the File Menu, load an image into the GUI, by browsing your computer folders. Double click on the image file name and it will load into the Main Window. Now select the Paint menu, shown at right, by clicking on the paint tab. This menu provides an array of image painting tools. Play around with them and customize your image by adding your call sign. Again I must refer you to the help files you printed off. The customization is very powerful. All sorts of effects can be added to your image. |
 |
 |
|
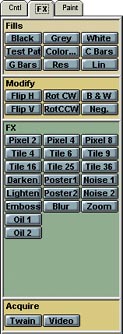
| ChromaPIX also includes a built in slide show program that will cycle through the current image tray. Enabling Wipes in the preferences menu will automatically add 100 random transitions to the slide show. Autosave will do just that to received images if a save path is declared in the Preferences panel. Oh! these will be saves in te format you select in the general, preferences panal. The FX menu complements the paint menu as this is where you will find the special effects. Pixilation, Mosaic, Image Rotation, Negative, and many more. Read the help files eh! The Acquire buttons activate the ChromaSCAN module which interface with Twain based devices such as scanners, and the ChromaCAP module, activated with the Video button, interfaces with video sources such as cameras. A quick word on the Histogram shown on the Cntl menu. The histogram shows the distribution of brightness from Black at one end to White at the other. The idea is to make sure your image pixels are distributed throughout the whole range. The ideal distribution curve is gaussian or bell shaped. If the the curve is in the lower part increase the brightness. If in the upper, decrease the brightness. If the bell shape distribution curve is narrow and does not fill the entire range, increase the contrast. Just to mention it, images from the main window or image trays can be freely dragged between each other and indeed dragged to those locations on any other open window. This way you can process an image in one window while Rx or Tx in the other. |
|||
The three virtual machine (VM) panels all refer to operating or control of the program itself. I will not go into detail of these. Please read the help files. |
 |
 |
 |
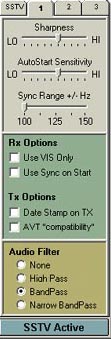
| The SSTV VM Control panel is where we will actually get ya! on the air :) OK so by now you have downloaded the software and configured it, and Interfaced your sound card to the radio. Hold it, hold it, don't click on Tx yet!! Tune your rig to 14.230mHz and listen to the SSB chatter. Eventually someone will send a picture.
Make sure you set the SSTV Mode to whatever the Ham declares he is going to use,
normally Scottie 1, then click� Receive. You
could also click Auto Receive and the program will seek the
mode being used to send the image and set itself to that mode. When the
picture starts it will automatically start collecting the data and displaying
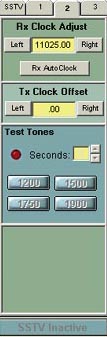
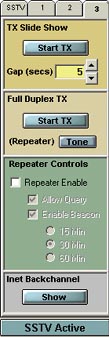
the image on your screen. Practice tuning a few times just to get the feel for it. Also read about Standby, ReSync and Tone. Try clicking on receive half way through an image Tx. Just practice and get the feel for it. Now Load an image from the Image tray into the Main Window. Remember the personalized images you put in the image tray? Yep! one of them. Get back to the SSTV group chatting away and offer to send an image. Take a deep breath and click TRANSMIT. |
|
It works. It works well. The freq's are 3.845, 7.171, 14.230, 21.340 and 28.680. Please! I cannot stress enough for you to copy off the help files and READ em! There is tons of information yet for you to learn that would not be practical to write into this account. Enjoy de Kirk N2LGE Ernie WM2U |