How to install a Lincoln Mark VIII Electric Fan

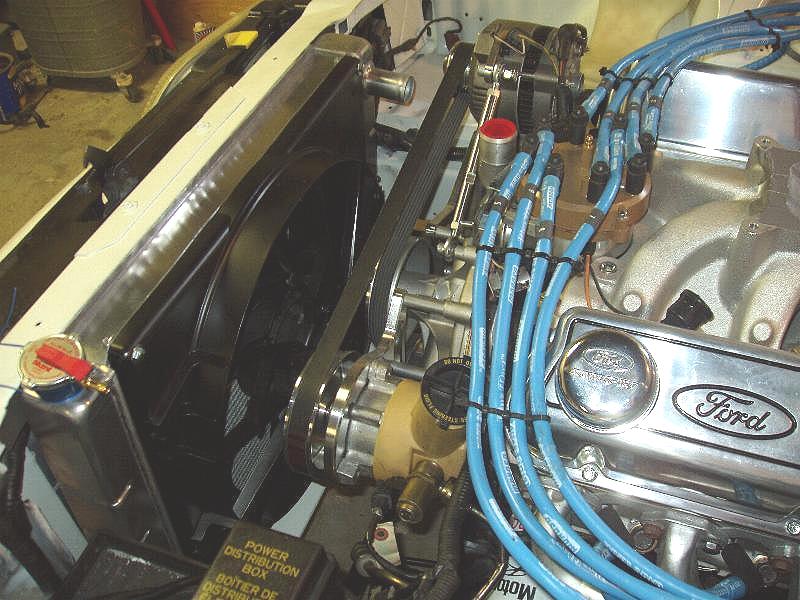
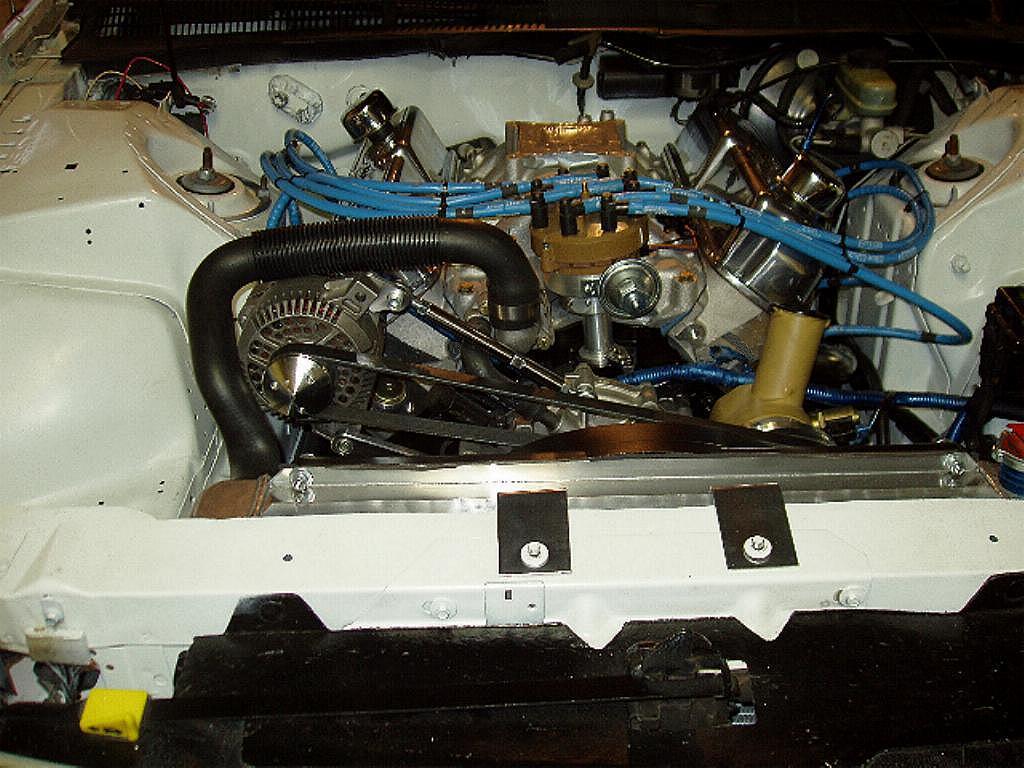
This is the Lincoln Mark VIII fan installed on my Thunderbird. The install looks factory.
How to install a Lincoln Mark VIII Electric Fan
This is the Lincoln Mark VIII fan installed on my Thunderbird. The install looks factory.
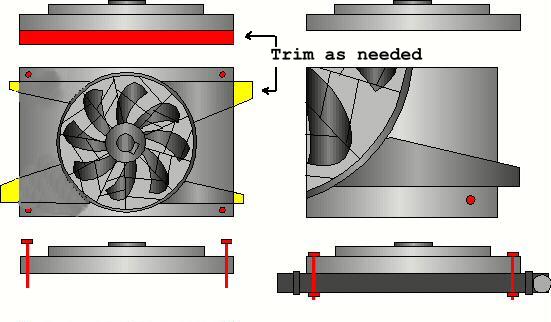
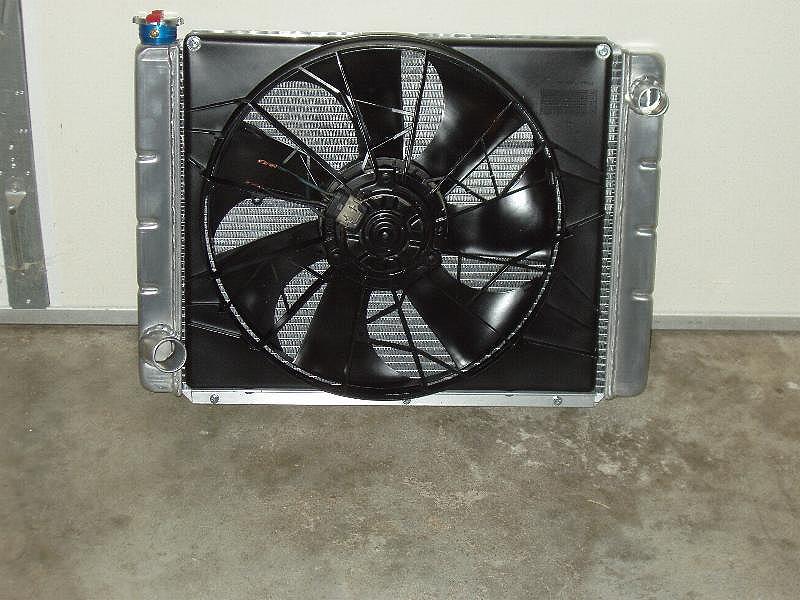
The MarkVIII fan is 21 5/8 wide, 18 1/2 high, and 4 1/4 thick when trimed to thinest size, and still allow room for blades to clear the radiator. These fams move between 4,000 and 4800 CFM, depending on which year you are using.
Here's a little diagram to help show what needs to be done to fit a Lincoln Mark VIII fan to a 89-97 Thunderbird. This diagram is based on a car with a thicker core aftermarket radiator. If your still using the stock radiator, then you might get by with out having to cut the shroud thinner. The (yellow) tabs should be trimmed off.
Supplies and Tools:Lincoln Mark VIII electric fan, radiator ties (used to mount tranny coolers to radiator), drill, dremel or jig saw, misc. wiring connections, 30 amp relay, 10/12/14 guage wires, and the appropriate hand tools. (Its also almost mandatory that your car be upgraded with a 130A 3G alternator) Note: My afte rmarket radiator has more fins per inch than stock and made pushing the plastic ties through it very undesireable, so I put a 1 inch aluminum angle L at the bottom and mounted to it, and attached the top to the aluminum strip on the radiator. Mount the fan to the L, then mount the the fan to the radiator at the top and bottom. Make sure it turn freely.

1.First you need to remove your stock fan, fan clutch, and shroud. Note: This install goes much smoother when you also remove the radiator, especially if you still have the A/C.
2.Re-install the bolts that held the fan assembly to the water pump pulley. Check the clearance on the back side of the pulley between the bolts and the water pump housing. You might need smaller bolts, or you might need to cut/grind the bolts shorter. Its not recommended to use more washers as that will leave less room for the fan motor.
3.Measure the width of your radiator ties. Using the appropriate drill bit, drill 1 hole in each of the corners of the Mark VIII fan. Slip the ties into the holes with the tail pointing towards the radiator.
4.Now, mount the overflow bottle to the shroud. To use the factory hardware, hold the clip with a pair of pliers while you tighten the bolt. Hey, it works! You could buy some grade 8 nuts and bolts...but why?
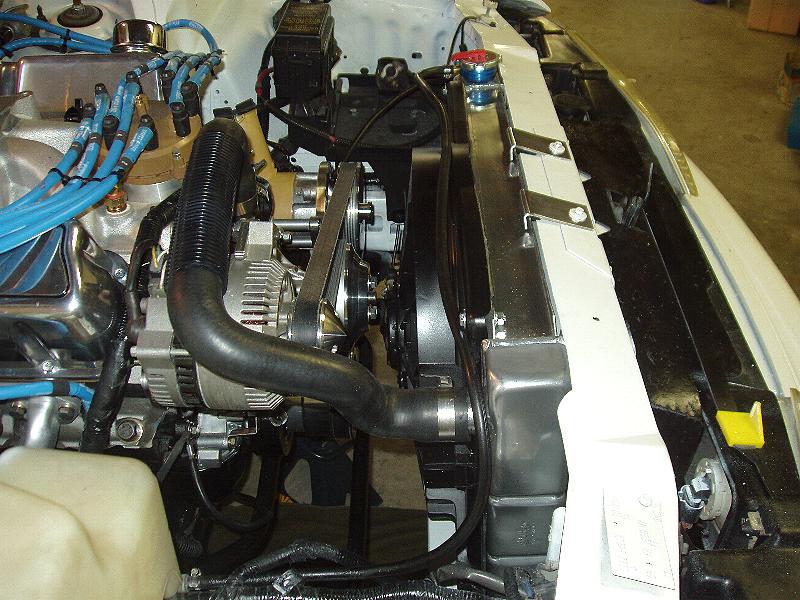
5.Get some help for this part. Test fit the fan and radiator together in the car. You should have about a half inch clearance between the water pump and the fan motor. You may need to slide the fan to the left or right to clear the snout of the water pump. Remember where the fan is placed in order to mount it correctly.
6.Now, gently slide the ties through the radiator and push the fan tight to the radiator. The fan fits perfectly between the top and bottom. There should be no part of the fan above or below the radiator. If so, pull it off and try again. There will probably be around an inch on each side of the shroud between the tanks, depending on your needs. Once satisfied, slide on the foam pads and the other half of the ties. Pull the ties snug, but do not over tighten. Snip the excess length of the ties off.
7.Next, install the fan and radiator combo into the car. Install brackets, overflow connections, and make sure the fan is secure.
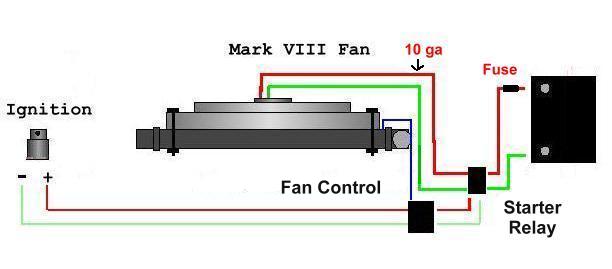
Here's another diagram that shows the basics to wiring up a relay and temp control for this application. For the key on 12V, I spliced into the wiring harness near the mass air meter. But, there are numerous places to get key on 12V under the hood.
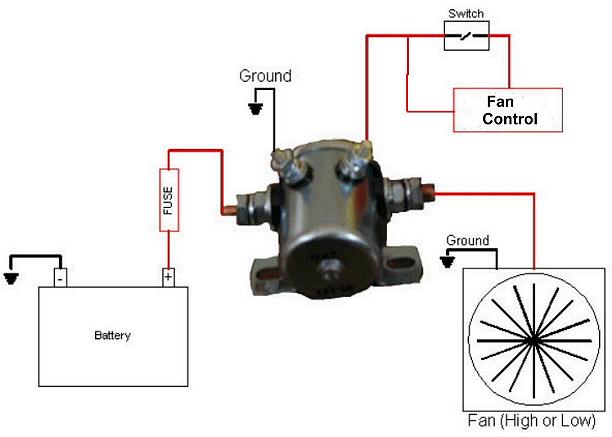
8.Now its time to get some power. First, familiarize yourself with the wiring of the relay. Then, find a suitable place to mount the relay. When happy, Run a 10 guage wire from the positive side of the starter relay to the fan relay. Run another 10 guage wire from the relay to the fan, and some 10 guage wire from the fan to a good ground. Now, with some 12/14 guage wire, run a line from key on 12v to the temp control module, then to the relay. And finally run some 10 guage wire from the relay to a good ground. The 10 guage wire on the grounds is over kill, but it pays to be safe. Wireloom to taste.
9.Check everything! When satisfied, place a jumper over the temp module to allow the fan to come on any time the key is on, and the temp is above the setting of the fan control module. Check everything again. Remove the jumper. Enjoy.
The radiator mounts are moved forward to where the A/C condenser
was located to allow room for the new much thicker radiator, and Mark VIII fan,
which still has to be mounted slightly off set to clear the water pump pulley.

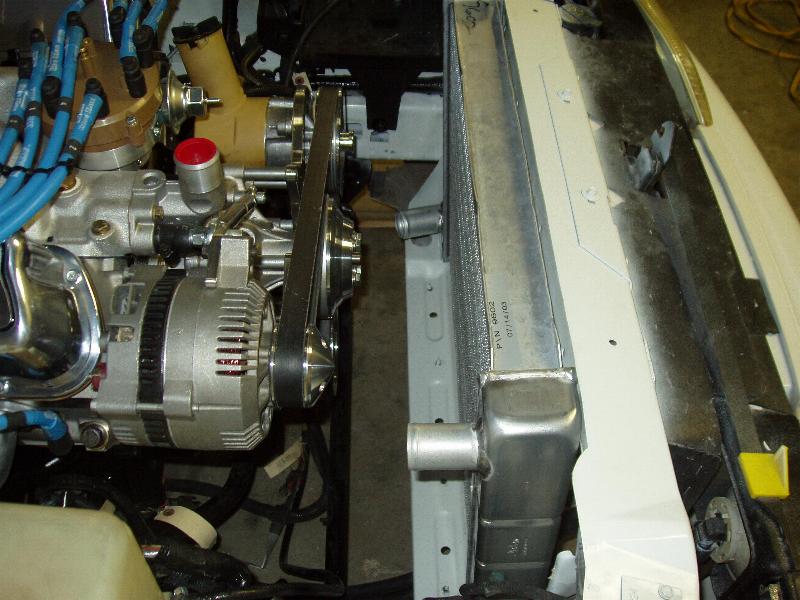
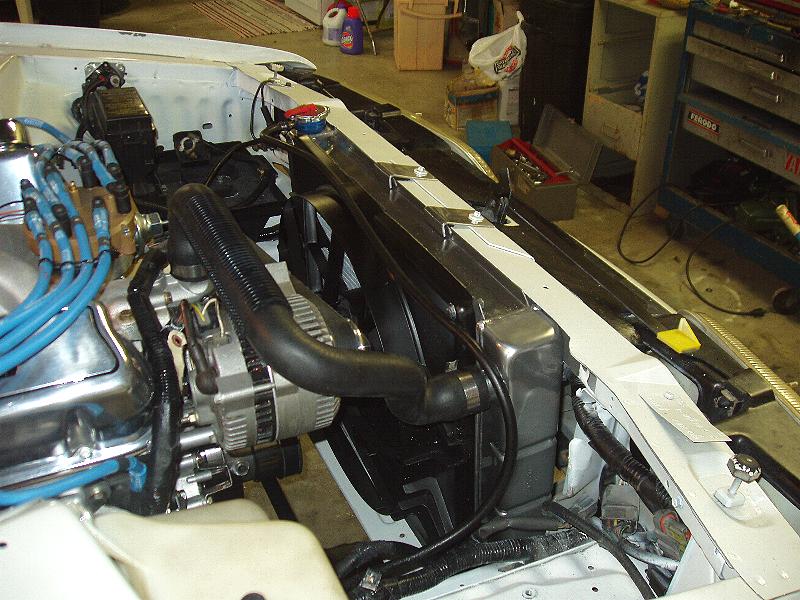
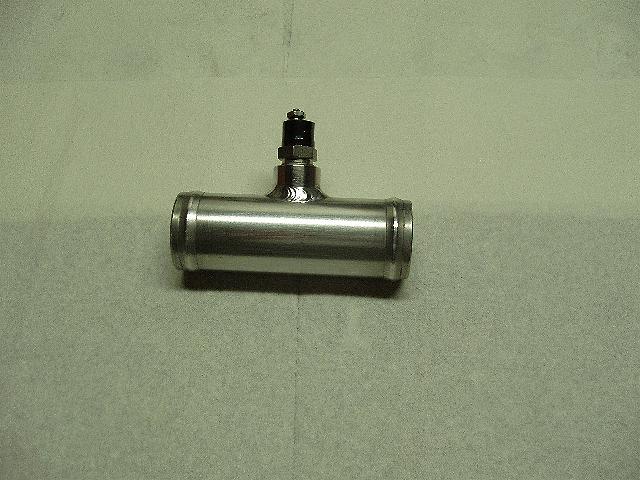
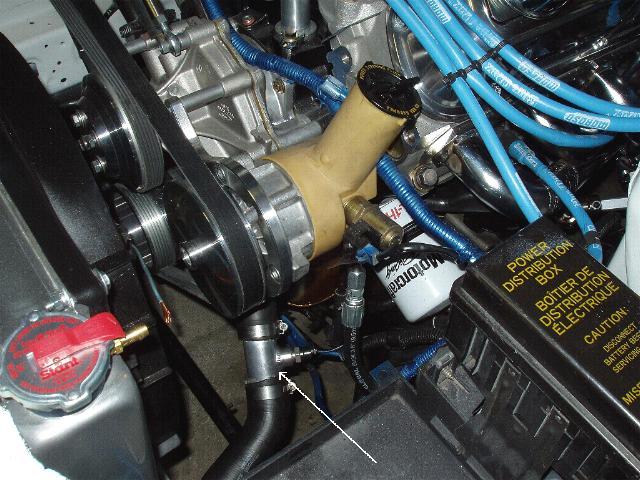
Since the fan is designed to lower the water temp that radiator can not on it's own, this was installed in the lower radiator hose to better sence the water temp leaving the radiator to turn on the fan if the temp rises above 185f.
I will have the fan wired up through a switch in the car to select normal, which will bring on the fan when ever the sensor calls for it. The other position will be Race. This will run the fan full time, except when the car is at WOT. During the short 11-12 second runs, the fan will not run. I will install a WOT switch on the carb, like is used in some nitrous systems. It will be connected to the normally closed contacts.This will reduce the electrical load, so the alternator is not running full charge trying to restore what the fan uses, thus saving some more HP. As soon as the car goes across the finish line, the fan will come on, and run till in cooled in the pits.
If this does not keep it cool, nothing will......
