Rewinding Kenpro KR-500 Elevation Rotor Motor
History
I
have a Kenpro KR-500 Elevation Rotor that the motor burned up in due to
a software malfunction of the control software. The Kenpro does
not have any limit switches, but just stalls when hitting the stop in
the rotor. The software moved the rotor past the zero point until
it stopped moving. This stalled the motor and before I realized
what was happening, the motor burned up. Kenpro sold out to Ysaeu
back in the seventies and Ysaeu produced the elevation rotor under
the model number of G-550, but it has been discontinued.
I
searched the Internet for either a replacement rotor or some
information where I might find a replacement motor. No luck.
The prices were too high on the ones I found and I could not find a
replacement part. I called Ysaeu and after being passed from one
person to another, I was told they couldn't help me. In my
research I happened on a web site by KB5WIA where he showed rewinding a
motor for the Ysaeu G-5500 combination rotor. The motor looked
very similar to mine, so with some of the information from his site, I
decided to make the attempt to rewind my rotor motor. The
following is a pictorial of the result.
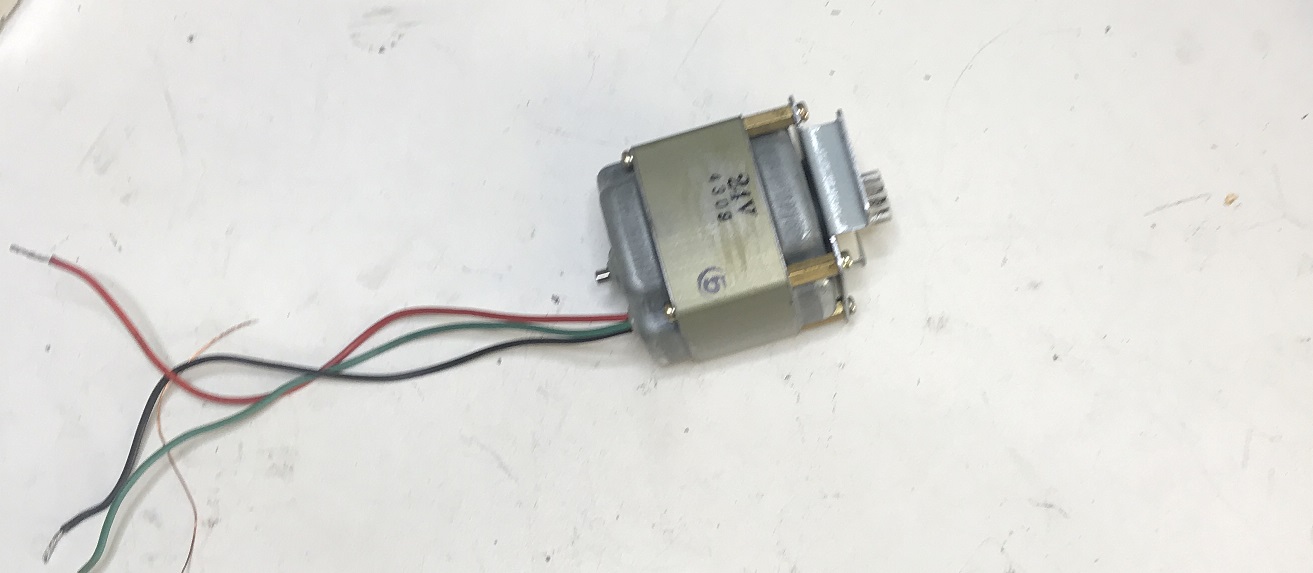
The bad motor removed from the rotor.
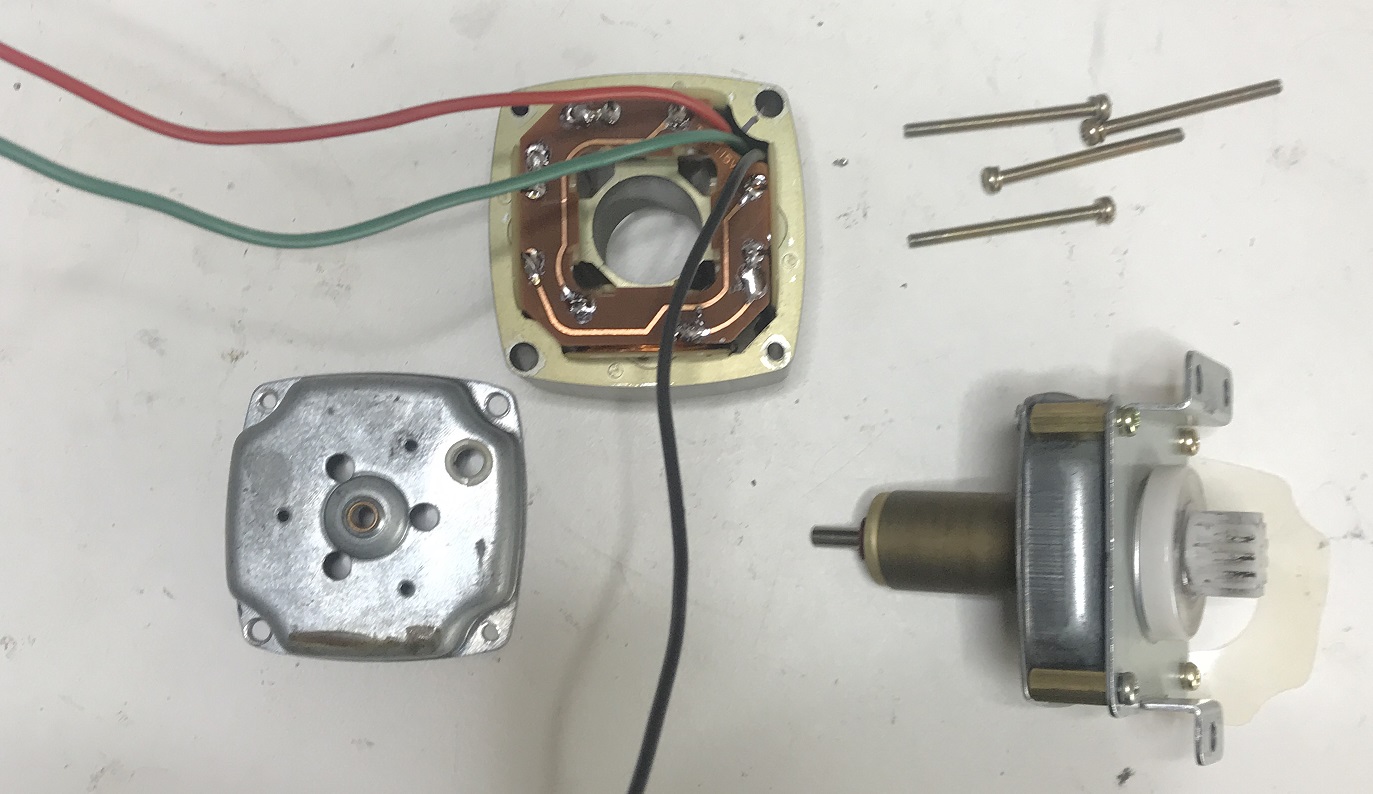
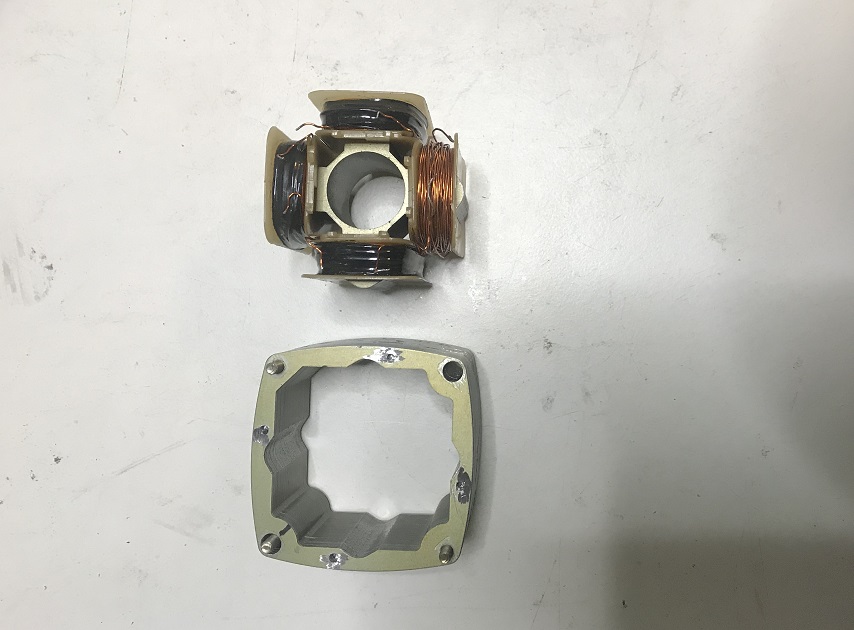
The motor disassembled into its three main parts.
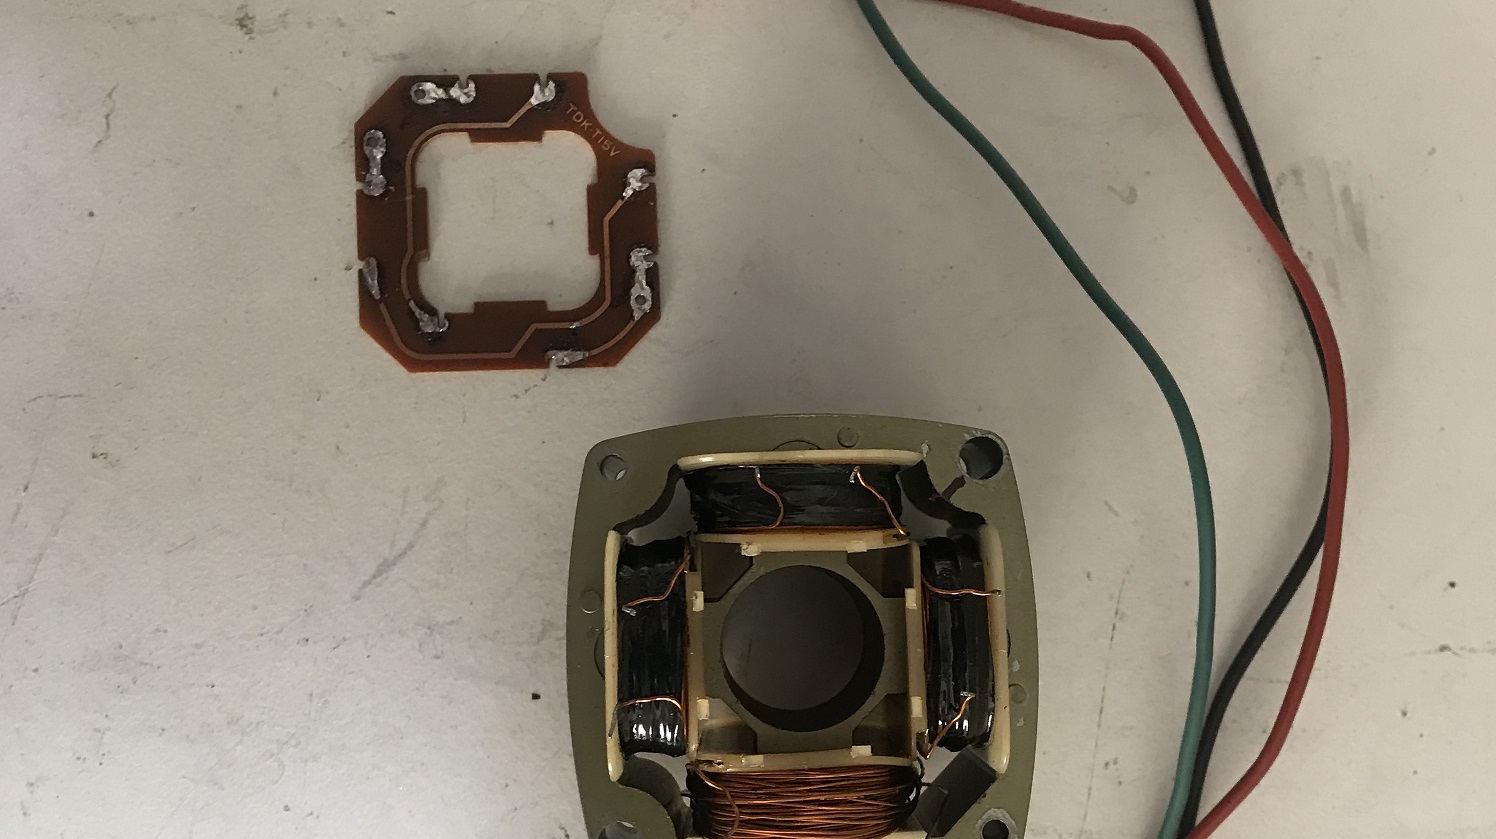
The
motor plate and connection wires removed. Notice the mark on
top right side of core. This marks where the connection
wires were run.
I had to grind off the heads of the core pins to be able to remove the laminations.
Wow!
It took a long time to remove each lamination, but I finally got
it done. I wonder if that was necessary. More about that
later.
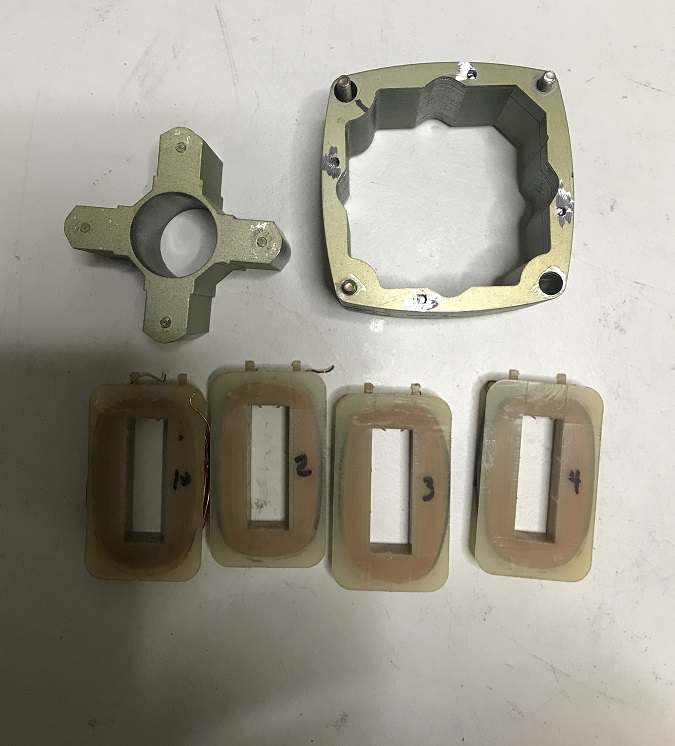
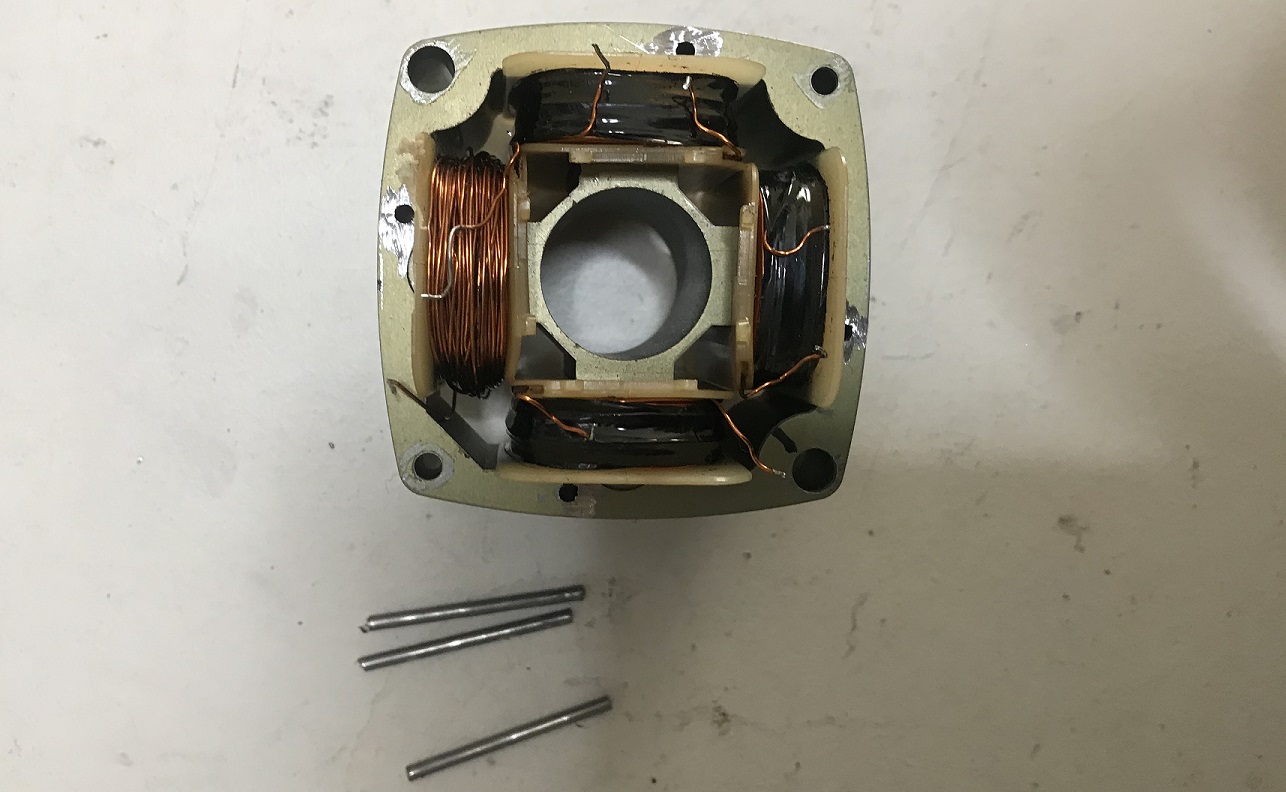
The
motor core separated into outer, inner, and coils. Notice the
coils are numbered, so I can be sure an put them back in the same
order. Necessary? Probably not, but I didn't want to take
any chances.
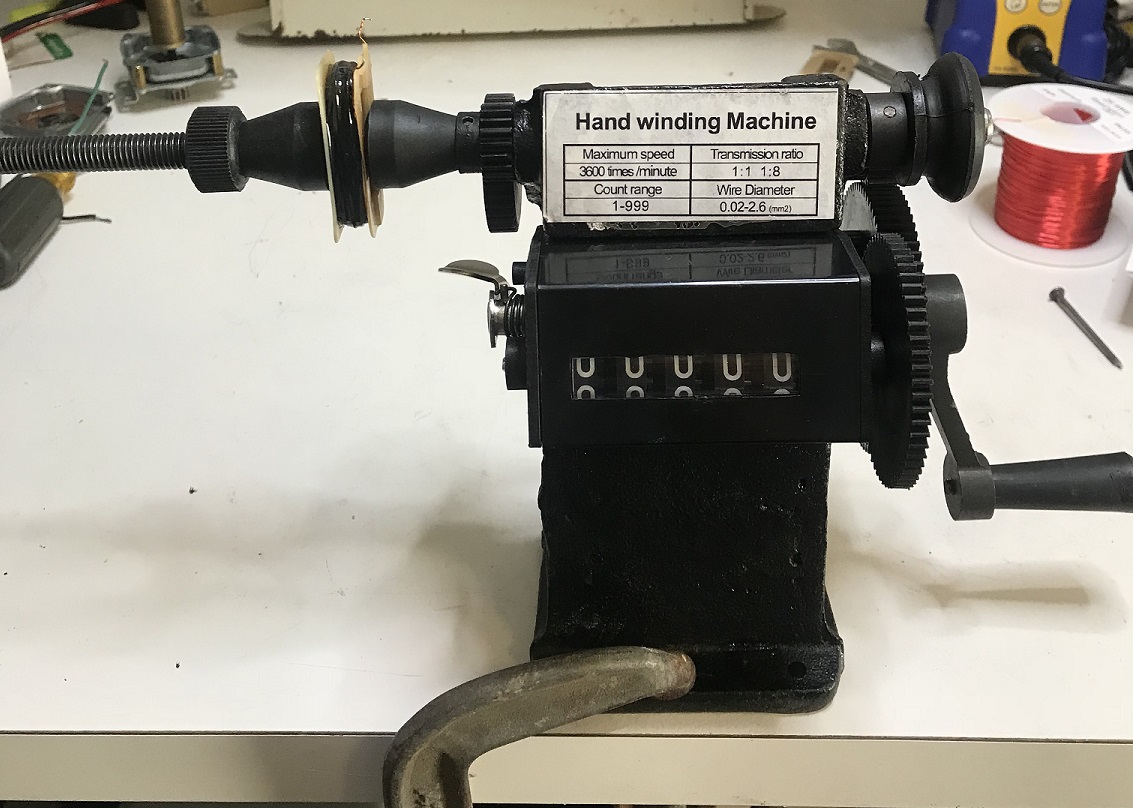
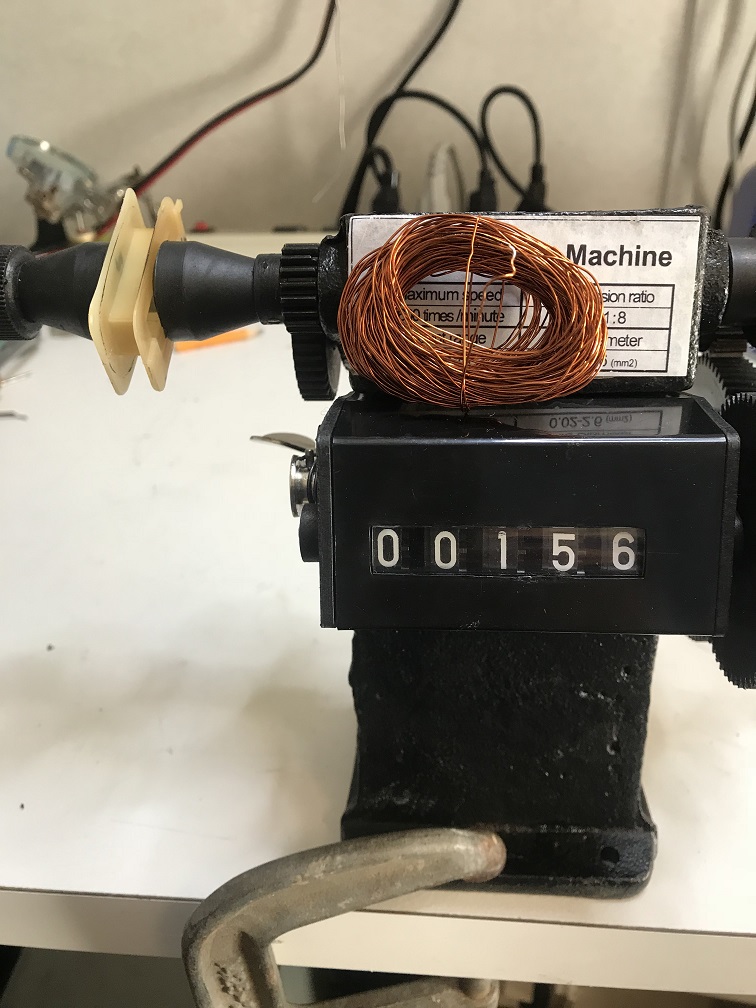
I
purchased a winding machine off of ebay. It was around $40.00
shipped. I figured that was much better than trying to build
something from scratch. In the picture above one of the coils is now positioned to remove
the old wires while counting the number of turns on the coil.
I marked the direction that the old coil was wound, so I could be sure and wind it back in the same direction.
Interesting!
On KB5WIA's web page, he says there was 158 turns on the coils he
unwound. I unwound three coils and came up with the same number
of 156, so that's the number I decided to use.

156
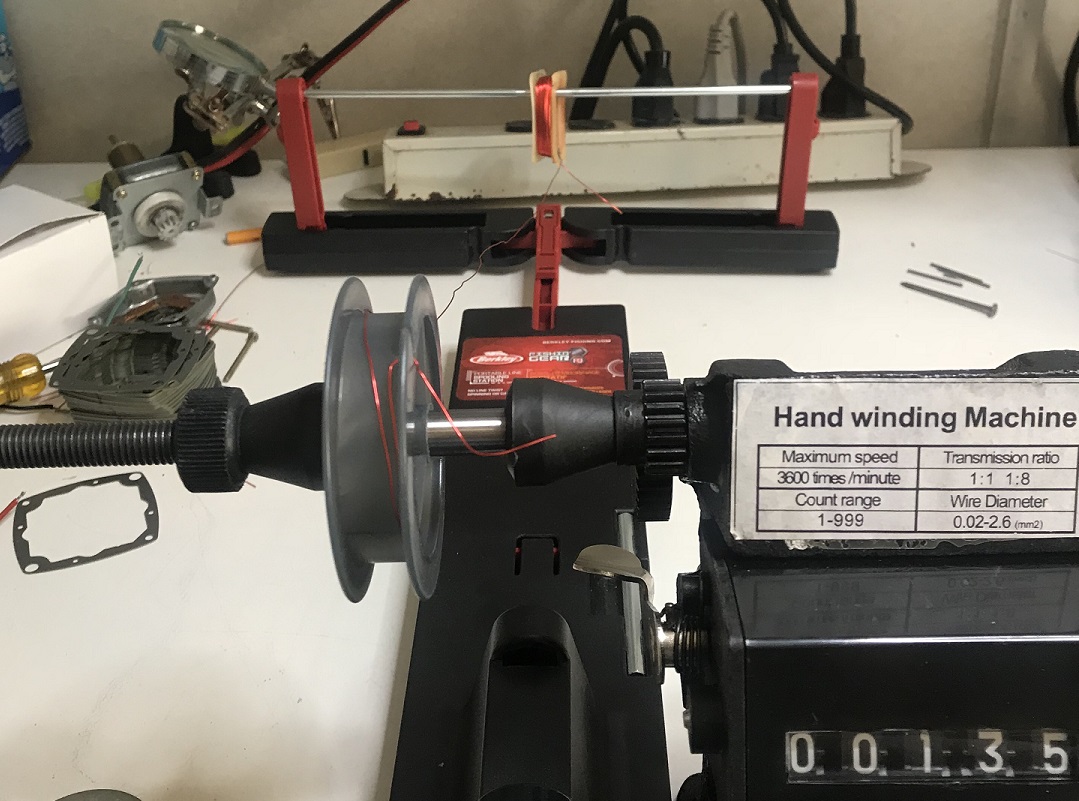
turns back on and Scotch 33 tape covering the coil wire. Notice
the setup. I used my fishing real spool winder to hold the wire.
In the back you can see the new wire The red arm device at
the bottom of the spool is used to keep the spool from unwinding and
hold a little tension as you wind the coil.
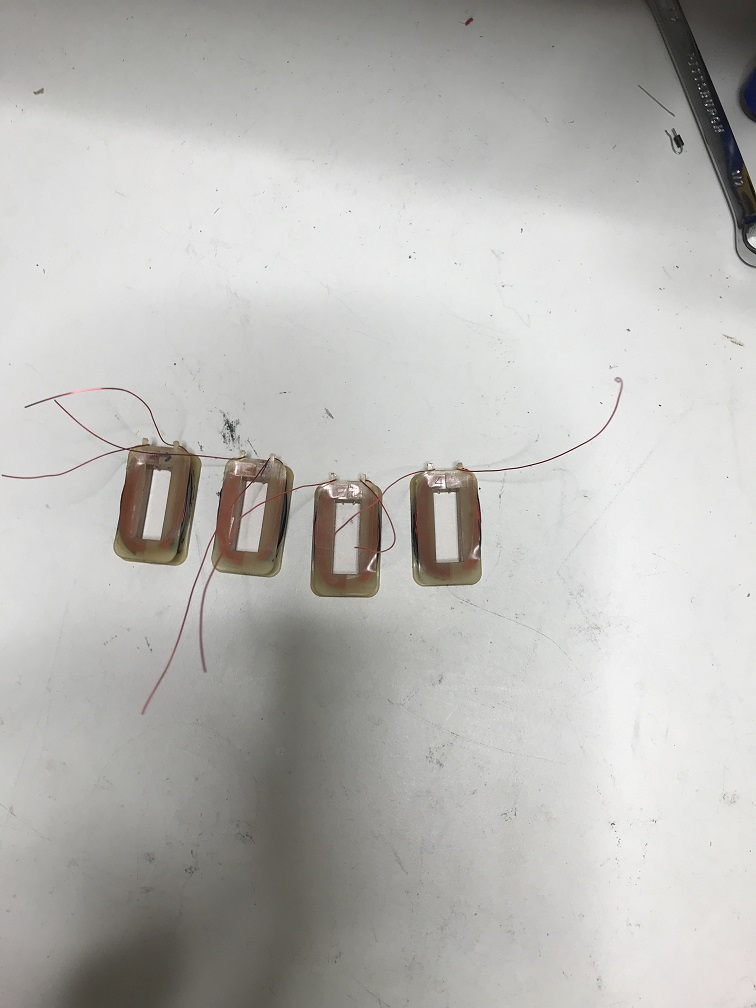
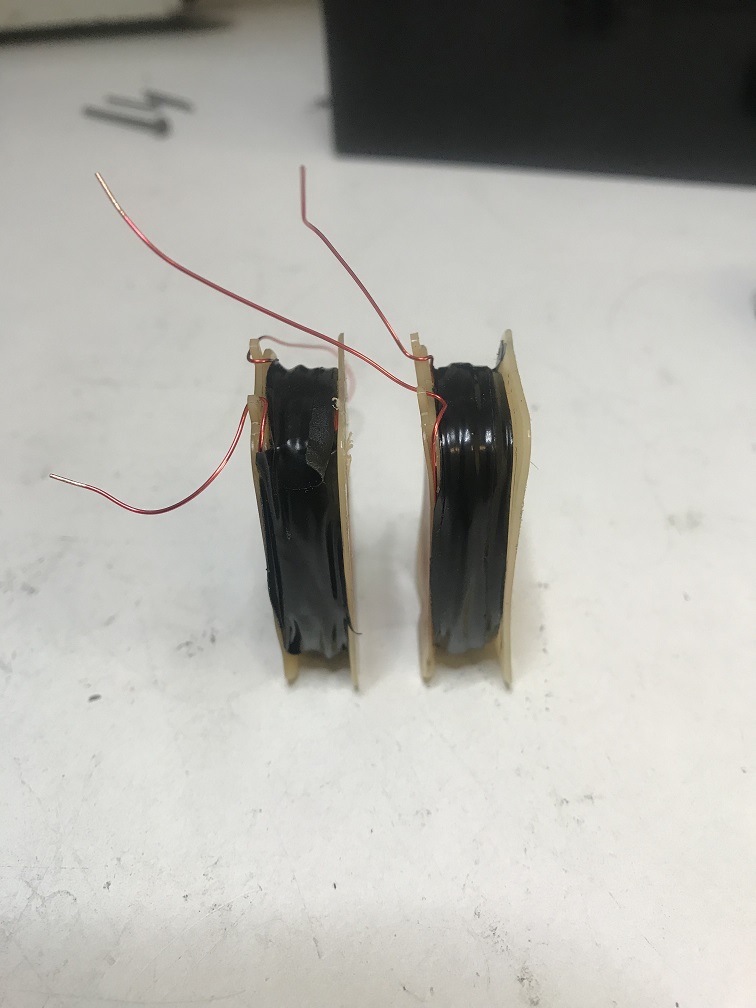
All four coils re-wound and ready to be re-installed.
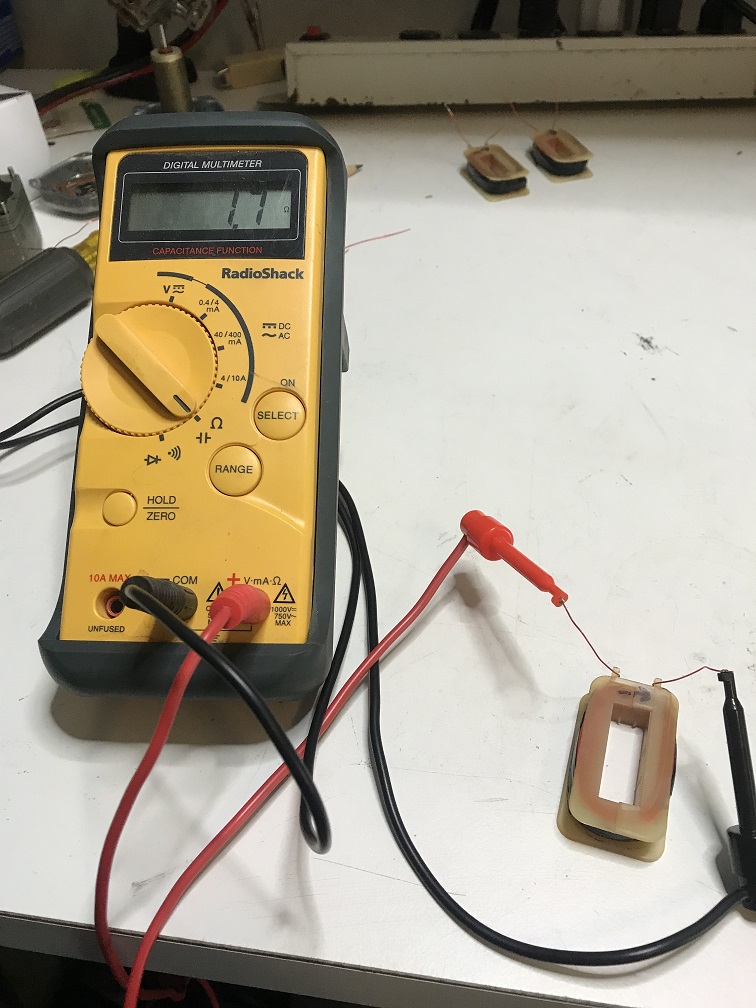
I checked each coil to see if they were about the same resistance value and they are.
HOUSTON,
WE HAVE A PROBLEM! After installing the new coils on the inner
core, I tried to start re-installing the laminations, but THEY WOULDN'T
FIT! Why? What did I do?
I
didn't realize that as I re-wound the coils, the edges of the coil
forms were forced out; thereby preventing the laminations from going
back on. I don't know if KB5WIA had this problem or not.
I don't think so because he probably would have mentioned it.
It would have been nice if he would have had the problem and
mentioned it, I wouldn't have made the
mistake. I now know better and hopefully it will help someone else
who might wish to do a re-wind job on their rotor motor. Notice
in the picture above: The coil on the right is one that I wound
the first time and the one on the left is one that was wound using the
method
as described next. You can see how much the right one is
distorted.
After
much deliberation, I decided to unwind the coils, and rewind them with
the method described next. I used an empty fishing line spool to
roll the old wire off on to.

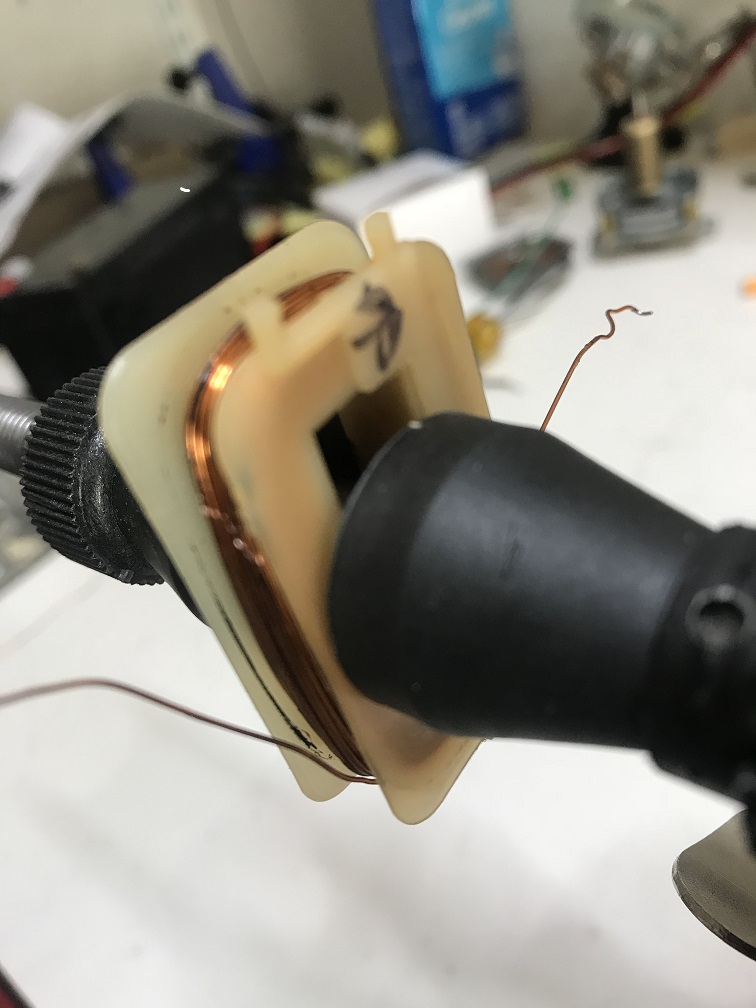
Here
is a finished re-wound coil. Notice the large flat washer on each
side of the coil form. This prevents the coil form from distorting when
being rewound. But, because it also makes the diameter of the
coil a little larger, I was not able to get all 156 turns back on. I
had to take one turn off. Too bad I didn't notice what was
going on in the beginning, so that I would have been able to put
all the turns on.. The question is now, will it still work with
one less turn. I think it will, but we will have find out
further down the story.
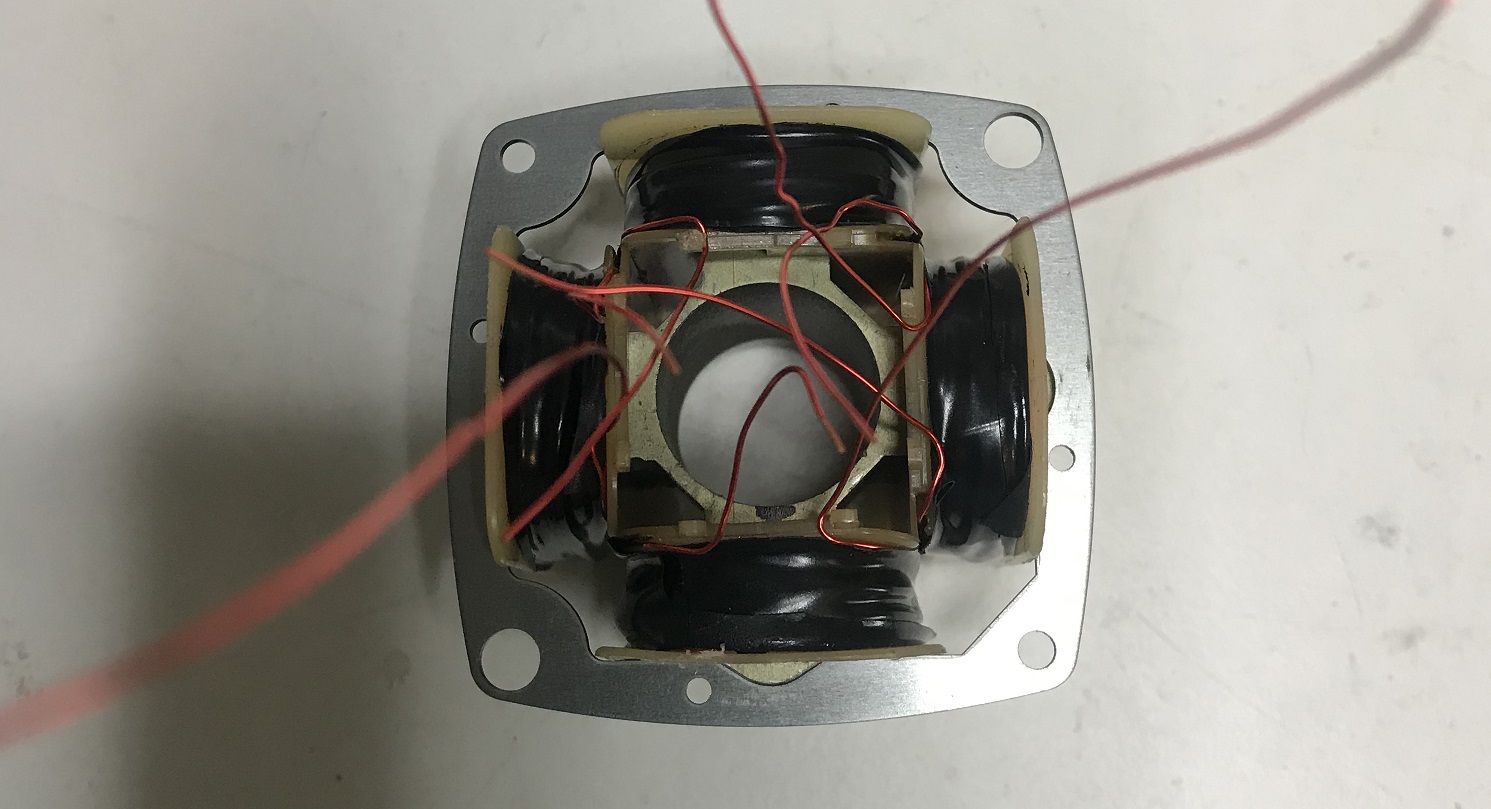
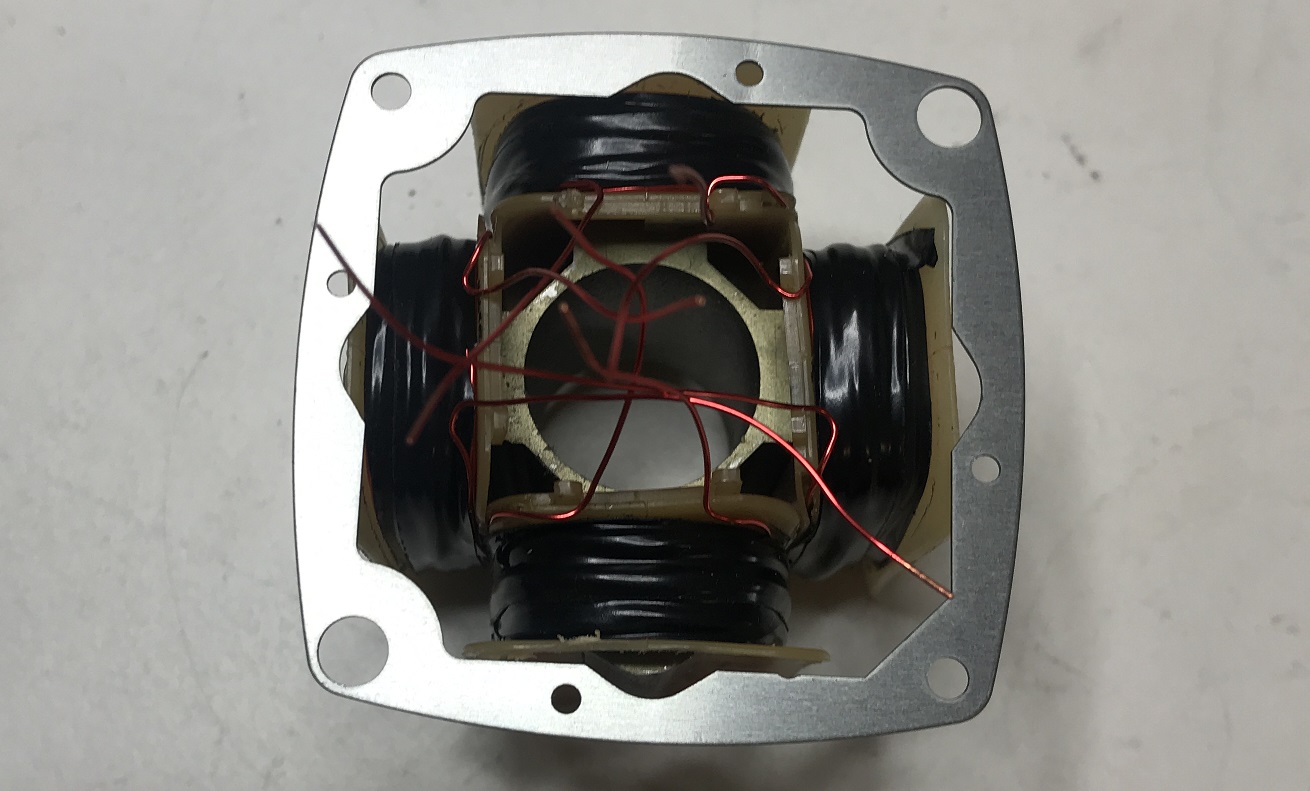
All
four coils have been rewound and installed on the inner core. The
laminations will now go back on as they are supposed to.
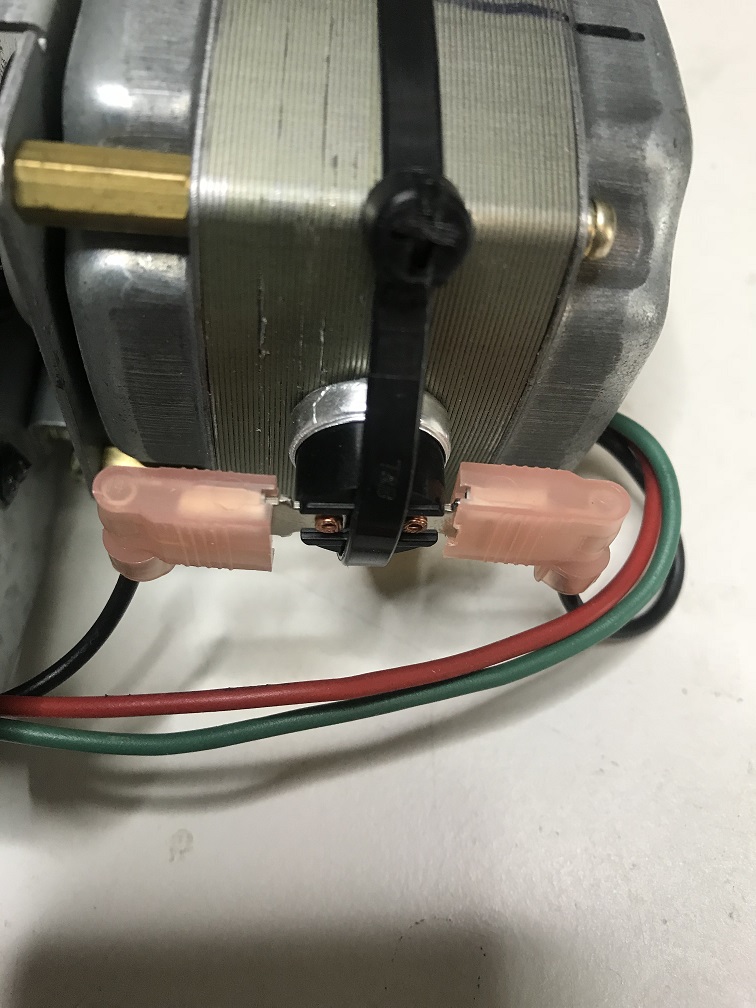
The
motor has been re-assembled and mounted on the gear works. Notice
the thermal switch mounted on the side of the motor as was also done by KB5WIA.
It is rated to open at 70C. The tywrap that is holding it
on is rated for 85C so it should trip the motor off before it reaches
the melting point of the tywrap (I hope) and therefore protecting the
windings that are rated at 150C.
Well, it's come down to what we
use to call the "smoke test," a term I hated when I was working for a
living. The following video is of the final test after assembly of the rotor.
Video:Smoke Test
A Short Video Of The Antenna Array In Operation Tracking Fox-1B In The Eastern Sky
Bottom Line
Lessons learned
I
think I could have built a jig and pressed the outer core off the inner
core assembly using my hydraulic press. I didn't want to try it
because I didn't want to damage the motor if it didn't press out
easily. If you decide to rewind your motor, you will have to
decide for yourself to try and press off the core or disassemble it the
way I did.
You should be careful not to distort the coil forms.
This means you will have to have some way to keep the forms from
spreading. I used a couple of big washers on the sides and it
seem to do the trick.
Final Costs
Coil winder(I can use this again) $42.30
Wire (I still have 800 feet left) $19.49
Thermal
switch
$4.67
Total $66.46
I'm ready for the next time!