Polar Orbital Weather Satellite Pictures,Astronomy
and HAM Radio Homepage
by Lewis E. Duffing
This web page first came on-line in 1994, �The web page was last updated on 5/18/2010
First, if
you want to learn more about me, click on the link below!
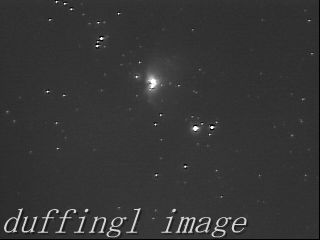
How can you
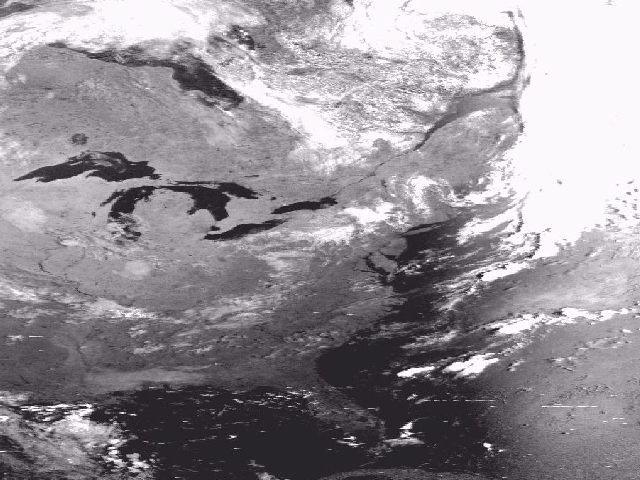
receive Polar Orbital Satellite pictures like the one shown above??
Well Read On
and Find Out...
The
following links and data will put you in touch with the world of real time
reception of polar orbital weather satellite pictures. This is a fascinating
hobby where you could, if you live on the eastern side of the USA, be the first
to see a picture of an Atlantic Ocean hurricane, even before the USA National
Hurricane Center brings it to the publics attention. However, no matter where
you live in the world, this hobby can be used to obtain satellite weather
pictures twice a day. This is the reason I thought a common page of information
on the �world wide web would be
useful. This data can still be used today to receive weather satellite pictures
![]()
 View
more satellite pictures which I have received
View
more satellite pictures which I have received
If you have
any questions or comments send mail to:
[email protected]
Lewis E.
Duffing,
Curator of Polar Orbital Weather Satellite Pictures And Astronomy Homepage
![]()
�
MY REMOTE
ASTRONOMY OBSERVATORY
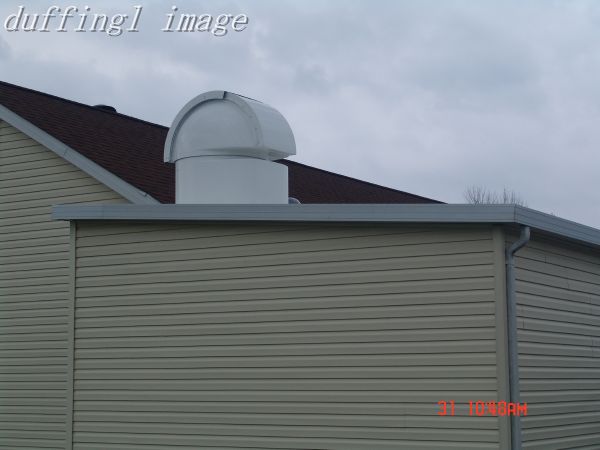
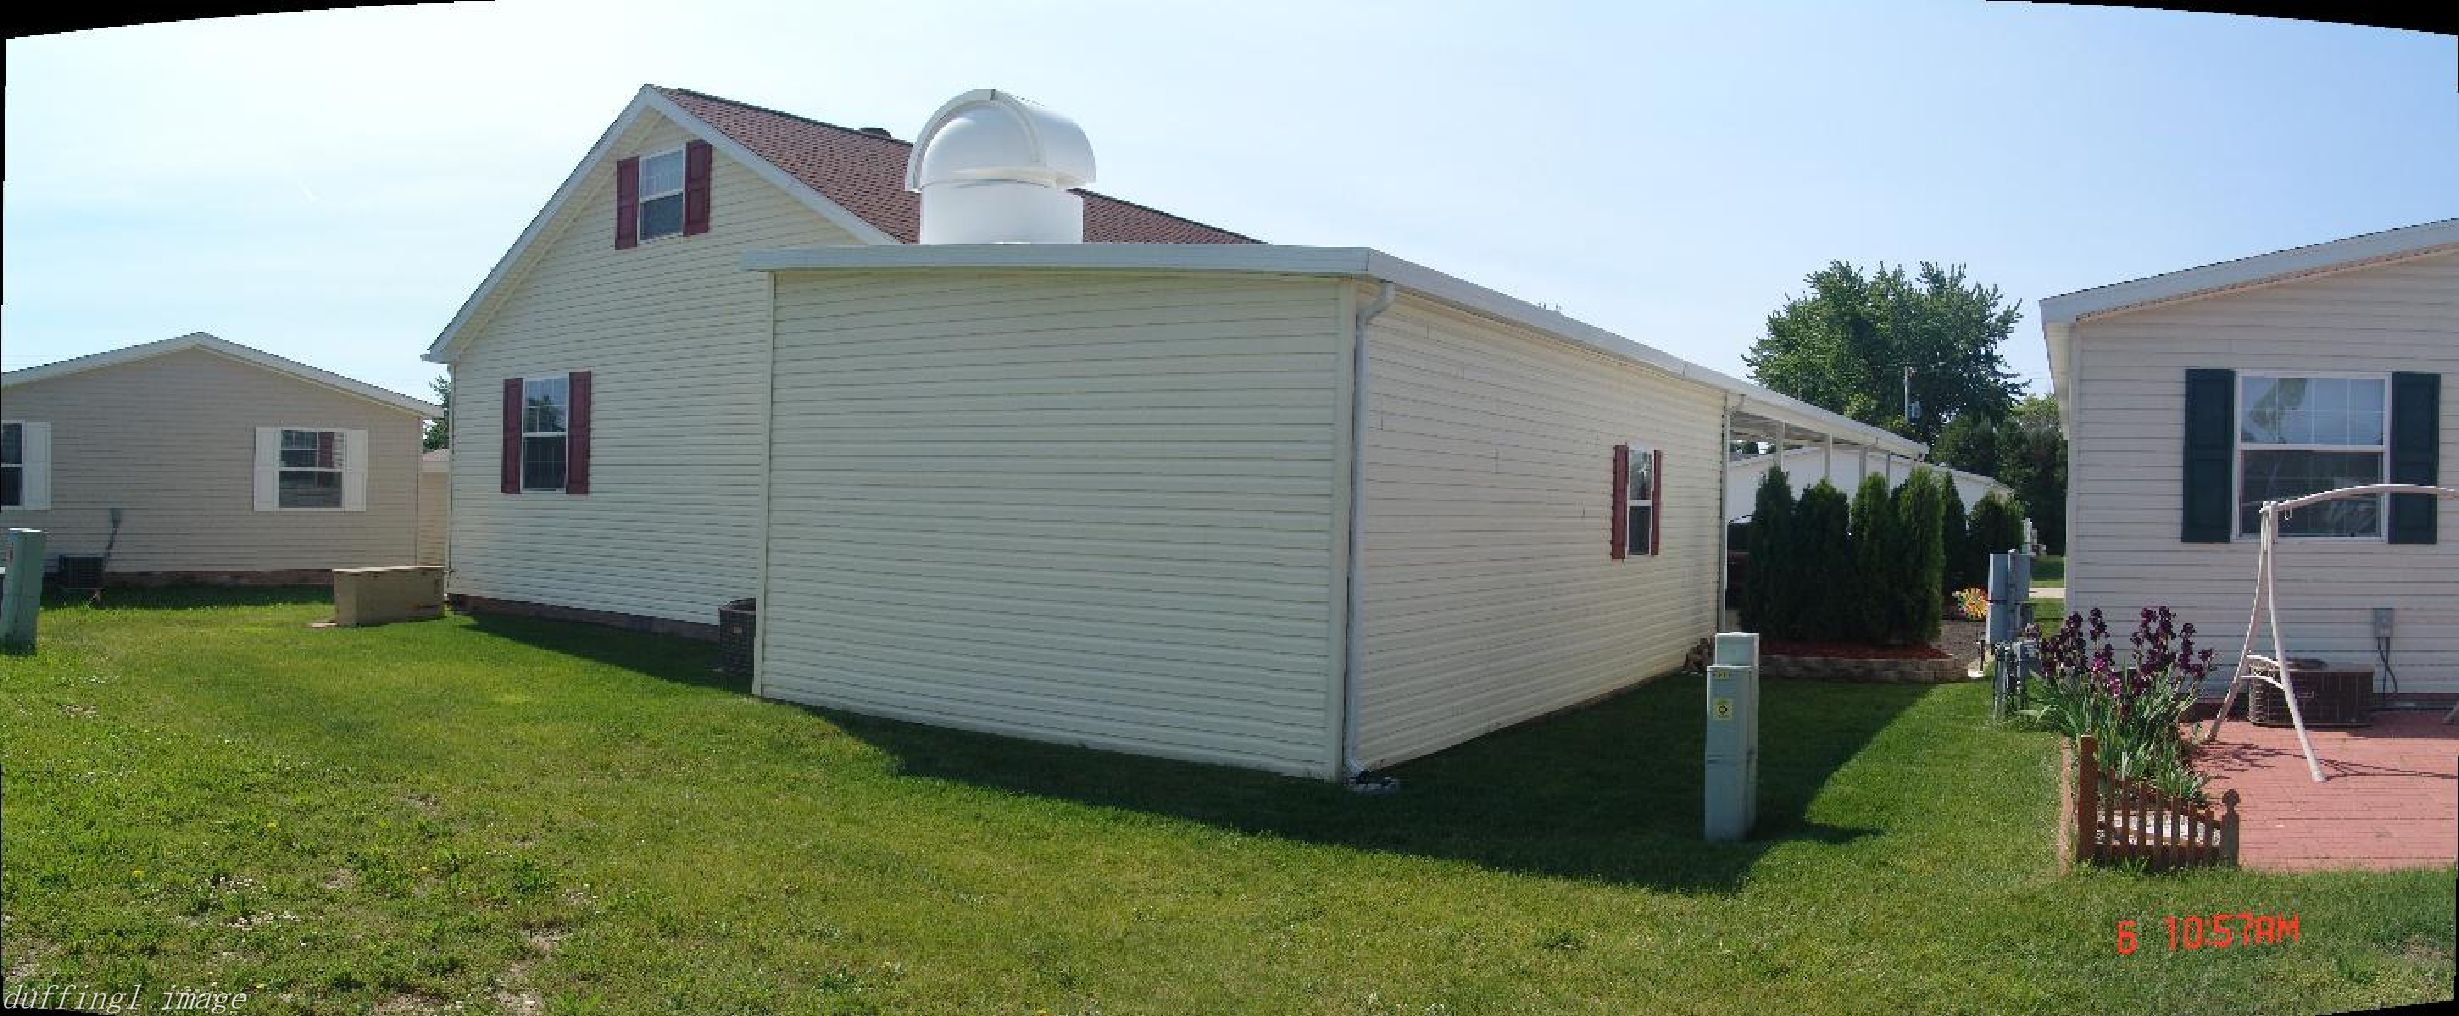
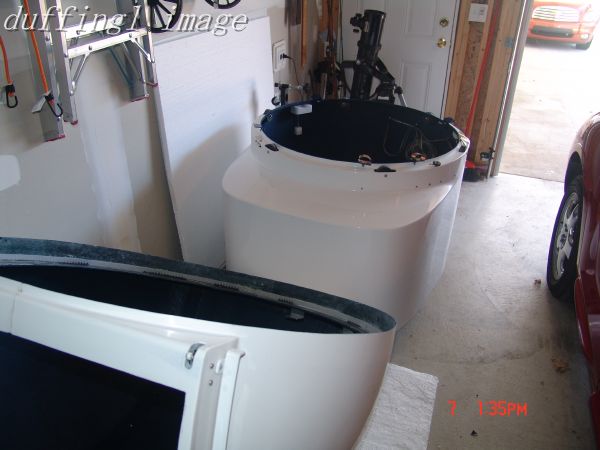
My remote observatory consists of a Technical Innovations RoboDome, http://www.homedome.com mounted on the top
of my addition at the back of my garage by my builder. The dome has so far
performed very well, and I am satisfied with its remote performance. here are
several pictures of my observatory: You can click on each picture to see a
bigger view just use your browser back button to get back here
The dome houses a computer controlled classic Meade LX200 8-inch f10 telescope,
http://www.meade.com which fits perfectly in
the dome. The opening in the top of the dome follows the rotation of the
telescope automatically and I use Software Bisque�s THE SKY�program http://www.bisque.com on a refurbished Gateway
http://www.gateway.com computer to point
at the object I wish to observe. I do not observe by eye from inside the dome
it is too small for a person, everything is done by CCD cameras and computer
software.
The LX200 is placed on the standard Meade Wedge for polar alignment and tracking. The wedge in turn is mounted on a 1� thick aluminum plate which is drilled for four � inch threaded rods on its edge which extends four feet down to an identical 1� thick aluminum plate supported on a wooden beam between the walls of my garage addition. �The wooden beam is a standard prefabricated beam which the builder cut and installed seven feet above the floor using the two-by-fours of the additions walls.� The beam can support a mans weight and prevents any vibration from reaching the scope. The wedge can be adjusted for leveling by moving the plates up and down with � inch nuts and lock washers on the top plate. The top plate with the telescope can now be raised or lowered with an Domar HDSJ-30, 7500# 30� Lift Scissor Jack. The jack is used to force the four rods with bolts and lock washers attached up against the bottom plate. This arrangement allows me to lower the scope down out of the dome for maintenance without affecting the wedge adjustments. The top plate has a sheet of non-stick aluminum foil glued to its top to allow more easy adjustment of the wedge azimuth. I use the Drift method with my CCD camera to refine my polar alignment. Here the first picture shows the wooden beam and the aluminum plates with the 3/4 inch threaded rods as they were installed. The second picture shows the LX200 in its current configuration mounted on the top plate. The third picture shows the new RV Trailer jack used to raise and lower the telescope out of the Dome for maintenance. The fourth picture shows the new step ladder with a platform I now use to access the telescope for adjustments.
The LX200 8 inch scope has a Meade electric focuser installed. The second picture above shows this. The main imager is a SAC 9, a very sensitive B&W CCD camera mounted on an Orion Dielectric Mirror Diagonal �since �the SAC 9 is too long to allow the LX200 to point to the pole star.� The program to control the SAC 9 is AstroVideo a program developed by COAA http://www.coaa.co.uk for using a web camera to take �astronomy�pictures . The SAC 9 is a very unique camera to quote an old SAC-Imaging webpage advertisement, �The new SAC9 is like no other camera on the Market! It combines the uniqueness of the SAC/Mitron with its 2 second live video and a 1/2 � Sony EX-View HAD CCD chip which makes focusing a snap.� On a good seeing night I can set the SAC 9 up and stream a pseudo-video updated every 2 seconds in real time over USB 1.1 of a deep space object like M51 The Whirlpool Galaxy at magnitude 8.1 and be able to focus and align on it before switching to long exposure mode for my picture. I wish the SAC 9 was still being made I would have purchased another. Here is some more info on the SAC 9 sac 9.html. Here is an example of how sensitive this camera is. This picture is a 2 second live capture shot from the SAC 9 while on my 135 mm f5 camera lens, you can easily make out M42 the Orion Nebula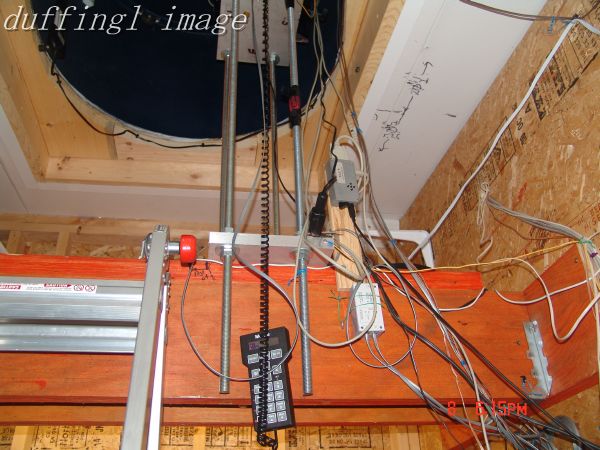


�
The piggyback finder telescope on the LX200 is a my old 400 mm f6.3 Spiratone "T" mount lens with an Orion Starshoot Deep Space Color Imager II ORION_StarShoot.html camera mounted using a much modified Orion Variable Universal Camera Adapter to adjust the "T" mount lens to focus. The field of view of the 400 mm lens is 41 x 55 arc-minutes. It works quite well as my main finder scope and takes reasonable wide angle pictures of objects. I use Nebulosity,� a program by Stark Labs http://www.stark-labs.com� or the Maxim�DL essentials edition supplied by Orion with the Starshoot DSCI II to control the camera. By using this combination I will be able to shoot many of the colored nebula which cover wide sections of the sky. Here is a picture of that combination during assembly and focus setup:

I also have an Orion StarBlast� 4.5 inch f4 imaging
newtonian reflector scope which I may piggyback latter and couple it to the Meade DSI-2 one-shot Color CCD camera dsi_2.html . I modified the Orion StarBlast telescope rack and pinion focusing
mechanism to accept the Orion AccuFocus�electronic focuser so I can focus the
telescope remotely. The reason that I have not done this yet is I need to do more work on balancing the LX200 before I proceed. The DSI-2
Orion StarBlast combination would provide a 36 x 49 arc-minutes field of view.

�
Problems and Solutions With My Observatory
This year I began another attempt to adjust the polar alignment of the wedge and the Lx200 which I messed up a couple of yeas ago trying to make it better. I changed the configuration to the current one with the Orion DSCI II on the 400 mm lens and the SAC 9 being on the main scope. This year I realized that I needed to think outside my previous experience to continue the polar alignment. I found that I needed only to start the LX200 with the finder scope on the bottom and allow the LX200 to attempt to line up with the North star. Then I continued to press Enter till the scope is pointed in the general direction of the alignment star that the LX200 program picked at the final press of the Enter key the LX200 thinks it is polar aligned. This is the normal polar alignment procedure built into the LX200. However I can not see the north star easily so I have to perform drift alignment. Everything was going Ok till the LX200 began running away in declination which I could not stop. I was able to lower the scope using my scissors jack and remove it for repair. I found a loose wire in the fork arm and a voltage regulator burned out on the control board which I fixed. I am now awaiting a clear day to perform drift alignment and then I will be back in action.
�
Older info is below:
The reason I purchased the dome was forced upon me several years ago, at that time
I was setting my scope up in my driveway and using the cameras and the LX200
through a laptop during the winter time. I found out first hand what happens when the sky is clear
during the winter time.� With my medical problems at that time, I am hard
pressed to describe how cold it gets.
I knew I could control the scope remotely if I could extend the RS232 port and
the USB lines out to the driveway. I looked on the Internet and purchased some
reasonably priced USB 1.1 over CAT5 cable extenders to operate the LX200 and
the cameras remotely. This combination allowed me to setup the LX200 in my
driveway up to 150 feet away, and then operate the scope and my SAC 9 from my
computer in the house. The first time I tried that combination I found that I
still spent quite a bit of time just setting up the scope, and if I encountered
a problem, I had to go outside again. In the meantime I also found out that
after dark, during the summer around here, the mosquitoes arrive in such large
numbers that I was getting them in my mouth with each breath. Well I decided
that was no longer a good idea either.
I found a clear plastic dome on the internet about 1 inch thick 42 inches in diameter
and purchased it. My builder installed that and my telescope wooden mounting
beam at that time. I mounted my scope using the aluminum plates described above
but only needed one foot to raise the LX200 into the dome center. This looked
promising but two things happened, I found my scope over the years had lost
collimination and would not focus on a star. I purchased some adjustment knobs
and believe I have that problem licked. I also found that the dome during the
summer got so hot that I had to cover the scope with a reflective sheet to
protect the electronics. This was almost as bad as other problems I had in the
driveway.
That�s when I looked into a dome. I knew I could not install a large people dome
so the RoboDome became my only alternative. I researched the RoboDome and asked
several people who owned one how they liked them. I was able to actually see a
RoboDome locally a short drive away. I purchased the dome and my builder
removed the plastic dome and installed the RoboDome.
The RoboDome came as a freight shipment because of its size. The dome is made
of fiberglass and I was able to move it around easily. I wired it up with no
major problems and it worked the first time after the dome was installed.�
I have had no problems with the RoboDome to date. here is a picture of the dome
after it arrived awaiting installation.
The scope in my original configuration was
set up using the original Meade diagonal which was poorly made, the threaded
portion came loose, and I almost lost the SAC 9. I purchased the Orion diagonal
which is better made and reflects light better.
Another problem developed when I purchased a SAC 4-2 one-shot color camera,
it will not function on USB 1.1 it requires USB 2 which is a higher speed USB
port. The Cat5 USB cable extenders only work at USB 1.1 the extenders can run
the Telescope and the SAC 9 but not the SAC 4-2. There are USB 2 Cat5 cable
extenders but they are very expensive. I purchased an inexpensive laptop to run
just the SAC 4-2 and found that I could run it remotely over my home network
but the picture was never clear on my indoor computer monitor. I could just see
what I wanted to take a picture of but could not focus properly because of
resolution differences between the laptop and my main computer monitor which I was never able to resolve.
I investigated on the web and found you can
use Cat5 cable to extend the keyboard, video and mouse so-called KVM over Cat5.
I purchased the extenders and a refurbished Gateway computer and placed it in
the garage addition. The Gateway runs the Telescope, the Dome and all the
cameras at the same time and I can use the same monitor for all my computers
using a KVM switch.
I originally tried to use the SAC 4-2 as a finder scope, which I coupled with a
shortened Orion Universal Camera Adapter to an old �T� mount 135 mm
f5 lens from my 35 mm camera days. The reason I needed to have the adapter
modified is the fact that all the CCD astronomy cameras I have used so-far use
the old 35 mm camera �T� mount threads but are not set at the
proper distance from the CCD chip to use a standard �T� mount lens
directly.� You need to move the lens mount away from the CCD chip to focus
at Infinity.� With this combination I could see stars but not recognize
what I was looking at. I read somewhere that looking through a astronomy CCD
camera was like "searching for a needle in a haystack looking through a
straw".� Boy is that a true statement, the camera is more sensitive
than your eye and sees more stars in a smaller area than you can. It does not
help when you have some astigmatism to boot.
The 135 mm was also mounted on the LX200 finder scope rail and I could not line
it up with the LX200 scope running in f10 mode. I pulled the SAC 4-2 off of the 135 mm lens and
replaced it with the SAC 9 camera still using the modified Orion Universal
�Camera Adapter and found that combination acceptable. I was able, the
first night, to find the Orion Nebula M42 and track it using this 135 mm
scope.� I could not find M42 in the main LX200 scope using the SAC 4-2 even though
I could see it on the135 mm lens. I now know the problem was
because the SAC 4-2 was not sensitive enough, it is a planetary camera.
I was reading Sky and Telescope magazine and saw a glowing review of the then
new Meade DSI-2 single shot color CCD camera. It sounded like a solution to my
problem with the SAC 4-2 and I was able to order one from a dealer out west. I
had problems with camera when it arrived and had to send it back to Meade where
I had more problems but finally I got a working camera in late winter.��I placed it on the LX200 and used it several times, some results during the winter are shown below. When warm weather came I became terribly dissatisfied
with the DSI-2 camera which is un-cooled and produces many hot spots requiring extra time to make dark frames.
I then purchased the Orion Starshoot Deep Space Color Imager II which is a cooled camera and produces the same coverage as the Meade DSI-2. I was able to find a power supply for the Orion Starshoot which usually runs on a battery pack and that is now my second camera in the dome behind the SAC-9.
I purchased Rails and mounting rings to mount two piggyback telescopes
from Scope Stuff http://www.scopestuff.com.
More pictures of
the RoboDome both before and after assembly can be found here
moredomepics.html
I installed some additional devices to check weather while runing my dome clouddetector.html
�
Some Astronomy Pictures
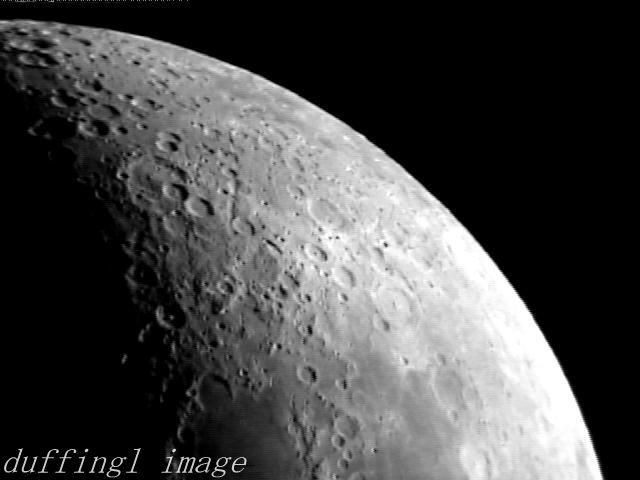
The following pictures of the Moon were made with the SAC 9 on the LX200 at f5 recently. The pictures are actually 50 millisecond captures of the crescent Moon.

Here are some pictures from my old configuration with the Meade DSI-2 mounted on the LX200 at f5.
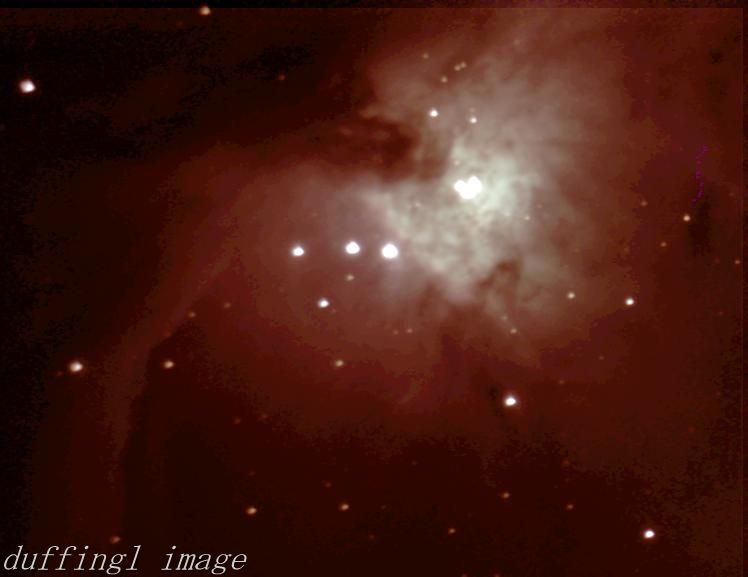
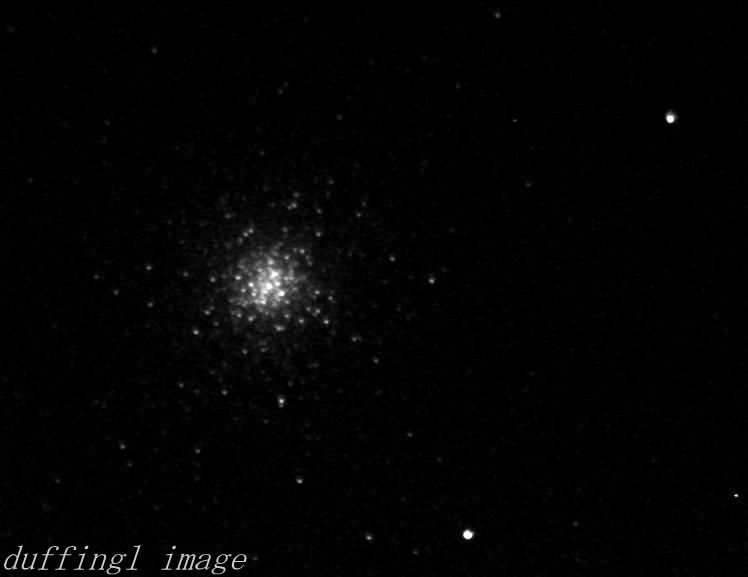
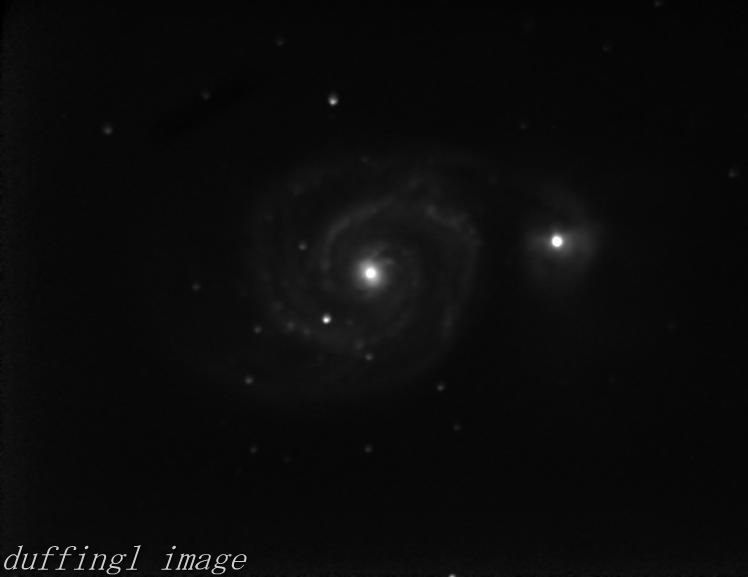
The first picture of M42 the Orion Nebula was processed with AIP4WIN2 a program supplied in the book "The Handbook ofAstronomical Image Processing"2 edition, by Richard Berry and James Burnell after being combined from the summed captured RGBL Fits images by the AutoStar image processing suite. The second image is of M3 a globular cluster it is summed but not processed, the larger picture looks very much like what I have seen in my eyepiece of M3. The third picture is of M51 the WhirlpoolGalaxy also summed but not processed.
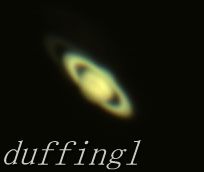
The following picture of Saturn was taken in 2006 using a SAC 4-2 and the AstroVideo program for capture and processing, I do not remember how many frames were used for this picture.The SAC 4-2 was barlowed at 2X on the LX200 giving a focal length of 4000 mm and an f20 scope. The picture was cropped to the current size.
�
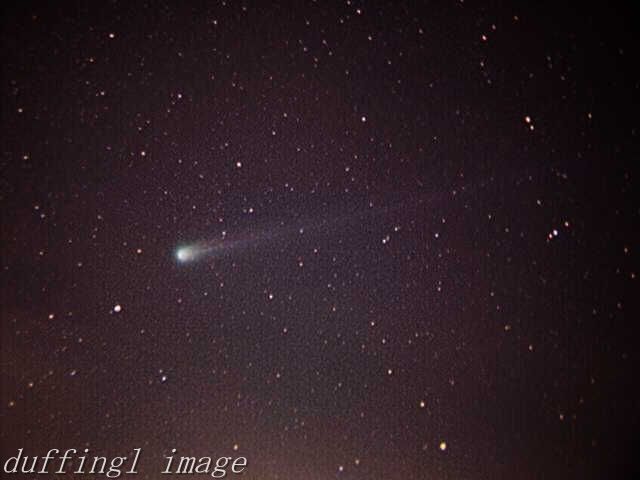
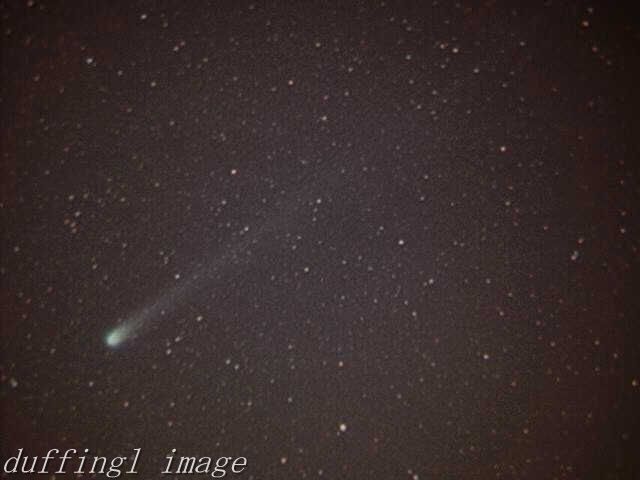
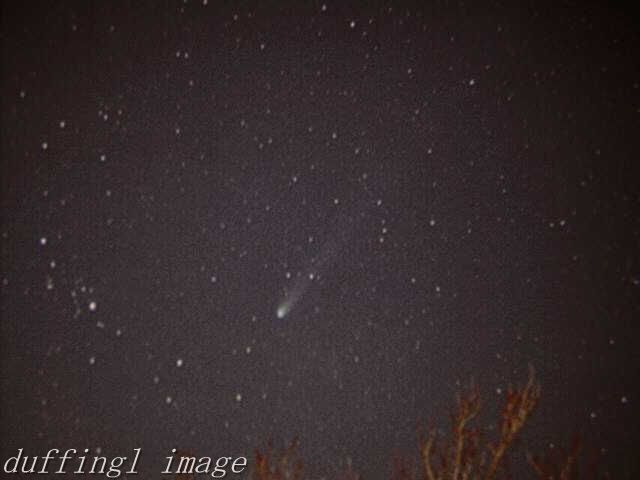
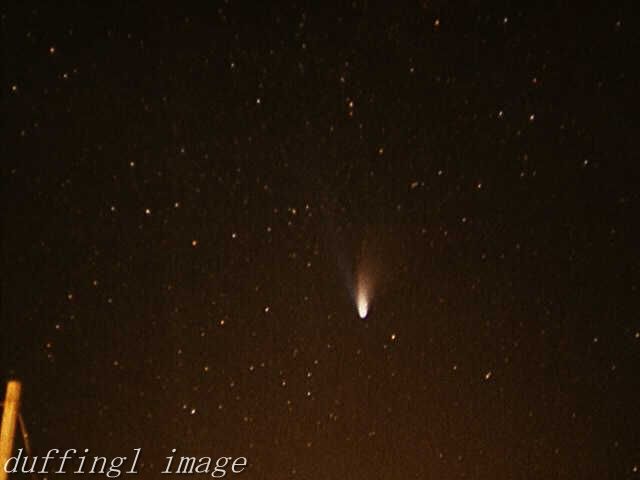
Here are four 1996 pictures of COMET HYAKUTAKE C/1996 B2
taken with ASA 400 Film in a 35 mm camera, a 50 mm standard lens and a cable
release on my standard tripod. Click on the picture for a larger view. Use your
Browser Back key to get back here

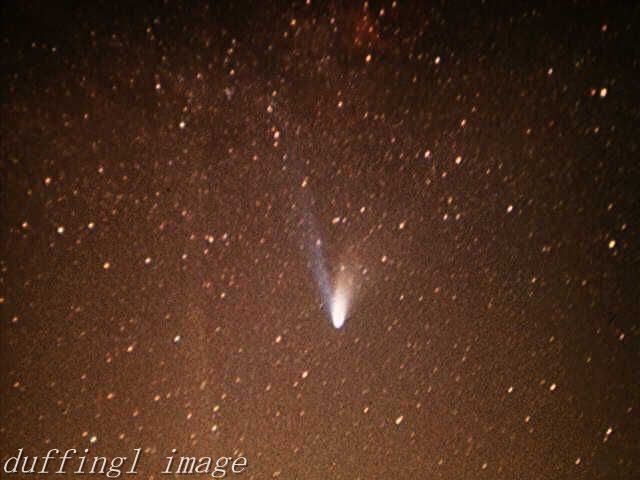
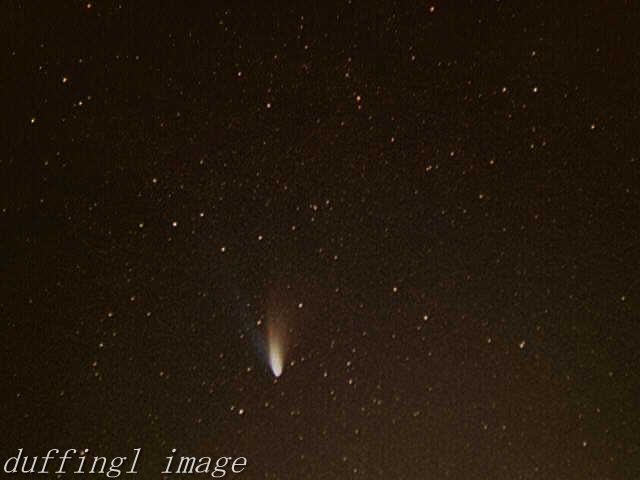
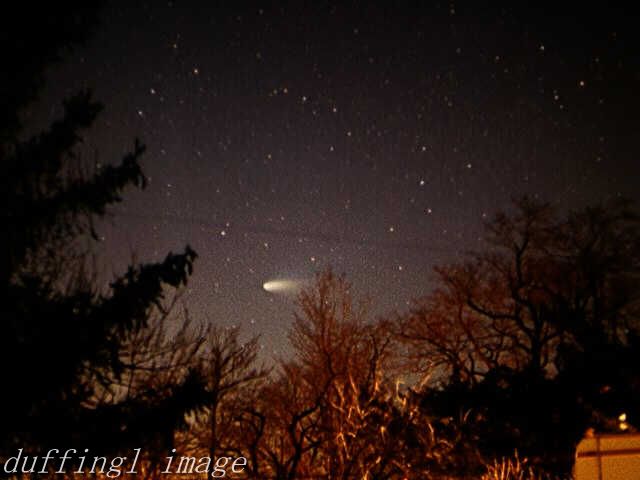
Here are four 1997 pictures of COMET HALE-BOPP C/1995 O1
taken with ASA 400 Film in a 35 mm camera, a 50 mm standard lens and a cable
release on my standard tripod. Click on the picture for a larger view. Use your
Browser Back key to get back here
MY AMATEUR "HAM" RADIO HOBBY W3LED
I was able to pass the test and received a Technician class Ham license on 3-2-2010. I then studied and passed my General Class license on 3-20-2010 and then passed my Amateur Extra class test on 3-27-2010. I received my vanity call sign W3LED on 4-14-2010.
I had purchased an Icom IC-706 used, off E-bay and am setting this tranceiver up to use as a digital signal tranceiver for PSK31 and other digital signal types, and a backup transceiver. I purchased a brand new Yaesu FT-857D HF-6M plus 2 M and 70 Cm tranceiver and this is now my main voice tranceiver.
I have built a coaxial trap antenna for 10 M to 80 M and have that in my attic because of restrictions here. I also have a purchased 2 M to 40 M 4:1 baluned Windom. I also built a 6 M Hentenna, a half square for 10 M and a 2 M quad antenna. My Yaesu uses a commercial J-pole antenna for 2 M and 70 Cm. My Icom uses the quad 2 M antenna I built. I am using a SGC SG-237 automatic antenna tuner on a long wire antenna. I also use an SGC SG-239 on a loop antenna in my attic. From time to time I will update the page and let you know of my accomplishments.
73 W3LED